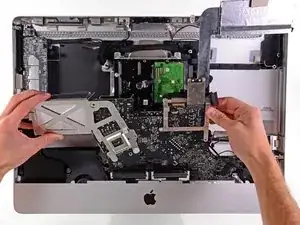
Introducción
Utiliza esta guía para reemplazar una entrada de CA rota.
-
-
Desenchufa el cable CA de tu iMac junto con cualquier otro dispositivo periférico.
-
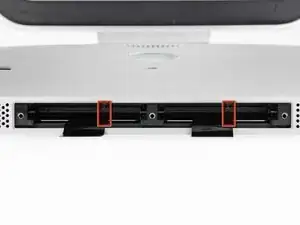
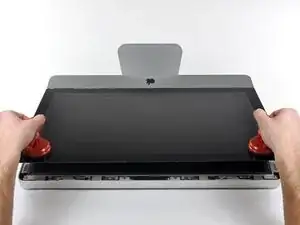
Coloca su iMac boca abajo sobre una superficie suave y limpia como se muestra.
-
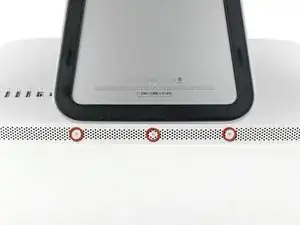
Afloja los tres tornillos Phillips que sujetan la puerta de acceso al borde inferior de su iMac.
-
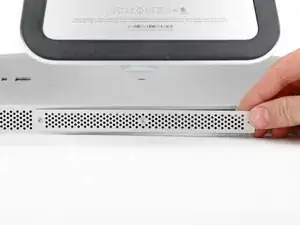
Retira la puerta de acceso.
-
-
-
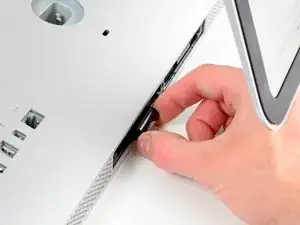
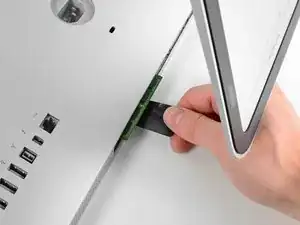
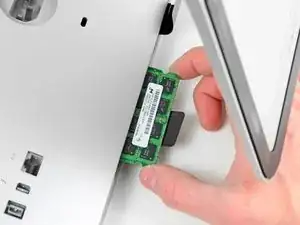
Desliza suavemente la lengüeta extraíble de plástico negro de la RAM hacia afuera de la ranura de RAM.
-
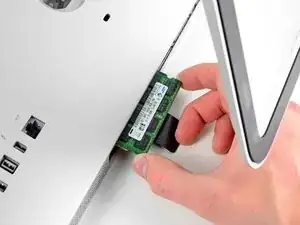
Tira de la lengüeta de plástico negro del borde inferior del iMac para expulsar los módulos en ese lado del compartimiento de RAM.
-
-
-
Desliza el (los) módulo (s) RAM anterior (s) de sus ranuras en la bahía de RAM y déjalos a un lado.
-
-
-
Repite el proceso en los pasos anteriores para eliminar los módulos de RAM del otro lado de la bahía de RAM.
-
-
-
Asegúrate de que la pequeña muesca cortada en cada módulo de RAM (que se muestra en la primera imagen) coincida con la protuberancia en cada ranura de RAM (que se muestra en la segunda imagen).
-
-
-
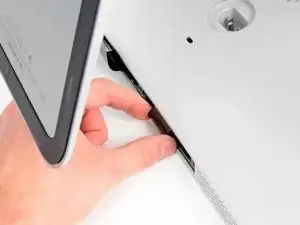
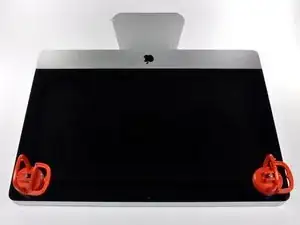
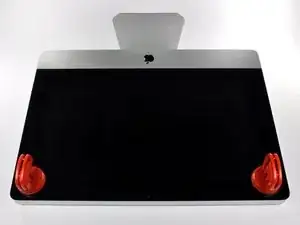
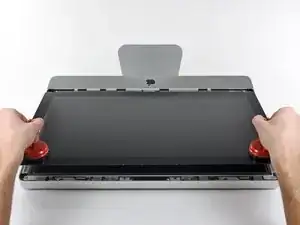
Adhiera una ventosa en los 2 angulos superiores del panel de vidrio.
-
Si sus ventosas no se pegan, limpie la superficie del vidrio y la goma de sus ventosas con un solvente liviano.
-
Insertar traducción aquí
-
-
-
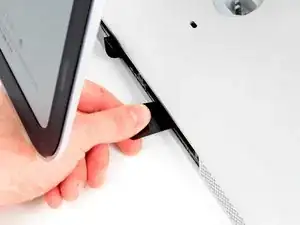
Tire despacio el panel de vidrio perpendicular a la cara del LCD con cuidado ya que hay pestañas de metal en la parte inferior del panel de vidrio.
-
Remueva el panel de vidrio hacia arriba sacando cuidadosamente las pestañas de acero y coloque sobre una superficie limpia.
-
-
-
Saca el conector del cable de sincronización vertical de su enchufe en la placa de controladores LED, cerca de la esquina superior izquierda del iMac.
-
-
-
Gira la pantalla fuera de la carcasa exterior lo suficiente para desconectar el cable de alimentación de la retroiluminación LED de la placa del controlador LED.
-
-
-
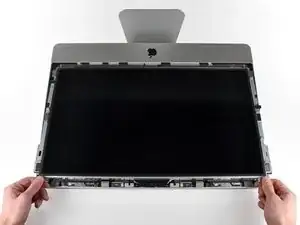
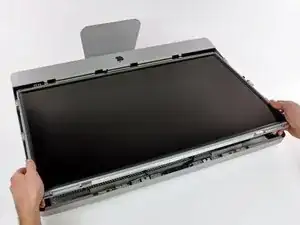
Tira con cuidado de la pantalla hacia el borde superior de su iMac y sácala de la carcasa exterior, prestando atención a los cables que puedan quedar atrapados.
-
-
-
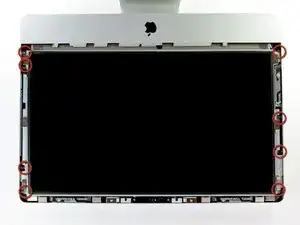
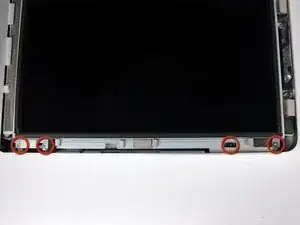
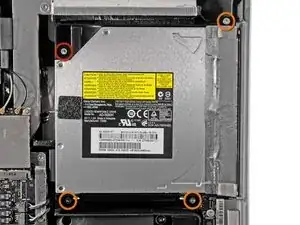
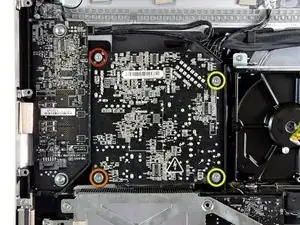
Retira los siguientes cuatro tornillos:
-
Un tornillo Torx T10 de 9,3 mm con cabeza grande
-
Tres tornillos Torx T10 de 9,3 mm con cabeza de tamaño normal
-
-
-
Tira del conector del sensor térmico de la unidad óptica hacia el borde superior del iMac para desconectarlo de su zócalo en la placa lógica.
-
-
-
Levanta el borde interior de la unidad óptica y maniobra tu conector más allá del marco de la GPU conectado a la placa lógica.
-
Retira con cuidado la unidad óptica de sus clavijas de montaje en el lado derecho de la carcasa exterior para tener espacio para desconectar el cable de la unidad óptica.
-
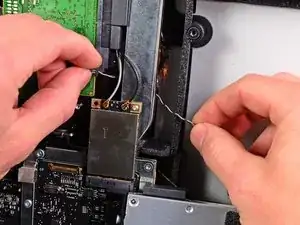
Deja que la unidad óptica cuelgue mientras desvías el conector del sensor térmico de la unidad óptica de detrás del disipador de calor de la GPU.
-
-
-
Desconecta el cable de la unidad óptica tirando de su conector para sacarlo de la unidad óptica.
-
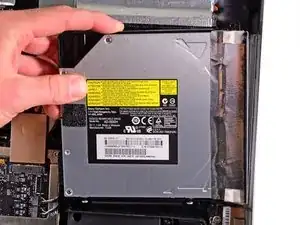
Retira la unidad óptica del iMac.
-
-
-
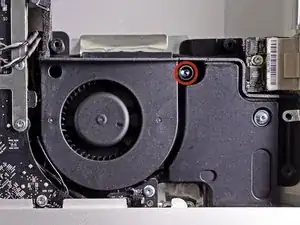
Retira el único tornillo Torx T10 de 13 mm que sujeta el ventilador de la unidad óptica a la carcasa exterior.
-
-
-
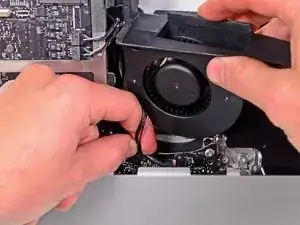
Extrae el conector del ventilador de la unidad óptica de su zócalo en la placa lógica.
-
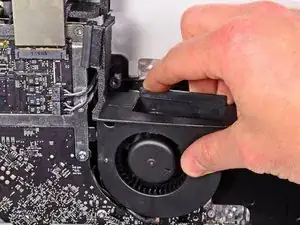
Retira el ventilador de la unidad óptica del iMac.
-
-
-
En el procedimiento, desconectaras los siguientes cables:
-
Tarjeta SD y micrófono
-
Altavoz Izquierda/Derecho
-
Antena WiFi
-
Bluetooth/Sensor de Luz Ambiental/Cámara/Sensor de Temperatura Izquierdo/Sensor de Temperatura del Disco Duro y ventilador del Disco Duro.
-
Ventilador del CPU/Temperatura Ambiente y Botón de encendido
-
Sensor IR
-
-
-
Jala el conector del cable del micrófono hacia el borde superior de la iMac para desconectarlo de la tarjeta lógica.
-
-
-
Desconecta los cables del altavoz izquierdo y derecho tirando de sus conectores hacia el lado derecho del iMac.
-
-
-
Usa el extremo plano de un spudger para levantar ambos conectores de antena AirPort de sus zócalos en la placa AirPort.
-
-
-
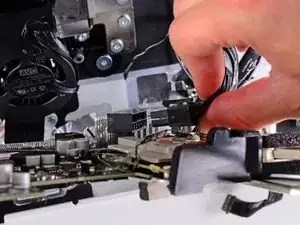
Desconecta el ventilador del disco duro tirando de su conector hacia el borde superior del iMac.
-
-
-
Saca el cable del sensor térmico del disco duro de su zócalo y hacia el borde superior del iMac para desconectarlo de la placa lógica.
-
-
-
Usa tus uñas en ambos lados del conector Bluetooth/sensor de luz ambiental/cámara/temperatura izquierda para empujarlo hacia el borde superior del iMac y sacarlo de su zócalo en la placa lógica.
-
-
-
Tira del conector del sensor de temperatura ambiente/ventilador de la CPU hacia el borde inferior izquierdo de la iMac y sácalo de su zócalo en la placa lógica.
-
Tira del conector del botón de encendido hacia la esquina inferior izquierda del iMac para desconectarlo de su zócalo en la placa lógica.
-
-
-
Usa sus pulgares para empujar el conector del sensor IR fuera de su zócalo y hacia el borde superior del iMac.
-
-
-
Tira de la placa del sensor IR hacia arriba desde detrás de la cara frontal de la carcasa exterior.
-
Retira el sensor IR y déjalo a un lado.
-
-
-
Retira los siete tornillos siguientes:
-
Dos tornillos torx T10 de 7 mm
-
Un tornillo Torx T10 de 30 mm
-
Dos tornillos Torx T10 de 25 mm
-
Dos tornillos Torx T10 de 21 mm
-
-
-
Retira los siguientes cuatro tornillos:
-
Un tornillo de rosca gruesa T10 de 9,3 mm
-
Un tornillo de rosca gruesa T10 de 25 mm
-
Dos tornillos de rosca fina de 22 mm
-
Tira de las esquinas superior derecha e inferior izquierda de la fuente de alimentación alejándolas de la carcasa trasera para desalojar los postes de montaje unidos a las esquinas de la fuente de alimentación.
-
-
-
Levanta con cuidado la fuente de alimentación para sacarla de la carcasa exterior y gírala para exponer el bloqueo del cable como se muestra, prestando atención a los cables de salida de CC y de entrada de CA que aún están conectados al iMac.
-
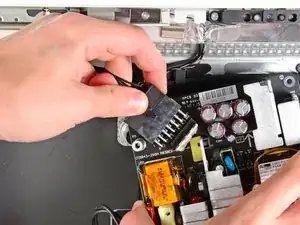
Desconecta el cable de salida de CC presionando el mecanismo de bloqueo del conector mientras retiras el conector de su enchufe en la fuente de alimentación.
-
Una vez que el mecanismo de bloqueo haya liberado el zócalo, extrae el conector de entrada de CC de la fuente de alimentación.
-
-
-
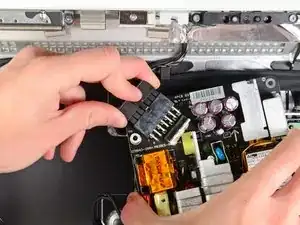
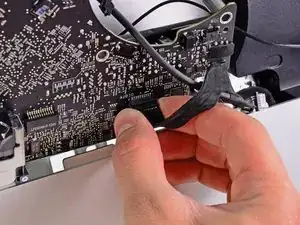
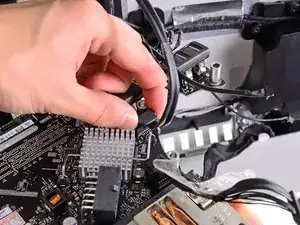
Desconecta el cable de entrada de CA presionando el mecanismo de bloqueo mientras tiras del conector para sacarlo de su zócalo.
-
Retira la fuente de alimentación de la carcasa exterior.
-
-
-
Retira la pared de plástico que está instalada directamente a la derecha de la placa del controlador LED.
-
-
-
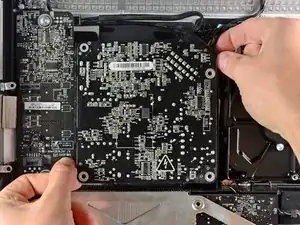
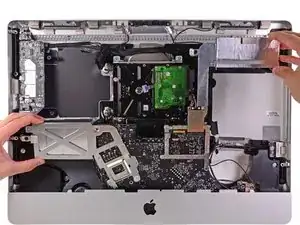
Separa ligeramente la placa lógica de la parte posterior de la carcasa exterior, luego levántala hacia arriba para despejar la cara frontal inferior de la carcasa exterior.
-
-
-
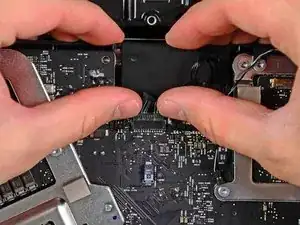
Desconecta el cable del puerto de audio tirando de su conector lejos de la cara frontal de la placa lógica.
-
-
-
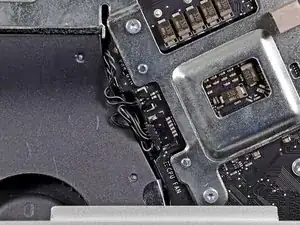
Si está presente, retira la cinta que sujeta el cable SATA del disco duro a la placa lógica.
-
-
-
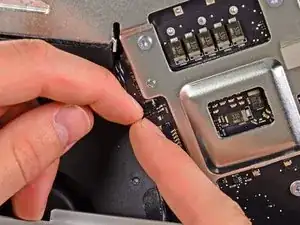
Presiona el mecanismo de bloqueo y tira con cuidado del cable de entrada de CC para sacarlo de su zócalo en la parte posterior de la placa lógica.
-
-
-
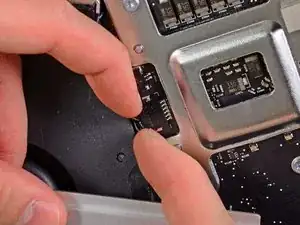
Con cuidado de no dañar el zócalo de la placa lógica, extrae con cuidado el cable de datos SATA del disco duro de su zócalo en la placa lógica.
-
Retira la placa lógica, teniendo cuidado con los cables que puedan quedar atrapados.
-
-
-
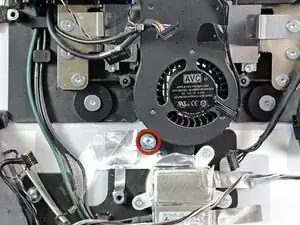
Retira el único tornillo Torx T10 de 13 mm que sujeta el ventilador del disco duro a la carcasa exterior.
-
-
-
Saca el ventilador del disco duro de la parte posterior de la carcasa exterior y retíralo del iMac.
-
-
-
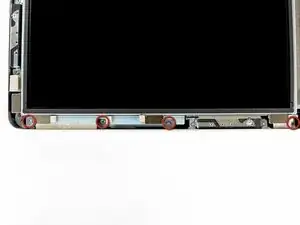
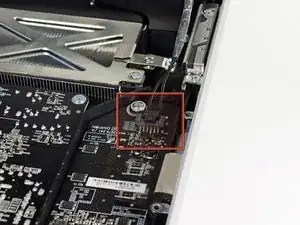
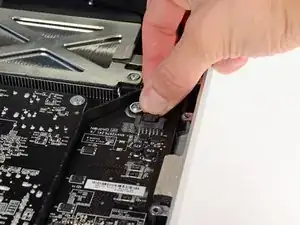
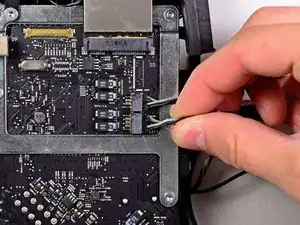
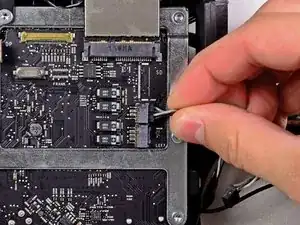
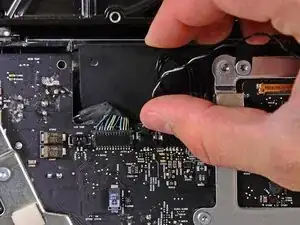
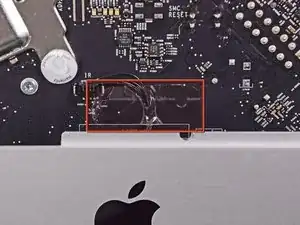
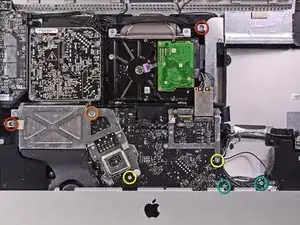
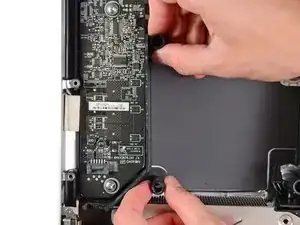
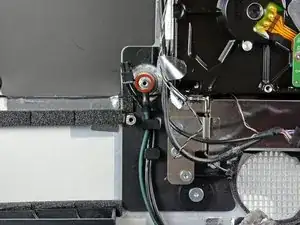
Retira los tres tornillos Torx T10 de 9,3 mm que sujetan la entrada de CA a la carcasa exterior.
-
-
-
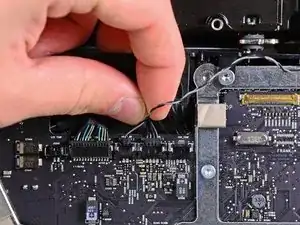
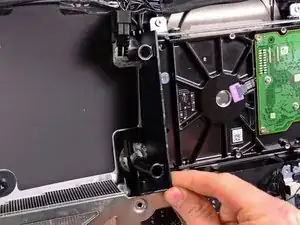
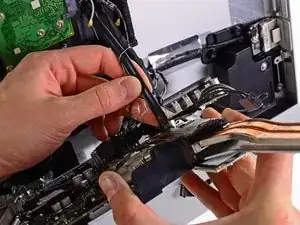
Tira de la pared de plástico instalada justo a la izquierda del disco duro para alejarla de la carcasa exterior.
-
Retira el trozo de cinta que sujeta los cables del sensor térmico y retira la pared de plástico del iMac.
-
-
-
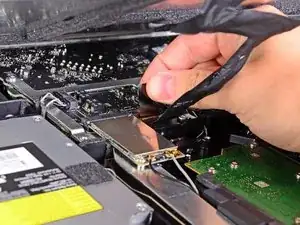
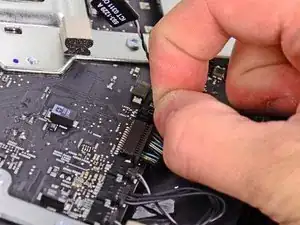
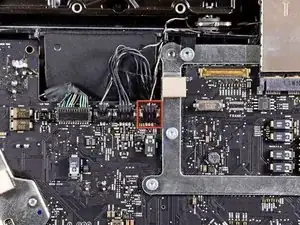
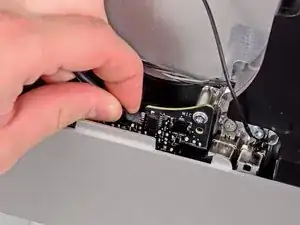
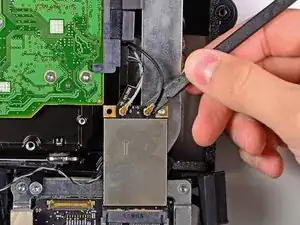
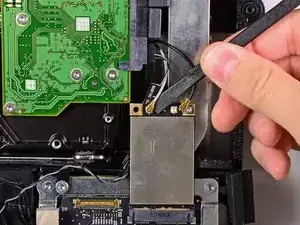
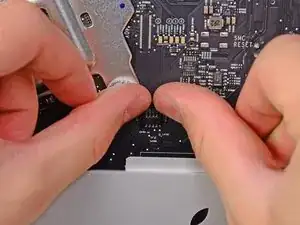
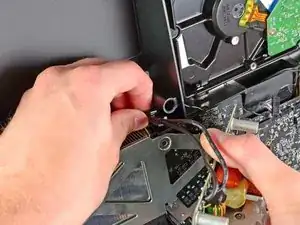
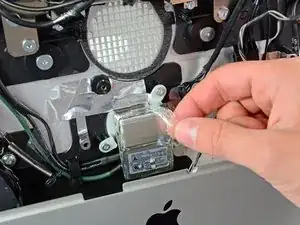
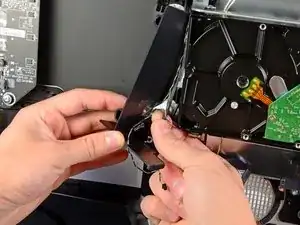
Utiliza una llave de tuercas de 5 mm para quitar el separador de 15,7 mm de largo que sujeta el bucle de conexión a tierra de la entrada de CA a la carcasa exterior.
-
-
-
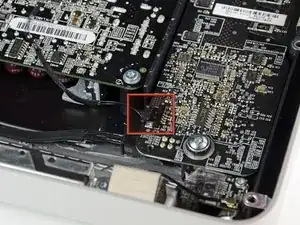
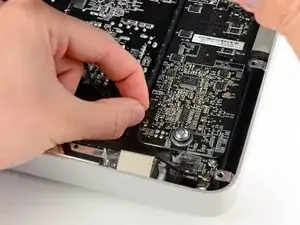
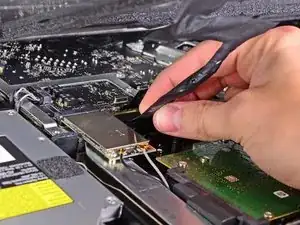
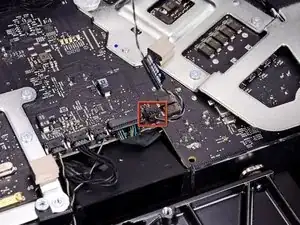
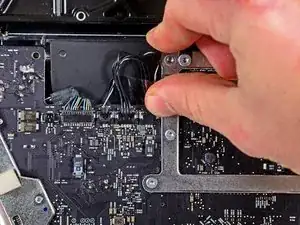
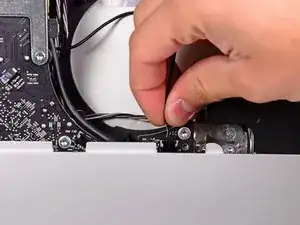
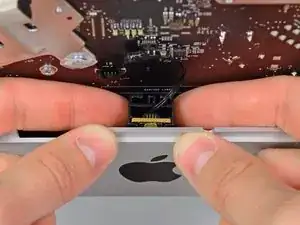
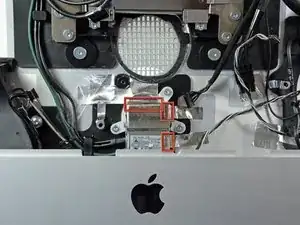
Desconecta la entrada de CA y los cables de tierra de sus retenedores en la carcasa exterior y retira el conjunto de entrada de CA del iMac.
-


Para volver a armar tu dispositivo, sigue estas instrucciones en orden inverso.

Before beginning unplug your iMac.
Henry Barnett -
The screws are not phillips #1 as implied above. My phillips#2 bit fit.
John McWilliams -
Yes phillips #2 is the correct Bit
Heath -
Whenever I go this “deep” into any computer that has a motherboard battery, like the CR2032 for this iMac, I’ll add a new battery to my workflow. I’m in the “neighborhood” anyway.
The battery is in a spring-loaded compartment, which requires patience and persistence.
I make sure to test the new battery before installation. (The “3-2-1 Rule” applies: 3 of something means 2, 2 means 1, and 1 means none - I keep spare batteries on hand.)
When I took part in my dual-drive adventure, I also added a thorough dusting (outside/outdoors) - phew!
Carrick -