Introducción

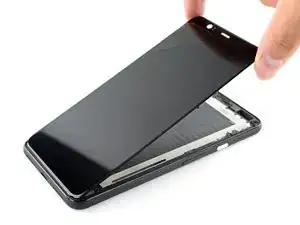
Utiliza esta guía para quitar o sustituir el ensamblaje de la pantalla de tu Google Pixel 4 XL.

Debido al diseño del Pixel, tendrás que quitar el panel trasero para desconectar el conector de la pantalla.

Antes de comenzar este procedimiento, asegúrate de tener un juego de adhesivos de repuesto tanto para el panel posterior como para la pantalla.

'''Este procedimiento casi siempre elimina de forma destructiva la pantalla del Pixel 4 XL". Las OLED dejan de funcionar cuando se exponen al oxígeno o a la humedad, y por lo tanto se sellan en un encapsulado hermético (esto es también por lo que los paneles OLED se vuelven negros debajo de una grieta de la pantalla). Las capas OLED de los píxeles se laminan en el vidrio y la pantalla sale como una unidad.

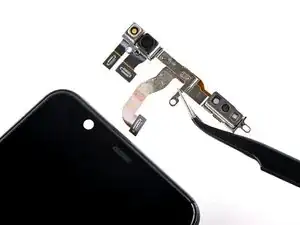
Precaución:Google advierte que el desmontaje del ensamblaje de láser frontal podría resultar en una exposición peligrosa a las emisiones de láser infrarrojo invisible. Lee sus advertencias de seguridad aquí.

  1. vIuPnpQJO4N1YPdv
    vIuPnpQJO4N1YPdv
    RxEtJDHWVlutniFn
    J3GDVmqa5JwKByYK
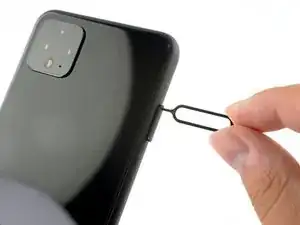
    • Inserta una herramienta de expulsión de la SIM, una broca o un clip de papel en el pequeño agujero de la bandeja de la tarjeta SIM en el borde izquierdo del teléfono.

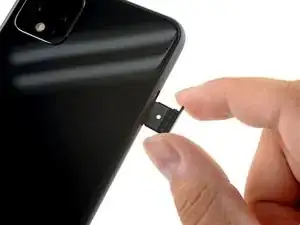
    • Presiona firmemente para expulsar la bandeja.

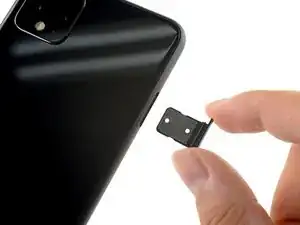
    • Remueve la bandeja de la tarjeta SIM.

  2. Hvp1kuHwJo1AClCp
    • Prepara un iOpener y aplícalo en el borde inferior del panel trasero durante un minuto.

    • También se puede utilizar un secador de pelo, una pistola de calor o una placa caliente, pero tenga cuidado de no sobrecalentar el teléfono, ya que tanto la pantalla como la batería interna son susceptibles de sufrir daños por el calor.

    I found 2 minutes works best per side. Great Guide btw, thank you for being a strong leader in the fight for right to repair.

    Dennis -

  3. VK4rWKHPMxSBgjeI
    VK4rWKHPMxSBgjeI
    GS4NhjEZM3SCXJcR
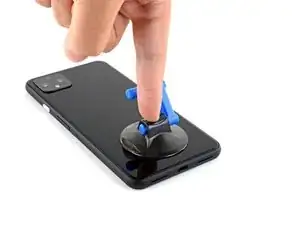
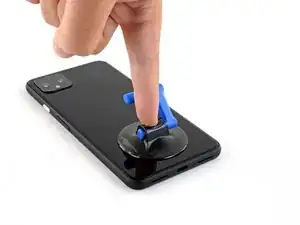
    • Aplica una ventosa al borde caliente del panel trasero presionándolo para crear succión, lo más cerca posible del borde.

    • Si el vidrio trasero está muy agrietado, cubrirlo con una capa de cinta de embalaje transparente puede permitir que la ventosa se adhiera. Alternativamente, se puede usar cinta muy fuerte en lugar de la ventosa. Si todo lo demás falla, puedes pegar la ventosa al panel roto.

  4. mkgNQMFVCGsIjSWI
    mkgNQMFVCGsIjSWI
    ZcuoIwCBSbZQv1Jp
    • Tira hacia arriba de la ventosa con una fuerza fuerte y constante para crear un hueco entre el panel trasero y el marco.

    • Dependiendo de la edad del teléfono, esto puede ser difícil. Si tienes problemas, aplica más calor en el borde e inténtelo de nuevo.

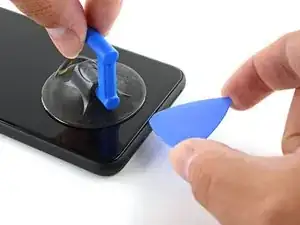
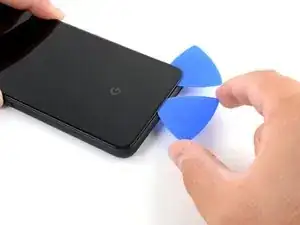
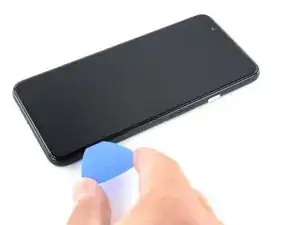
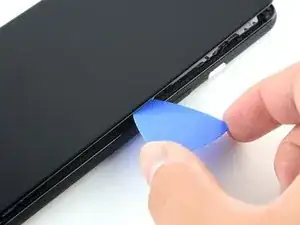
    • Inserta la punta de una púa de apertura en el hueco.

  5. JPn1p4UL3KeHgTlm
    JPn1p4UL3KeHgTlm
    rerDsh5OJUS5DXft
    pq3vfvBe5v5htEJY
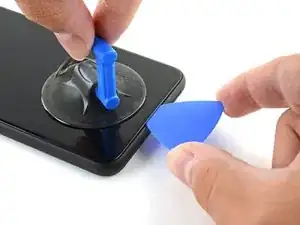
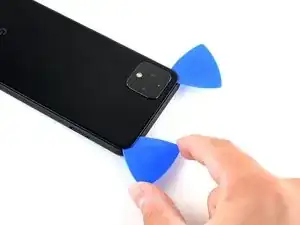
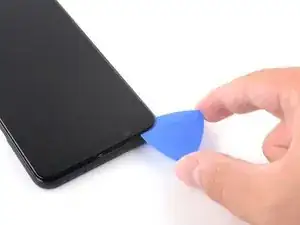
    • Desliza la púa de apertura por la parte inferior hacia la esquina izquierda para cortar el adhesivo.

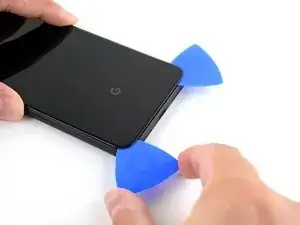
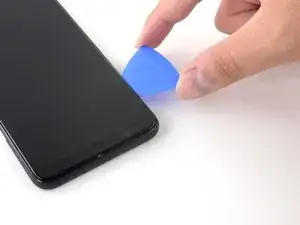
    • Con la púa aún insertada, deslízala desde la esquina inferior izquierda hacia la esquina inferior derecha para cortar completamente el adhesivo del lado inferior.

    • Deja la púa insertada en la esquina inferior derecha para evitar que el adhesivo vuelva a sellarse.

  6. bmjILIENBtpPcpxn
    • Prepara un iOpener y aplícalo en el borde izquierdo durante un minuto.

  7. GQ32GFimDFPnCaIN
    GQ32GFimDFPnCaIN
    KwMHik5nQYlWV3HD
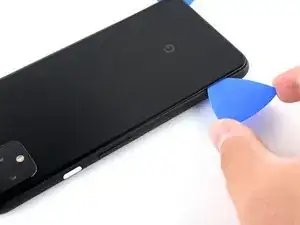
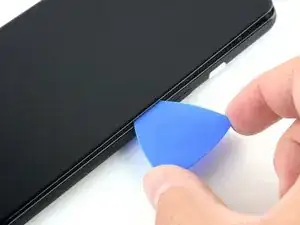
    • Inserta una segunda púa de apertura debajo del panel trasero directamente sobre el puerto de carga.

    • Desliza la púa de apertura a la esquina inferior izquierda del teléfono.

  8. 3wRXCsDVIiReHwDt
    3wRXCsDVIiReHwDt
    TsAtoOUWx5OUtfJw
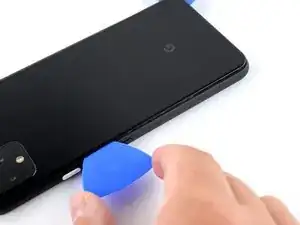
    • Desliza la púa de apertura por la esquina inferior izquierda y por el lado izquierdo del teléfono para cortar el adhesivo.

    • El adhesivo puede ser muy gomoso. Empuje el pico hacia adentro y hacia afuera con un movimiento de sierra para ayudar a cortar.

    • Insertar traducción aquí

  9. qPt1cI1qIYhrYhrk
    • Prepara el iOpener y aplícalo al borde derecho del teléfono durante un minuto.

  10. 3MaLYKdcXwMGfmHm
    3MaLYKdcXwMGfmHm
    nNHbQECIIHKXCkeA
    dgKAYchvRQfbG4ZJ
    • Con las dos primeras púas de apertura todavía en su lugar, inserta una tercer púa en la parte inferior del lado derecho.

    • Desliza la púa de la apertura hacia la parte superior del teléfono, cortando el adhesivo del lado derecho.

    • Deténte cuando llegues a la esquina derecha superior y deja la púa insertada.

    Be careful when slicing the right side's adhesive. The contacts for the wireless charging pad are close to the edge and can easily be bent with the opening pick.

    John G -

  11. pdXuWBOPnOHID4vo
    pdXuWBOPnOHID4vo
    I1Y2GTUYJV4tftII
    • Desliza la tercera púa de apertura por la esquina superior derecha y por la parte superior del teléfono, cortando la última tira de adhesivo.

  12. OMcDBjHL2YjtAAYG
    OMcDBjHL2YjtAAYG
    R6ddvSVjuedNBCHd
    ILBFbo2bfDKEJJGy
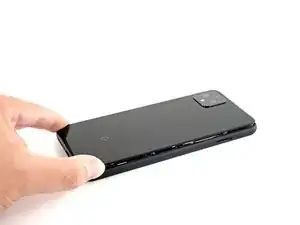
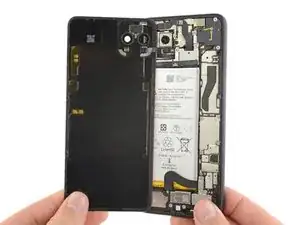
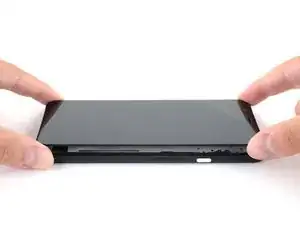
    • Una vez que hayas cortados alrededor del perímetro del teléfono, levanta con cuidado el borde derecho de la tapa trasera, abriéndolo como un libro.

    • No intentes sacar el panel del todo aun ya que está todavía conectado al teléfono.

  13. NijixQFNhSKKTdcI
    NijixQFNhSKKTdcI
    UxwAwwrw1KYD2pTe
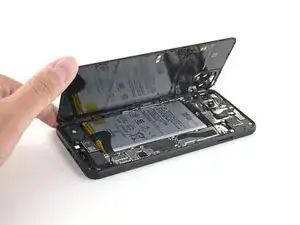
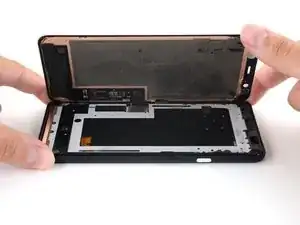
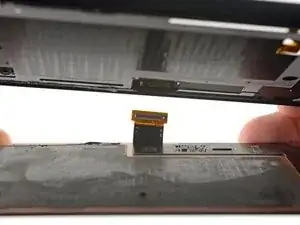
    • Continúa abriendo el panel trasero hasta que puedas apoyarlo en el borde izquierdo del teléfono, teniendo cuidado de no poner ningún tipo de tensión en el cable plano conectado.

    • Durante el reensamblaje, este es un buen punto para encender el teléfono y probar todas las funciones antes de sellarlo. Asegúrate de volver a encender el teléfono completamente antes de seguir trabajando.

    “and test all functions before sealing it up.”

    Pretty sure I wont be sealing this up for a few hours, might be worth removing this part of the sentence as it’s confusing…

    Geoff B -

    Geoff B: These are good instructions. Any technician worth his or her salt will test the device for functionality before sealing it up. That’s why it reads, “During reassembly…and test all functions before sealing it up.” Not confusing if you read and comprehend the full pin.

    Jeana Morales -

  14. CbLvKfMPLSOIPeZj
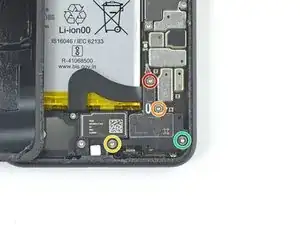
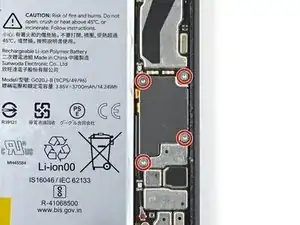
    • Remueve los cuatro tornillos Torx T3 que sujetan el escudo del conector de la batería.

    • Un tornillo de 1.8 mm

    • Un tornillo de 4.1 mm

    • Un tornillo de hombro de 4.4 mm

    • Un tornillo de hombro de 4.0 mm

    • A lo largo de esta reparación, haz un seguimiento de cada tornilloy asegúrate de que vuelva exactamente a su lugar de origen.

  15. hMmMYeCZjYcTckiS
    hMmMYeCZjYcTckiS
    TbLkCgwKGB3CkFsh
    • Usa un par de pinzas para remover el escudo del conector de la batería.

  16. vjiUuPc6ra4hSELD
    vjiUuPc6ra4hSELD
    1FGTf5VCS2ELOc6N
    • Siempre que uses el spudger cerca de la batería, ten mucho cuidado de no perforar la batería.

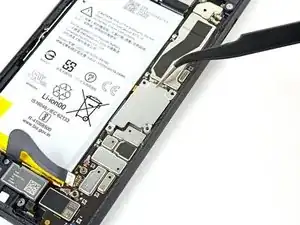
    • Usando el extremo puntiagudo de un spudger, haz palanca en el conector de la batería directamente desde la placa madre para desconectar la batería.

    • Para volver a conectar los conectores de prensa como éste, alinea con cuidado y presiona hacia abajo en un lado hasta que encaje en su lugar, y luego repite en el otro lado. No presiones en el medio. Si el conector está mal alineado, los pines pueden doblarse, causando un daño permanente.

    I had the piece from the cable break off inside the connector. How would I go about getting it out

    Dylan DVP -

    What are the 5 copper dots under the battery connector for.

    Brian Davis -

    When you reattach the connector to the motherboard this is a good time to power up and check basic functionality temporarily. Even though it had appeared it was correctly lined, my camera was not functional, in particular the switch button from the rear to the front camera, I was stuck in selfie mode. Then I was getting a message on the screen, possible hardware or software issues. Once I reattached the connecter (several times) until it was correctly inlined, the error went away and I was able to switch from the rear and front cameras.

    bonita pauley -

  17. jPpHHrKTJhDOLRAB
    jPpHHrKTJhDOLRAB
    35eGEb6Yerdr1akU
    • Usando el extremo plano de un spudger, dobla suavemente el cable de la batería para que no haga contacto accidentalmente durante el resto de las reparaciones.

  18. pW6WYwrosLkYWaER
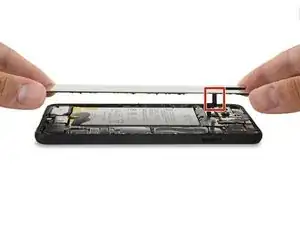
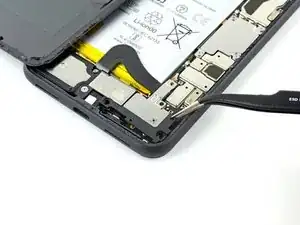
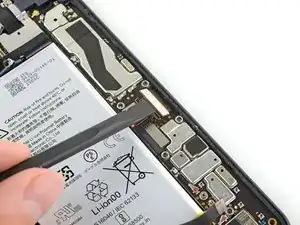
    • Usa un destornillador T3 Torx para remover los dos tornillos de 4.1 mm que sujetan el panel trasero de la tapa del conector.

    Wouldn’t it make more sense to use the same (orange) color circles as the other 4.1mm screw?

    Mark Kanzler -

    Maybe Google did it to avoid exchange in the models where they differ

    Daniele Carminati -

  19. XYAjcLAoBQJMddZM
    XYAjcLAoBQJMddZM
    LhAReXLOg44Cb1wP
    • Usa un par de pinzas para remover la tapa del conector del panel trasero.

  20. laE2TsjjIUOFpHUR
    laE2TsjjIUOFpHUR
    6GAPsQ54pk1QgKgK
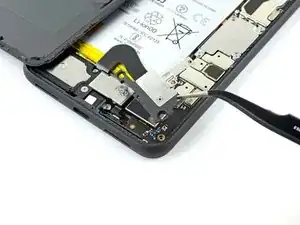
    • Utiliza el extremo puntiagudo de un spudger para levantar y desconectar el conector del panel trasero.

  21. CafjDv5LWBPJIgAZ
    • Remueve el panel trasero.

    • Durante el reensamblaje, sigue esta guía para instalar adhesivos cortados a la medida para tu dispositivo.

    • Sigue esta guía si estás utilizando una tarjeta adhesiva precortada.

    REASSEMBLY ADHESIVE: This is the step during reassembly that you'll want to set the back glass adhesive strip on (before you reattach ribbons). Set the adhesive strip into the body of the phone with the red tabs down (toward the body of the phone, it will simply rest inside the lip of the phone body). Press the back glass onto the adhesive strip to set the strip onto the back glass, lift the back glass back out of the body of the phone. Next reattach the ribbons, test functions, reattach connector covers, peel red adhesive cover off of the adhesive (on the back glass) then set the back glass into the phone lip. This could have been explained far better but was skipped over and the generic adhesive instructions posted in the comments are useless for this.

    Michael A. Mascaro -

    There are also detailed instructions at answer 742532, "How do I apply new back panel adhesive on a Pixel 4xl?" (sorry it doesn't let me link directly). But it advises adhering the adhesive to the main frame first before the glass. I do notice a slight lip on the main frame on both sides, which seems less forgiving to align with than the glass, so I would imagine doing the frame first would be easier? I haven't done this yet myself, so would be interested in opinions.

    AySz88 -

    Update: it appears the discrepancy is due to a difference between the third-party adhesives and the iFixit "genuine" one. The iFixit one is not mirror symmetric and must be adhered to the glass back first, though it has cutouts that avoid protrusions and facilitate this. The third-party one (I believe) has no such cutouts and thus must go on the frame first.

    However, in trying to follow Michael's instructions, I could not get the adhesive and red tabs off the blue plastic without distorting the adhesive, and had to take the clear side off first. I ended up directly placing the adhesive onto the glass back, without the frame to help align (I posted my method in the above-mentioned answer 742532). The cutouts in the blue plastic seem to have been made with this in mind.

    AySz88 -

  22. RdbbAkl2tlooGZVQ
    RdbbAkl2tlooGZVQ
    gAv3xVwHfKs1VZQ2
    • Suavemente, empuja la lengüeta del adhesivo de la batería para permitir un acceso más fácil a los tornillos que están debajo de ella.

  23. LTN1MHFwJWNeOKN6
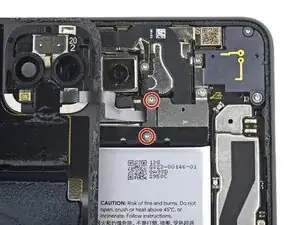
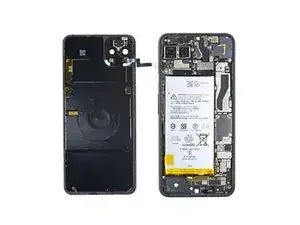
    • Retira los tres tornillos T3 Torx que aseguran la cubierta del conector de la cámara orientada hacia atrás:

    • Un tornillo de 2.7 mm

    • Un tornillo de 4.1 mm

    • Un tornillo de 4.2 mm

  24. N2OiApTPYGOLXRhn
    N2OiApTPYGOLXRhn
    hrgKLByNtkJITses
    • Usa un par de pinzas para remover la tapa del conector de la cámara trasera.

  25. Q1YUWQW4Ra1JMMCm
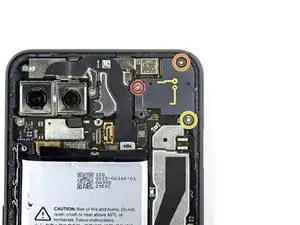
    • Remueve los tres tornillos T3 Torx que sujetan la tapa del conector de la cámara frontal:

    • Un tornillo de 4.1 mm

    • Un tornillo de hombro de 4.00 mm

    • Un tornillo de hombre de 4.1 mm

  26. N22t5YwvACvbKIot
    N22t5YwvACvbKIot
    AaJ6qkgRkwWfLLki
    • Usa un par de pinzas para remover la tapa del conector de la cámara frontal.

  27. af4uREnZEWhI1SPt
    af4uREnZEWhI1SPt
    IPfZK6qOD51TLthK
    dicHZoEKwd3hXrGE
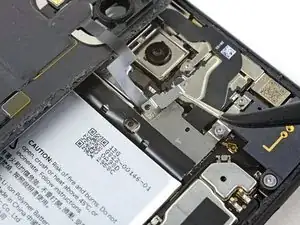
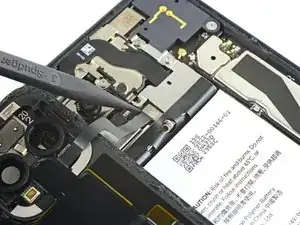
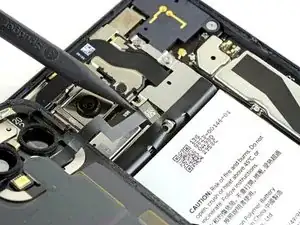
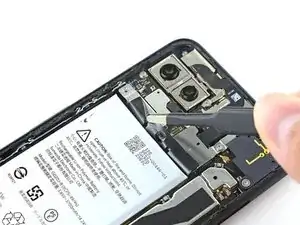
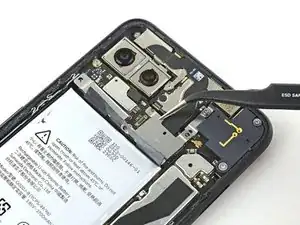
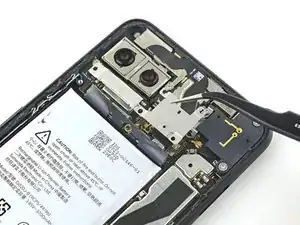
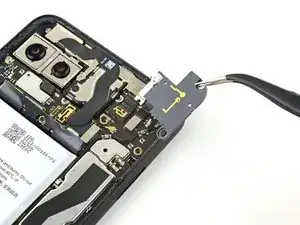
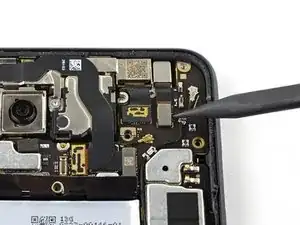
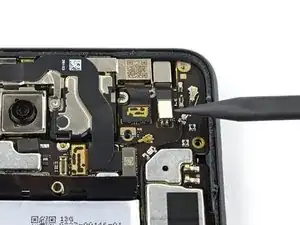
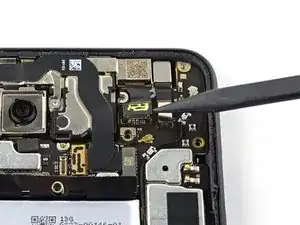
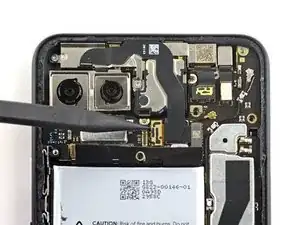
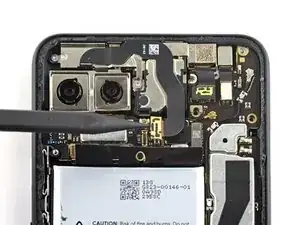
    • Usando el extremo puntiagudo de un spudger, saca la cámara y los conectores del sensor directamente de la placa madre.

  28. j4gUGc6GNmiU3AFi
    j4gUGc6GNmiU3AFi
    KtW4ODkDMMIStQcd
    • Desconecta el conector del sensor adicional.

    • Este cable está asegurado al teléfono con un poco de adhesivo ligero.

  29. 14snNyomEgDpAhyC
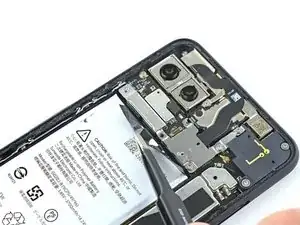
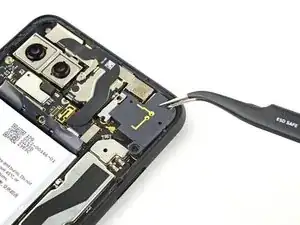
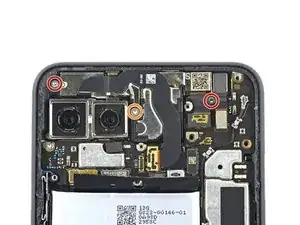
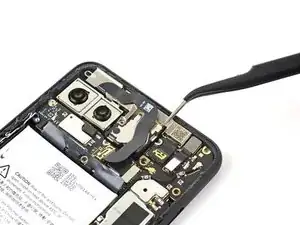
    • Remueve los tres tornillos T3 Torx que sujetan el ensamblaje del sensor y de la cámara frontal:

    • Dos tornillos de 2.7 mm

    • Un tornillo de 3.1 mm

  30. ryOZWUXQdeRw6ISI
    ryOZWUXQdeRw6ISI
    1hZY4aLEwgNpKFVs
    p1lTZxZOcsYdpK5x
    • Usa un par de pinzas para remover el ensamblaje de sensor y cámara frontal.

    Additional Sensor from Step 28 is held down with adhesive. Gently pry up on cable to remove sensor assembly.

    Devon Sherouse -

    After replacing the camera , the phone shows certificate expired for the face unlock. It would be nice to have the how to fix that here.

    [deleted] -

  31. B3Q2ndCBIyHvXjEV
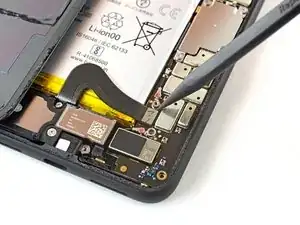
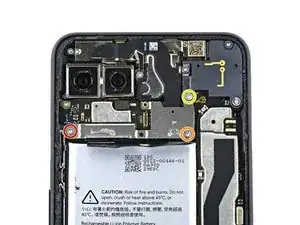
    • Usa un destornillador T3 Torx para remover los cuatro tornillos de 3.5 mm que sujetan la tapa del conector de la pantalla.

  32. CTfAcEoC6bqcKjQp
    CTfAcEoC6bqcKjQp
    lBJKZf5fqEgHmFml
    • Usa un par de pinzas para remover la tapa del conector de la pantalla.

  33. LMesMCHaR33IsDWC
    LMesMCHaR33IsDWC
    aXcMSDuPNYsSVmqW
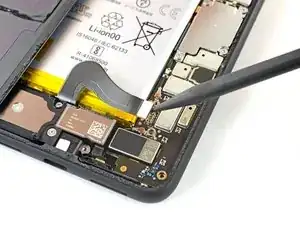
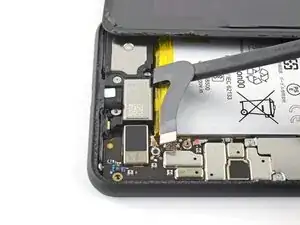
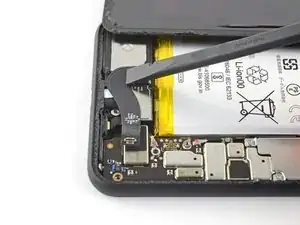
    • Usa el extremo plano de un spudger para desconectar el conector de la pantalla de la placa madre.

  34. PdOOMs2WHbfforLp
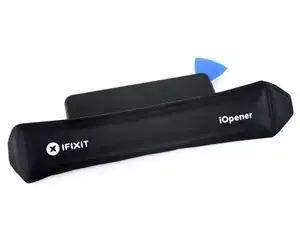
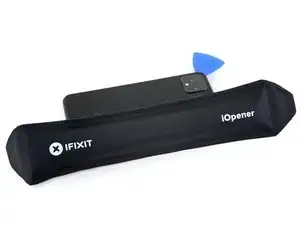
    • Prepara un iOpener y aplícalo en el borde derecho de la pantalla cerca del botón de encendido durante un minuto.

  35. o6GmolhQayYVxrSf
    o6GmolhQayYVxrSf
    XsyV2P6uLFrEJMs4
    MqVwIJs4ABDNPWDI
    • Este proceso casi siempre destruirá el panel de visualización OLED. Sólo procede si estás reemplazando una pantalla ya rota.

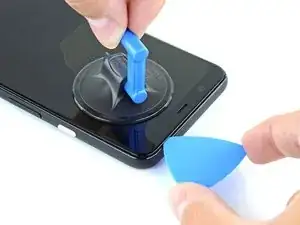
    • Aplica la ventosa al borde caliente de la pantalla.

    • Si la pantalla está muy rota, cubrirla con una capa de cinta adhesiva transparente puede permitir que la ventosa se adhiera. Como alternativa, se puede utilizar cinta muy resistente en lugar de la ventosa. Si todo lo demás falla, puedes pegar la ventosa a la pantalla rota.

    • Tira hacia arriba de la ventosa con una fuerza fuerte y constante para crear un espacio entre la pantalla y el marco.

    • Según la antigüedad del teléfono, esto puede resultar difícil. Si tienes problemas, aplica calor en el borde e inténtalo de nuevo.

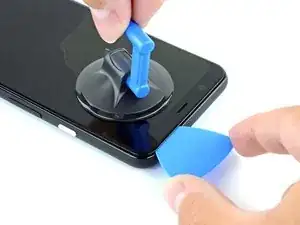
    • Inserta la punta de apertura en la grieta.

    • Según la antigüedad del teléfono, esto puede requerir una fuerza considerable. Si tienes problemas, aplica más calor e inténtalo de nuevo.

  36. q4w1SQMdEoKeuMax
    q4w1SQMdEoKeuMax
    hDbhjQTJraiRtxlH
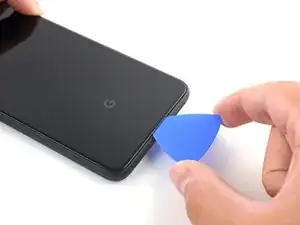
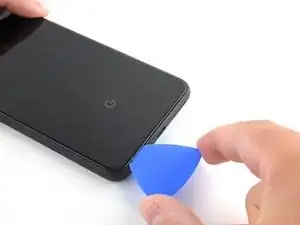
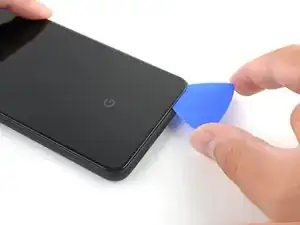
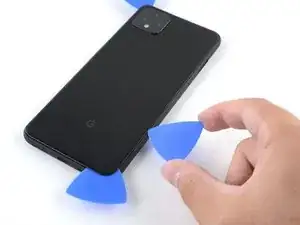
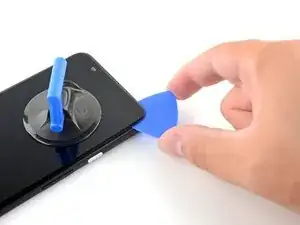
    • Desliza la púa de apertura hacia abajo en el bisel derecho del teléfono, entre la pantalla y el marco, para cortar el adhesivo.

    • Deja la púa inserta en la esquina derecha inferior.

  37. sAWTkpyQkBVpcPSr
    sAWTkpyQkBVpcPSr
    unELkAsmXWbusxjk
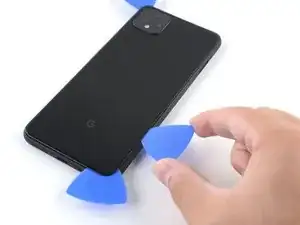
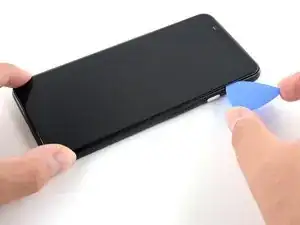
    • Inserta una segunda púa de apertura debajo de la pantalla en la esquina superior izquierda del teléfono, cerca del recorte de la cámara frontal.

    • Si esto es difícil, es posible que tengas que volver a aplicar un iOpener en el borde superior de la pantalla.

    • Desliza la púa de apertura a la vuelta de la esquina y por el lado izquierdo del teléfono, deteniéndote a mitad de camino, y deja la púa insertada.

  38. jqLAIYHgGmQGHHWY
    jqLAIYHgGmQGHHWY
    pJceUDa6VGmQQVc4
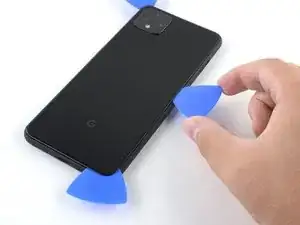
    • Inserta una tercer púa de apertura debajo de la pantalla en el centro del borde derecho del teléfono y gírala para separar la pantalla.

    Note that the screen will be significantly more difficult to remove than the back cover as not only is there adhesive along the perimeter of the front glass, but the entire OLED element is also adhered to the phone’s frame. I found that more heat than the iOpener could provide was required for this step, and resorted to a hair dryer.

    Damien -

  39. 3aHvEamChAP5dD3u
    3aHvEamChAP5dD3u
    ZawwEgNrS2dHlvX6
    • Inclina la pantalla hacia arriba a lo largo del borde izquierdo del teléfono.

    • No remuevas la pantalla aun, ya que el cable de pantalla está todavía enrutado a través del marco del teléfono.

  40. KGtY41ccNAIeZ4Bc
    • Desliza el conector de la pantalla fuera del orificio cerca de la placa madre para separar la pantalla del resto del teléfono.

    • Es posible que tengas que inclinar la pantalla de lado a lado para permitir que el conector se deslice por el orificio del marco del teléfono

    • El conector se deslizará hacia afuera sin ninguna fuerza.

  41. HACSt1ff3kqwxypS
    • Remueve la pantalla.

    • Tendrás que pasar con cuidado el cable de la pantalla de repuesto por el recorte de la placa madre. Si tienes problemas, siempre puedes aflojar y retirar parcialmente la placa madre.

    • Sigue esta guía para obtener instrucciones sobre cómo aplicar el adhesivo a la pantalla de reemplazo.

    • Asegúrate de probar las reparaciones antes de pegar la pantalla con adhesivos.

    • Si utilizas cinta adhesiva Tesa para volver a pegar la pantalla, sigue esta guía.

Conclusión

Compara la nueva pieza de repuesto con la original. Es posible que tengas que transferir los componentes restantes o retirar los respaldos adhesivos de la nueva pieza antes de instalarla.

Para volver a montar el dispositivo, sigue los pasos anteriores en orden inverso.

Lleva tus desechos electrónicos a un centro de reciclaje certificado.

¿La reparación no salió como planeaste? Echa un vistazo a nuestra https://www.ifixit.com/Answers/Device/Go...|comunidad de respuestas] para ayuda en la resolución de problemas.

Carsten Frauenheim

Miembro Desde 10/03/20

88878 Reputación

10 comentarios

If you’re only replacing the screen, can you just skip to Step 34?

Gerson -

Because the front-facing camera module is partially embedded in the screen, it’s recommended that you remove it before attempting a screen repair. You won’t have to worry about damaging or realigning the module during reassembly!

Carsten Frauenheim -

Hi, I bought an OEM screen to replace my broken one: how can I make sure the OEM replacement is an original one and not simply a comaptible screen of lower quality?

Giovanni Stoto -

If I'm only replacing the front screen which steps do I need to do and which can I skip?

Marlena Cremeens -

The Pixel 4 XL’s layout requires the rear panel to be removed in order to disconnect the display connector, which is necessary to do prior to removing & replacing the display. This guide is that entire process, so no steps should be skipped. Happy fixing!

Carsten Frauenheim -

This guide was incredibly well written and the photos were perfect. I have ZERO experience working on small electronics/phones but I was able to complete this repair in 2hrs15mins. As the author and everyone says; take your time to clean surfaces of old adhesive before you reinstall. I was glad to see that the replacement screen was same part/quality as original. This repair fixed my touch screen not functioning issue. The specialty tools they included with repair kit were exactly what was needed and helpful. The included alcohol swab saved me because I ran out of rubbing alcohol in my house. This was my first purchase from ifixit and I’m pleased to say it went extremely well and I will definitely be a repeat customer! Thank you to the author of this guide! You and ifixit saved me a lot of money! :-)

Andrew Stagge -

Great instructions. Everything was easy to follow and although i had some issues with removing the front cracked screen, i eventually managed to do it. All tools are of sufficient quality, although not as good as the tools included in ifixit’s larger tool kits.

I don’t think the screen is nearly as good as the original and although i don’t know how hard it is to source these things, there is a good deal more color shift when viewing off axis.

All in all i think this kit screams premium from the very second you receive the box and you really feel like you just bought something well thought out and considered. My only gripe is that the “How to Apply Custom-cut adhesives” instructions call specifically for “…high concentration (>90%) isopropyl alcohol…” but then ifixit includes a single 70% pad in their kit.

My front screen replacement took me nearly 3 hours and 15 minutes, 2 Founders Breakfast Stouts, a boat load of isopropyl alcohol, q tips, coffee filters and 6 trips to the microwave to heat up the iOpener.

Colby Wertz -

It was very usefull and the repair kit was amazing! My friends couldn’t believe I did myself.

Bryan Cerda -

Bonsoir à la Team iFixit,

Je souhaiterais nettoyer/dépoussiérer la caméra frontale.

Dois-je tout démonter comme indiqué sur votre tuto, ou est-ce que je peux éviter certaines étapes.

Je veux uniquement enlever la poussière qui c'est glissé entre la face interne de l'écran et l'optique de la caméra frontale.

Merci d'avance pour votre réponse.

Pierre french user de tuto.

Pierre Paineau -

Bonjour Pierre, excuses d'avance pour mon mauvais Français.

Pour nettoyer correctement la caméra frontale elle-même, vous devez plutôt utiliser ce guide pour y accéder correctement : https://www.ifixit.com/Guide/Google+Pixe... /135919

Le retrait de l'écran le casse généralement.

Bonne chance!

Carsten Frauenheim -