Introducción
Usa esta guía para reemplazar la placa de carga en tu Motorola Moto E4 (XT1762).
-
-
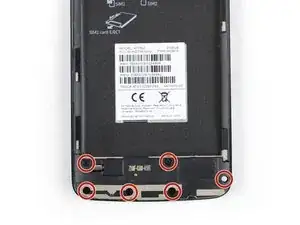
Apaga el teléfono antes de comenzar el desmontaje.
-
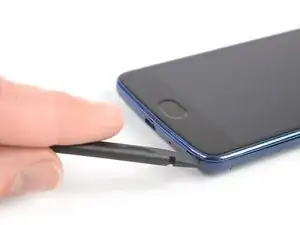
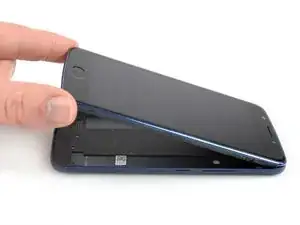
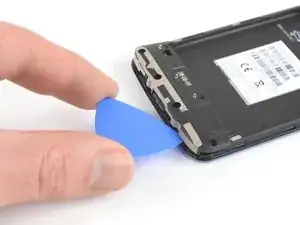
Inserta el spudger en la muesca de la esquina inferior derecha para empezar a separar la unidad de teléfono de la tapa trasera.
-
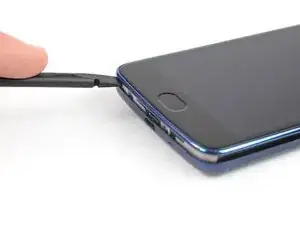
Mueve el spudger a la esquina inferior izquierda y saca la unidad de teléfono de la tapa trasera hasta que puedas agarrarla bien.
-
-
-
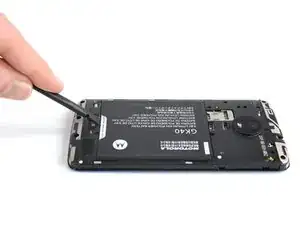
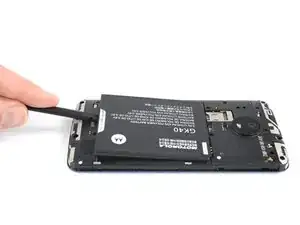
Aplica un spudger o tu uña en la muesca de la parte inferior de la batería.
-
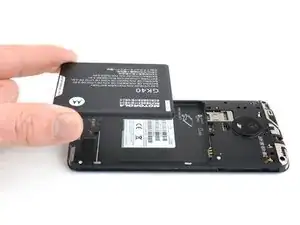
Levanta la batería de su huevo y retírala.
-
-
-
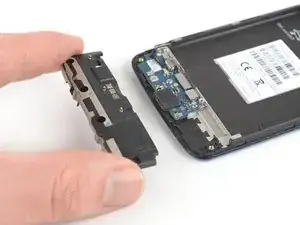
Inserta una púa de apertura entre el altavoz y el marco para levantarlo torciendo la púa de apertura.
-
Remueve la unidad de altavoz.
-
-
-
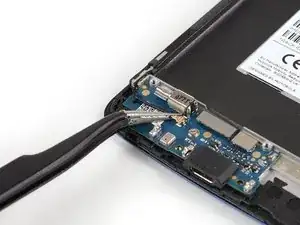
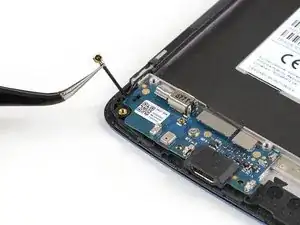
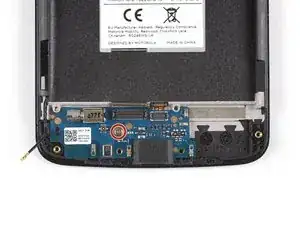
Usa el borde de un spudger para levantar y desconectar el cable flexible del sensor de huella digital.
-
-
-
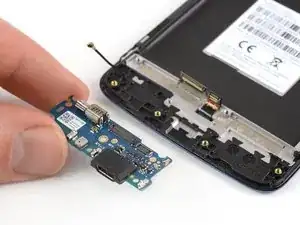
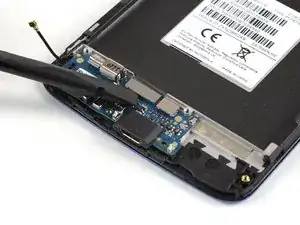
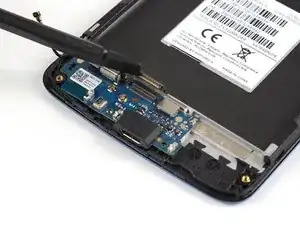
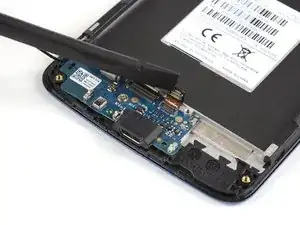
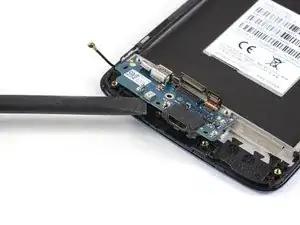
Aplica el borde de un spudger en el extremo inferior de la placa de carga y levántala.
-
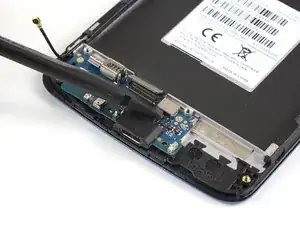
Remueve la placa de carga.
-


Antes de volver a montar la parte nueva, comprueba si hay algún componente que deba ser transferido de la anterior (por ejemplo, la junta de goma del micrófono).
Para volver a ensamblar el dispositivo, sigue estas instrucciones en orden inverso.
Lleva tus desechos electrónicos a un centro de reciclaje certificado.
¿La reparación no salió según lo planeado? Consulta nuestra comunidad de respuestas para obtener ayuda para la resolución de problemas.

I hve a question not a comment. I would like to know if this battery model will work in my moto E 4 Model # XT1775. Thank you.
Gamaliel Gooding -
This models battery is compatible with the Moto G4 Play, E4, and E5 Play:
Motorola Moto G4 Play, E4, and E5 Play Battery - Genuine
You’re probably looking for the Moto E4 Plus (XT1775) battery:
Moto E4 Plus Battery - Genuine
Tobias Isakeit -
My US XT1768 did not have a notch here. I used my fingernails to pop the back cover off. Also, I followed this guide to successfully repair my US XT1768 in about 2 hrs. I’ve added a few comments below to point out the slight differences I found along the way
Tom Bartol -