Introducción
Utiliza esta guía para reemplazar una placa lógica defectuosa.
No olvides seguir nuestra guía de aplicación de pasta térmica antes de reinstalar su disipador de calor.
-
-
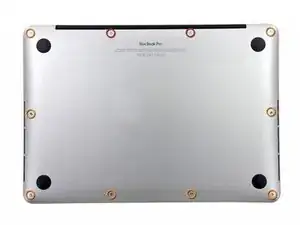
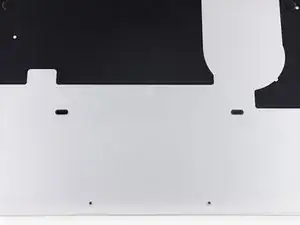
Quita los 10 tornillos que aseguran la parte inferior de la carcasa a la parte superior:
-
Dos tornillos Pentalobe P5 de 2.3 mm
-
Ocho tornillos Pentalobe P5 de 3.0 mm
-
-
-
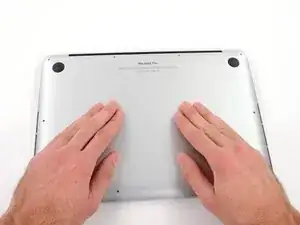
Introduce tus dedos entre la parte superior y la parte inferior de la carcasa.
-
Tira suavemente de la carcasa inferior para retirarla.
-
-
-
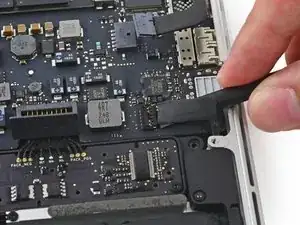
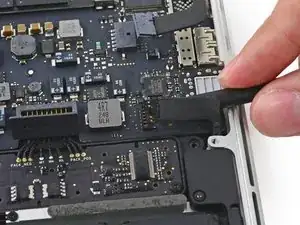
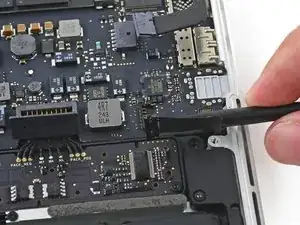
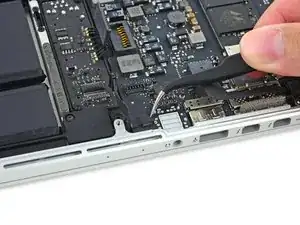
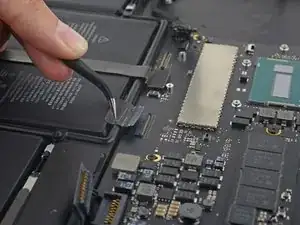
Utiliza el extremo plano de un spudger para levantar el conector de batería directamente de su enchufe en la placa lógica.
-
-
-
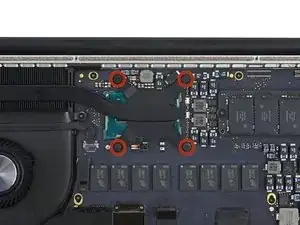
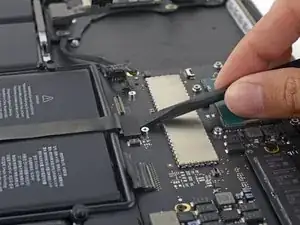
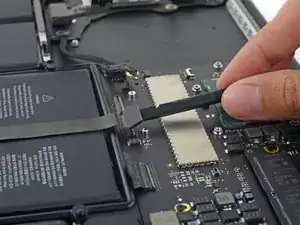
Usa el extremo plano de un spudger para despegar las cuatro pegatinas de espuma de los tornillos del disipador de calor.
-
-
-
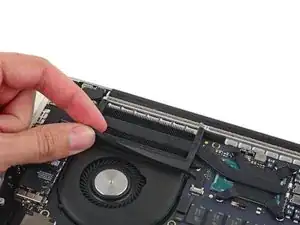
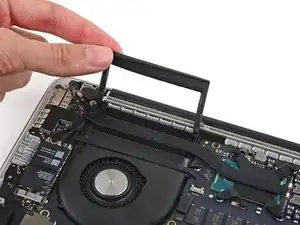
Retira los siguientes tornillos que sujetan el disipador de calor a la placa lógica:
-
Un tornillo T5 de 2,7 mm (plateado)
-
Cuatro tornillos T5 (negros)
-
-
-
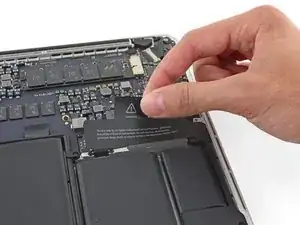
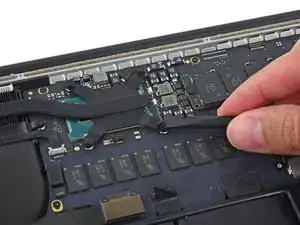
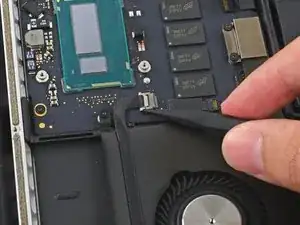
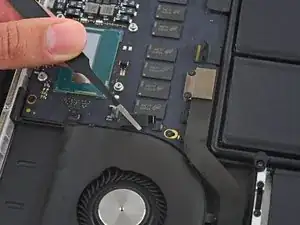
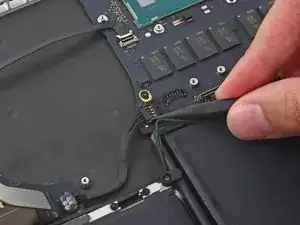
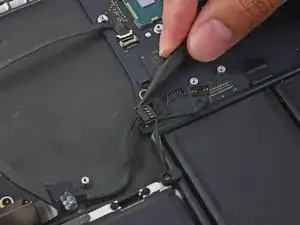
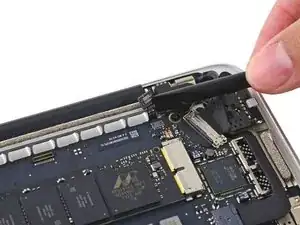
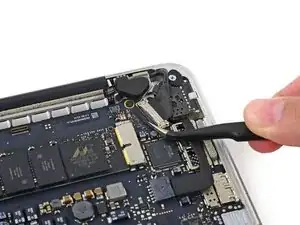
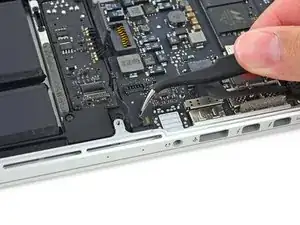
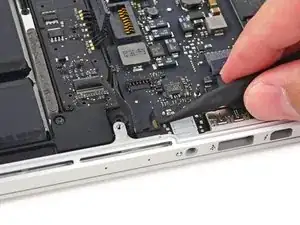
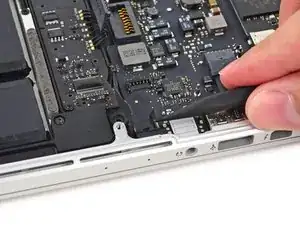
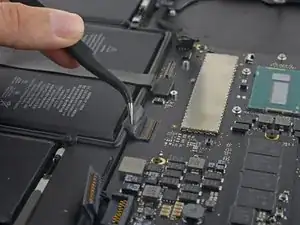
Utiliza la punta de un spudger para empujar a cualquier lado del conector del cable de la cámara para desplazarla afuera de su zócalo en la placa lógica.
-
-
-
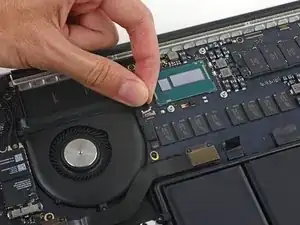
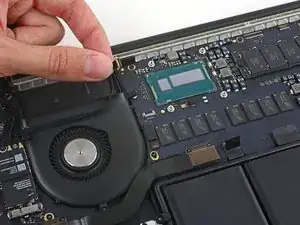
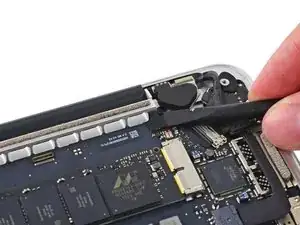
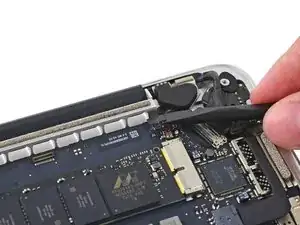
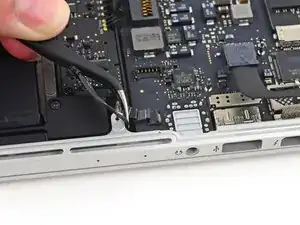
Despega el cable de la cámara iSight fuera de la carcasa del ventilador para doblarla fuera del camino.
-
-
-
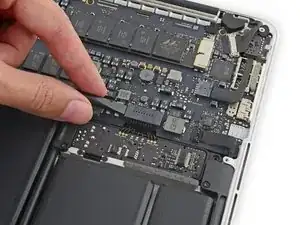
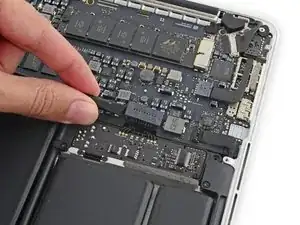
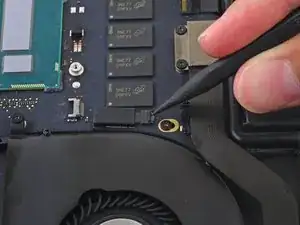
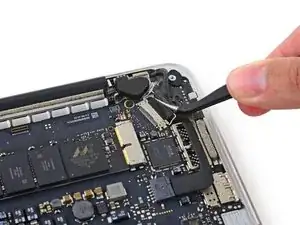
Utiliza la punta de un spudger para voltear la pestaña del conector ZIF del ventilador.
-
Jala con cuidado el cable del ventilador fuera de su zócalo.
-
-
-
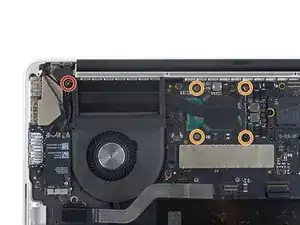
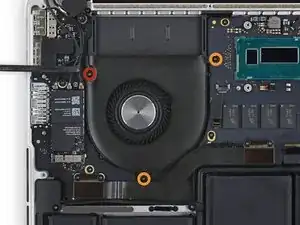
Remueve los siguientes tornillos que sujetan el ventilador a la caja superior:
-
Un tornillo T5 Torx de 5.0 mm
-
Dos tornillos T5 Torx de 3.6 mm
-
-
-
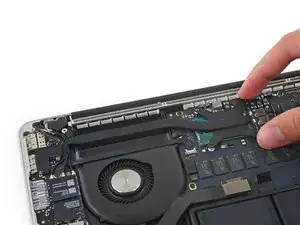
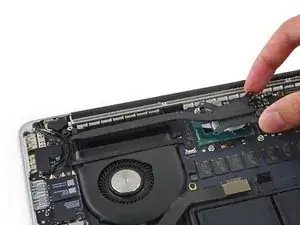
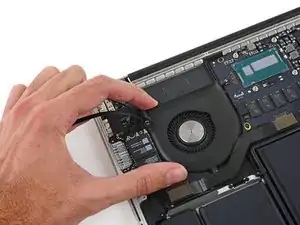
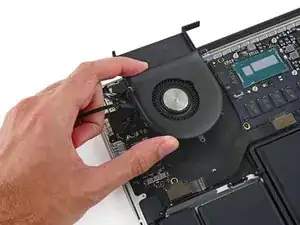
Levanta el lado del ventilador más cercano a la bisagra de la pantalla, y remueve el ventilador de la caja superior.
-
-
-
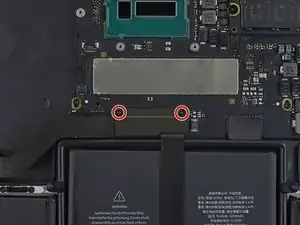
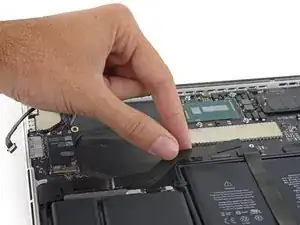
Retira los dos tornillos Torx T5 de 2,1 mm que sujetan el soporte del cable de la placa de E/S a la placa lógica.
-
Retira el soporte del cable de la placa de E/S.
-
-
-
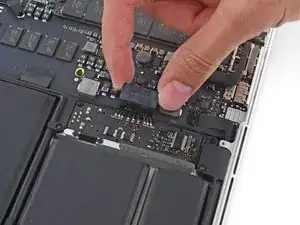
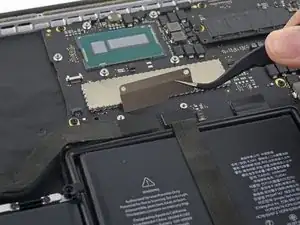
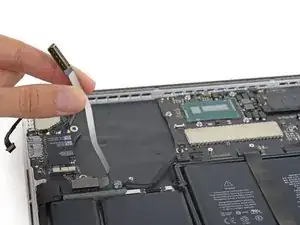
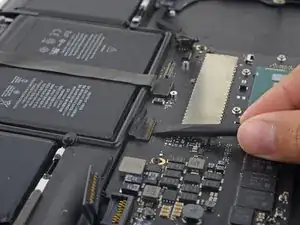
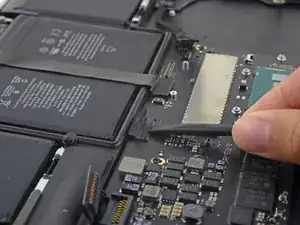
Usa el extremo plano de un spudger para sacar el conector de la placa de E/S de su zócalo en la placa lógica.
-
-
-
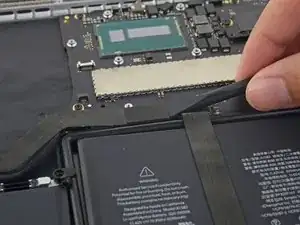
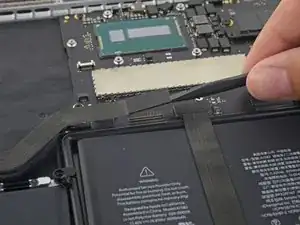
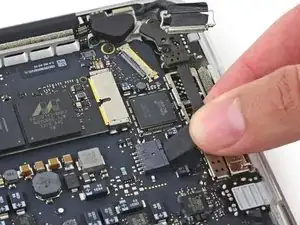
Levanta el extremo de la placa lógica del cable de la placa de E/S hacia arriba para doblarlo y apartarlo.
-
-
-
Usa la punta de un spudger para levantar el conector del altavoz derecho y sacarlo de su zócalo en la placa lógica.
-
-
-
Con la punta de un spudger, empuja cualquier lado del conector de la placa de E/S para sacarlo de su zócalo en la placa lógica.
-
-
-
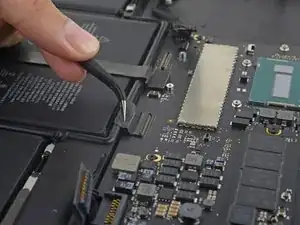
Usa el extremo plano de un spudger para desconectar el cable de retroiluminación del teclado y dóblalo para que no interfiera con la placa lógica.
-
-
-
Toma la pestaña de plástico negro para abrir el conector del cable de la pantalla y sácalo de su zócalo en la placa lógica.
-
-
-
Coloca el extremo plano de un spudger debajo del cable del altavoz izquierdo cerca del conector y levántalo para sacarlo de su zócalo y dóblalo para que no estorbe.
-
-
-
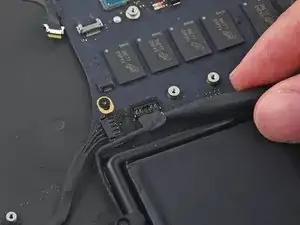
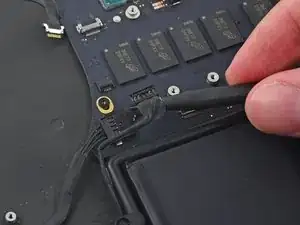
Usa la punta de un spudger para voltear la pestaña de retención en el conector ZIF del cable del micrófono.
-
Saca el cable del micrófono de su zócalo en la placa lógica.
-
-
-
Usa el extremo plano de un spudger para sacar el conector del panel táctil de su zócalo en la placa lógica.
-
Dobla el cable hacia atrás sobre la batería para despejar el camino para la placa lógica.
-
-
-
Retira los cinco tornillos Torx T5 de 3,5 mm que sujetan la placa lógica a la carcasa superior.
-
-
-
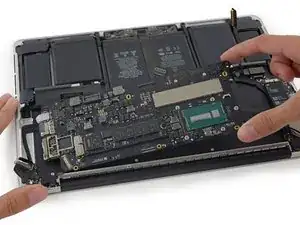
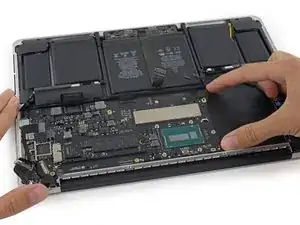
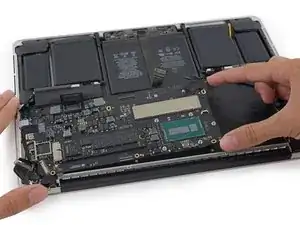
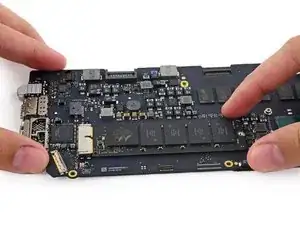
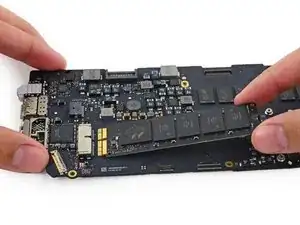
Levanta ligeramente el extremo del procesador de la placa lógica y tira de él hacia el hueco del ventilador para liberar los puertos del borde de la carcasa superior.
-
Retira la placa lógica.
-


Para volver a armar tu dispositivo, sigue estas instrucciones en orden inverso.
19 comentarios
Any idea where the power on pads are ?
Sebastien
I did not need to remove the heat sink. You can simply remove part of the fan assembly in about 1 minute and the heat sink and its associated arm with fins comes right out. Removing the heat sink introduces unnecessary complications that could destroy your logic board should you perform an incorrect repair on the thermal paste.
Any instructions and images demonstrating this?
Richard -
Only part i am missing is how to give the new board it's serial number
me too,me too,
You can order a new bottom plate with the new serial nummer custom printed. Several suppliers in China provide that service.
Robert72 -
For all the screws you use the P5 pentalobe screwdriver?
Carlos -
Pentalobe is only for the screws on the bottom cover. The Torx screw driver is for the remainder.
Fredrik -
I never, ever, ever considered using anything but the correct tool on the Pentalobe screws. Too easy to strip and void your warranty (if still in effect), as well as make it almost impossible to get inside later for another upgrade or repair. The Wiha P5 Pentalobe screwdriver fits like a glove and costs only about $11 (a fraction of your drive's price)at Amazon.com. Get it!
marketing -
I followed this exactly and was able to replace my broken trackpad. I did not have to replace the ribbon OR the battery. However I would suggest getting the ribbon since it’s fairly cheap, as for the batteries I was able to do it with a card only. I didn’t use any heat or the liquid but it takes some time. You really have to work the card in there to release the glue. Also you must be very careful not to bend the batteries or damage them, if you do you must replace with new. This took me about 1.5hrs and my computer works like new. Apple cost for this job was around $450, I did it for $120. Big ups to ifixit for this awesome tutorial, tool set and parts!
On a side note, only use quality tools, the cheap ones will break or strip the screws.
Dustin Steward -
Note that the eight 3mm screws have a shoulder under the head, while the two 2.3mm screws are “full thread”, i.e., there is no shoulder under their heads. It’s important to put the two screws with no shoulder at the hinge of the cover.
All ten screws require a P5 Pentalobe screwdriver, preferably with a magnetized tip to help hold and position the screw.
All of the screws have blue “Loctite” thread locker compound on their threads. This is to help prevent the screws from working loose and falling out. Don’t attempt to clean the Loctite from the screws — leave it in place, and it will continue to help prevent the re-inserted screws from working loose.
When replacing the bottom cover, it is a good technique to insert and BEGIN tightening all ten screws BEFORE fully tightening any one screw. After all the screws have been started, then go around and finish tightening all of them. By doing this, you make it easier to feel that each screw has been started properly, and is not “cross-threaded”.
doubleclutch -
This is what I found on my MBP mid-2014 13” Retina. All 10 used the same screwdriver. I didn’t see the blue “loctite” but I also got my computer refurbished.
Evan Shulman -
A good technique for starting to thread the screws when replacing them is to position and align the screw, and with the driver, gently turn the screw in the REMOVAL direction until you feel and hear a slight click. This click happens when the leading thread of the screw drops off of the leading edge of the thread in the hole — this is the point at which the threads are properly positioned for engagement. You can now turn the driver and screw in the TIGHTENING direction. This technique will help prevent accidental “cross-threading” of the screw, which will damage the threads permanently.
Note that this is a useful technique when installing ANY threaded fastener.
doubleclutch -
Hi peeps,
I have a wifi problem on this MBP 13” early 2015 and was pleasently surprised to find your guide to changing the airport card.
However upon closer inspection it seems that on my MBP (purchased new or so I thought) the 3 antennae seem so have been soldered together at the point where they are clamped to the chassis. I have photos but cannot post here. Can anyone conform that where the 3 antennae wires are held to the chssis by the 2 scew metal support (just before disappearing into the screen hinge), the support is not meant to short the 3 wires together. This makes no sense for 3 seperate antennae wires.
Any advice /close up photos is welcome here.
dom
colonel mustard -
Tip: Use post-it notes to keep track of screws
1. Pack of post it notes
2. Stick screws to the sticky part of the post it note
3. Write on the post it note which step and what kind of screw it is
ibash -
Hi, in order to drain the battery I am running:
yes > /dev/null
in 4 terminals, so the CPU maxes out at almost 99%.
I hope this speeds up the battery draining process.
And the backlight is at maximum brightness :-)
You can see the cpu load in Activity Monitor.
Its draining at 20% per 15 minutes.
Any concerns about draining the battery in this way?
Andre van der Ham -
Something I’ve been curious about, is it possible to upgrade a late 2013 Retina model MacBook Pro, with the improved 16gb ram and i7 processor logic board from the 2015 retina model? I’d be interested to try but not ready to shell out the $500+ to be the first lol
Chat Dawgie -
Without rehashing what others have said, I would highly recommend reading through the steps *and* the comments for each before tackling your replacement for tips. Highlights for me were: only disconnecting what actually needed to be disconnected, rotating the spudger to release the track pad cable, a hair dryer worked perfectly fine, and the pencil outline of the battery before you remove. You got this!
N DesRochers -
Installation of replacement AirPort card was easier than I had expected thanks to this guide. Thank you.
chaslaw -
I use replaced SSD and it was super easy and working great. I can finally upgrade Mac OS with plenty of room to spare and no more low memory alerts. Well worth investment and didn’t have to buy new laptop
Pete James -
It's interesting that this tutorial is rated Moderate even though you need to remove the battery. The battery removal tutorial which is basically the same but with fewer steps is rated Difficult.
Marv Ruona -
when i pulled the screws out i arranged them in the same way they were in. the top 2 middle screws appeared to be shorter than the rest. in order to keep them in place i got a square of packing tape sticky side up, taped both sides down with 2 other pieces of tape. and then put the screws head down in the order i pulled them.
Jason Wade -
Excellent instructions although checking battery and speakers aligned before fixing batteries into place is essential. MacBook good as new!
John Foreman -
I find it helpful to spread a soft, slightly fuzzy cloth (like flannel) over my workspace before doing something with small parts. It keeps screws and things from rolling or bouncing away. A towel might be too plush, though, as a screw might get lost in it.
Richard KeslerWest -