
Introducción
Usa esta guía para reemplazar la placa madre en un Samsung Galaxy Watch.
-
-
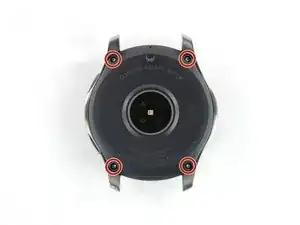
Retira los cuatro tornillos Tri-point #00 (de 4.2 mm de longitud) en la parte trasera del reloj.
-
-
-
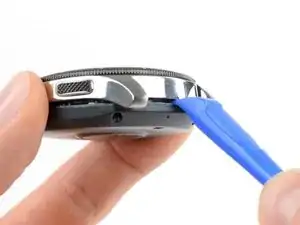
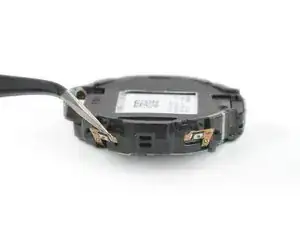
Utiliza una herramienta de apertura para pasar entre la tapa trasera y la caja metálica del reloj.
-
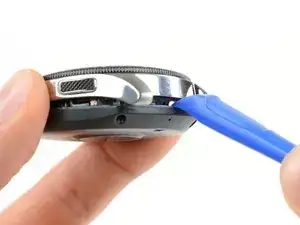
Abre con cuidado la tapa trasera de plástico.
-
-
-
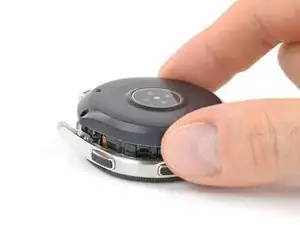
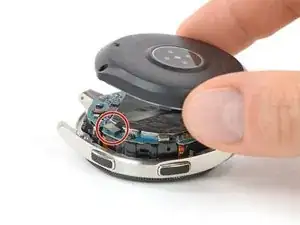
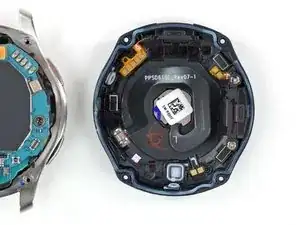
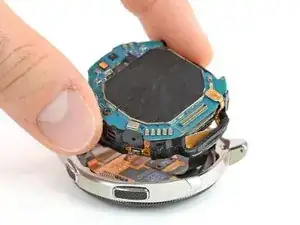
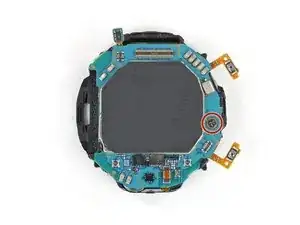
Pon el reloj y levanta la tapa trasera para acceder al conector del sensor en la placa madre.
-
-
-
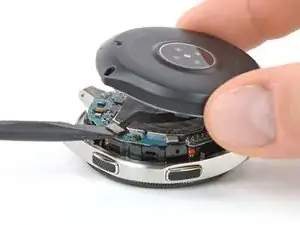
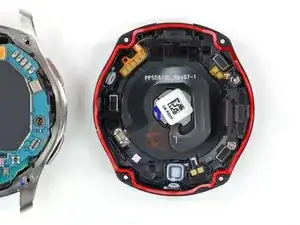
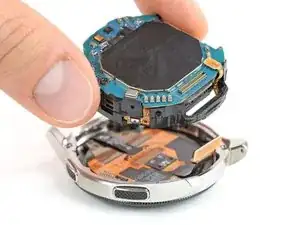
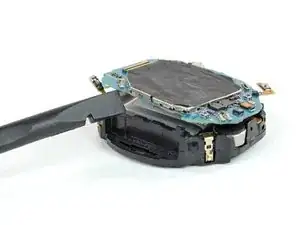
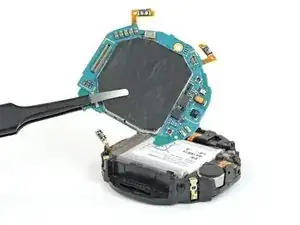
Inserta un spudger en una grieta pequeña por debajo de la placa madre donde se encuentra el marco de plástico.
-
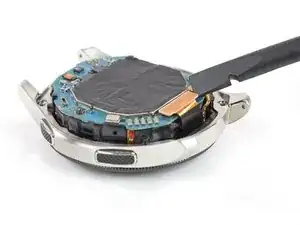
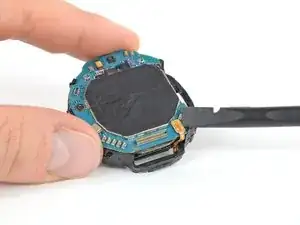
Levanta la placa madre torciendo el spudger.
-
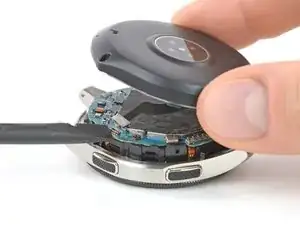
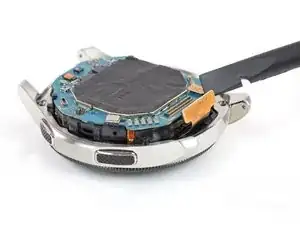
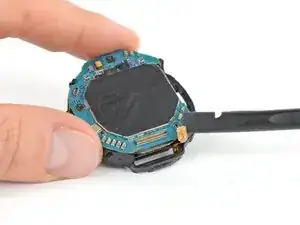
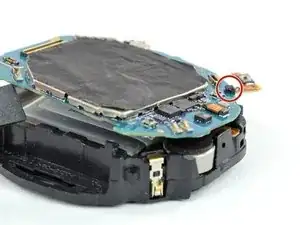
Desliza la placa madre por debajo de la lengüeta de plástico.
-
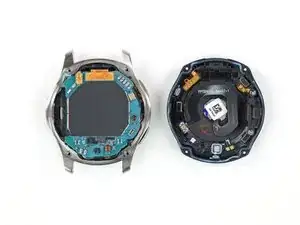


Si es posible, enciende tu dispositivo y "prueba tu reparación" antes de volver a sellar.
Para volver a ensamblar tu dispositivo, sigue estas instrucciones en orden inverso.
¿La reparación no salió como planificaste? Intenta resoluciones de problemas básicos o pide ayuda en nuestra comunidad de respuestas.
Lleva tus residuos electrónicos a un centro de reciclaje certificado.

7 comentarios
Anyone know where to purchase a Galaxy Watch mother board?
What is the part number, or where can you get the motherboard?
Where can the motherboard be purchased from for Galaxy Watch ?
I can't get them to budge
Irene -
Same here, its impossible to get the screws off. They’re almost stripped now too.
Prabhat -
Sorry to hear that. Here are some tips on how to get those screws off hopefully: Cómo quitar un tornillo barrido
Tobias Isakeit -
Just started working on watch. Can not get the screws out. I purchased the recommended tools. Screws won't budge. I have not stripped them yet. How do I get them to loosen up?
joyce c -
Same here. I did buy your Electronics repair Bundle. The Y000 is too pointy, we need a flatter tool
Robertob67 -
Hi Ladies & Gentleman, please try as follows:
Use a spray can of "WD 40" with a spray pipe/tube but DO NOT spray into the screw holes. Just spray shortly on a piece of paper, a drop of WD40 will remain at the end of the spray pipe. This drop I put into the screw hole position. Do this for each screw hole and leave the stuff approx. 10 minutes alone. Afterwards use the screw driver as normal to turn the screws out.
*** After the drop is placed into the hole do not wait too long as WD40 is crawling into "even not existing gaps"
*** just use a small drop of WD40.
*** I intend for using 4 new screws as the head (Tri-Pont profile) seems worn out. But if I get new screws for sure I will go for a TORX profile because its the best as you don't need to apply axial force on screw driver.
Very best regards from Harald (a German machine building engineer)
Harald -
Harald again to Robertob67:
It is NOT the Tool Y000 but the Y00
Best regards
Harald
Harald -