Introducción
Si estás utilizando el modelo iMac 27 "de finales de 2009 o 2010 para juegos, es posible que desees actualizar tu tarjeta gráfica a la serie 6 del último modelo de 2011.
Partes
-
-
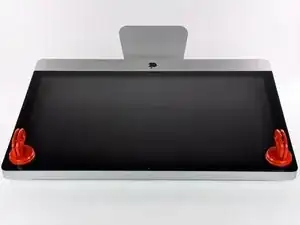
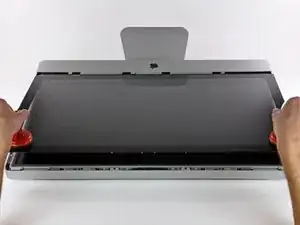
Coloca una ventosa para trabajos pesados cerca de cada una de las dos esquinas superiores del panel de vidrio.
-
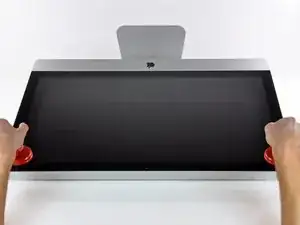
Mientras sujetas ligeramente la ventosa contra el vidrio, levanta la manija móvil hasta que quede paralela con la otra manija (como se indica en la tercera imagen).
-
-
-
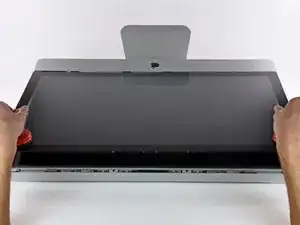
Levanta suavemente el panel de vidrio perpendicular a la cara de la pantalla LCD, lo suficiente para despejar las clavijas de montaje de acero unidas a lo largo de la parte inferior del borde superior del panel de vidrio.
-
Tira del panel de vidrio desde el borde inferior del iMac y cuidadosamente déjelo a un lado.
-
-
-
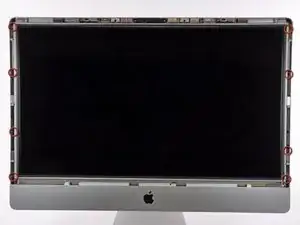
Coloca con cuidado el iMac con el soporte hacia abajo sobre una superficie plana.
-
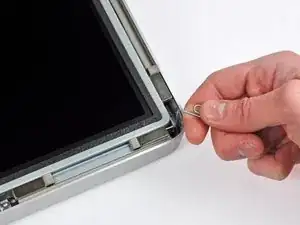
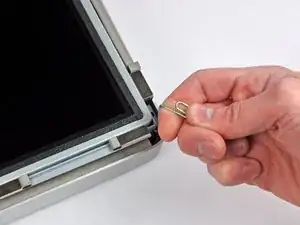
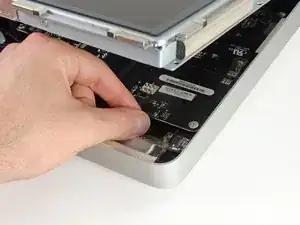
Usa una herramienta delgada con forma de gancho para levantar un lado del borde superior de la pantalla por su marco exterior de acero.
-
-
-
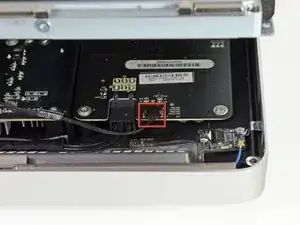
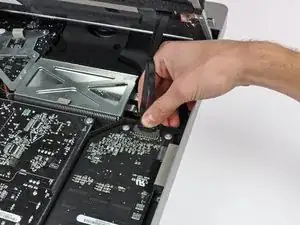
Con los dedos, saca con cuidado el cable de sincronización vertical de su zócalo en la placa del controlador LED cerca de la esquina superior izquierda de tu iMac.
-
-
-
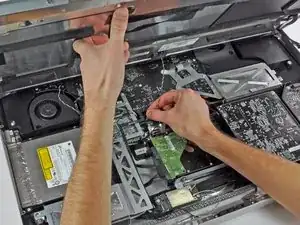
Aprieta los dos brazos del conector del cable de datos de la pantalla para desbloquearlo de su zócalo en la placa lógica.
-
Saca el conector del cable de datos de la pantalla de su zócalo en la placa lógica.
-
-
-
Gira la pantalla fuera de la carcasa exterior lo suficiente para desconectar el cable de alimentación de la retroiluminación LED de la placa del controlador LED.
-
-
-
Levanta la pantalla para dejar espacio suficiente para desconectar el conector del cable del sensor térmico LCD de su zócalo en la placa lógica.
-
-
-
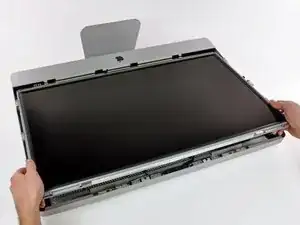
Tira con cuidado de la pantalla hacia el borde superior de tu iMac y sácala de la carcasa exterior.
-
-
-
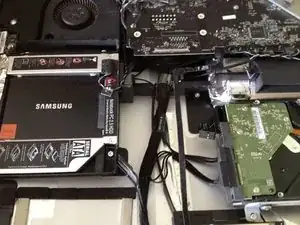
Retira el cable del sensor de temperatura del disco duro. Esto permitirá que se extraiga el disco duro.
-
-
-
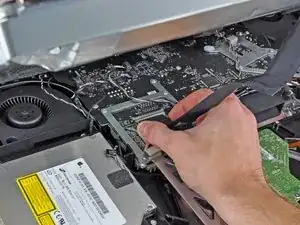
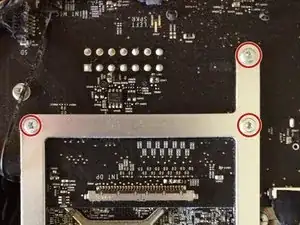
Retira los tres tornillos Torx T9 del bisel de la tarjeta gráfica.
-
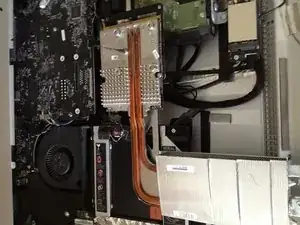
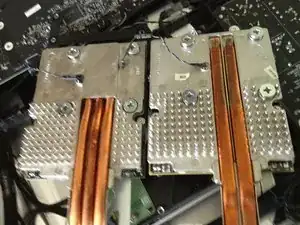
Localiza el disipador de calor grande de la tarjeta gráfica, que debe estar justo encima de tu unidad óptica.
-
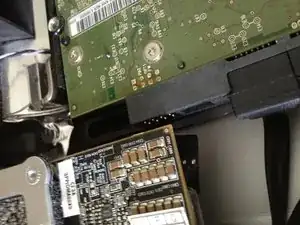
Retira el único tornillo que lo sujeta en su lugar.
-
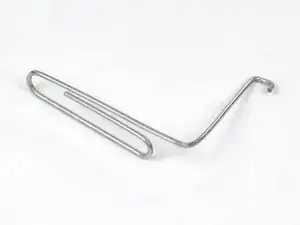
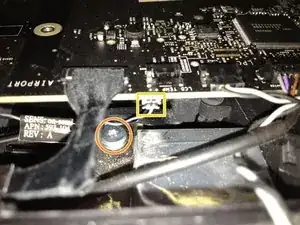
Retira con cuidado el cable del sensor de temperatura de la tarjeta gráfica de debajo de la placa base
-
-
-
Tira lentamente y con cuidado de la tarjeta gráfica hacia arriba y hacia afuera de la placa base.
-
Deberías poder quitar la tarjeta gráfica fácilmente cuando quites el cable del sensor de temperatura primero.
-
-
-
Quita el engaste de metal de la tarjeta gráfica; solo un par de tornillos lo mantienen en su lugar.
-
Guarda tu tarjeta gráfica en un lugar seguro en caso de que la necesite nuevamente o si deseas volver a reinsertarla.
-
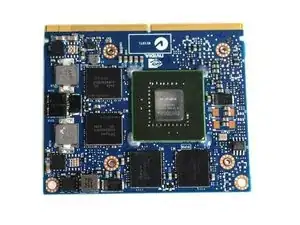
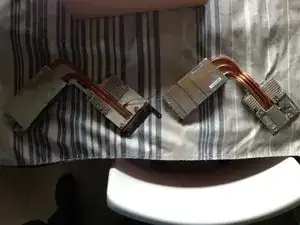
La segunda imagen muestra las series 4 y 6 una al lado de la otra. Una pequeña diferencia en la altura hace que sea necesario un trabajo extra (ver el siguiente paso).
-
-
-
Deberás quitar la unidad óptica para quitar la pieza de plástico mencionada en el siguiente paso. La unidad se sujeta con 4 tornillos Torx.
-
Una vez que se quitan los tornillos, la unidad se puede levantar y apartar sin quitar ningún cable.
-
-
-
Como la serie 6 es ligeramente más alta, necesitamos dejar un poco de espacio en el soporte de plástico que está debajo de la tarjeta
-
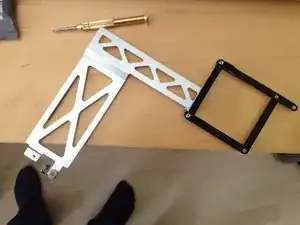
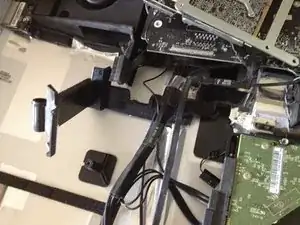
Quite la parte de plástico que se muestra en la segunda imagen quitando un tornillo y tire con cuidado de la carcasa de aluminio.
-
Esta sujeto con cinta así que no te preocupes de romper algo.
-
Un poco de meneo y navegación desde los cables y deberías tenerlo en tus manos
-
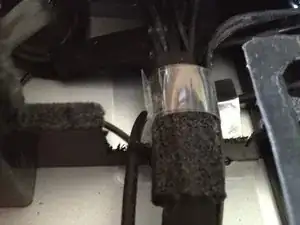
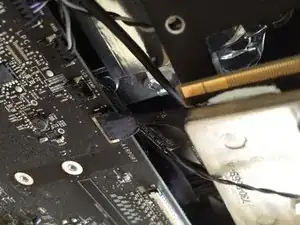
Verás el espacio rectangular por donde pasa el cable grande. Usa una sierra u otra herramienta para hacerlo aproximadamente 5 mm más ancho y 2-3 mm más profundo
-
La tercera imagen muestra el resultado final que queremos lograr.
-
La razón principal de este paso es el tubo de calor de la serie 6, que ocupa más espacio.
-
Nota: ¡esto SOLO es necesario en el modelo de finales de 2009, los modelos de 2010 ya tienen suficiente espacio!
-
-
-
Aplica el engaste de metal a la nueva tarjeta gráfica de la serie 6. Asegúrate de que esté alineado correctamente.
-
Ahora inserta la tarjeta gráfica de la serie 6 con cuidado.
-
Cuando esté en su lugar, fíjalo con 3 tornillos
-
Vuelve a insertar el cable del sensor de temperatura. Necesitas buenas manos o una buena herramienta para hacerlo. Se paciente con este paso
-
-
-
Vuelva a montar la pantalla LCD como se explica en iFixit.
-
No se necesita hacer otro trabajo. A medida que retiras el cable de alimentación, el SMC debe reiniciarse, que es el chip que configura tu hardware
-
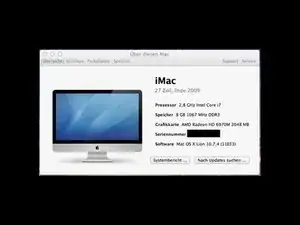
Si todo va bien, deberías ser recibido con una pantalla de bienvenida y "Acerca de este MAC" debería mostrar la imagen a la izquierda
-
Nota: También reemplacé la unidad óptica con una SSD de 256 GB que se puede hacer fácilmente durante el proceso de instalación
-
Último consejo: Si quitas la unidad óptica de cun SSD, haz una partición mínima de bootcamp e instala Windows en ella. Te ahorrarás muchos problemas si alguna vez necesitas uno. Créeme, simplemente hazlo, instalar bootcamp sin unidad óptica es un fastidio.
-


Para rearmar tu dispositivo, sigue estas instrucciones en orden inverso.
124 comentarios
works perfectly ;-) just be slow and precised
Just be noticed that this upgrade not work for iMac 27 late 2009 equipped with core 2 duo CPU, but only with the i5 and i7 CPU one!
Paolo -
Did you know you can add an additional SSD drive WITHOUT needing to remove your Optical drive? It installs vertically just to the right of your HDD. I just performed this upgrade last weekend. I believe you can do this to 2009 and up models.
Regretfully Not on the iMac late 2009, because the motherboard has only 2 SATA ports, not 3 like the 2010 and later models...
Just a question: with this mod, are you able to use Airplay Mirroring in Mountain Lion? Since the inhability to use it on these macs is GPU-related, virtually with this Graphic card you may be able to enable it... Let me know please!!
I read somewhere that AirPlay mirroring uses a technology on the processor called Intel Quick Sync Video, ant it is present only in the 3rd+ generation of Intel Core ix processors. So if this is true it explains why some Macs do not have AirPlay mirroring and why you do not get AirPlay Mirroring after updating the graphics card.
You can easily lift the glass panel off the magnets with only your fingernails (or something thin like a credit card or a guitar pick). No need to buy suction cups you will only use once.
Nick Caron -
Yes, you don't need the specific suction cups to remove the display cover - it's held on by magnets, and if you start at the center by the iSight you can work out to the edges and remove it. I had an iPhone screen suction cup around and it helped with balancing the screen when you pull it out fully, but by no ways is it required.
jtowner -
Great guide and pretty straight forward the only thing that took me ages and I didn't manage to undo were the power btn cable (step 28) and the thermal sensor (step 25) Seemed like they were glued on! Very difficult to remove and obviously conscious so I didn't break anything!
Eddie -
Thanks!!! Worked excellently.
I used a plunger (clean first ;-) to get the screen off, and http://exirion.net/ssdfanctrl/ for fan control.
Then, i did not take out the whole display and left it in the hinges on the bottom side and held it up with two small cardboard boxes. Easy enough to disconnect the hdd then.
I replaced with an ssd, put that into a ssd enclosure. Had to drill an extra hole in it to fasten the pins that hold it in place.
Used Carbon Copy Cloner to make an image from the old hdd, with the sad connected via usb. Checked it of it booted via System Preferences > Startup Disk. It worked so the took the imac apart and replaced the disk. Booted, everything was working as always, only faster!
Frank303 -
I'm replacing my optical drive too. what exactly needs to be plugged into the SSD? I don't have the kit - as I am not sure one is required if I buy something like this: http://www.amazon.com/gp/product/B0056OB...
Can you please advise? Can I do it with this piece, or do I need to get the entire bracket kit?
Allen Borza -
My display data cable forks, with a smaller section going up near the camera board. Where it forks, it is attached to the aluminum plate that attaches around the cpu board. I haven't seen any images that look similar, and I'm stumped at how to remove this second section of the cable. 2010 i7 build to order
Awolf -
Agree with the other comments here. Despite buying suction cups, not sure they were necessary as the screen removed very easily. A sat nav suction cup would do the job fine.
Stuart Bloomfield -
I can confirm that it is possible to remove the front glass using fingernails rather than suction cups. It isn’t easy, but if you try you should be able to pry off the glass.
I did this twice: once at the beginning of the procedure and once again at the end, when I realized that a big pice of lint was trapped under the glass.
gordonhamachi -
Don’t use suction cups. totally unnecessary. screen pops off with fingernails.
Kieran Hobbs -
The reason for caution about suction cups tends to be making sure you don’t apply uneven pressure on the edges of the glass and crack it in the process of removal. I do agree however that some pretty small suction cups would do fine. These suction cups can be had at your local princess auto (Harbor freight) for a few bucks and are useful elsewhere as well. if you use your fingernails or other items just try and do it evenly :)
Abirinder Brar -
good duct tape or gaffer tape wrapped around your hands makes an excellent glass removal 'tool'. Even clear packing tape works a charm.
Stu Blair -
A great first step that minimizes that first gust of dust migration when the glass is lifted is to clean the glass, sides *and the back* before lifting the glass, and then lift SLOWLY. Most of that dust is already trapped inside and pulled up as the screen lifts, but with care you can keep it there (or gently vacuum out with a micro vac…).
John -
before starting any of this…there is a device that you can use that comes with the IFixit kit to format and either clone or restore your hard drive to the new drive…it will save you a lot of headaches..it is a SSD enclosure that you can plug into your existing computer …
Tom Richter -
Thanks for the instructions. Before doing this the first time, suggest to everyone, read through at least twice. This is the easiest step, as you’ll soon see. As for removing the glass, USE suction cups, either the ones the sell here, or others. DON’T skimp. Also wear gloves when handling the glass. Don’t take chances.
ECJohansen -
Duct tape works too!
Dani -