Introducción
¿Tus pies MacBook Pro han visto días mejores? Utiliza esta guía para darle a tu MacBook Pro de principios de 2015 un nuevo par de pies.
-
-
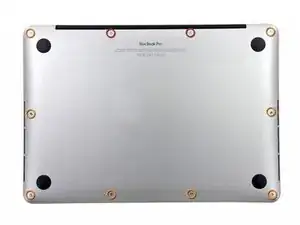
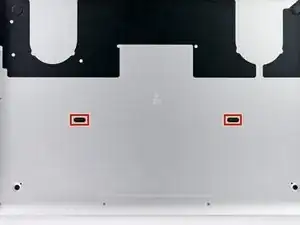
Quitar los siguientes diez tornillos que unen la tapa inferior con el cuerpo:
-
Dos tornillos Pentalobe P5 de 2.3mm
-
Ocho tornillos Pentalobe P5 de 3.0mm
-
-
-
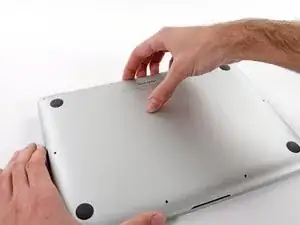
Introduce los dedos entre el cuerpo y la tapa inferior.
-
Tire suavemente de la tapa inferior.
-
Retire la tapa inferior y déjela a un lado.
-
-
-
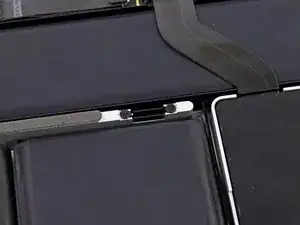
La carcasa inferior está conectada a la carcasa superior en el centro, con dos clips de plástico.
-
-
-
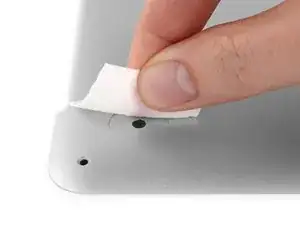
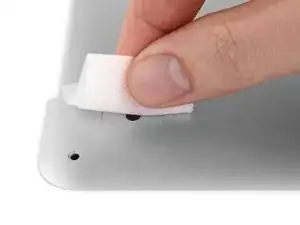
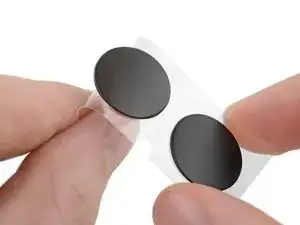
Despegue cualquier pegatina de la parte trasera de la tapa trasera cubriendo las patas que haya decidido reemplazar.
-
-
-
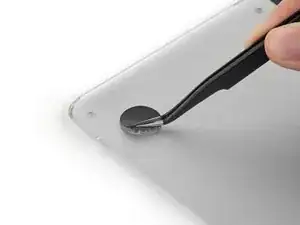
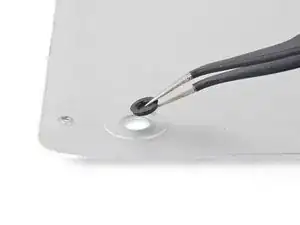
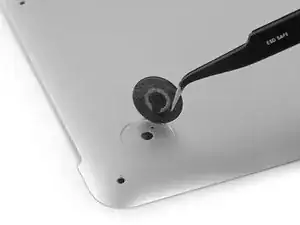
Quite cualquier pata que este rota o dañada.
-
Si la pata antigua es difícil de quitar, use un secador de pelo o una pistola de calor para aplicar un poco de calor al área y despegar el adhesivo.
-
-
-
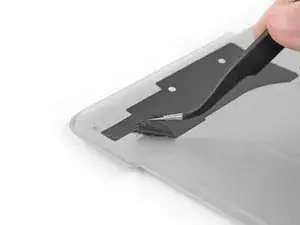
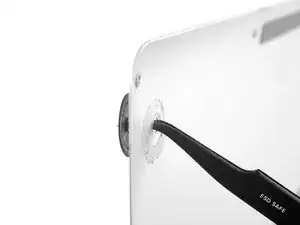
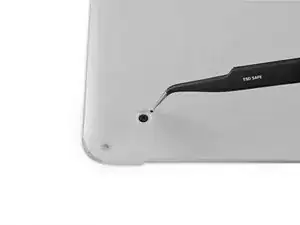
Frote la cavidad de la pata con eliminador de adhesivo para eliminar el adhesivo que haya quedado.
-
-
-
Limpie la cavidad de la pata con una toallita de alcohol isopropilo para remover el residuo del limpiador y preparar la area para el adhesivo en la nueva pata.
-
-
-
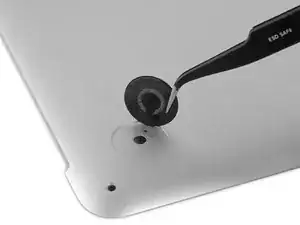
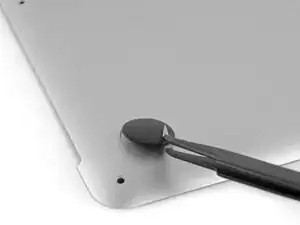
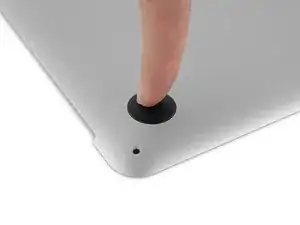
Alineé la nueva pata dentro de la cavidad.
-
Pon el pie abajo mientras lo deja alineado correctamente.
-
Compruebe que la alineación esta correcta desde el interior de la tapa. El nudo de alineación debería de ser visible por el agujero de alineación.
-
-
-
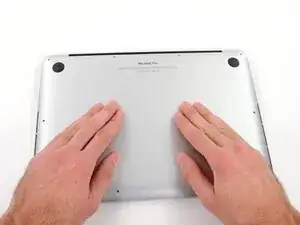
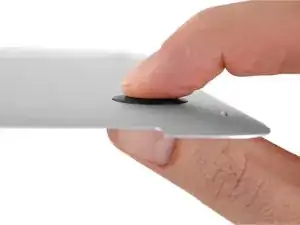
Presione la nueva tapa en su sitio firmemente con su dedo, entonces aplique presión apretando la pata de cualquier lado de la tapa con su dedo y su pulgar.
-
Mantenga presión durante 30 segundos para poner el adhesivo.
-
Repita los últimos 7 pasos con cualquier pata rota o usada.
-
Para volver a armar tu dispositivo, sigue estas instrucciones en orden inverso.

3 comentarios
On the inside of the cover of my A1502 Early 2015 MBP, two of the four feet are covered by large black stickers. So, how do we remove the little piece left behind when we remove any foot that is damaged? Do we just cut through the large black sticker or remove it?
This review was helpful, but it didn’t mention the black stickers on the inside of the lower case. I ended up poking a small hole through the black stickers to get the remaining pieces of previous feet out.
Jason and Taylor, the stickers you mention are on Step 4 of this guide.
If don’t have one of those neat project mats, then you can use small pieces of flattened blu-tack to hold the screws. If you arrange them in the shape of your mac book cover, and put the screws down methodically, you can get a one-to-one mapping of the screws to the correct screw holes.
Toby Thurston -
Or you can use an ice tray where you put the screws and the parts in separate bays in the same order as they come in the instructions.
timofej.se -
This is great! I used a small magnetic white board, and wrote on it to identify the parts as I went. This whole process, from the fast shipment to the great instructions to the complete, high quality, tool kit has been great. I’m typing this comment on my resurrected laptop. Thank you! Sue
Susan Greer -