Introducción

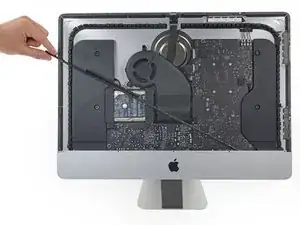
Guía de prerequisito para únicamente remover la ménsula de soporte inferior de un iMac.

  1. QMqfyRTWUxyD6PaN
    QMqfyRTWUxyD6PaN
    mphdji2lKIR3CwWS
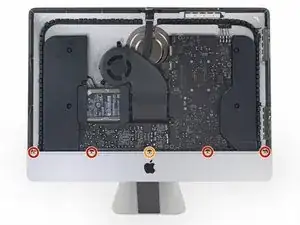
    • Remueve los siguientes cinco tornillos Philips que mantienen la ménsula de soporte inferior en su lugar:

    • Cuatro tornillos de 3.2 mm

    • Un tornillo de 1.7 mm

    • En al menos algunas máquinas con EMC 2544, todos los tornillos son del mismo tamaño.

    • Podrías necesitar quitar el adhesivo de la pantalla que pasa por el borde inferior del marco del iMac para acceder a los tornillos.

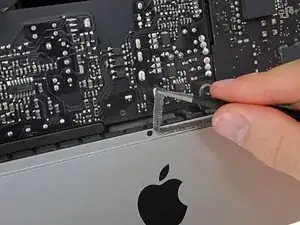
    I used the CR-V 4.0 standard screwdriver head to help peel away the adhesive lining. My fingers were too big to grab it, and my fingernails too short to get the removal started. This 4 screw head worked perfectly.

    airshack -

  2. NUQ4YmOm2RlEEAAO
    • Remueve la ménsula de soporte inferior del marco del iMac.

    Of all the parts of this entire procedure, replacing this one piece is the hardest part! The screws are tiny and they just don’t seem to want to grab the support piece. Also it seems to perform no function which is also annoying.

    John M -

    I left mine out. LOL

    jerrid_foiles -

    Line up the screw holes and press on the bracket from the back to help the screws grab. If your fingers are too big, press with the flat side of your spudger. As long as there’s no gap between the bracket and the iMac’s frame, the screws should grab easily.

    Jeff Suovanen -

    I put it in at a slight angle lining up the right hand side holes, screwed in the two screws and gently pressed my finger behind it on the rest

    jmorphett5 -

    If you only want to replace the HD and RAM, take a big shortcut and leave the logic board in, as well as all the parts needed to remove it (speaker, power supply etc). Once the display is removed, just take out the fan and the top two logic board screw. There is than sufficient space to gently remove and insert the two ram modules. HD can easily be replaced with an SSD by just removing the HD mounting brackets...

    diddl14 -

Conclusión

Para re ensamblar tu dispositivo, sigue las instrucciones en orden inverso.

Evan Noronha

Miembro Desde 06/02/15

219277 Reputación

0 comentarios