Introducción

Esta guía muestra cómo reemplazar la pasta térmica dentro de una PS4. La pasta térmica es un líquido plateado que se aplica a un procesador para transferir calor a una solución de enfriamiento. La pasta térmica de cualquier dispositivo electrónico debería ser reemplazada cada pocos años, ya que se seca. En la PS4, la placa donde está la pasta térmica se encuentra justo debajo del disipador de calor, y el disipador de calor es donde se acumula la mayoría del polvo. Limpiar el disipador de calor y reemplazar la pasta térmica, ayudará a la PS4 a funcionar como si fuera nueva. Mi PS4 tiene unos seis años y, después de completar este procedimiento, ha dejado de sobrecalentarse y es tan silenciosa como un ratón. La única habilidad requerida para esta tarea es poder atornillar y desatornillar tornillos. Es un proceso muy fácil, pero tedioso, así que elige un día en el que estés libre si vas a hacer esto.

  1. XODFiLajUW1pXiQT
    XODFiLajUW1pXiQT
    Z15kif4HQcDYPxVU
    ujUlbGSNrlqRlycV
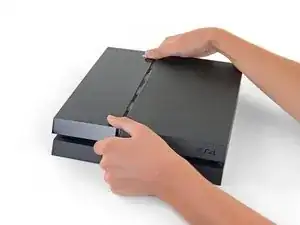
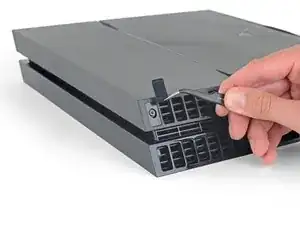
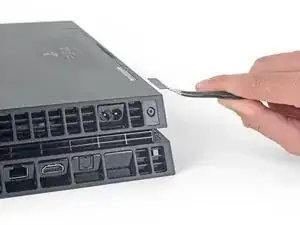
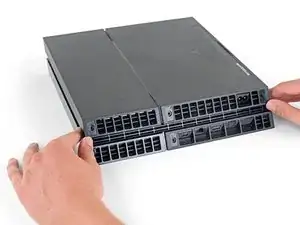
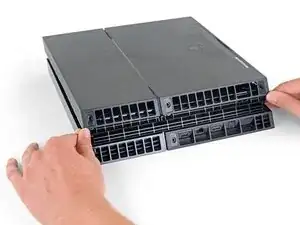
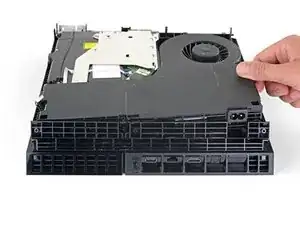
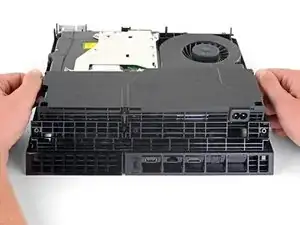
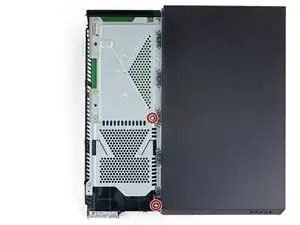
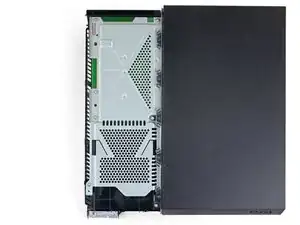
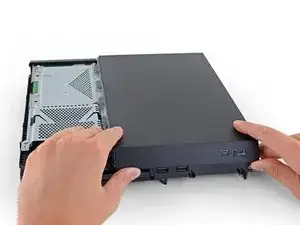
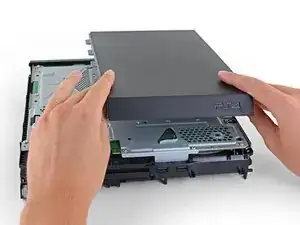
    • Agarra la PS4 con ambas manos a lo largo del hueco en la cubierta superior.

    • Empuja el lado brillante de la cubierta superior con los pulgares hasta que salte a un lado.

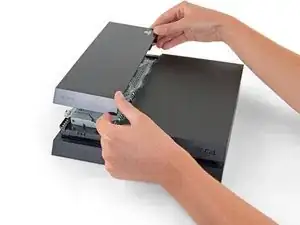
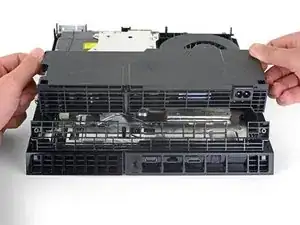
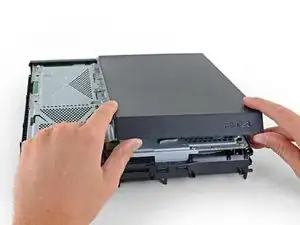
    • Levanta la cubierta superior brillante hacia arriba y hacia atrás para quitarla del PS4.

    I have a CUH-1102A version of this PS4.

    Would this teardown work for it?

    Cary B -

  2. 4jG4MsFWDV6TOc4K
    4jG4MsFWDV6TOc4K
    RTxxNkPWMlPqEFCE
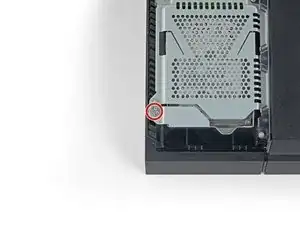
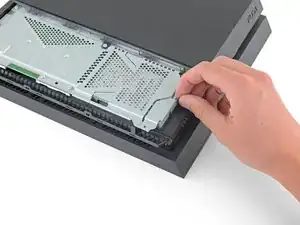
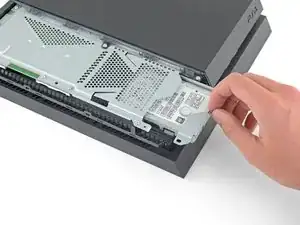
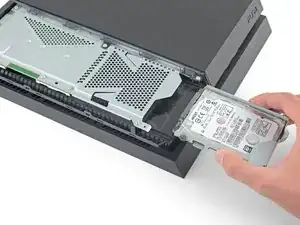
    • Usa un destornillador Phillips para quitar el tornillo de 6.5 mm que fija el disco duro a la carcasa.

  3. cVNDJIs1PHwFiv1K
    cVNDJIs1PHwFiv1K
    bZq6BRMigBrWhATA
    p3SAR2gJw22qmID5
    • Saca el soporte del disco duro del recinto.

    • Ten cuidado de no dejar caer el disco duro. Los componentes internos son frágiles y son susceptibles de sufrir daños por golpes repentinos.

    Can these take an SSD?

    Cary B -

  4. 21LJYnUT534diPkY
    • Voltea la PS4 al revés con la parte trasera hacia ti.

  5. kywHHmkOcswPFDjm
    kywHHmkOcswPFDjm
    g3p1nmGqDLvNYlwD
    HVJTWJOoL6cUcoBS
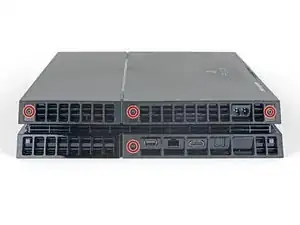
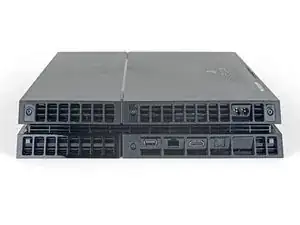
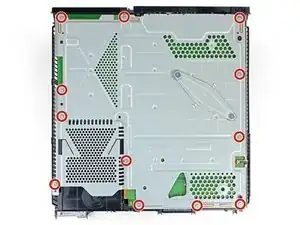
    • Usa pinzas para quitar las dos pegatinas en el centro de la parte trasera de la PS4 exponiendo dos tornillos de la caja.

  6. QGDNpTn4LrZHSr2F
    QGDNpTn4LrZHSr2F
    MLVk3bQRWjJpjhKh
    • Usa pinzas para quitar con cuidado las cubiertas de plástico de los tornillos en cada esquina, exponiendo dos tornillos más de la caja.

    What If my PS4 doesn't have the two screws on the side

    Michael Jimenez -

    I should imagine that plastic cover will come off?

    How did you go?

    Cary B -

  7. EoWfJjtMRGNijIDA
    EoWfJjtMRGNijIDA
    kPwQlcOBVwv2PxuA
    • Quita los cuatro tornillos de seguridad Torx de 7.2 mm de la parte trasera de la PS4.

    I only have two screws, those in the middle of the console.

    Oscar Martinez -

    Have you removed the plastic covers mentioned in the previous step? That will expose the other two screws.

    Sam Omiotek -

    same, here. there are only the middle screws, no covers or screws on the sides. and it sits pretty tight

    Johannes Müller -

    turns out 12XX models are different. Look at this for reference: https://www.youtube.com/watch?v=Hpr0z0ve...

    Johannes Müller -

    Yes there is slight variations between the first models, and the second gen and on models. I have an original and only has the two screws in the middle, removal of the cover remains the same.

    Mary Westphal -

  8. kbpHqgpXdtdVifwo
    kbpHqgpXdtdVifwo
    gtKNupdgQ44yDPVf
    • Usa tus pulgares para levantar la carcasa inferior y sacarla de la PS4.

    • La carcasa inferior se mantiene en su lugar mediante clips de plástico. Es posible que debas usar mucha fuerza para liberar la caja inferior.

    sur la version 2 de l ps4 fat il n'y a que les 2 vis du milieu. Comment défaire le boîtier ?

    nlvolle -

  9. coGRVtdMr6vYQIWw
    coGRVtdMr6vYQIWw
    BGP5HaSrJNavVLaN
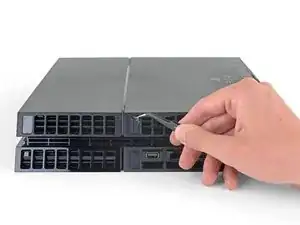
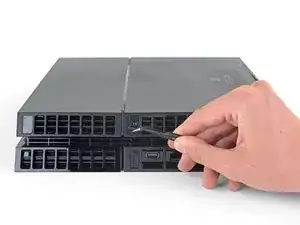
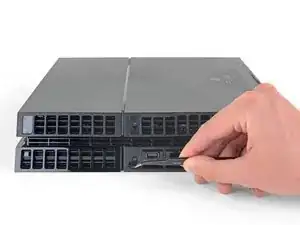
    • Usa un par de pinzas para sacar el cable de la fuente de alimentación y desconecta la fuente de alimentación de la placa madre.

    • Si notas el conector atascado, utiliza un spudger para hacer palanca suavemente para sacarlo.

    This part looks dangerous. There should be a flag/warning not to destroy that cable yes?

    Shawn -

    I second Shawn's comment. That cable seems to be very fragile, and one of the wires snapped on mine while removing the cable. It wouldn't have bothered me so much, if it wasn't a pain to find a replacement for it.

    Matt Gaia -

    The tweezers used here, do not cut it. Not enough grip.

    I had to use a set of needle nose pliers to remove this.

    Cary B -

    Power supply connection stuck. I don't want to damage it

    Nick Alex -

    What you need to do here is be patient. Do not pull the wires. Get some fine nosed pliers, wiggle the white connector from left to right in small movements and edge it out slowly. You can also use your nails one finger at each edge of the white connector to do this.

    David Harkness -

    Its really hard but i managed it with both of the tweezers/pincers at the same time


    1. Keep in mind to pull not too hard on the wires and make step 2 and 3 simultaneously!

    2. the straigt and wider tweezer to pull the white connector itself
    (top and bottom grip)
    3. the small and angled tweezer to pull the wires carefully
    (as shown on the picture above)

    dinkelberg01 -

    Another option, is to remove the screws holding it down, leave the cable in place and lift it out carefully, revealing the other end of the connection. The hidden side of the connection wire is easier to get a handle on.

    Mary Westphal -

    I concur with David, some patience and a lot of wiggling did it for me despite the stubbornness of the connection. Does seem like this one varies a lot in how difficult it is to remove.

    hazelrat -

  10. QuWBy6PULou5kCNl
    QuWBy6PULou5kCNl
    hgyBH31OKmXWCda6
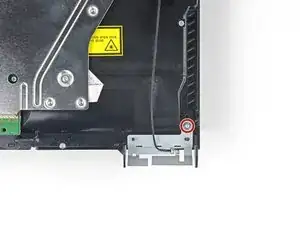
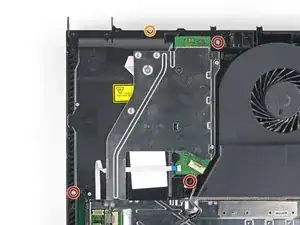
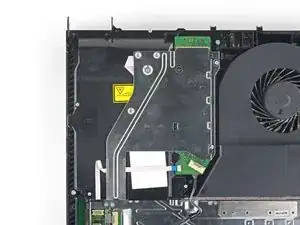
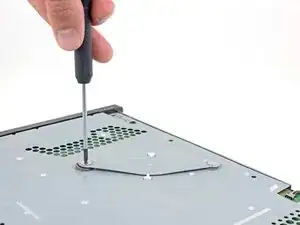
    • Remueve tres tornillos de seguridad Torx de 9.7 mm.

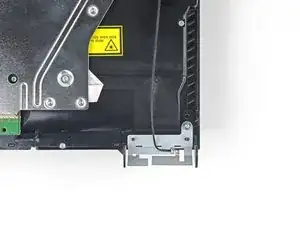
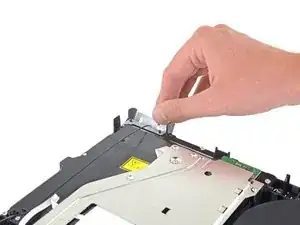
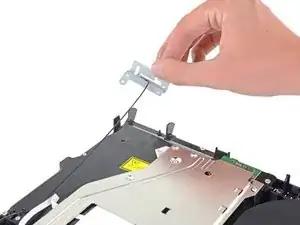
    • Remueve dos tornillos Philips de 41mm y quita los seguros.

  11. SpnmPM4gMehIdDX3
    SpnmPM4gMehIdDX3
    RarAwfBCLQdtutfe
    jVDy11JFDXQsv43q
    • Levanta la fuente dude poder afuera del PS4.

    • La fuente de poder esta sujetada firmemente en su lugar por clavijas en el lado izquierdo. Puede que tome multiples intentos para removerla.

    • Durante el re-ensamble, asegurate que las clavijas están alineadas, después presiona la fuente de poder en su lugar.

    How do you remove the battery wires? I’ve personally been wiggling it to no effect, is there a certain way i have to pull it out, and should i pull it out of the power supply or the console?

    Tubby -

    Retirar en vertical, derecho hacia arriba. Sino puedes doblar uno de los tornillos largos

    FabianCampos -

  12. EcgmyieGDdcMElOU
    EcgmyieGDdcMElOU
    oES1wXquYuIymPTQ
    • Usa la punta de un spudger para desconectar el cable de antena de la placa madre.

    dumb question but I’m very new to this. when reconnecting the wifi antenna, does it just click back on? I'm hesitant to try this procedure if I need to solder anything since I have zero experience.

    cliodhna -

    Yup! Hold it in place and press straight down on top of it with your finger or a spudger. If you have any other cable/connector questions see this guide.

    Sam Omiotek -

    Heads up, you might have a black philips screw above the power connector. It fixes the motherboard and EMI shield on if you're dealing with an 1100 model.

    Dzmitry -

  13. MCxbfUY6UaKrmKCQ
    MCxbfUY6UaKrmKCQ
    TVMGZOKQUI53asHY
    62BX2LGhKLgvIJmY
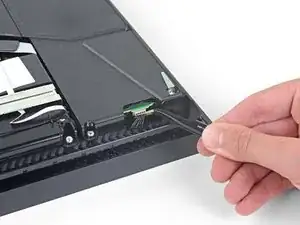
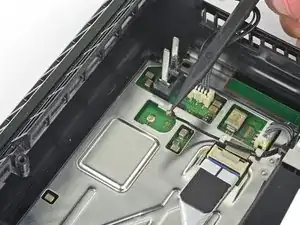
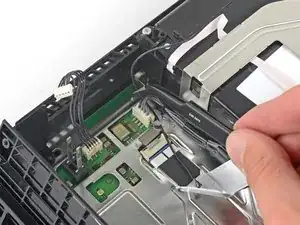
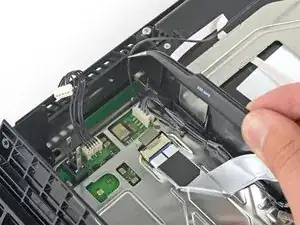
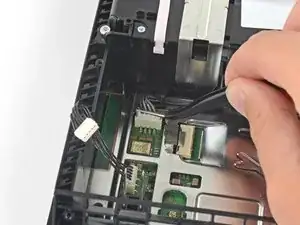
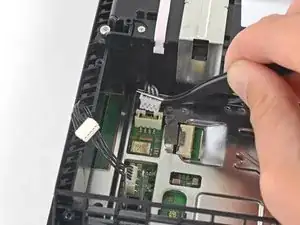
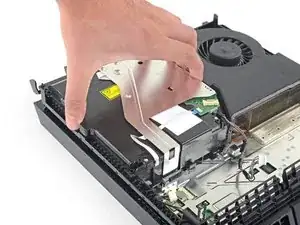
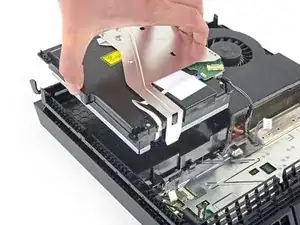
    • Usa un par de pinzas en tus dedos para tomar el cable de antena y alejarlo delas guías del cable.

  14. UPXA4VifbGFrvlIj
    UPXA4VifbGFrvlIj
    nXPq5UZ6AQwMh4aU
    M33e21yyIJ6ZAGlc
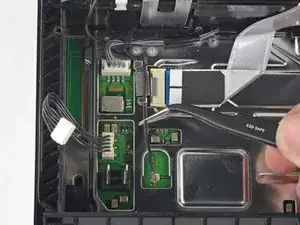
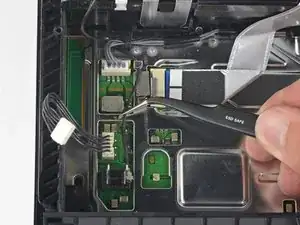
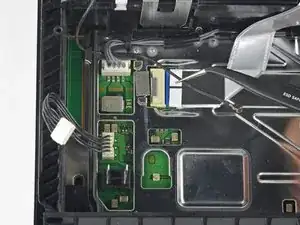
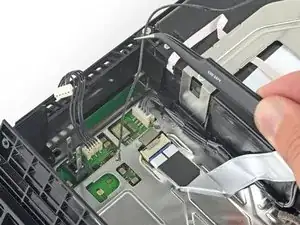
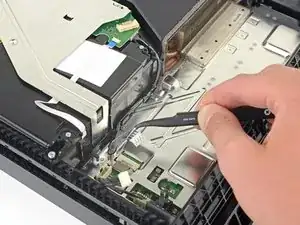
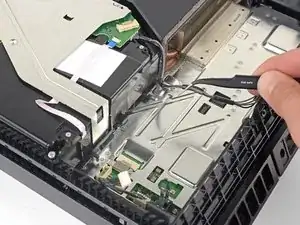
    • Usa un par de pinzas o tus dedos para pasar el cable de antena por debajo del cable del disco óptico.

  15. MIQAcQeKr1eTTVwf
    MIQAcQeKr1eTTVwf
    NxEPgJZruCIGLEhI
    • Remueve el tornillos Torx security de 9.7 mm que sujetan la antena.

    This does not work on the newer 12 series

    raseemhassan123 -

    Thank you! I thought I was insane. I've been trying to figure out where the hell this thing goes and the seat for it is like an inch from the corner. It's driving me mental trying to figure out how to put this back on

    Leo Halliwell -

  16. GUboTTDfFRGvEiF1
    GUboTTDfFRGvEiF1
    LiMR2mf1HehdEOsR
    • Remueve la antena Wi-Fi.

    When I’m connected to wifi it does good for awhile then it disconnects from the wifi and I can’t use the controller. I have to turn the game off and disconnect power source. Do you think the wifi antenna could be the problem or doin have another situation.

    Jay Pax -

    I would check the antenna connection to the motherboard, if it's properly seated I don't think it's the problem.

    hazelrat -

  17. UtJl22epDDxnDmXK
    UtJl22epDDxnDmXK
    EApjrGivEtJ2BSL2
    BdKvel4uAd3DTKJf
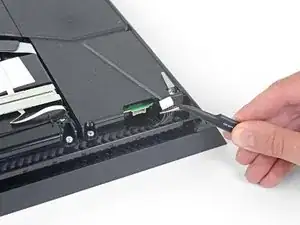
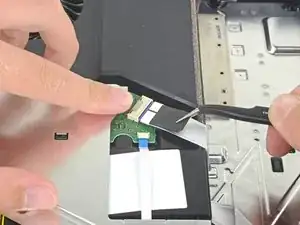
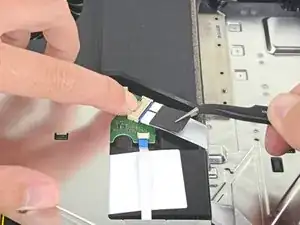
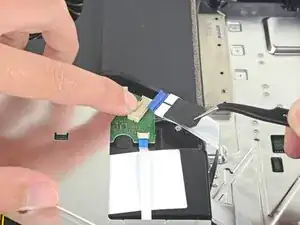
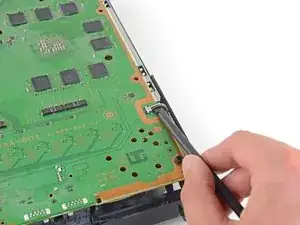
    • Usa tu uña para presionar la palanca metálica de liberación del cable plano en la parte superior de la unidad óptica.

    • Usa tus dedos o un par de pinzas para desconectar el cable de cinta tirando de la lengüeta negra.

    • No es necesario que presiones la palanca metálica cuando vuelvas a insertar el cable de cinta. Oirás un clic una vez que esté completamente insertado.

    Please note that the younger generations of PS4 have a different setup of connectors to the driver, its sometimes 3 of these as presented but with different sizes and no pad to press down. However, dont be alarmed, just use the pair of tweezers and gently pull them off the connectors of the motherboard. Grab on tight on the blue area of the ribbon cable and pull gently! They tend to sit tight so take some time and patience on this.

    Mathias Kopp -

  18. 1LvBVqmqpBYstDEE
    1LvBVqmqpBYstDEE
    iTpPFQ2FtODogYS2
    GpRFwcaYGWPInGpL
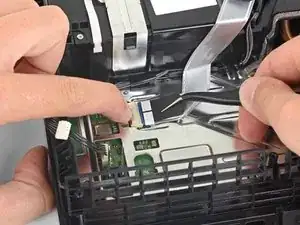
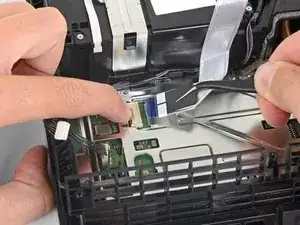
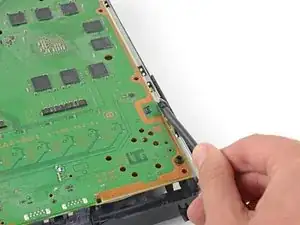
    • Usa tu uña para presionar la palanca metálica de liberación para el cable de cinta conectado a la placa madre.

    • Usa tus dedos o un par de pinzas para desconectar el cable plano tirando de la lengüeta negra.

    • Deja el cable plano a un lado para volver a montarlo.

    • No es necesario que presiones la palanca metálica cuando vuelvas a insertar el cable plano. Escucharás un clic una vez que esté completamente insertado.

    bei mir ist das leider defekt Plastikteil abgebrochen wie kann ich das ersetzen

    kevin pospiech -

    Is it possible to buy the white port for ps4? My one seems to be damaged so won't hold the ribbon cable.

    dorszes -

    This may be a difficult fix, as the white port seems to be integrated into the motherboard. You could try simply holding the ribbon cable down with electrical tape, if it's just a fitting issue?

    hazelrat -

  19. TeTMAoimw4tWu3an
    TeTMAoimw4tWu3an
    Z4EVnPGtququsxGP
    • Usa tus dedos o un par de pinzas para desconectar el cable del disco óptico de la placa madre.

  20. VHP4L4gyrtPc5nC1
    VHP4L4gyrtPc5nC1
    1B43RCFxNHTSVdLf
    bLYmLS4WOufOyEwM
    • Usa tus dedos o un par de pinzas para remover el cable del disco óptico de las guías de cable que lo mantienen en su lugar.

  21. roUPxyMotoTmVYpU
    roUPxyMotoTmVYpU
    JbWvkobm2uRPxtZQ
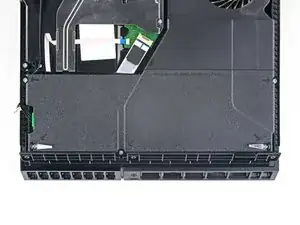
    • Remueve los cuatro tornillos que sujetan el disco óptico.

    • Tres tornillos Torx de 9.7 mm

    • Un tornillo Phillips de 6.2 mm

  22. 6O3MEDhAAGCqpqRa
    6O3MEDhAAGCqpqRa
    GxXAvyXwtYHZISCU
    • Levanta el disco óptico directamente de la PS4.

  23. kPI1VHvEPfPPBORI
    kPI1VHvEPfPPBORI
    m4kAwQ1mj2a3NCyY
    • Remueve los dos tornillos Torx de 9.7 mm que sujetan la caja superior.

  24. GL32Tp1yyqTGWPe2
    GL32Tp1yyqTGWPe2
    1W3k5Y1O3SiJFIoY
    16H6rMkNPl2j5QOS
    • Levanta la caja superior y vuelve a quitarla de la PS4.

    • La caja superior está sujeta por las lengüetas de plástico en la parte delantera. Necesitarás una fuerza significativa para separarlas.

    “Significant force” is a bit of an understatement. It’s like it’s superglued together..

    Wouter Rietberg -

    You absolutely should not need a lot of force for this. In the picture above, press upward using the left thumb from under the outer lip of the cover. You may need to pull it slightly toward you as well. Once that half is lifted, the right-hand side is still firmly attached. Keeping the left-hand side of the top separated, flip the unit over. Along the right-hand side, press the outside lip with your thumb about 2 thumb-widths down from the corner. There is a tab here and once released, the cover comes off easily and off in the back. Otherwise, you’ll be placing stress vertically (and rotationally) on the first tab on the side.

    Donovan Ray -

    I appreciate this feedback – thank you. This sounds like a safer method. I’ll test it on our guide unit and update the procedure.

    Sam Omiotek -

    THIS SET OF INSTRUCTIONS FROM YOU, IS ABSOLUTELY SENSATIONAL.

    I got this cover off quite easily. Still some resistance, but I didn't need this significant force at all.

    THANK YOU!!

    :)

    Cary B -

    There is a piece of plastic underneath the casing here. The PS4 I worked on got so hot on the inside that part of the plastic started to melt and warped some inside the metal plate underneath. This made it tricky to open the case, but by using spacers I managed to get it off.

    Kerstin -

    I found an easier method for myself is to have the console upright and pointed away from myself. From this position, wrap your fingers over the top of the cover, hooking it in its front with the last digits of each finger. This allows you to press with your palm into the top of the console and pry in an upward/outward motion. This feels safer as it took much less force to disengage the problematic clip.

    Callie -

  25. YWNY2VNT2SqRLxqF
    YWNY2VNT2SqRLxqF
    px2FCsaZYqeUcIJc
    • Remueve los doce tornillos Torx de 9.7 mm que sujetan el escudo EMI superior.

    In my PS4, there is a small black Philips screw behind where the power lead connects to the motherboard. That screw connects the EMI shield to the inner metal where the power supply sits.

    Wouter Rietberg -

    I had exactly the same thing, and mine is a fairly old model of PS4. Confused me for a moment until I spotted it.

    Tom G -

    Can confirm this.

    This screw was on mine. To anyone reading this, flip the PS4 over and look where the pain in the ass power supply connector is.

    Black screw right there.

    If you have that screw of course. :)

    Cary B -

  26. fTffq2EBGNwnytyW
    fTffq2EBGNwnytyW
    DN3ZJPAhdkYapAKT
    Lf1QluHUHD4uNKrr
    • Este paso te muestra cómo desenroscar correctamente la placa de presión.

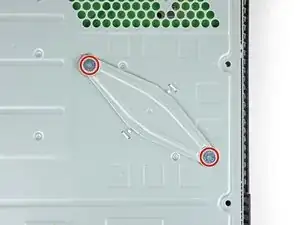
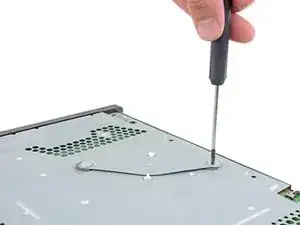
    • Retira los dos tornillos Phillips de 15.6 mm.

    • Desenrosca gradualmente la placa de presión girando cada tornillo media vuelta a la vez.

    • Alterna entre los dos tornillos para mantener una presión uniforme en la placa de presión.

    • No desenrosques un lado completamente antes de desenroscar el otro lado o podrá dañar el procesador.

    why does my PS4 have some metal thing attaching the plate to the metal beneath it?

    Beetroot -

    My PS4 also has 2 metal rings around each screw hole and 4 metal pieces 2 on each side closing in the same shape as the pressure plate as you take the pressure plate off?

    Geoff King -

    How strong do you tighten the screws when re-applying the plate?

    To the max, or stop one to two turns before?

    Andreas Raum -

    I've tightened mine until the screws became taut and I've not had any stability issues.

    hazelrat -

  27. 5keR1RSsB2b3iTLa
    • Remueve la placa de presión.

  28. RYfSgfFXDlGid341
    RYfSgfFXDlGid341
    FigrCWmt6JZbUiMh
    • Remueve el escudo superior EMI.

    This is the 2nd PS4 I have disassembled and on both units I have found there is a black Phillips screw securing the upper EMI shield. This should be mentioned in the teardown as the EMI shield cannot be removed completely without first removing this screw and you risk damaging the EMI shield in the process . To locate the screw turn the unit over and you will see a small black Phillips screw located near the power supply prongs. There will be a set of arrows pointing to the screw. Once you remove this screw then you can fully release the upper EMI shield.

    Geoff King -

    Ditto. This is my first time disassembling a PS4. EMI shield didn’t lift off easily on one corner. Noticed the black Phillips screw holding it in place. I scrolled up in the tutorial to see if I missed it. Easy enough.

    Kwan Park Tom -

    All the ps4's I opened had this one Phillips screw. And I've cleaned/repaired ~12 units. So I think it's safe to assume that (almost) every one of them have it.

    Manoel -

  29. BLJqWPsljRAMmBf6
    BLJqWPsljRAMmBf6
    uTyWtC3ItUpmEhY3
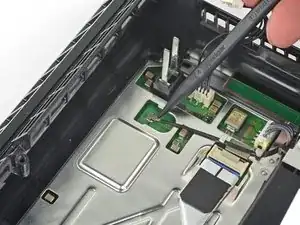
    • Inserta el extremo plano de un spudger entre el cable del ventilador y la placa madre.

    • Gira el spudger para levantar el conector y desconectarlo de la placa madre.

  30. 4RgFwh1JR6AENLhs
    4RgFwh1JR6AENLhs
    CtVlhGBWoYOXTLyi
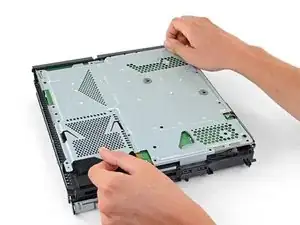
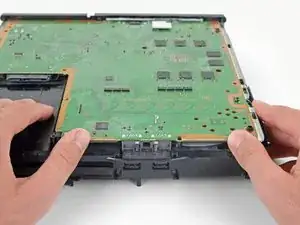
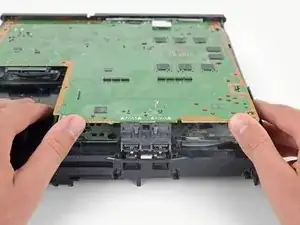
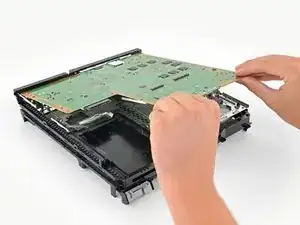
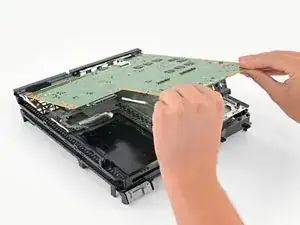
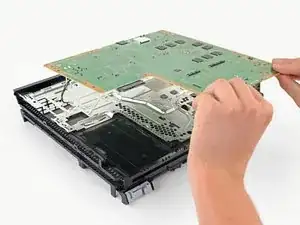
    • Agarra el borde de la placa madre en la parte delantera de la PS4.

    • Levanta la placa madre hasta que los puertos USB despejen la caja de la PS4.

  31. vTfxB4lRi1NjiPLX
    vTfxB4lRi1NjiPLX
    CPwBRFVQEVALTJw1
    dobTJxmcCQVaXEwK
    • Levanta la placa madre de la PS4.

    • Aplica una nueva capa de pasta térmica al procesador antes de instalar una placa madre usando esta guía.

    • Si no se instala correctamente la nueva pasta térmica, la PS4 se sobrecalentará.

    • Inserta primero el lado de E/S de la placa madre y luego baja el otro lado.

  32. HyhPIMNxxgIVsYp1
    HyhPIMNxxgIVsYp1
    wUMTDF3XQHArm3Yd
    wVTUPdMlkDxsQkea
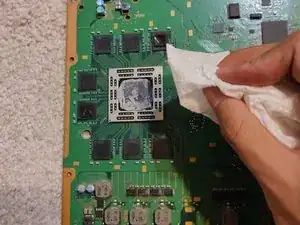
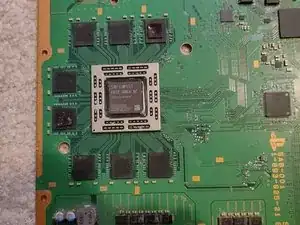
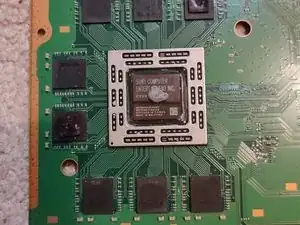
    • Usando un pañuelo de papel, limpia la pasta térmica existente. Toma tu nueva pasta térmica y aplica una cantidad pequeña en el centro del componente.

    • Asegura de haber limpiado la pasta térmica en ambos lados

Conclusión

Para volver a montar tu dispositivo, sigue estas instrucciones en orden inverso.

Alyasin Hossain

Miembro Desde 29/10/20

2174 Reputación

13 comentarios

Se me hizo muy buena la guia, sobre todo para no cometer algun error al trabajar en la reparacion, mi PS4 dejo de zumbar el abanico con el cambio de pasta termica y una limpieza general de polvo y pelusa.

Luis Garcia -

I followed this guide step by step, including reversing the order to reassemble my unit.

My PS4 is still loud but not as loud as before, so everything worked well. Thanks for the writeup!

Billy P -

i might be a little late to reply, but i followed this guide aswell BUT after step 31 i took off the extra metal/aluminum plating and saw thats that where the bulk of the dust will be built up, this plate has the vents that go to the cooling fan on the opposite side of it after unscrewing. i bought an original ps4, it sounded like a jet engine taking off. The vents on my ps4 were just about covered in dust almost no airflow was able to get through, after taking the extra step and taking off the 1 extra panel (the one under the motherboard in step 31) and of course after replacing the thermal paste made my ps4 run and sound like new again,

Beau -

I cannot reply to Beau's comment.

I also went the extra step of taking that metal shroud that sits below the motherboard (step 31).

I completely recommend this step. It is then you can get access to the heat sink fins to remove dust. There are 3 screws that hold this metal shroud in place. Easy to get out.

Then you can also now remove the fan - 2 screws for this.

You can then clean out the accumulated dust from the fan and in the plastic shroud, that the fan sits in.

Holy cow, dust factory. :)

Cary B -

Great guide! Just did it and now the console is dead silent during gameplay of super demanding games <3 I just went a step further after Step 31 and removed the plate there so that I could properly take care of the heat sink underneath that had lots of dust on it.

Sébastien Morin -

“Great guide! Just did it and now the console is dead“ I just read that and was shocked for a second, you had me in the first half.

Envy on RK61 -

What thermal paste did yall use

Sgt. Brandon Sauls -

I just used Arctic Silver 5, it’s for sale on iFixit’s store and works great. However, it is not a lot if you repair or build a lot of devices.

Jacob Unruh -

Great guide! Did repair a white model for a friend, which had an extra screw next to the powersupply cable that is holding the EMI shield from the other side. also great tipp from the other commenters to look underneath the heat sink!

Flo -

The ps4 is working fine but the fan is not working after launching a game for 1m the ps4 die due to overheat

Jhownwn -

What Size Thermal Pads for the RAM? not sure how necessary it is but the old ones look a bit dated

Mr.AC -

I had to replace my fan and thermal paste. My fan bearings were not gliding at all. Before fixing I would just hear a click, like the fan was trying to spin but couldn't. There was a huge blockage of dust on the heat sink too. Not sure which did the trick but now I'm playing the latest COD on PS4 and it's absolutely silent. I do have two tiny Phillips head screws leftover though. Oh well?

Derek Fullmer -

When I take my PS4 apart I always write down where the screws came from on a piece of paper. It helps if you're a little forgetful.

Some Guy -