Introducción
Usa esta guía para reemplazar la tapa trasera en tu Nexus 6P. Al volver a ensamblar, aplica adhesivo nuevo donde sea necesario.
Herramientas
Partes
-
-
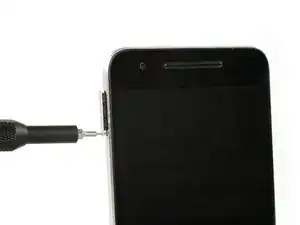
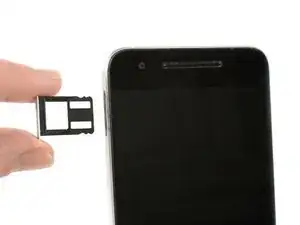
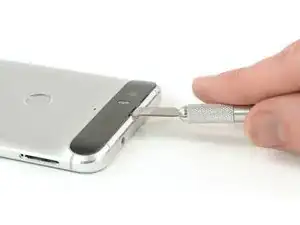
Usa una herramienta de expulsión de tarjeta SIM y remueve la bandeja de la tarjeta SIM.
-
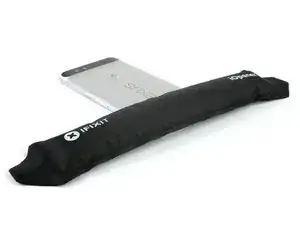
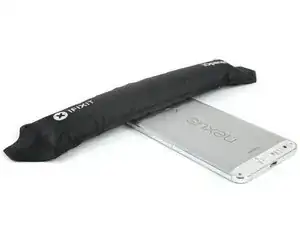
Usa un iOpener para aflojar el adhesivo por debajo de la tapa de plástico trasera en la parte inferior del teléfono.
-
-
-
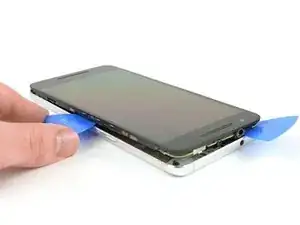
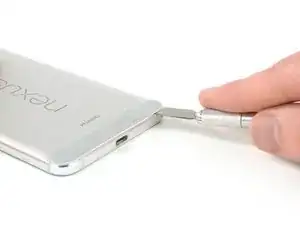
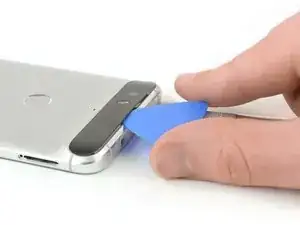
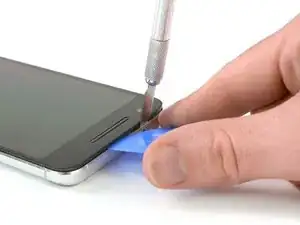
Inserta un cuchillo entre el teléfono y la tapa de plástico. Levanta la tapa de plástico hasta que puedas insertar una púa de apertura.
-
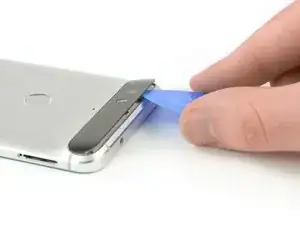
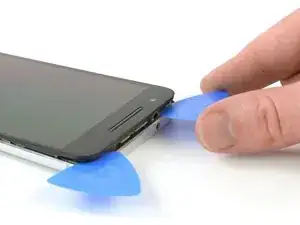
Desliza la púa de apertura por debajo de la tapa de plástico para cortar el adhesivo.
-
-
-
Usa un iOpener para aflojar el adhesivo por debajo de la tapa de vidrio en la parte superior del teléfono.
-
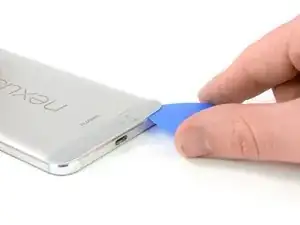
Inserta un cuchillo entre el teléfono y la tapa de vidrio. Levanta la tapa de vidrio hasta que puedas insertar una púa de apertura.
-
-
-
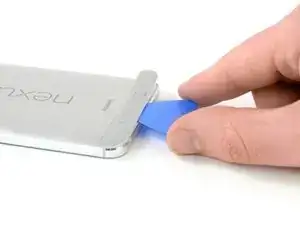
Desliza la púa de apertura por debajo de la tapa de vidrio y úsala para cortar el adhesivo.
-
Levanta la tapa de vidrio.
-
-
-
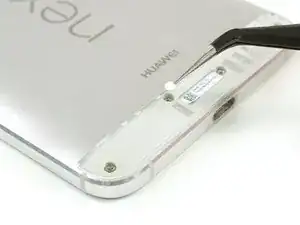
Usa pinzas para remover las pegatinas de indicador de líquido.
-
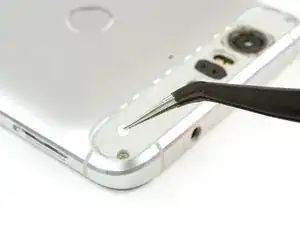
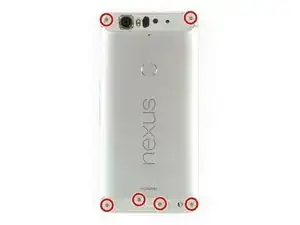
Remueve los seis tornillos Phillips #00.
-
-
-
Inserta una cuchilla entre la tapa trasera de metal y el vidrio frontal para crear un espacio. Insertar una púa de apertura en el espacio y deslízala hacia la esquina superior derecha.
-
Inserta una segunda púa de apertura y deslízala hacia la esquina superior izquierda.
-
Desliza las púas de aperturas a lo largo de los bordes para separar los clips de plástico que sujetan la tapa trasera y el marco medio.
-
Remueve la tapa trasera.
-


Para volver a ensamblar tu dispositivo, sigue estas instrucciones en orden inverso. Al volver a ensamblar, aplica adhesivo nuevo donde sea necesario.

Un comentario
The first picture of Step-6 is very misleading when looking at guitar pick.
By mistake, I pulled apart my front glass from digitizer by taking the pic as reference.
For the heat gun users — any approximate temperature, and distance from phone, to not damage it?
Kamal -
Hi Kamal,
my advice is the be very, very gentle with a heat gun. Especially the small plastic cover at the bottom end deforms within seconds. Try the lowest heat you can, with a good distance to the cover. Then try to remove the cover. If it doesn’t go off, lower the distance of the heat gun to the phone and try again and so on. I recommend to rather pry a little bit more than to use to much heat. If the cover deforms you’ll need a new one.
Dominik Schnabelrauch -
Is their a particular time i should have my heat gun on it like for ex: 10 secs
PlayStation Studios -
Hi,
there’s no particular time but I advise you to go only for a couple of seconds and then try to remove the plastic cover. If you can’t manage to remove it, repeat the heat gun process and so on. Under strong heat the plastic cover deforms very fast and is not usable anymore.
Dominik Schnabelrauch -
Hi,
I used a hair dryer (exhaust air about 60°C) instead of a heat gun: this temperature was sufficient to soften the glue. The plastic and glass cover could be removed without damage.
Daniel Demuth -
The Ifixit SIM removal tool is a bit rough for the 6P SIM eject opening I suggest a small paper clip and its easier for aged fingers to use.
Terry Ess -
The IOpener may need to be applied more than once in cold weather. Even for a first time repairer it is possible to remove the small lower rear cover without damage.
Terry Ess -