Introducción

Seguir esta guía involucra abrir el Xbox 360 E y para algunos involucra más que reemplazar otras partes del Xbox.

Herramientas

  1. TIkfryCTehaILEu6
    • Introduce el puntero entre el panel superior y la parte inferior que incluye patas de goma.

    • Retrocede con el puntero, manteniendo la presión constantemente en el hueco.

  2. ERPkKFArPRTshPPh
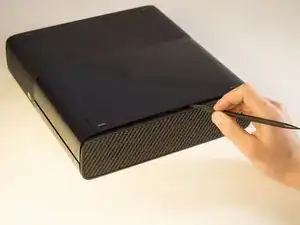
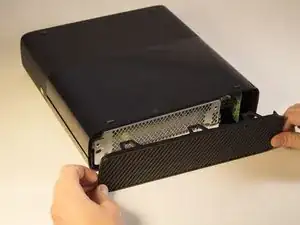
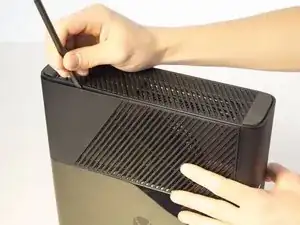
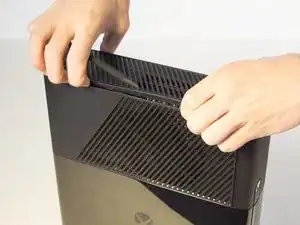
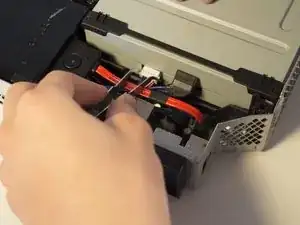
    • Desliza el puntero a través del hueco entre el panel superior y la parte inferior de la Xbox.

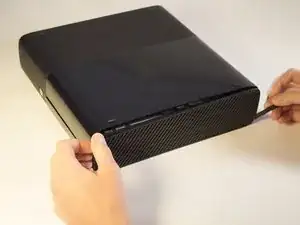
    • Continúa retrocediendo con el puntero, manteniendo la presión firme por todo el hueco.

  3. 21WAeRRGNRrebZwO
    21WAeRRGNRrebZwO
    MfoUiSTn2qFjbOLj
    UvvehPt1bmaqMb4V
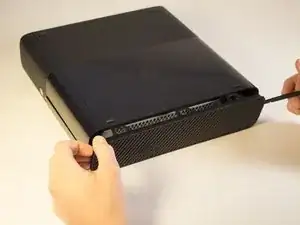
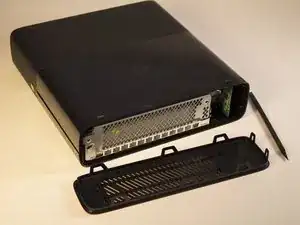
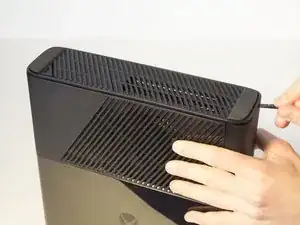
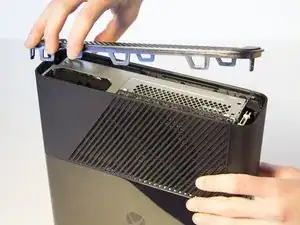
    • Continúa deslizando el puntero a través del perímetro del lado izquierdo de la Xbox.

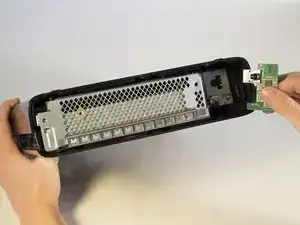
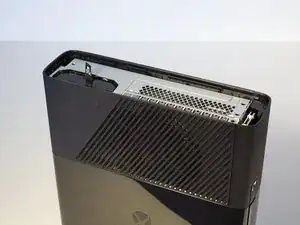
    • Extrae el panel superior.

  4. dGaeBuMn56SHFP4U
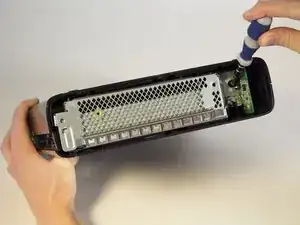
    • Remueve el tornillo de 11 mm a la izquierda de la tarjeta verde de Wi-Fi usando la punta de atornilla Torx T9.

    In my case it was a T10 Screw, not T9

    Limer o -

  5. Z53XUDpwcU4pDQCT
    Z53XUDpwcU4pDQCT
    BUKBFeZEMwrv1ImF
    • Firmemente tome la tarjeta verde de Wi-Fi y jálela fuera del Xbox.

    On that wifi card there is a little port that you can plug and old router antena into. Any idea what its called?

    Tyler Goyette -

  6. RJCHUEVkPc6cVR5U
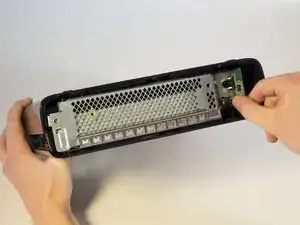
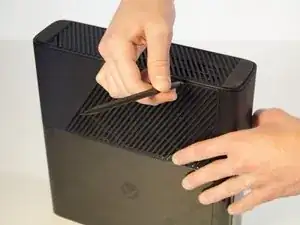
    • Empuja la espátula en la hendidura entre la reja de la cara derecha y el cuerpo superior del Xbox. Es más fácil empezar lejos de la ventilación.

    • Tira de la espátula como una palanca, manteniéndola presionada firmemente en la hendidura.

  7. hN6exAnbrZ4fReNA
    hN6exAnbrZ4fReNA
    yMweMIBKCAsr2GEv
    • Desliza la espátula a lo largo de la hendidura para separar la cara con enrejado y el cuerpo superior.

  8. kpAmeJfKoDQfiWyw
    kpAmeJfKoDQfiWyw
    x6ghK2CdG3febjDD
    MThCCcS4bfJT2ZAT
    • Menea la espátula en la hendidura conforme vas deslizando la espátula para aflojar la placa inferior.

    • Desliza la espátula a lo largo de la hendidura, yendo completamente alrededor del perímetro del panel inferior.

    • Retira el panel inferior.

  9. LlYifhpgiFgVI1Km
    LlYifhpgiFgVI1Km
    MHT2PYrsMUgWIdjI
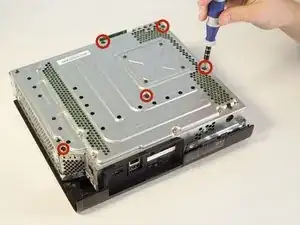
    • Remueve los cinco tornillos de 55 mm de largo marcados C2-5 y C7 con un desarmador Torx T9.

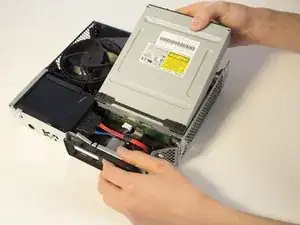
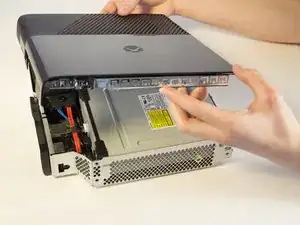
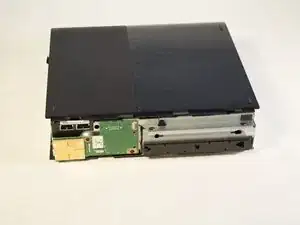
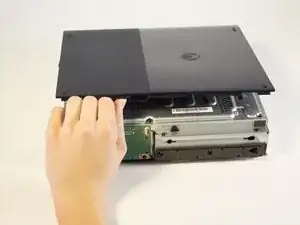
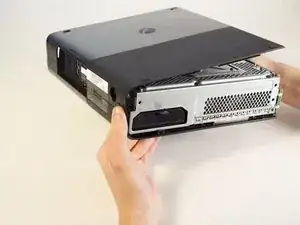
    • Cuidadosamente levanta el dispositivo y jala el cuerpo levantando la sección de metal que esta unida al plástico exterior.

    C1 - C5 screws

    Jeff Gray -

    And not T9 - the're T10 screws

    Limer o -

    Missing some steps here…. Where are the clips holding the sides together? To go straight from “Remove bottom cover” to “Device is apart” is a bit… lacking.

    Aksel Barnes -

    Yes, Aksel Barnes is correct. There are missing pictures and steps showing the removal of the plastic exterior from the metal section.

    yovel binjamin -

  10. eXfMbnZiYwyOTUGF
    eXfMbnZiYwyOTUGF
    Bvpv65VFAxuJdkMg
    jEl4TpggCFE6hNvX
    • Orienta la Xbox para que el cuerpo inferior quede hacia arriba. Asegúrate de ver las patas de goma para saber que tienes el lado correcto del dispositivo.

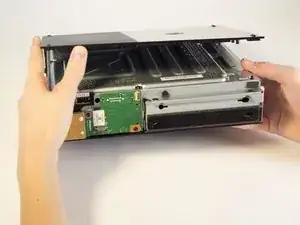
    • Levanta el cuerpo inferior ligeramente lejos del núcleo en un ángulo de 45 grados.

  11. H3fcE3EBfbjCreC5
    H3fcE3EBfbjCreC5
    PoJyGGaV2jxpixHv
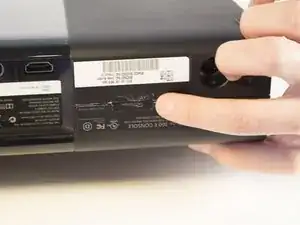
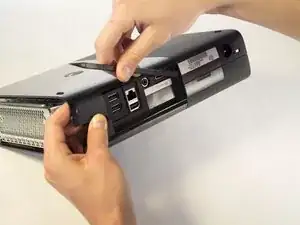
    • Gira la Xbox para que ahora esté mirando la parte posterior del dispositivo.

    • Este paso de desmontaje requiere la eliminación de la etiqueta de garantía. Esto anulará tu garantía. Consulta la página principal para obtener un enlace a la información de garantía de Microsoft.

    • Retira la etiqueta de la parte posterior de la Xbox.

    • La pegatina no es necesaria para volver a montar.

  12. jGBxXYgHjSwvrXjF
    jGBxXYgHjSwvrXjF
    TuBmSeEBJMN1Y61K
    1xEVZvTGfyAgP3LE
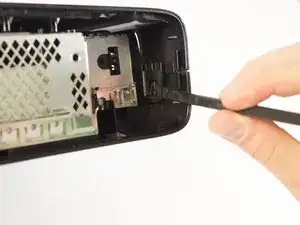
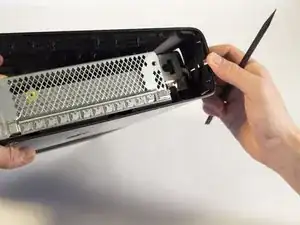
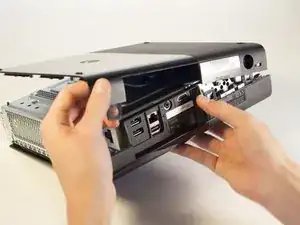
    • Gira la Xbox hacia la izquierda para ubicar el clip que sujeta el cuerpo.

    • Con un spudger, presiona el clip hacia arriba como si fuera un pestillo. Muévete al otro extremo para deshacer el otro clip de la misma manera.

  13. ONsIseFA3qyAKhQS
    ONsIseFA3qyAKhQS
    t5aIWOVan3pxGakw
    • Empuja el spudger en la grieta. Desliza el spudger a lo largo de la grieta vertical para separar el último clip. El cuerpo inferior debe deslizarse después de esto.

  14. wbdpZsNP2JZcmyhk
    wbdpZsNP2JZcmyhk
    q1JdQekOBLTL6RvC
    • Usa tus dedos para desconectar el cable de cinta azul de la unidad del CD.

    Note: The ribbon cable connected to the CD drive can be in the color red (as it was on my board). Just make sure the other end is connected to the motherboard to be sure.

    yovel binjamin -

  15. iH6ZAlUKWrNkOJiG
    • Usa pinzas para desconectar el cable azul y rosa.

  16. VsQVM1VUCyj4SEMN
    • Levanta la parte delantera de la unidad CD y retírala.

    Just note that you will have to swap the PCB inside the disc drive. If you do not go through with this the game will not start.

    You do also require some soldering skills as the wires for the motor and sensor for the disc tray are soldered to the PSB.

    Michael Mouton -

Conclusión

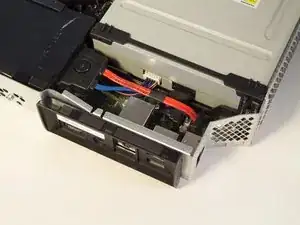
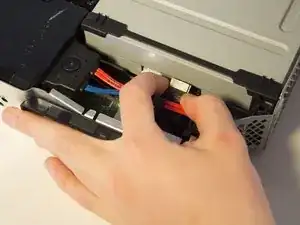
Para reensamblar tu dispositivo, sigue estas instrucciones en orden inverso.

George

Miembro Desde 03/02/14

521 Reputación

11 comentarios

i wish the bottom cover magically came off like in step 9

sandjo -

screws are actually C1- C5 one is incorrectly labelled - C7 = C1 also in step 8.5 there are 3 clips holding back edge of bottom cover to top one. one on each end and one just to right of I/O area. can get 2 of them with a spudger (ends) and the middle one with a isesamo.

Andrew Boyd -

Several steps missing between 8 and 9

Freddie Parsons -

Like remove wifi adaptor.

william capewell -

There is some consistency errors in this guide. Step 9 seems to blast ahead beyond where we should be at this point of the guide.

Joe G. -

Yeah, most definitely it jumps from removing the side grills to have completely disassembled the entire console case...

MagoSaronno -

All the videos I watch tell me to take the drive apart and use the old motherboard on the new drive, so it's the same old motherboard. But mine is broke so can I just use the same motherboard from the new drive?

Gregory Lansberry -

No must change the board over or it will not work.Gregory Lansberry.

william capewell -

Did you not mention the fact that the drives won’t work unless programmed?

Jack Smith -

I have had the need to replace the cd assembly on a few 360 e-models. The problem I run into occasionally is the new cd assembly will sometimes only play music discs. I'm not sure if there is a software lock on the assembly or not as installing a 2nd new drive fixes the problem. Are some 360 drive assemblies not compatible with certain mobo revisions? Also, once you get the sides off, a very long screwdriver does the trick on the clips to get it open.

Willam T. Purnell -

Didn't mention you have to remove the original dvd mainboard and put into the new drive for it to be recognised

tim hoath -