Introducción

Usa esta guía para reemplazar la unidad de disco en un Xbox de Microsoft.

  1. DAWYeQTbJIyRE44H
    • Asegúrese de que su Xbox está desenchufado de forma segura y está sobre una superficie plana y estable.

  2. jG2uJZqNF5OSgIoi
    • Gira la Xbox para revelar los cuatro pies de goma

    • Utiliza un spudger de metal para quitar los cuatro pies de goma.

    The screw is in the outside corner. If you pry up only the half of the foot on that side, you can easily remove the (very long) screw, and the foot will stay attached.

    Ian Butler -

    Ah I always used to damage the feet.

    Andrew Veiga -

  3. CNc1f5HgbfeLyU6V
    CNc1f5HgbfeLyU6V
    Fkv25vcmRjCqx11G
    • Hay dos tornillos más escondidos debajo de las dos etiquetas en la parte inferior de la caja.

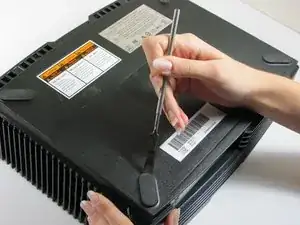
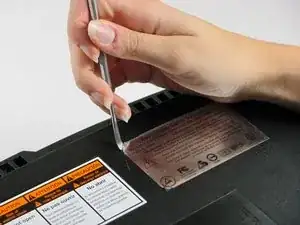
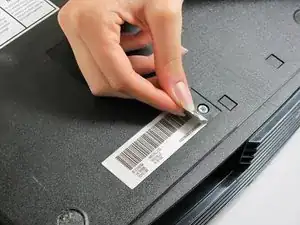
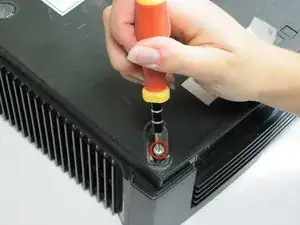
    • Puede quitar las etiquetas o simplemente sentir los agujeros de los tornillos a través de las etiquetas y luego cortar o perforar un agujero a través de ellos.

    It is also easy to feel for the screw hole with your finger and then cut a hole, or punch it out with the tip of the Torx driver to reveal the screw.

    Ian Butler -

  4. yrHWicQWhkLfIroI
    • Retire los seis tornillos Torx T20 que sujetan la cubierta superior a la cubierta inferior.

  5. HWBO3akf3JrTpItt
    HWBO3akf3JrTpItt
    QSGAQlPuDMAd4lyt
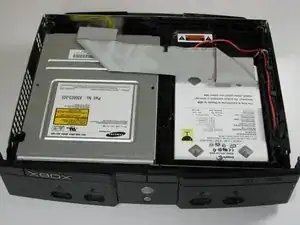
    • Una vez que las carcasa inferior y superior ya no están conectadas, gira cuidadosamente la Xbox hacia arriba, levanta y retira la cubierta superior.

  6. tPN4vdeeZKl1I1rZ
    tPN4vdeeZKl1I1rZ
    g4NJhsK3pDOWGQkB
    • Retire los tres tornillos T10 de 3 mm que sujetan el disco duro a la Xbox.

    • Hay un tornillo en el lado izquierdo trasero del disco duro que sólo es visible cuando se eleva el cable plano IDE. Los otros dos están en los lados delantero derecho e izquierdo del disco duro.

    • El tornillo en la esquina inferior izquierda de la unidad de disco no está en el agujero en el que parece estar, sino más bien cerca de la esquina.

  7. 1fXjrAGgWWybWvHI
    1fXjrAGgWWybWvHI
    A2OccKgygJyyMSuP
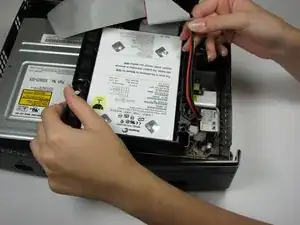
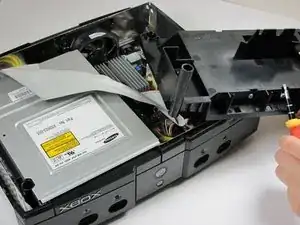
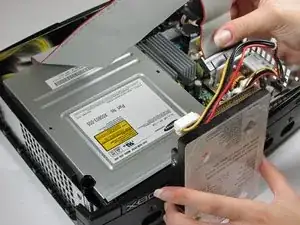
    • Libere el cable de alimentación de la unidad de disco duro de la portadora para obtener suficiente holgura para levantar la unidad de disco duro.

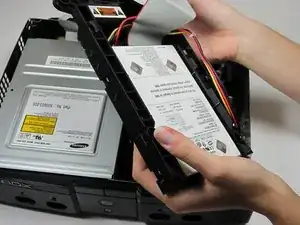
    • Levante el soporte de disco duro de plástico de la caja de Xbox.

  8. 2DKHk4nEpggCoB3R
    2DKHk4nEpggCoB3R
    k1Kyg6JejwYtJREe
    PJVDyrRyKbsR22CB
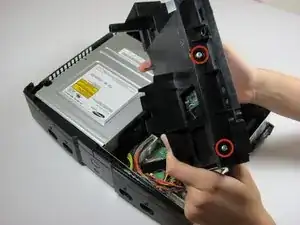
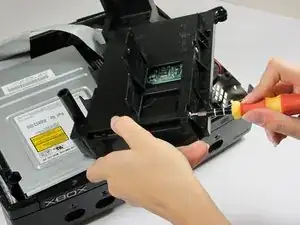
    • Retire los cuatro tornillos T15 Torx de 3,4 mm del soporte de plástico duro (dos tornillos por lado).

    • Retire con cuidado el disco duro del soporte de plástico. Sontengalo suave verá el disco duro salir absolutamente fácilmente.

  9. hIptJJoxao2CLYaT
    hIptJJoxao2CLYaT
    huhJSci5P4rvoDnU
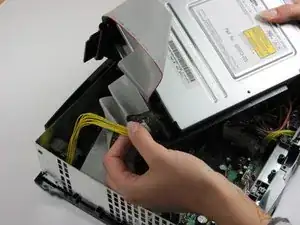
    • Tire el cable plano de datos del disco duro y el cable de alimentación hacia arriba desde el disco duro.

    • Pueden estar firmemente asentados, así que tenga cuidado tratando de eliminarlos. NO tire de los cables ya que podría dañar el conjunto del cable.

    Remember that the new drive will only work if it has been properly prepared, and the Xbox has been modified.

    Ian Butler -

    there is NO way to legally replace the xbox hard drive. it is LOCKED to the motherboard and the xbox will not boot to the OS or make it past the BIOS if the HDD is not the one that came with it from the factory. you MUST use a mod chip and “home brew” to do a HDD swap and expect it to work

    James Vawter -

    Could you point me to a good tutorial on using a modding an original Xbox? All I want to do is swap an HDD in original Xbox with another original Xbox HDD because I want my saved game data. Any way to figure this out? Seems like modding is a !&&* of a burden.

    michaelaugustin2000 -

    Can i replace the original hard drive with new one

    Andrew Veiga -

  10. XDlnvx2dBLlAVeAC
    XDlnvx2dBLlAVeAC
    kaYjBxJx6VKZRiQE
    2cXKp5y1FRLpbjwT
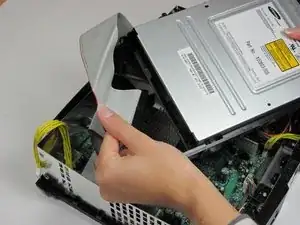
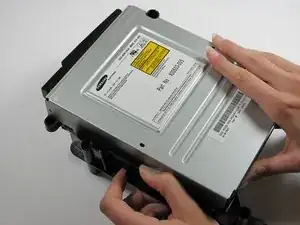
    • Remueve la unidad de disco. Debe salir directamente.

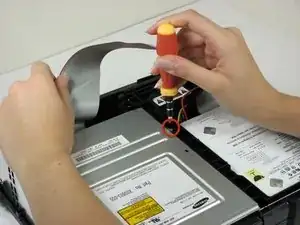
    • Desconecta el cable plano y los cables amarillos de la parte trasera de la unidad de disco.

    I dont got the tools and i dont know how to do ut

    jacob lowery -

  11. SrpssrrJjwjsKRwf
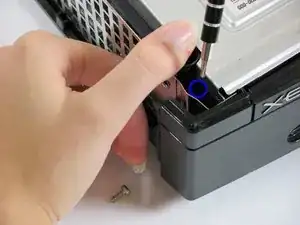
    • Haga palanca hacia atrás las pestañas de plástico negro alrededor de la unidad de disco con el fin de removerlo de su carcasa. Una vez retirado, dejar la unidad a un lado.

    • ¡Solo remuévalo si no funciona!

    It is ok to remove the drive if it isn't dead. If repairs are required to the drive it needs to be removed from the drive's housing.

    Navy Vet 2015 -

Conclusión

Para reensamblar tu dispositivo, sigue estas instrucciones en orden inverso.

rmarstel

Miembro Desde 29/10/09

5355 Reputación

6 comentarios

http://www.ebay.com/gds/How-To-Determine...

Utilize the information on this website to determine what Xbox version you have so you know what replacement parts to look for.

Navy Vet 2015 -

The final comment mentions “only remove if dead.”   What about a disc drive that closes and opens immediately….in other words, won’t stay closed.  Is this a sign of a defective disc drive too?

Miguel -

I am having the same issue, Miguel.

Did you buy a new drive or figure out a better fix?

Thanks

Ben C. -

Can anyone help..My Xbox can't read games..I took it apart and cleaned it, still can't read games

mr.mistermitchell@yahoo.com -

I have the Xbox original..

mr.mistermitchell@yahoo.com -

I’m having the same problems too ??‍♂️

Pablo Pablo -