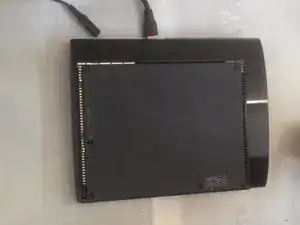
Introducción

Como se desmonta y se cambia una unidad láser.

  1. WToErMevBLlKHBZU
    • Apaga la consola y desconecta todos los cables.

  2. y3NnLUQQNvRwUs3S
    y3NnLUQQNvRwUs3S
    FlUpN5ReCxspyxrE
    R3cfVAJhd1p3UcXR
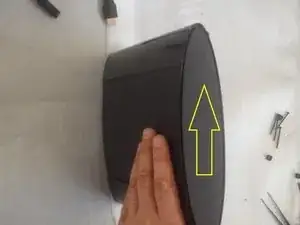
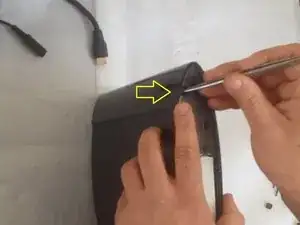
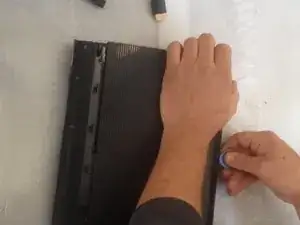
    • En la parte trasera de la consola, quita las patas de goma haciendo palanca con el spudger metálico.

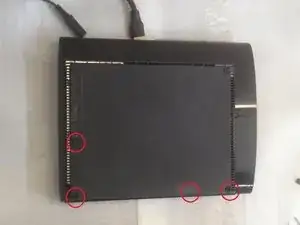
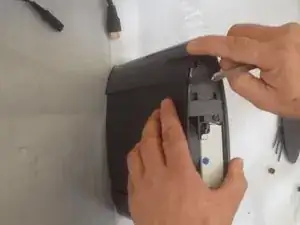
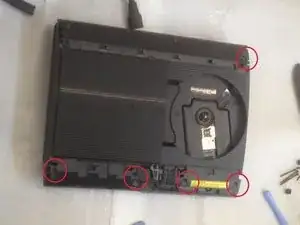
    • Quita los cuatro tornillos negros largos de 36.3mm que hay debajo con un destornillador Phillips #1.

    • Un tornillo está escondido debajo de la pegatina de la garantía. La pegatina se puede pelar o pinchar con un destornillador.

  3. HnaOoC2dWsSYnUPV
    HnaOoC2dWsSYnUPV
    gF5fKSf4YXnaCTYy
    HCpyH5W2SCCIOLMi
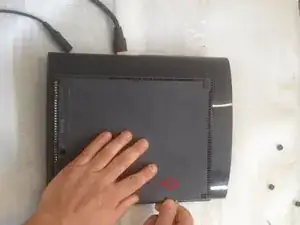
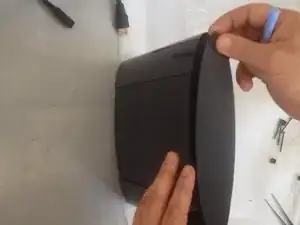
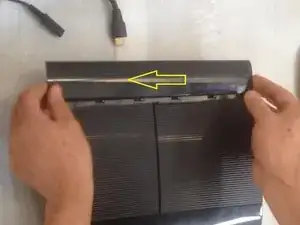
    • Quita la cubierta que cubre la bahía del disco duro deslizando el panel desde atrás hacia delante de la consola.

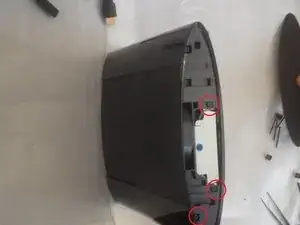
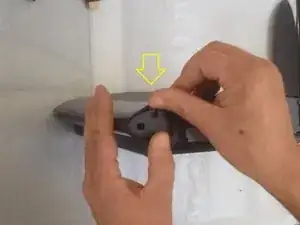
    • Aquí verás otros 3 tornillos.

  4. bnPjkKy4CFYxqeRr
    bnPjkKy4CFYxqeRr
    pdihuCtN6BwDUUMX
    ZVv2IYWqyoU4EdJQ
    • Quita el panel trasero haciendo presión hacia abajo la pestaña de la parte derecha del dispositivo y deslizando el panel hacia la izquierda.

  5. ie5rLxZVIbjFIGTs
    ie5rLxZVIbjFIGTs
    5TZxxwoW1VZxPdPF
    EM5QnlM3vcJoDr4C
    • Esta parte es difícil de quitar.

  6. hvLfxYXTscN4YA1n
    hvLfxYXTscN4YA1n
    kBRG2Ftmna4IIsoU
    XKLLtLDlCKgsVANi
    • Quita los 5 tornillos plateados largos de 20.8mm con un destornillador Phillips #1.

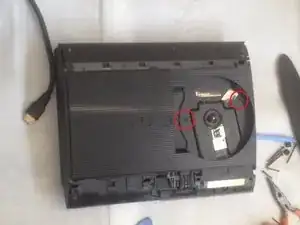
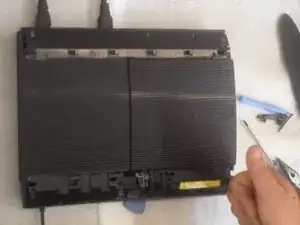
    • Quita los 2 tornillos negros largos de 9.9mm en el lector de discos con un destornillador de seguridad T-8.

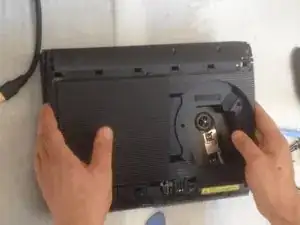
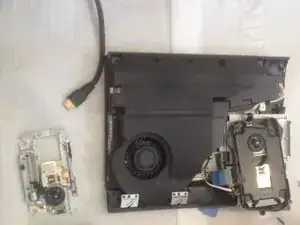
    • Quita la carcasa superior de plástico.

  7. XrcVMMku4ObMGUUK
    XrcVMMku4ObMGUUK
    cmdhb3FLQCxFLV61
    cUcJYTcAIh3aGaF1
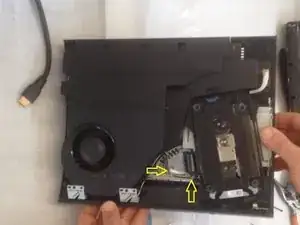
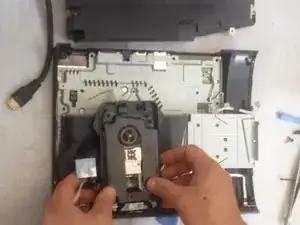
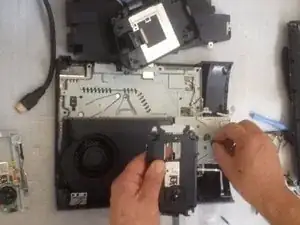
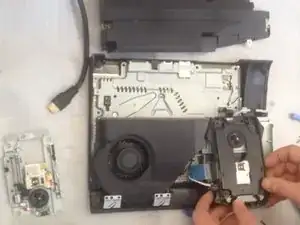
    • Quita el cable flexible frontal blanco tirando hacia arriba desde su base y los cables flexibles azul y negro detrás de él tirando hacia arriba de la pestaña negra.

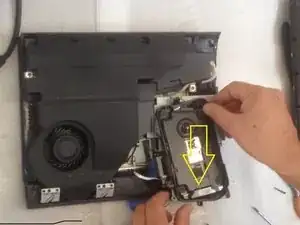
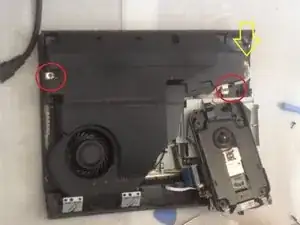
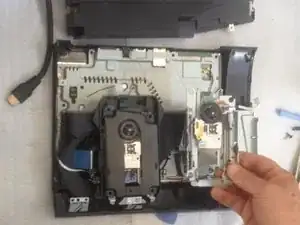
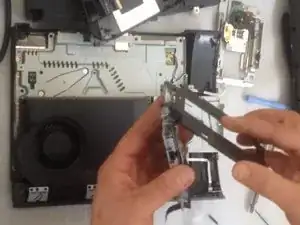
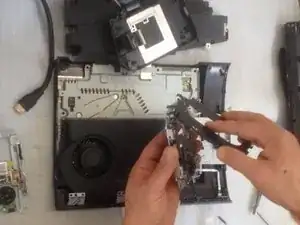
    • Haz a un lado la unidad óptica y los 2 tornillos que sujetan la fuente de alimentación.

  8. KgG5ItDSmtIDnAWv
    KgG5ItDSmtIDnAWv
    qSGmndY2duSELIxD
    2gw2qVAGDkvTRwpO
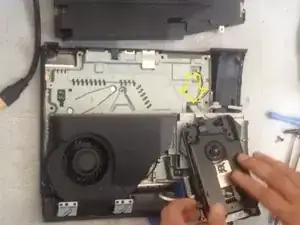
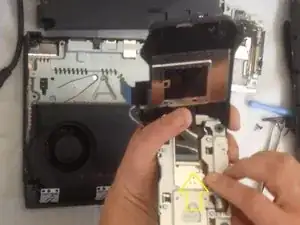
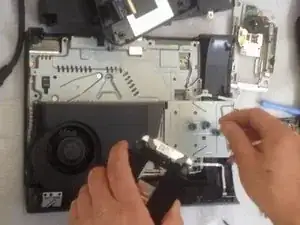
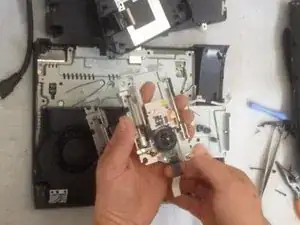
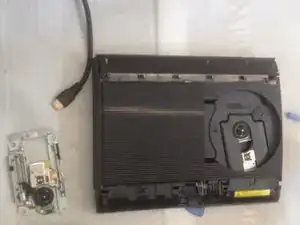
    • Quita el cable flexible blanco y negro tirando hacia arriba desde su base para quitar la unidad óptica.

    How is called this flex cable? Mine is broken so I have to buy another

    Gianpaolo Scionti -

  9. eQC5lAFZeQHCgIx3
    eQC5lAFZeQHCgIx3
    pKdFfAWtShK4fWRL
    DeYjHlTQT5N2cBnF
    • Un cable plano, para las gomas y la abrazadera metálica.

  10. uShHKRDQ131hAFPF
    uShHKRDQ131hAFPF
    ap4Uktr53wHdcEr1
    kLpwyuOmdmuTWLYk
    • Desconecta este cable plano y cámbialo por el nuevo. Comencemos el montaje.

  11. gmyUA2hYjGqJlrrT
    gmyUA2hYjGqJlrrT
    iLXBa3yUaDrppuvd
    pLh3YFam6xWPs2hF
    • Montando, montando...

  12. hpx2QrbVVDEl2RbG
    hpx2QrbVVDEl2RbG
    53vcqCbs4EhLTVJU
    • Vamos a probar la consola antes de terminar el montaje por completo.

Conclusión

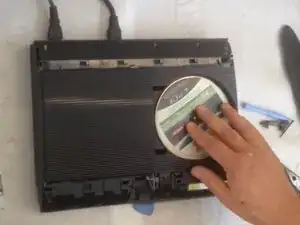
Para volver a montar la consola ,sigue las instrucciones en el orden contrario.

ZFix

Miembro Desde 09/12/13

188324 Reputación

5 comentarios

Very good job, kudos!

Kevin Borras -

I have found that there are to types of lasers do you sell the second one that does not have the black screws on top but are silver. I have found the one with the silver screws has a smaller laser flex cable and plug. its for the cech-43xx

jack blevinski -

My only problem now is how to purchase the right Laser unit? Any specs for the right Laser unit? Thanks

Sebasttain Tuscano -

I’ve done this but my ps3 still doesn’t read disks it spins it up 4 odd times but doesn’t read them and it sounds like the disk skims the top of the laser unit but it hasn't done any damage and it does it with both units, I’m so lost on what to do.

Dome Bucket -

I am replacing the optical drive in my console. But didn't note where the drive ribbon was positioned!? Every video I have found, they just pop right in...my original and replacement drives, have larger receptacles than the ribbon it self. There are at least 5 pins, that don't have (potentially) anything connecting them, to the ribbon. I don't want to randomly place the ribbon in one of the possible (7?) positions and fry something in the process...so where do I connect the smaller ribbon?!

Robert Shelton -