Introducción

Si el sonido de tu altavoz no es claro o no está funcionando, utiliza esta guía para cambiarlo.

  1. dkjcaDiNdnHRlBNK
    • Coloca el reloj al revés, de forma que puedas ver la tapa trasera.

  2. GGkylvHNgSn44Pgd
    GGkylvHNgSn44Pgd
    UnZkByNqSWRHiYTW
    • Desatornilla los cuatro tornillos de 4.2 milímetros con un destornillador Y00.

    Y0 passte bei mir deutlich besser als Y00

    Alex Fi -

    Did you use iFixit tools? I just checked and I believe Y00 is correct. Y0 slips too easily. My test was with the Y bits from the Pro Tech Toolkit.

    Nicholas Dudde -

    I too had to use an Y0 screwdriver (from Ifixit 64 bit driver kit....). Y00 just don't grip, may be some batches of the watch used different screws??

    regislefeuvre -

    One screw just doesn't want to move, any suggestions/tips how to remove it?

    Slartibartfast -

    Problem solved: after 2 times of careful WD40 application and blunting the Y00 a bit it came of with a lot of patience.

    Slartibartfast -

    I also had a problem with one of the screws and flipping to Y0 worked for that one.

    Jeff Lambert -

    Yo use Y 0.6 y anduvo perfecto!!

    Gustavo Zarate -

    Yo use Y 0.6 y anduvo perfecto!!!

    Gustavo Zarate -

    The tool kit that came with my battery was a Y1.5 and worked perfectly

    jnewsom22 -

  3. SoEQC43VSGULT5ZW
    SoEQC43VSGULT5ZW
    HQQY6ay24yOxZFJc
    mKVCBwkWvxLUNqoj
    • Este paso dañará el sellado a prueba de agua del reloj.

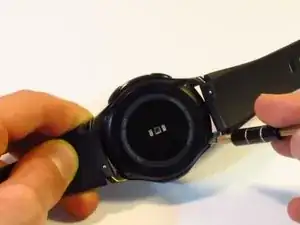
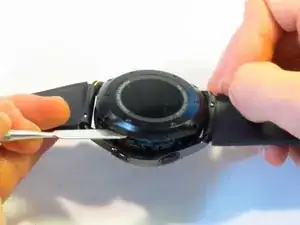
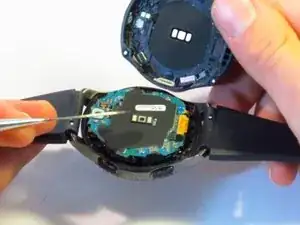
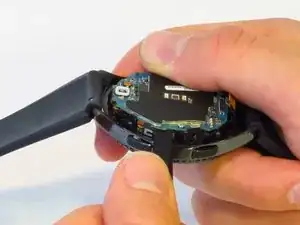
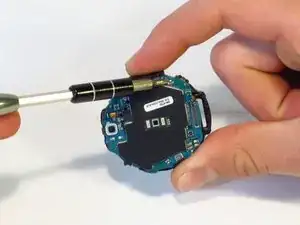
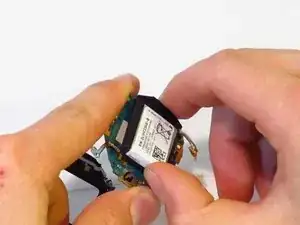
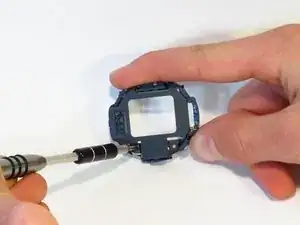
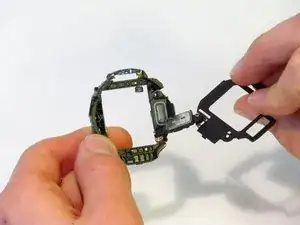
    • Introduce el spudger metálico entre la tapa trasera del reloj y el marco, realiza esto por toda la tapa trasera.

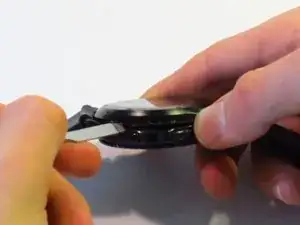
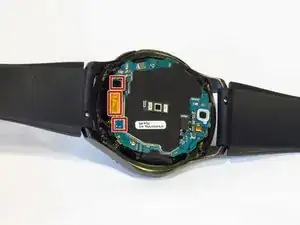
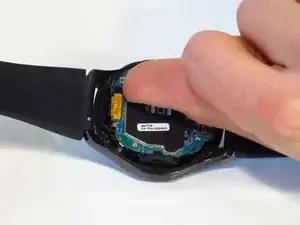
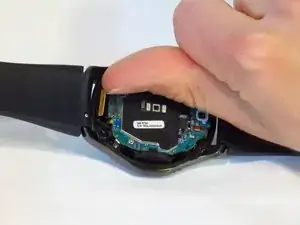
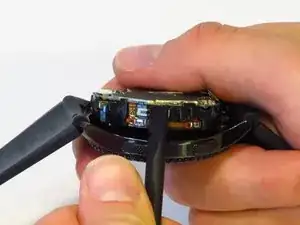
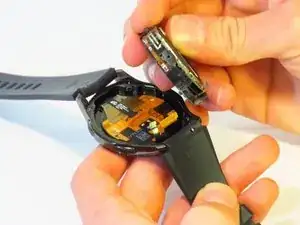
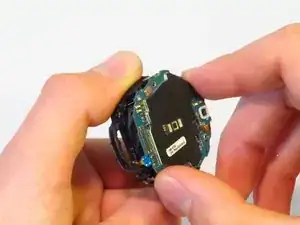
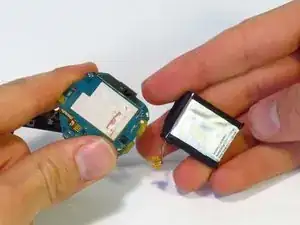
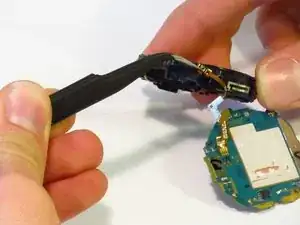
    • Haz fuerza para hacer palanca y separar la tapa trasera del marco del reloj.

    • Este paso requiere mucha fuerza. Puedes utilizar un Jimmy en vez de el spudger metálico para hacerlo de forma más sencilla.

    Il est plus facile et moins domageable pour le joint de commencer par ouvrir le cache de connexion situé à coté de l’axe du bracelet long. On peut alors glisser la broche sans détériorer le joint, qui est plus éloigné du bord à cet endroit.

    Yann Richet -

    I’m pretty sure the seal is equally far away from the edge on all sides.

    Nicholas Dudde -

    This was the hardest part. I did use thin flat head screw to dismantle it. Using the metal spudger felt like impossible due to its thickness.

    Mariusz -

    Did using the screwdriver damage the case in any way? I’d recommend being careful using a tool with smaller surface area as that will apply more pressure at the point of entry. As the guide states, a Jimmy may also be used instead of the spudger.

    Nicholas Dudde -

    Anyone know where to buy the replacement gasket after breaking the seal between back cover and watch? Thanks.

    Jyon -

    Not sure if it's a gasket or some sort of sealant paste/gel. Just took my case off, and the gasket seems intact (fused to back cover of the watch. Quick search for waterproof sealant yielded lots of possibilities - don't know which one to choose. Can anyone with experience provide advice?

    Alan Lawee -

    Ma questa guarnizione impermeabile si puo sostituire ? Come controllare se si è danneggiata? Come evitare che entri acqua dopo averlo aperto ?

    ant.beneduce -

    La photo montre une ouverture coté bouton mais pire coté car l'ouverture abime quand même le couvercle en plastique sur la face la plus visible : essayer plutôt sur les autres cotés

    stoufbook -

  4. P4yRmQMdEi3qS5ll
    P4yRmQMdEi3qS5ll
    DUqw1YGV3hdissjv
    u5YIEsZxZBKXmKyV
    • Desconecta los tres conectores de la placa madre utilizando tus uñas.

    • Estos conectores se desconectan fácil, se requiere un mínimo de fuerza.

  5. hkprJoZEkEp12nS6
    hkprJoZEkEp12nS6
    EFKCNYDYZ1gxf44i
    gSdIOCiEwy1UVTD2
    • Separa la placa madre y la pantalla frontal utilizando un spudger.

    Oui tuto bien clair. Opération réussi !

    Bien qu’adroit de mes mains, et après avoir découvert la “bête à coeur ouvert”, je ne sais pas si je me serais lancé... C’est tout l’interêt de ce Tuto qui invite à le faire (car pas trop de détails), et qui suivit pas à pas permet de s’en sortir. Bravo

    Merci Dan.S

    Dan.S -

    Better replace the 2 bolts from next step first.

    Gabriel Pinho -

    The guide has you remove the screws second because it makes it possible to remove the whole assembly without snapping any cables.

    Nicholas Dudde -

  6. wSKBt1qxRfSYoeCe
    wSKBt1qxRfSYoeCe
    x4uTpqCCSnAtinmu
    • Utilizando un destornillador JIS #00, desatornilla los dos tornillos de 4.5mm.

  7. PpMifwcx6bmXKIlE
    PpMifwcx6bmXKIlE
    xCXNjPtktKVv4F52
    vkiyIMERMrkBV4PS
    • Desconecta el cable plano de la batería del conector.

    • Ten cuidado con el cable plano de la batería y el cable de la placa base (localizado en el lado opuesto al cable de la batería, destacado con la caja naranja), ya que son muy fáciles de romper (el nuestro se rompió al desmontar).

    • Observa como el final del cable plano encaja en el chasis de plástico. Busca el pin en el chasis cuando lo vuelvas a colocar durante el remontaje.

    • Separa el chasis de la placa base.

    What happens if the battery ribbons breaks?

    sarah rus -

    Hi the ribbon has come away from the mother board. How do I stick it back on? What type of adhesive do I use?

    Peter Alderson -

    I broke my ribbon :( ordering a new one. How do I stick it on?

    Justin Lalonde -

    I also broke the ribbon for the motherboard. What adhesive should I use to reattach it

    danieljchoe -

    I'd like to know too please

    Justin Lalonde -

    Be very careful with a ribbon that cannot come off on the opposite side of the red box on the motherboard when preforming this step. I found this and managed to avoid it.

    Andrew Watson -

    You should first detach/separate the buttons ribbon cable from the side of the plastic casing so you don't tear/break it accidentally. (orange box, the cable is soldered onto the motherboard cannot detach it from there)

    István Szikra -

  8. LVnu5n2A26CqULu3
    LVnu5n2A26CqULu3
    OroFXIQEYGMdZIhE
    • Separa la batería de la placa madre.

    • Si la batería y la placa madre están aseguradas con pegamento, requerirás algo de fuerza para separarlas.

    • Las baterías de ión de litio son potencialmente peligrosas. Ten cuidado al manipularlas y no las perfores.

    I just used this guide to do a replacement, the watch works perfect now. Pay attention to whats in your hand vs whats on the guide a couple of the steps are not as straightforward just take your time. Overall good guide though.

    Michael Carlson -

    Replaced the battery successfully with this guide. Take your time to carefully see whats on the watch compared to the guide.

    I removed the battery ribbon cable in step 7 by using a really small flat screwdriver to lift the cable from the housing. It's attached with adhesive tape.

    Eric Mulder -

    Perfect. I just remove the two bolts form step 6. Battery was a little difficult to remove due to a tape that attached it on board.

    Works very well.

    Gabriel Pinho -

    It took an extra tool that isn’t mentioned (very small, thin, straight screw driver), but it took only 20 minutes! Great step by step instructions!

    Walker -

    J'ai suivi tout le processus, au final la montre charge mais ne s'allume plus.

    liotard -

  9. qGEg4qwSrPqsvCjC
    qGEg4qwSrPqsvCjC
    GhBZnfuCCq5knoOD
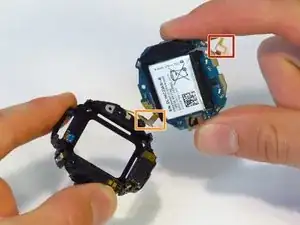
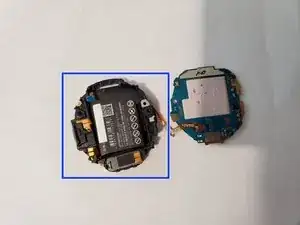
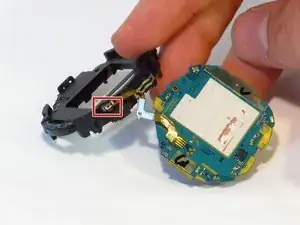
    • Cuando estes re-ensamblando, coloca la batería en el ensamble de plástico primero. No la pegues al adhesivo primero. De esta manera, es fácil de posicionar el cable de la batería.

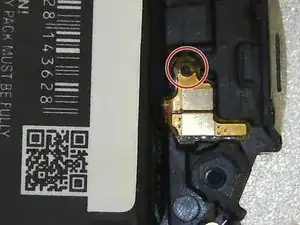
    • Cuando asegures el cable de la batería, asegura que el agujero que atraviesa la clavija es circular. El agujero en el cable de tu bateria de remplazo podría ser malformado. Puede que quieras agrandar el agujero antes de asegurar el cable.

    • Para agrandar el agujero, utiliza la herramienta par la SIM del Pro Tech Toolkit, un clip pequeño o una herramienta con punta fina. La herramienta igual puede ser usada para presionar gentilmente el cable de la bateria en la posición correcta. Has esto cuidadosamente para evitar daños

    • Siga las pasos 8-1 en orden inverso para el re-ensamble

    Notez que la montre ne redémarre pas tant que le boitier n’est pas fermé.

    Yann Richet -

    Formidable demande de l'attention et de la délicatesse a solvé ma montre Frontière.

    Bravo et merci de partager.

    Alain ESCAFFRE chateauneuf le rouge FRANCE

    ESCAFFRE -

  10. MfQWwb2eLRJkknhU
    MfQWwb2eLRJkknhU
    Gl4IEHTkKupEvPIP
    WiUBk62NO2Z16m4v
    • Desconecta la batería del chasis utilizando unas pinzas.

  11. BQPKHOKqUAhwe3HN
    BQPKHOKqUAhwe3HN
    2JuI5TImWxivWvaN
    • Desatornilla el tornillo de 3.9 milímetros con un destornillador JIS #000.

  12. xYVheTrfjAXQKVT4
    xYVheTrfjAXQKVT4
    mRBWL62irBWeg1kN
    xqU4b41jBODMGVRr
    • Separa las dos partes del chasis.

    • El altavoz está en la mitad más ancha del chasis (échale un vistazo a la tercera imagen).

  13. dZiyHnwgdnYbhdC6
    dZiyHnwgdnYbhdC6
    jDLniUCtyFAKJNoa
    • Quita las conexiones del chasis con unas pinzas.

    • Intentar desconectar los cables agarrando el altavoz puede resultar en un daño al altavoz y a su conexión.

    • Separa el altavoz del chasis.

Conclusión

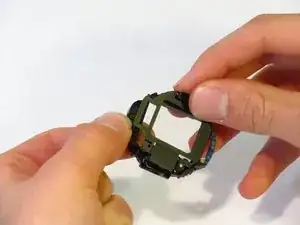
Para volver a ensamblar tu dispositivo, sigue estas instrucciones en orden inverso.

Jimmy Algeo

Miembro Desde 08/10/18

791 Reputación

2 comentarios

Bonjour où peut-on trouver une pièce merci

Voodress -

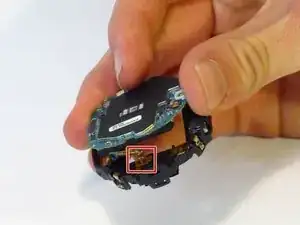
For step 3, you should be able to also remove the rubber rectangle at the base of the back plate exposing that connector area… stick the spudger in there and lift off the back plate. I assume there may be a reason why you didn’t use this method.. but I just did and it opened the back part enough where I could separate the rest by hand.

Still, excellent tear down… it made my speaker repair that much easier!

Lauren Glenn -