Introducción

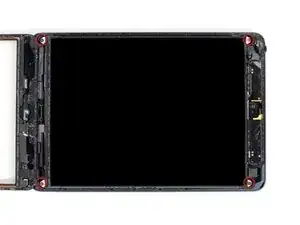
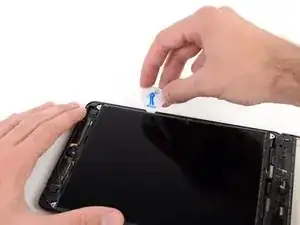
Prerrequisito para voltear el LCD y exponer la protección.

  1. dDy3OwMrUbjFFfAR
    dDy3OwMrUbjFFfAR
    5u6dwjujXLDeePwg
    DECBEVviNy1QfvAZ
    • Pequeñas piezas de cinta de espuma cubren los tornillos del superior e inferior de la mano derecha que aseguran el LCD en la carcasa trasera.

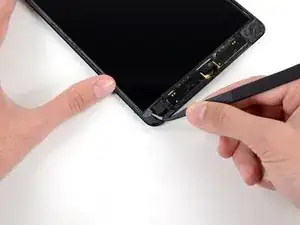
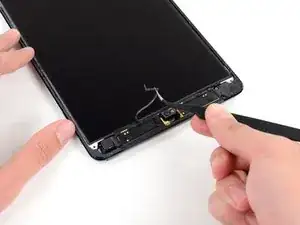
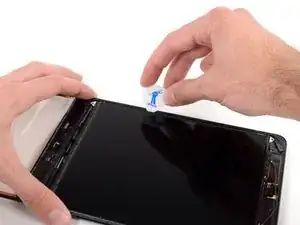
    • Usa pinzas para despegar y remover la pieza rectangular de cinta de pieza de espuma que cubre los tornillos del LCD.

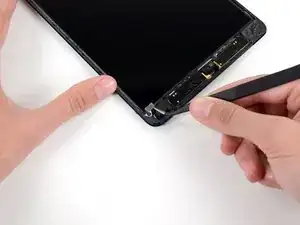
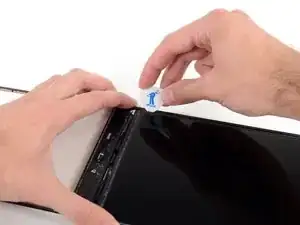
    • Remueve la cubierta triangular de cinta que cubre los tornillos del LCD.

  2. lbbpyFj4r3ROWoTS
    lbbpyFj4r3ROWoTS
    HYeUEyQGkhqc2XvZ
    • El tornillo derecho del LCD puede que este cubierto con cinta adhesiva del panel frontal.

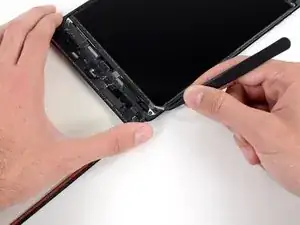
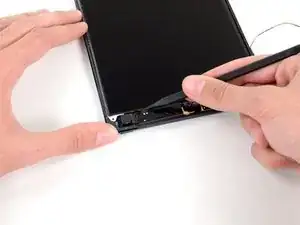
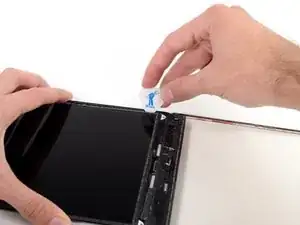
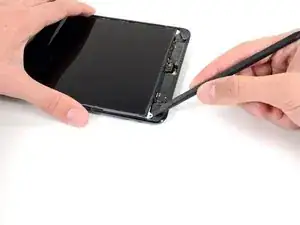
    • Si hay cinta presente, usa la punta de una espátula para retirar la cinta, exponiendo así el tornillo del LCD por debajo.

  3. 1qLSyBAe4V6DOMSi
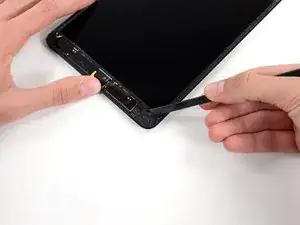
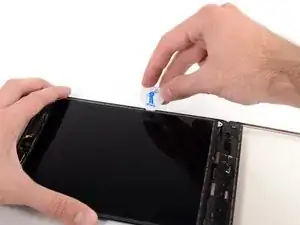
    • Remueve los cuatro tornillos Phillips #000 de 3.9 mm que aseguran el LCD a la carcasa trasera.

    In my case the 4 screws are not the same. One is 4mm, and 3 of 3.5mm, or better 2 x 3.5mm and one 3.45mm. I put the longest one at the left edge at left of the LCD flat cable.

    mitja

    Mitja Jankovic -

    Hi Mitja. I just checked the measurements with an electronic digital caliper. I got 3.9 mm for all four screws. Are you sure it was the same model? Thanks.

    Walter Galan -

    The top left screw is longer than the other 3 - iPad mini Retina Wi-Fi.

    sandro -

    On mine the top right screw is longer

    oliver -

    top right is longer on an ipad mini 2 retina wifi 32GB

    sagert -

    ipad mini wifi no screws are longer

    iliketrains kid -

  4. Pb6TRgvtOcTsELLh
    Pb6TRgvtOcTsELLh
    iuDdMMAS5O6XETXV
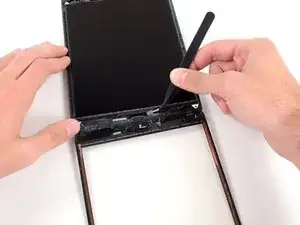
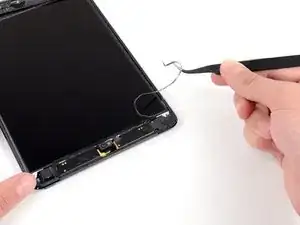
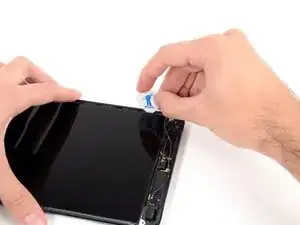
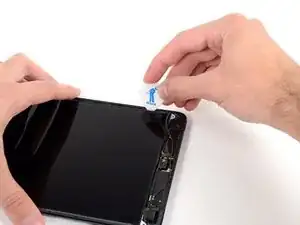
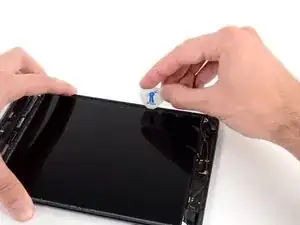
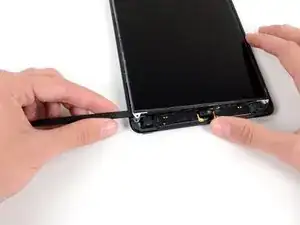
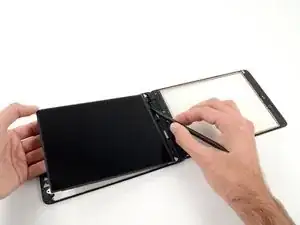
    • Usa un par de pinzas para despegar la pieza pequeña de cinta que conecta el marco del LCD a la bocina derecha.

    I wonder what does this sticker stands for…

    K8L -

    what sticker?

    iliketrains kid -

  5. qm6fitZarP1pNMSN
    qm6fitZarP1pNMSN
    G25jBRqXWBlSbWKJ
    IqPjA3Zh4NdBsRPQ
    • Una tira delgada de cinta de espuma en el marco del LCD está cubriendo una pieza de cinta que conecta el LCD a el panel debajo de él. Para continuar, tendrás que romper y despegar algo de la cinta de espuma para exponer la cinta escondida debajo.

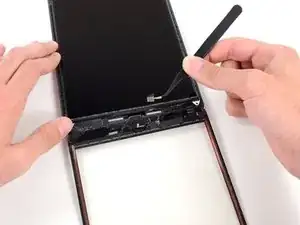
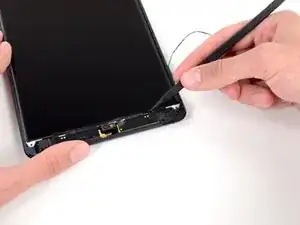
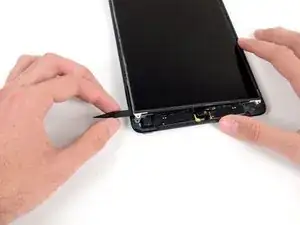
    • Usa un par de pinzas para jalar la parte superior de la cinta de espuma que cubre el LCD.

    • Ten cuidado de no tocar el LCD con las pinzas, ya que podrías dañar el display.

    • Usa las pinzas para despegar la cinta de espuma para exponer la parte superior del LCD.

  6. GFbNmhSBmUVfVX55
    GFbNmhSBmUVfVX55
    tqUeCkEdRFJxIlV2
    jaO6LhLjrilZpfNw
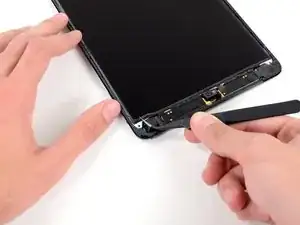
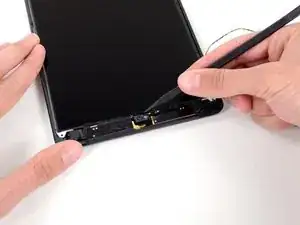
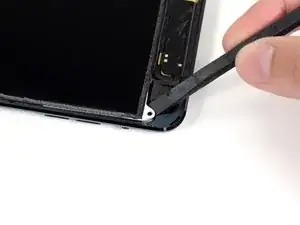
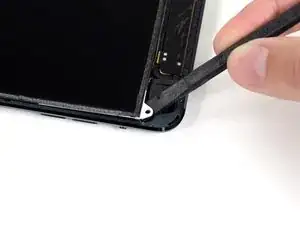
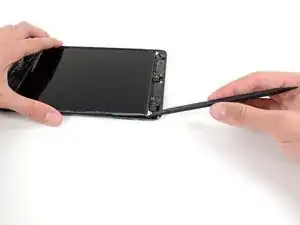
    • Inserte la punta de un spudger entre el marco del LCD y la cinta en el superior del LCD.

    • Desliza el spudger a lo largo del espacio entre el marco del LCD y la cinta, separando la cinta del marco del LCD.

    I finished a successful replacement of my screen following these instructions. Thanks.

    Step 36 (remove tape from LCD perimeter), however, seems unnecessary. I ended up spending a lot of time separating the tape from the LCD frame only to discover it was not necessary for steps 37-44 and actually made things really difficult for step 45-46 (removing the tape near the speakers). Finally, steps 45-46 can be skipped since it is much easier to remove this tape once you flip the LCD over (Step 55).

    Kenneth Snyder -

  7. ArGZYabBVuTAdDkm
    ArGZYabBVuTAdDkm
    ZBVfedEEXliUuIaJ
    • El LCD está pegado a la protección de metal del LCD que esta atrás de el a lo largo de los bordes superior, izquierdo y derecho. En orden para aflojar este adhesivo, estarás usando un plumilla para mover el LCD unos milímetros de izquierda a derecha varias veces.

    • Inserte una plumilla en el hueco entre el LCD y la carcasa trasera, cerca del lado izquierdo superior de la LCD.

    • Dobla la púa un poco, lo suficiente para hacer el hueco entre el LCD y la carcasa trasera más grande.

    I found a very simple method for removing the LCD from the metal shield. Slightly lift one of the top corners and insert a 1' piece of fishing line. Insert the line under the other top corner placing the length between the LCD and shield. Once in place, gently pull each end toward the bottom of the LCD breaking the adhesive as you go. This will make things much easier than using the picks and possibly breaking the LCD.

    bababooey -

    The fishing line trick is amazing… although i had already broken the LCD when i saw that comment. Good Learn!

    Brandon Lukasik -

    This step is what destroys my LCDs :(

    Dan Harris -

    Just destroyed my LCD as well. A red warning remarking is missing here! The LCD assembly is very fragile an cannot be bent, even slightly!!

    brauliox -

    I have broken about 10 of the 50 or so iPad minis that I have repaired. I always try to have a LCD on hand. I’ll have to try the fishing line trick!

    northstar -

    I also recommend doing step 45 first (removing the two pieces of foam tape at the bottom).

    northstar -

    I was able to do this the first time w/out damaging the LCD simply by following the instructions to the letter, slowly and carefully. The only thing I did differently was to follow Northstar’s instructions to remove the two pieces of tape at the bottom of the LCD before beginning.

    Jenny Lawson -

    I found a good way to remove the LCD without breaking it. Once you finish to clean up around the LCD just lift a bit one of the white metal backing plate and insert in the gap a plastified playing card under le LCD and slowly make your way to the center of the LCD. Repeat on the other side and the LCD will lift up intact.

    lemerise -

    nothing Brocken after

    (I did not read the comments before doing it lol)

    iliketrains kid -

  8. BwLWVyFypwEtqtNB
    BwLWVyFypwEtqtNB
    DtkNCX6mtPfZ62iY
    6AoUwJLtlwHhpKFv
    • Inserta la plumilla en tres lugares más en el lado izquierdo del LCD y dóblalas en cada lugar, para deslizar el LCD sobre el lado derecho de la carcasa trasera.

  9. 2xAIc63CSGJQF1sl
    2xAIc63CSGJQF1sl
    baxbUFmPywfuNhOy
    cOTcENNnUFoolydP
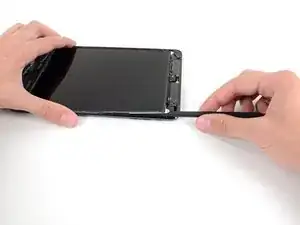
    • Ahora cambia a el lado derecho del LCD, y palanquea con la plumilla en varios lugares a lo largo de este lado para mover el LCD de vuelta al lado izquierdo.

    • Repite este y el paso anterior varias veces, hasta que el LCD pueda moverse de manera sencilla de izquierda a derecha.

  10. Ny32cm3NuKB2oBBB
    Ny32cm3NuKB2oBBB
    rWvTODV5q6DMYQOC
    DxtYHmpDHU3EllGt
    • En los siguientes pasos, estarás deslizando una púa entre el LCD y la placa de soporte de metal para separar por completo el LCD del adhesivo que tiene debajo.

    • Inserte la punta de un spudger entre el marco del LCD y la placa de soporte de metal.

    • Asegúrate de colocar el spudger entre el marco del LCD y el soporte de metal, y no debajo de este soporte. Hacer palanca en el soporte lo dañará, por que esta atornillado a la carcasas trasera debajo del LCD.

  11. YFLy6KnoWFGxGDIc
    YFLy6KnoWFGxGDIc
    jqnnwqmFoblSMV3w
    1R44fhUmogMeDopV
    • Empezando en el superior derecho del dispositivo, desliza el spudger entre el marco del LCD y la placa de metal, lo que va a separas el adhesivo conforme empujamos.

    • La meta es separar el adhesivo, no hacer palanca en el LCD, así que mantén la punta del spudger apuntando hacia abajo lo más que púedas para prevenir doblar el LCD.

    • Si insertar un spudger causa que la esquina del LCD se doble, repite los pasos con la plumilla para aflojar mas el adhesivo.

    These steps were hard. I was too scared that I was going to brake the LCD. Luckily I got it off! Don’t know how delicate these things are and how much force they can take.

    Padraic Hoselton -

    me to it was hard

    iliketrains kid -

  12. WAGHN2T2hLggR5UC
    WAGHN2T2hLggR5UC
    tYR4iIkIBAUlZnK6
    OHQUq3vircBtRVAd
    • Repite el procedimiento anterior a lo largo de la parte superior del LCD.

    • Inserta la punta de una espátula entre el marco del LCD y la placa de metal y gentilmente empuja el spudger hacia adentro a través del superior del dispositivo, separando el adhesivo.

  13. qMTF4hKvYBtmLaBQ
    qMTF4hKvYBtmLaBQ
    j1Afji3RCxVe5Yr6
    2hACPxRdTGuWJdpe
    • Continua con el lado izquierdo del LCD, inserta la punta de un spudger entre el LCD y la placa de protección e inserta el spudger tan profundo como se pueda.

    • En este punto el LCD debe de estar flojo de su adhesivo que lo sostenía. Si no lo está, re-inserta el spudger en el lado derecho o superior para liberar completamente el LCD.

  14. ZnjcmscLMS3yBH5S
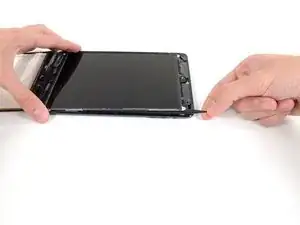
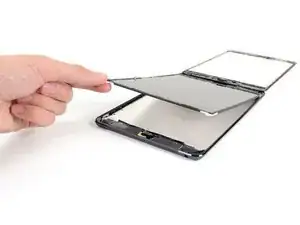
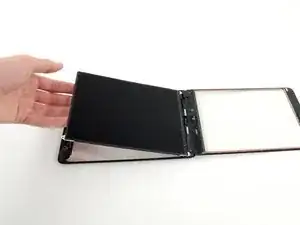
    • Levanta el LCD unas pulgadas de la carcasa trasera para asegurarse que esta libre del adhesivo.

    When I did it I found that the adhesive sticking was mainly on the edges, so if you take a spudger and just break that adhesive carefully it will help. Be gentle lifting the lcd as it’s very breakable.

    Jasper Holden -

  15. X1o1AwQVpnm5SMEn
    X1o1AwQVpnm5SMEn
    brYnHKUwyNYWtYyH
    • Dos franjas anchas de cinta conectan el LCD a las bocinas.

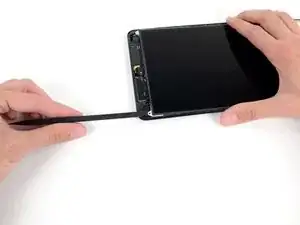
    • Mientras sostienes el LCD con una mano, inserta la punta de un spudger en el hueco entre esta cinta y la bocina izquierda.

    • Gentilmente jala el LCD de las bocinas mientras rotas el spudger hacia afuera para separar la cinta de la bocina.

    I recommend removing these two pieces of foam tape prior to loosening and lifting the LCD.

    northstar -

  16. yqFCZlX2BQG1XO1h
    yqFCZlX2BQG1XO1h
    txqPaDfPDF1Uyisv
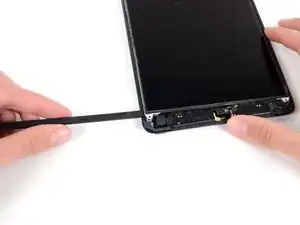
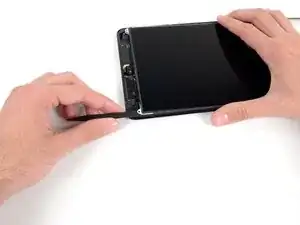
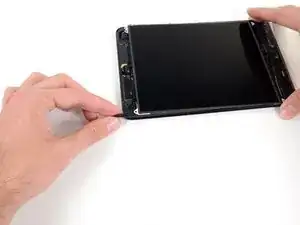
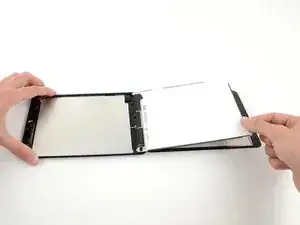
    • Inserta la punta de una espátula en el hueco entre la bocina derecha y la cinta del LCD.

    • Mientras jalas el LCD de las bocinas, rota la espátula hacia afuera, abriendo el hueco y soltando la cinta de la bocina.

  17. 4DQ25dbGRVbZrEhd
    4DQ25dbGRVbZrEhd
    Z4NDNrhv5Kb2uWEi
    • Voltea el LCD y déjalo reposar en la parte superior del cristal del panel frontal.

    • No intentes remover el LCD del iPad, ya que aún sigue conectado por su cable de datos.

Conclusión

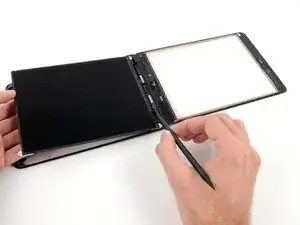
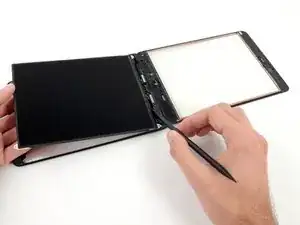
Para reensamblar tu dispositivo, sigue las instrucciones en orden inverso.

Andrew Optimus Goldheart

Miembro Desde 17/10/09

494141 Reputación

0 comentarios