Introducción
Sigue los pasos de esta guía para reemplazar la pantalla en un iPad Pro 12.9" o para acceder a otros componentes internos para el servicio.
Ten en cuenta que el botón de inicio instalado en tu pantalla original está emparejado con la placa lógica del iPad y deberá quitarse y transferirse a la nueva pantalla para conservar la funcionalidad Touch ID.
Antes de comenzar, verifica si tu pieza de repuesto tiene una placa secundaria adherida a su parte posterior. Si es así, esta guía te servirá. De lo contrario, deberás transferir el tablero de la pantalla anterior a la nueva. Transferir la placa secundaria de la unidad original a la de repuesto requerirá un equipo de microsoldadura especial y recomendamos a los usuarios de bricolaje obtener una nueva pieza en lugar de intentar el procedimiento.
Algunas partes de esta guía se tomaron con un modelo Wi-Fi y, como tal, las partes internas pueden tener un aspecto ligeramente diferente al del modelo LTE. El procedimiento es el mismo para ambos modelos excepto donde se indique.
El procedimiento de apertura de este iPad Pro se muestra usando un Halberd Spudger. Si no tienes uno, puedes usar una punta de apertura en su lugar; el proceso es el mismo.
Herramientas
Partes
-
-
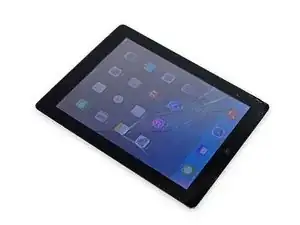
Apaga completamente tu iPad antes de comenzar.
-
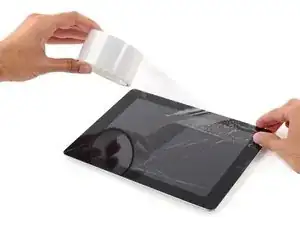
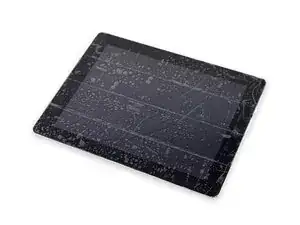
Coloca tiras superpuestas de cinta de embalaje transparente sobre la pantalla del iPad hasta cubrir toda la cara.
-
Haz tu mejor esfuerzo para seguir el resto de la guía como se describe. Sin embargo, una vez que se rompa el vidrio, es probable que continúe agrietándose mientras trabajas, y es posible que debas usar una herramienta de palanca de metal para sacar el vidrio.
-
-
-
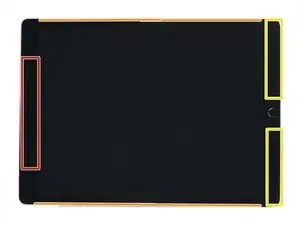
Mientras cortas el adhesivo, ten en cuenta lo siguiente:
-
La parte superior tiene un gran parche de adhesivo grueso. Deberás cortar 1/2" de profundidad para cortar el adhesivo.
-
No cortes más de 2 mm a lo largo de los bordes largos del iPad, o corres el riesgo de dañar el panel de la pantalla.
-
El borde inferior también tiene parches gruesos de adhesivo, pero hay cables flexibles delicados en cada esquina. No cortes más de 1/4" alrededor de las esquinas inferiores.
-
-
-
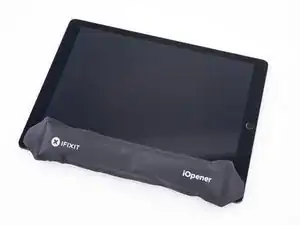
Calienta un iOpener y colócalo sobre el borde izquierdo del iPad para ablandar el adhesivo que sujeta la pantalla en su lugar.
-
Espera unos dos minutos para que el adhesivo se ablande antes de continuar con el siguiente paso. El borde debe estar un poco demasiado caliente al tacto.
-
-
-
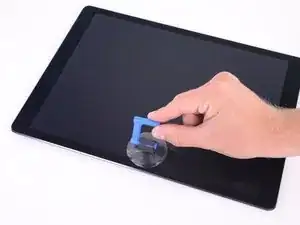
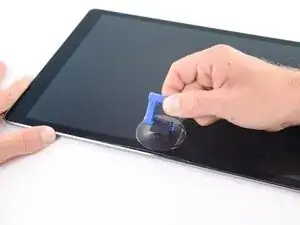
Coloca una ventosa en el borde izquierdo de la pantalla del iPad, sobre el puerto Smart Connector.
-
-
-
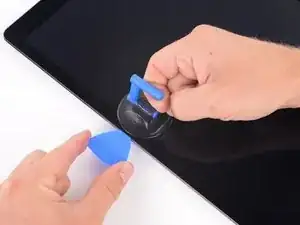
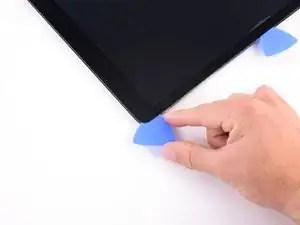
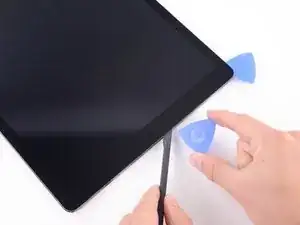
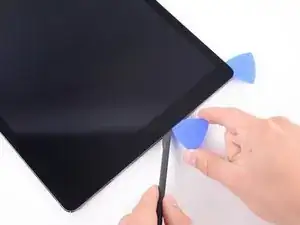
Mientras mantienes presionadas las esquinas del iPad, tira repetidamente hacia arriba de la pantalla y luego bájala para debilitar el adhesivo. Esto eventualmente creará un pequeño espacio en la costura.
-
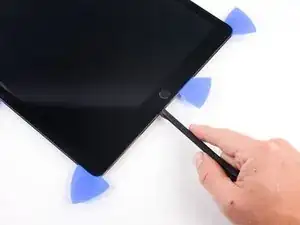
Una vez que haya creado un pequeño espacio, inserta la punta de una púa de apertura en el espacio.
-
-
-
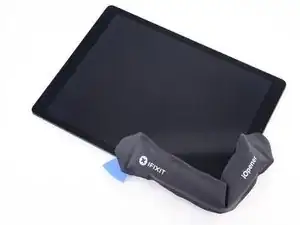
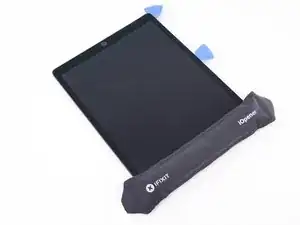
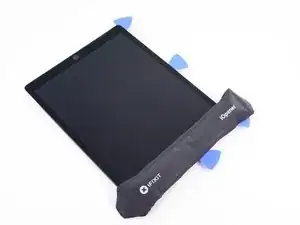
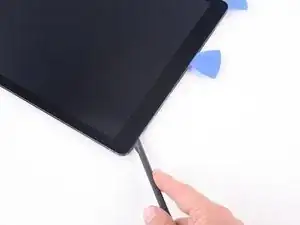
Coloca un iOpener caliente a lo largo de la esquina inferior izquierda del iPad, desde la selección de apertura hasta el botón de inicio.
-
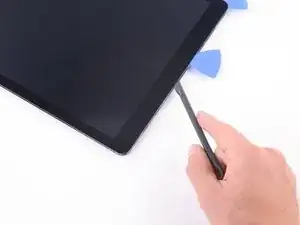
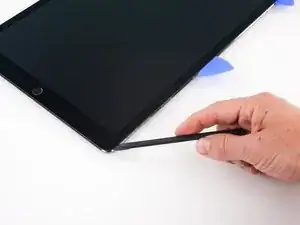
Después de dejar que el adhesivo se ablande, inserta una púa de apertura o una espátula de alabarda en el espacio junto al conector inteligente.
-
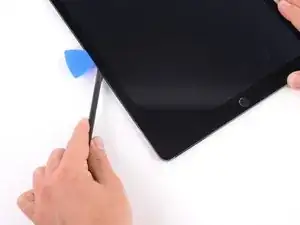
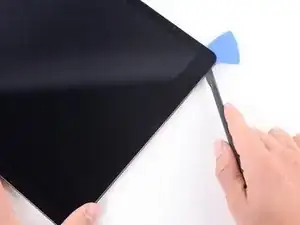
Usa una púa de apertura o un spudger de alabarda para cortar el adhesivo a lo largo del lado inferior izquierdo del iPad. Si el corte se vuelve difícil, vuelve a calentar el borde y vuelve a intentarlo.
-
-
-
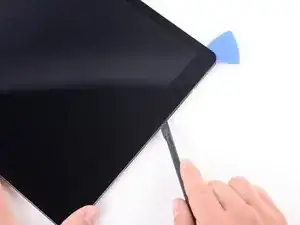
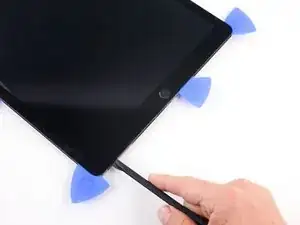
Inserta una púa en la esquina inferior izquierda del iPad para evitar que el adhesivo se vuelva a sellar.
-
-
-
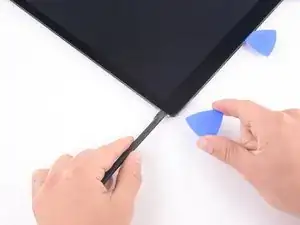
Colocae un iOpener caliente a lo largo de la esquina superior izquierda del iPad, desde la púa de apertura hasta la cámara frontal. Espera un minuto para que el adhesivo se ablande.
-
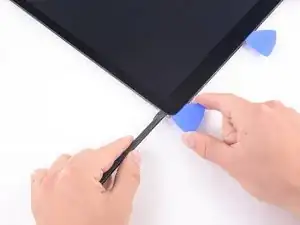
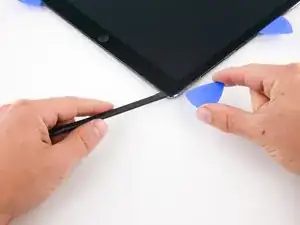
Usa una púa de apertura para cortar el adhesivo a lo largo del lado superior izquierdo del iPad. Si el corte se vuelve difícil, vuelve a calentar el borde y vuelve a intentarlo.
-
-
-
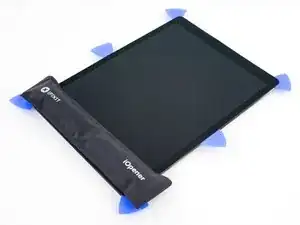
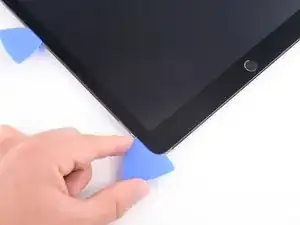
Inserta una púa en la esquina superior izquierda del iPad para evitar que el adhesivo se vuelva a sellar.
-
-
-
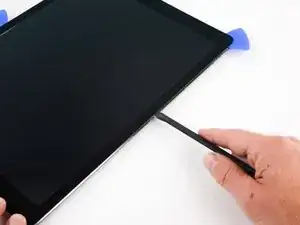
Vuelve a calentar su iOpener y colócalo sobre el borde superior del dispositivo. Espera un par de minutos para que el adhesivo se ablande.
-
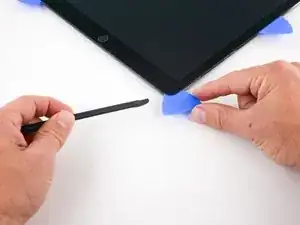
Usa una púa de apertura para cortar el borde superior del iPad, deteniéndote antes de llegar a la cámara frontal.
-
Si el corte se vuelve duro, vuelve a calentar el borde y vuelve a intentarlo.
-
-
-
Inserta una púa de apertura justo antes de la cámara frontal para evitar que el adhesivo se vuelva a sellar.
-
-
-
Vuelve a calentar su iOpener y colócalo sobre el borde superior del dispositivo. Espera un par de minutos para que el adhesivo se ablande.
-
Inserta una púa de apertura o una hoja de spudger de alabarda justo después de la cámara frontal.
-
Usa la púa de apertura para cortar el adhesivo en la esquina superior derecha.
-
Si el corte se vuelve duro, vuelve a calentar el borde y vuelve a intentarlo.
-
-
-
Inserta una púa de apertura en la esquina superior derecha para evitar que el adhesivo se vuelva a sellar.
-
-
-
Suaviza el adhesivo calentando el borde derecho del iPad con un iOpener.
-
Usa una púa de apertura o un spudger de alabarda para cortar a lo largo del borde derecho del iPad, hasta llegar a la esquina inferior derecha.
-
Deja una púa de apertura en el medio del borde derecho para evitar que el adhesivo se vuelva a sellar.
-
-
-
Deja una púa de apertura en la esquina inferior derecha del iPad para evitar que el adhesivo se vuelva a sellar.
-
-
-
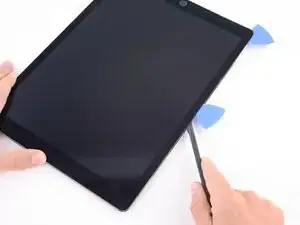
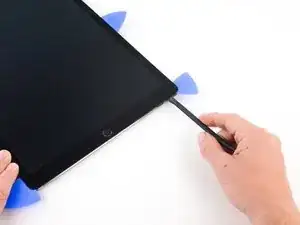
Usa un iOpener para calentar el borde inferior del iPad.
-
Inserta una púa de apertura o una hoja de spudger de alabarda de 1/4" en la esquina inferior derecha del iPad.
-
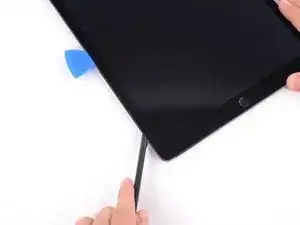
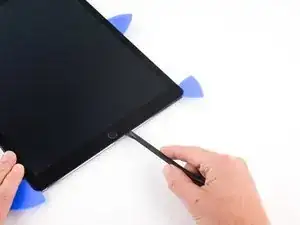
Desliza la púa de apertura a lo largo del borde inferior del iPad, deteniéndote aproximadamente 1/2" antes de llegar al botón de inicio.
-
-
-
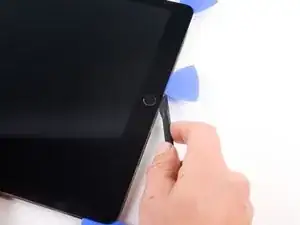
Desliza la punta de una púa de apertura o un spudger de alabarda para cortar el adhesivo debajo del botón de inicio.
-
-
-
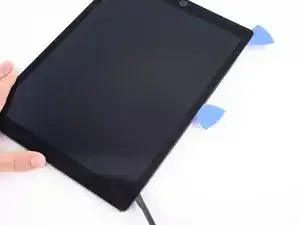
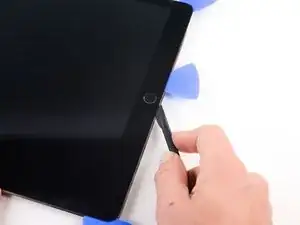
Después de cortar debajo del botón de inicio, vuelve a insertar la punta de una púa de apertura o una hoja de spudger de alabarda 1/4" en el borde inferior.
-
Corta a lo largo del borde inferior hasta llegar a la púa de apertura.
-
-
-
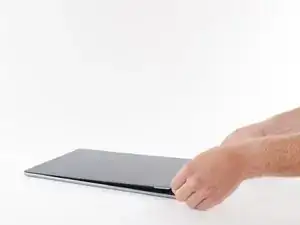
En este punto, has cortado la mayor parte del adhesivo de la pantalla. Usa una púa de apertura para cortar con cuidado cualquier resto de adhesivo a lo largo de los bordes hasta que se libere la pantalla. Si algunas partes se resisten, calienta el área con un iOpener para aflojar el adhesivo.
-
-
-
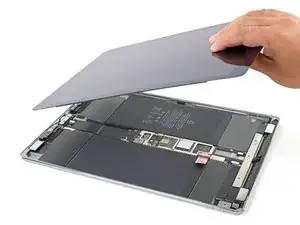
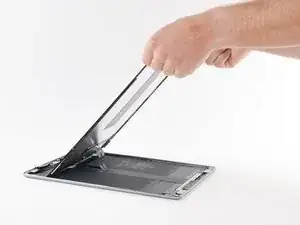
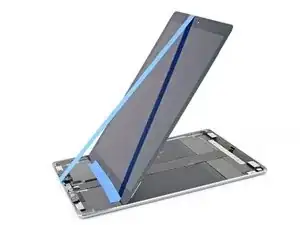
Levanta el borde superior de la pantalla y desliza toda la pantalla hacia la cámara frontal para acceder a los componentes internos del iPad.
-
Usa cinta adhesiva para pegar el borde inferior de la pantalla al marco para evitar que la pantalla se deslice.
-
-
-
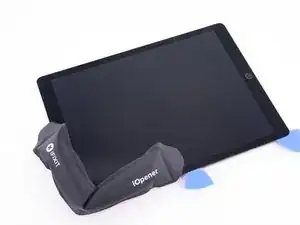
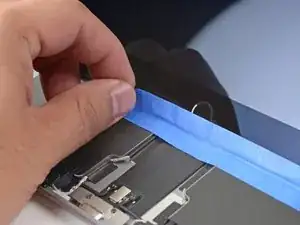
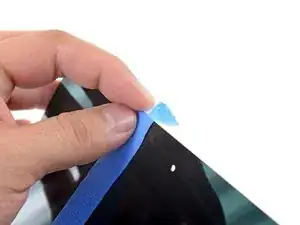
Coloca una tira larga de cinta adhesiva en el borde superior de la pantalla. Dobla la cinta sobre el borde y asegúrate de que esté bien sujeta.
-
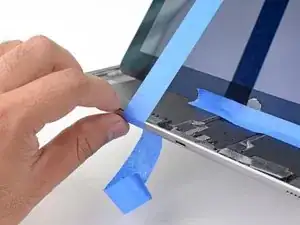
Sujeta el otro extremo de la tira al borde inferior del marco del iPad para sostener la pantalla en ángulo. Asegúrate de que la cinta se adhiera firmemente al marco.
-
-
-
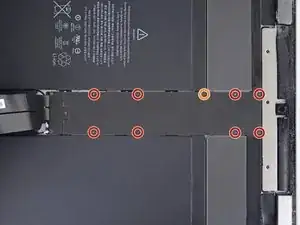
Usa un destornillador Phillips para quitar los nueve tornillos que sujetan el escudo EMI de la placa lógica:
-
Ocho tornillos de 1,2 mm
-
Un tornillo de 2,4 mm
-
-
-
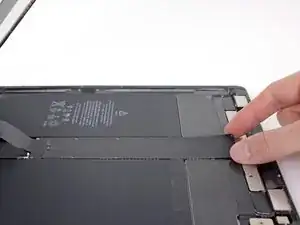
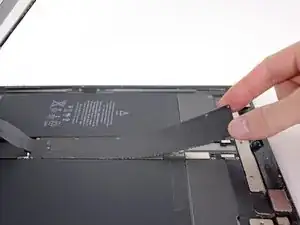
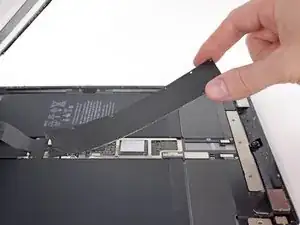
Levanta el escudo EMI de la placa lógica desde el borde más cercano a la parte superior del iPad.
-
Despega y retira el escudo EMI de la placa lógica.
-
Retira el escudo EMI de la placa lógica.
-
-
-
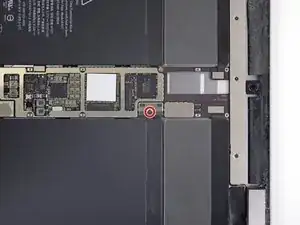
Utiliza un destornillador Phillips para quitar el tornillo de 1,8 mm que sujeta el conector de la batería.
-
-
-
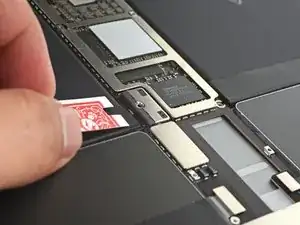
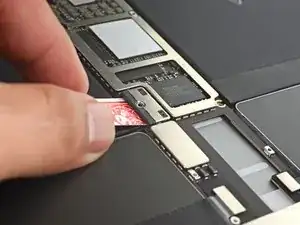
Haz un bloqueador de batería con una tarjeta de juego y deslízalo debajo del conector de la placa lógica para desconectar la batería.
-
Deja el bloqueador allí para evitar que los cables del conector de la batería hagan contacto hasta que hayas completado las reparaciones.
-
-
-
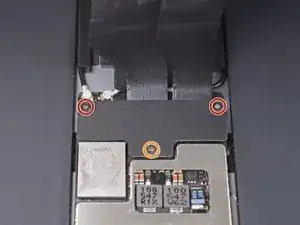
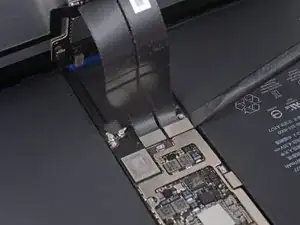
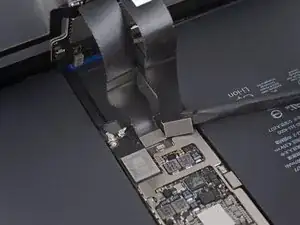
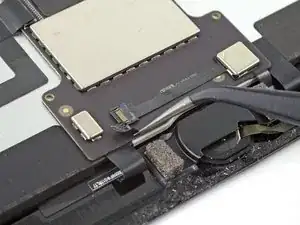
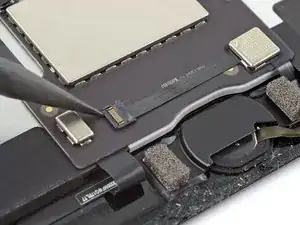
Usa un destornillador Phillips para quitar los tres tornillos que sujetan el soporte del cable de la pantalla:
-
Dos tornillos de 2,4 mm
-
Un tornillo de 1,2 mm
-
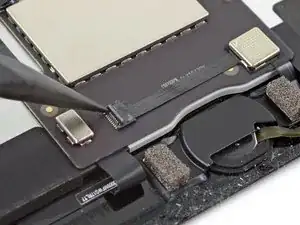
Retira el soporte del cable de la pantalla.
-
-
-
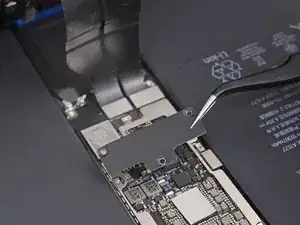
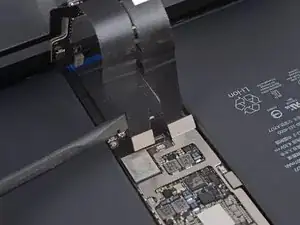
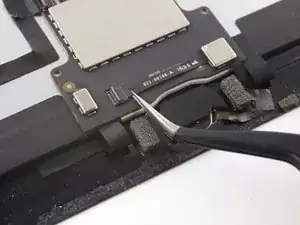
Usa el extremo plano de un spudger para levantar y desconectar los cables de la pantalla y del digitalizador de los enchufes de la placa lógica.
-
-
-
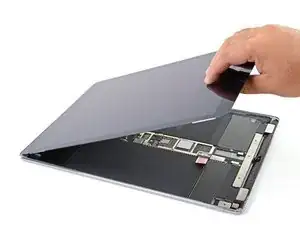
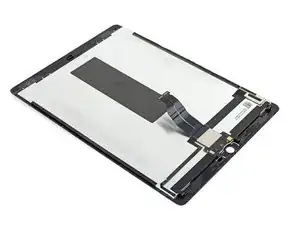
Retira la pantalla.
-
Si tu pantalla no vino con adhesivos preaplicados, usa nuestra guía de aplicación de adhesivos para pantallas para instalar tiras adhesivas precortadas nuevas cuando vuelvas a armar tu iPad.
-
-
-
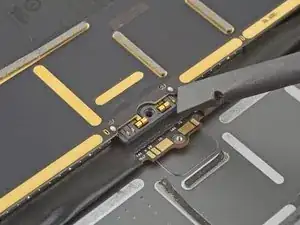
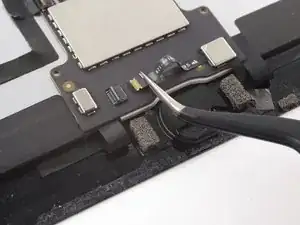
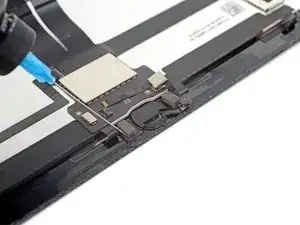
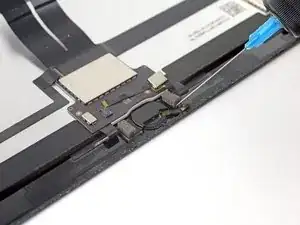
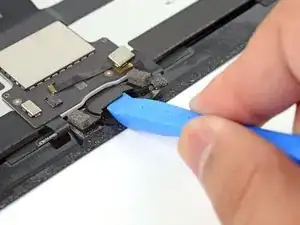
Usa un iOpener, una pistola de aire caliente o un secador de cabello para ablandar el adhesivo debajo del cable antes de levantarlo.
-
Alternativamente, aplica unas gotas de alcohol isopropílico al cable y espera un minuto para que el adhesivo se ablande.
-
-
-
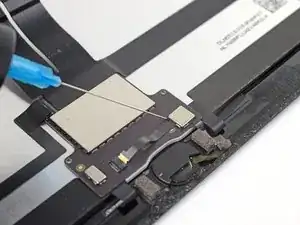
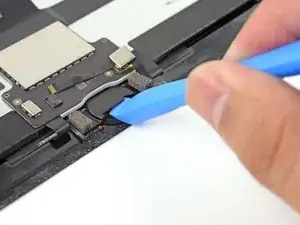
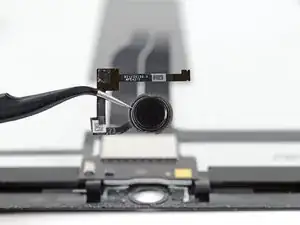
Comenzando desde el conector ZIF, usa una púa de apertura para separar el cable del botón de inicio del adhesivo que lo mantiene en su lugar. Detente cuando llegues al botón de inicio.
-
-
-
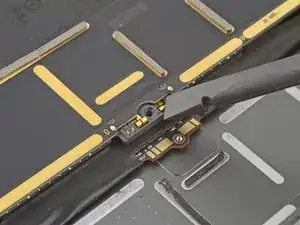
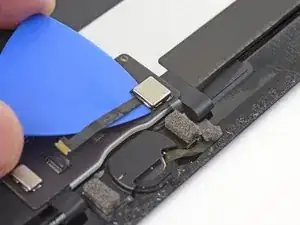
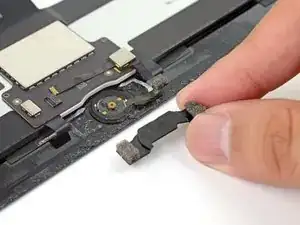
Aplica unas gotas de alcohol isopropílico en la base del soporte del botón de inicio.
-
Alternativamente, puedes usar un iOpener calentado para aflojar el adhesivo.
-
-
-
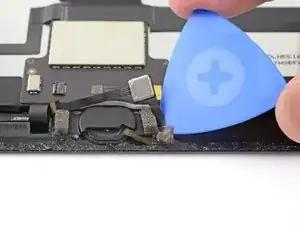
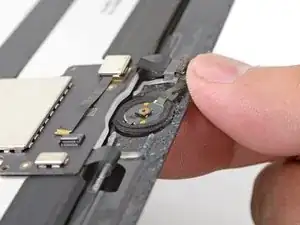
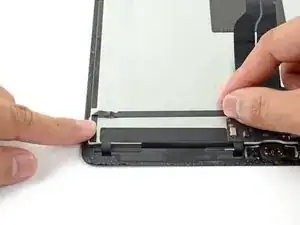
Inserta el borde de una herramienta de apertura debajo del borde del soporte del botón de inicio.
-
Haz palanca con fuerza constante para aflojar el soporte.
-
-
-
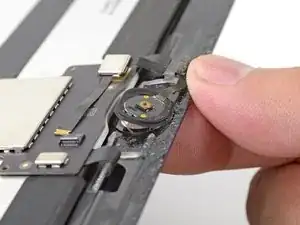
Retira el soporte del botón de inicio.
-
Raspa la mayor cantidad posible de residuos de adhesivo antiguo y luego límpialos con acetona o alcohol isopropílico de alta concentración (>90 %).
-
Asegura el soporte con pegamento E6000, superpegamento o cinta de doble cara de alta resistencia. Asegúrate de que el soporte esté alineado correctamente antes de permitir que se seque el adhesivo, o el botón de inicio no hará clic cuando se presione.
-
-
-
Presione suavemente el botón de inicio desde la parte delantera de la pantalla hacia adentro con la punta de un dedo.
-
-
-
Retira toda la cinta de embalaje.
-
Despega los revestimientos adhesivos de los cables flexibles y presiona los cables en su lugar en el panel de la pantalla.
-
Dobla y conecta el cable flexible en la esquina inferior izquierda de la pantalla.
-
No peles ni expongas el adhesivo perimetral hasta que hayas probado tu reparación y estés listo para sellar el iPad.
-


Compara tu nueva pieza de repuesto con la pieza original; es posible que debas transferir los componentes restantes o quitar los respaldos adhesivos de la nueva pieza antes de instalarla.
Para volver a armar tu dispositivo, sigue estas instrucciones en orden inverso.
Lleva tus desechos electrónicos a un centro de reciclaje certificado.
¿La reparación no salió según lo planeado? Consulta nuestra Comunidad de respuestas para obtener ayuda para solucionar problemas.

19 comentarios
Hello there OK so I have 2 screens with 2 different connectors one L shaped (which is on the new screen) and the old cracked screen has a rectangular type? I’m not sure rather it’s a 1gen/2nd gen type of problem? I’m about to grab my hot air gun to completely disassemble the cracked screen, as maybe I’m missing something? Any assistance is welcome… well actually please help me with this before I get a headache since this has totally frustrated me and i’ve had this sitting for nearly 2 1/2 months now but it’s about that time that I readdress this in attempt to fix it.
Hi, does your replacement screen have the home button assembly included? Otherwise there's need of soldering the assembly to it before it can be installed.
Dreetn -
hi
does anyone knows why there is a foam adhesive in thr back of the screen ? do i need to put back when i replaxe screen ?
thanks
I suppose the foam adhesive is similar to the one on the back of the 6s screens. I guess it has more of a heat dissipation function or is meant to absorb any pointy pressure points from inside that may develop (loose screw, sand, dirt...)
Dreetn -
hi
hope someone can help . i tested couple of screens before fitting them in they were working but once tech close it there no touch or black lcd (backlight on but no image )
NB : they disconnect battery before connecting Screen
If you don't have this problem while the assembly is still loose, my best guess is that you have an unwanted contact somewhere, causing a short circuit or malfunction. Perhaps in the bending of the flex?
Dreetn -