
Introducción
Utilice esta guía para reemplazar el disco duro de su disco duro únicamente o Fusion Drive Mac Mini Late 2014.
Esta guía fue hecha con un Fusion Drive Mac Mini. Si su Mac Mini solo tiene un disco duro, omita los pasos sobre el SSD PCIe y su conector.
-
-
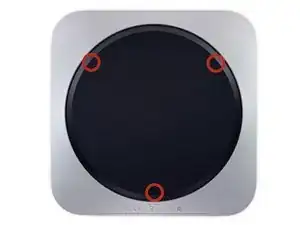
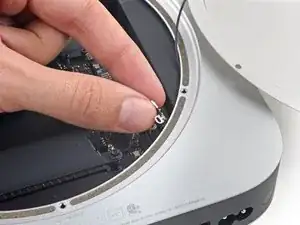
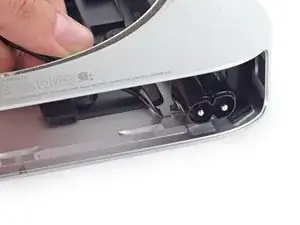
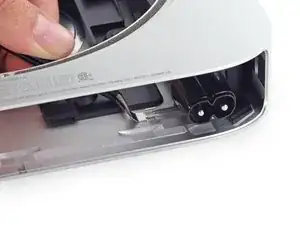
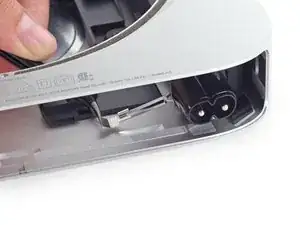
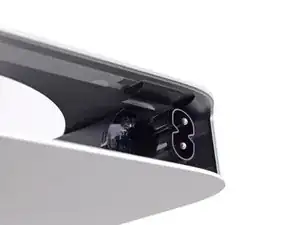
La tapa inferior está sujeta a tres pilares de tornillo.
-
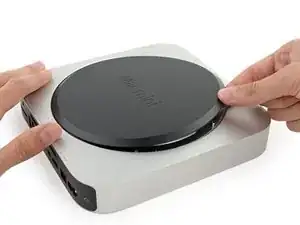
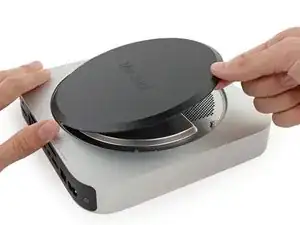
Haz palanca cerca, pero no en los postes de los tornillos.
-
-
-
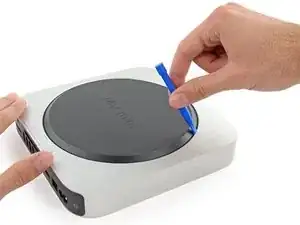
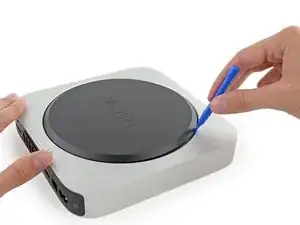
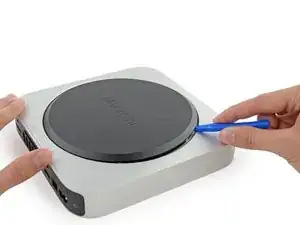
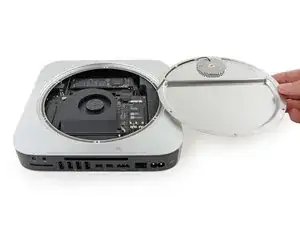
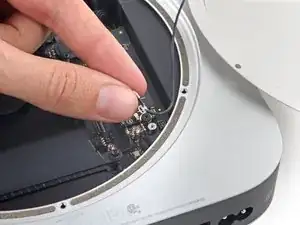
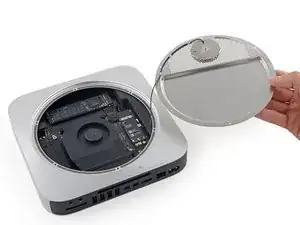
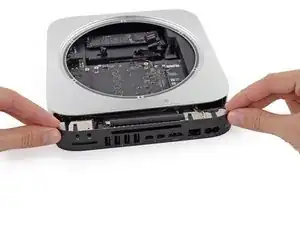
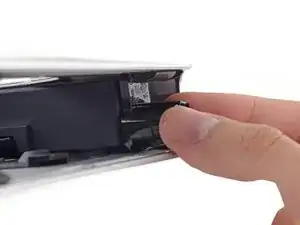
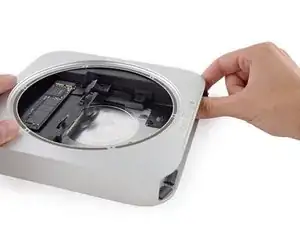
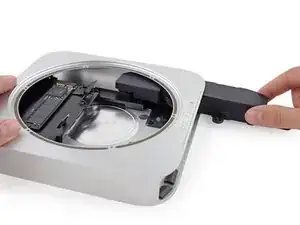
Usa la herramienta de apertura de plástico para levantar la cubierta inferior de la Mac Mini.
-
-
-
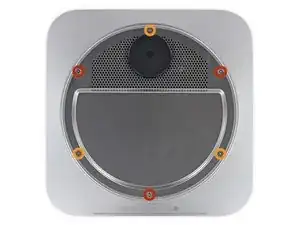
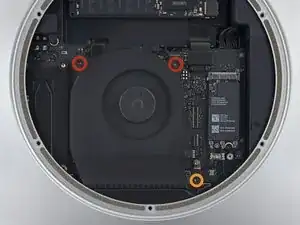
Remueve los siguientes tornillos tipo TR6 de la placa que sirve de antena:
-
Tres (03) tornillos de 4.1 mm
-
Tres (03) tornillos de 1.9 mm
-
-
-
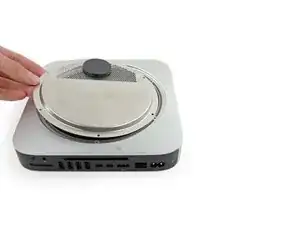
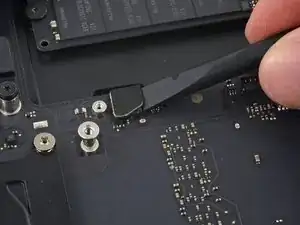
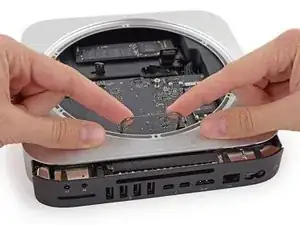
Con los puertos mirando hacia tí, levanta el lado izquierdo de la placa y voltéalo hacia la derecha para acceder al conector del cable.
-
-
-
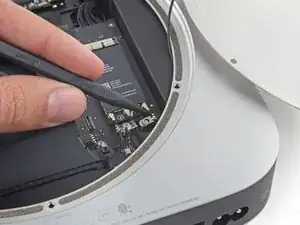
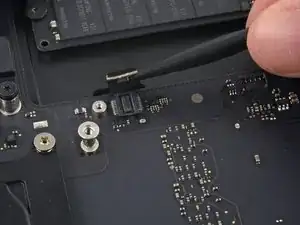
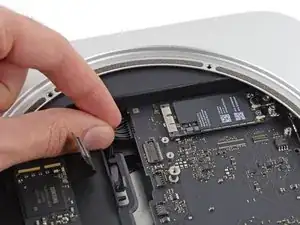
Usando la punta de un spudger (palanca de plástico) levanta el conector de la antena del zócalo de la placa Airport.
-
-
-
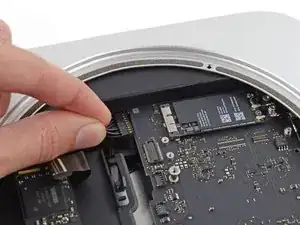
Con mucho cuidado, extrae el cable de la antena por el espacio que hay entre la fuente de alimentación y la carcasa.
-
-
-
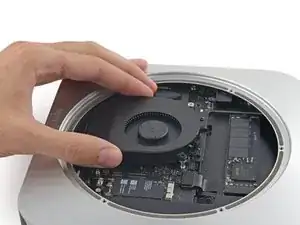
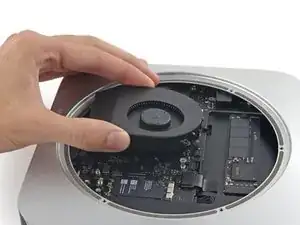
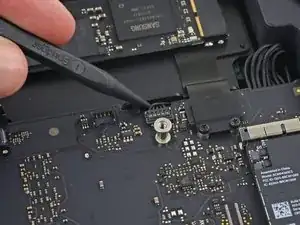
Retira los dos tornillos T6 de 12 mm del ventilador.
-
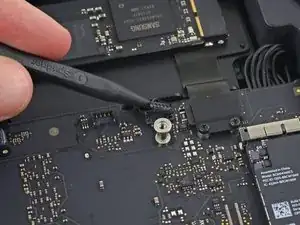
Afloja el tornillo cautivo T6 de 27 mm.
-
-
-
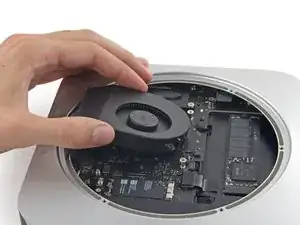
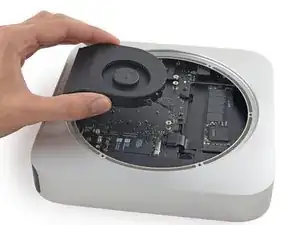
Levanta el ventilador hacia arriba para liberar el tornillo cautivo de su orificio en la placa lógica.
-
Aleja el ventilador del SSD hasta que pueda acceder fácilmente al conector del ventilador.
-
-
-
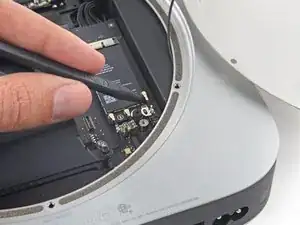
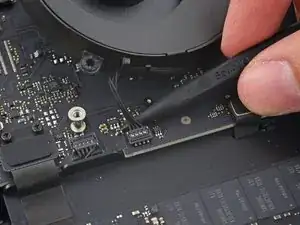
Usa la punta de un spudger para levantar el conector del ventilador y sacarlo de su zócalo en la placa lógica.
-
-
-
Usa el extremo plano de un spudger para levantar el conector del cable SATA de su zócalo en la placa lógica.
-
-
-
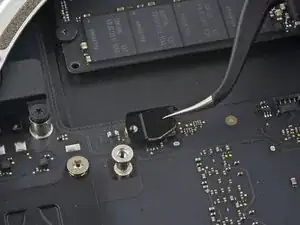
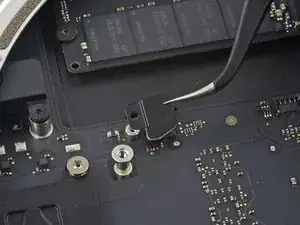
Usa la punta de un spudger para desconectar el conector del cable del sensor de infrarrojos levantándolo directamente de su zócalo.
-
-
-
Los siguientes tres pasos solo se aplican a las minis Mac equipadas con un SSD PCIe. Omita los siguientes tres pasos si su Mac mini solo tiene un disco duro.
-
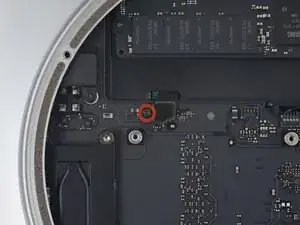
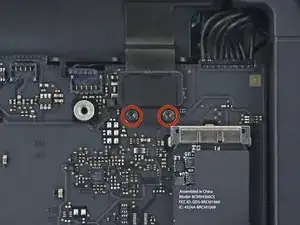
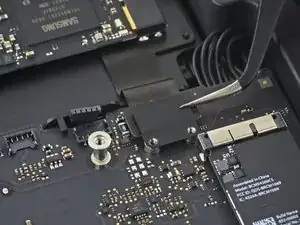
Retira los dos tornillos T6 de 2.6 mm que sujetan el soporte del cable SSD PCIe.
-
-
-
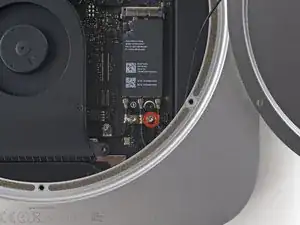
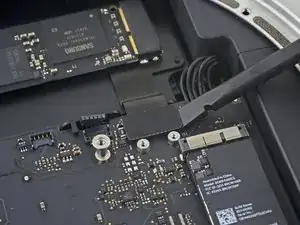
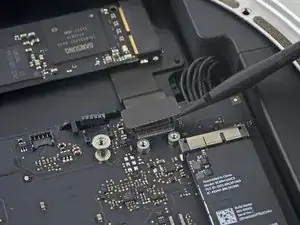
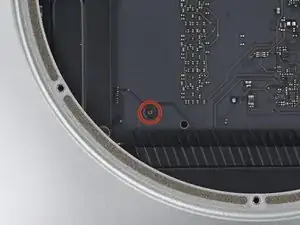
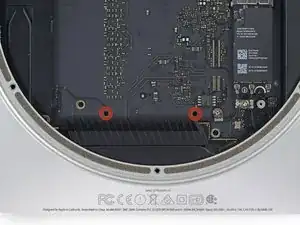
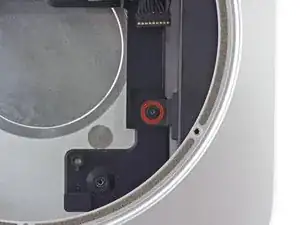
Inserta la herramienta de extracción de la placa base del Mac minien los dos orificios resaltados en rojo. Asegúrate de que las varillas entren en contacto con la caja debajo de la placa lógica antes de continuar.
-
-
-
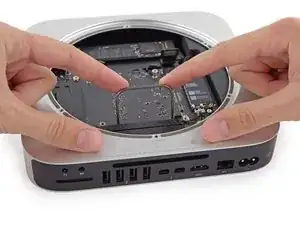
Tira con cuidado de la herramienta hacia la placa de E/S. La placa lógica y el conjunto de la placa de E/S deben deslizarse ligeramente hacia afuera de la caja exterior.
-
Deja de hacer palanca cuando la herramienta de extracción haga contacto con la abertura de la caja trasera.
-
-
-
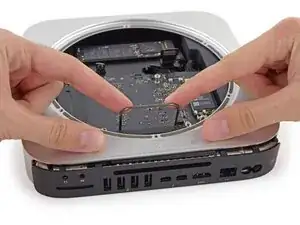
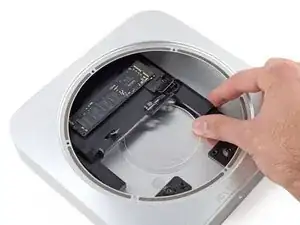
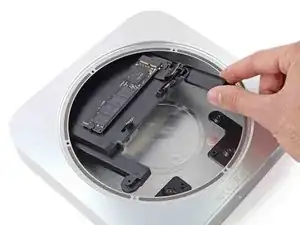
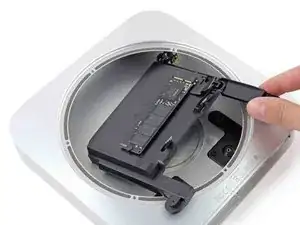
Desliza con cuidado el conjunto de la placa lógica fuera de la Mac mini, teniendo en cuenta los cables que puedan quedar atrapados.
-
-
-
Usa unas pinzas o tus dedos para retirar el clip lejos del zocalo de entrada de AC, y remuévelo de la Mac mini.
-
-
-
Para sacar la fuente de alimentación de la carcasa, toma el conector de entrada de CA, que actúa como una pestaña.
-
Rota el conector de CA 90 grados en sentido contrario del sentido del reloj.
-
-
-
Desliza la fuente de alimentación fuera de la Mini, teniendo en cuenta los cables que puedan quedar trabados.
-
-
-
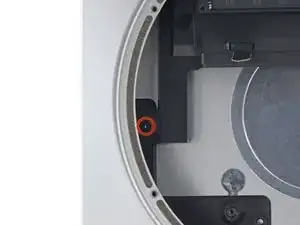
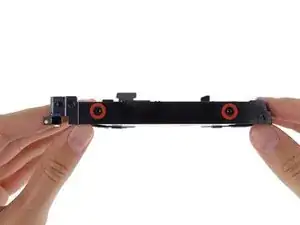
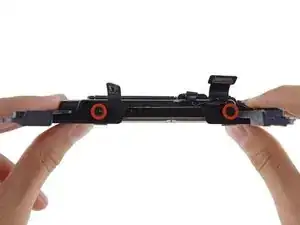
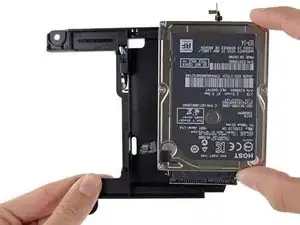
Retire los cuatro (dos en cada lado) tornillos T8 de 6,5 mm que sujetan el disco duro a la bandeja de la unidad.
-
-
-
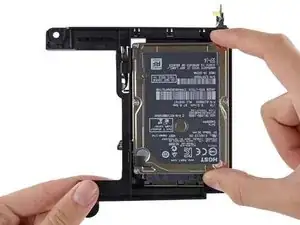
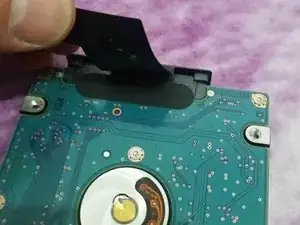
Levante el cable de cinta y retire con cuidado la cinta negra que se encuentra debajo. Asegura el conector del cable SATA a la PCB del disco duro. Si no retira la cinta, es casi seguro que los contactos soldados al cable flexible se desprendan de la carcasa del conector, ya que la fuerza de retención de los contactos en la carcasa es bastante baja.
-
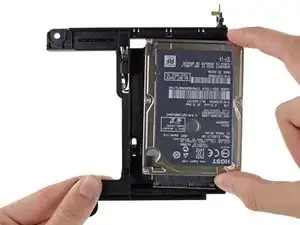
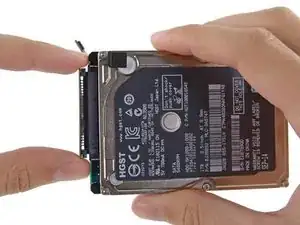
Tire del conector del cable SATA directamente del disco duro.
-
Retire con cuidado las dos almohadillas adhesivas negras (una visible en la imagen) del disco duro y péguelas en su nuevo disco duro en las mismas ubicaciones.
-


Para volver a armar su dispositivo, siga estas instrucciones en orden inverso.

220 comentarios
Hello, the following hard drive goes on the Mac Mini ??
no problem. but if you can get a evo 850 or a pro for the 2014 is better
All in all, this was a fairly terrifying process, however this guide was a massive help! Thankyou!!
geeksix -
This is exactly the reason I purchased their tools. They offer these guides which have helped me save several of my computers and a couple of my phones over the years. The $70 was a small price to pay for the help and I love the tools.
Ordered kit which arrived very quickly from Germany to UK. Only problem with taking it apart was with the IR sensor was difficult to lift up and I ended up pulling the whole fitting off glued it back on but now have no working IR sensor or front light but everything else works fine. Swapped SLOW HDD for SSD and now my Mac MIni is flying.
Andrew -
Read Me First: I purchased an SSD drive directly from Crucial and, of course, it came uninitialized. After going thru the entire tear down, installing the new drive, and rebuilding the mini, it refused to recognize the new drive. So, of course, I had to re-tear it down, remove the new drive, insert it into an external housing and format it using my Macbook. After that the mini recognized the new drive. A word to the wise: format the new drive before installing it.
tom -
How were you installing the OS? I am planning on booting into a USB drive with a copy of OS High Sierra on it, and I assume I will be able to format my new Samsung SSD using that?
Simon -
On my Samsung EVO 850, mac mini download system automaticly
Stefan Repac -
Pre-formatting is not necessary if you make a USB boot installation drive with macOS installer. During boot up, hold down the option key until the mac boot into the USB, formatting can then be done using disk utility running off the USB drive.
SBR249 -
I had the exact same experience as tom. I installed a brand new 2TB Samsung 850 EVO and it was not recognized by the Mac Mini. I booted from a portable USB drive with a bootable copy of macOS High Sierra but the 850 EVO SSD I had just installed was not shown as an option. I tore down the Mac Mini again, formatted the 850 EVO, rebuilt the Mac Mini, and booted off the same bootable High Sierra USB drive, and sure enough the 850 EVO was recognized.
maxim -
diskutil list
diskutil erasedisk [filesystem] [drivename] /dev/disk[disk number]
Paul Rodgers -
My drive (Evo 860) was also not initialized. I started in recovery mode and went to disc utility and from there selected the drive. I then was able to use the “erase” function on the drive. I just left the settings as default and as soon as it erased then the drive was ready to go.
Nathan Cooper -
Just completed this upgrade a few days ago, having purchased the 1 TB SSD kit from IFixIt. The kit arrived quickly and the tools and drive worked perfectly. The step by step guide posted here is pretty much flawless, but do pay attention to the specific comments from users on certain steps - they really help. As far as ensuring that the new drive will reboot and install MacOS, I watched 1-2 videos on YouTube about re-installing using the Internet Recovery tool and that worked perfectly. My MacMini is performing WAY better than it used to, for only a $200 upgrade kit and about 3 hours of work, all in. Thanks!
Joshua Rednik -
I’ve had Apple computers since the G3 machines and they have always been snappy.
Unfortunately this 2014 macmini has always been slow but this upgrade (6 years later) has changed that!
if you have a late 2014 macmini, do this.
I used a 860 Samsung.
Mike Hayes -
A quick comment to tell you that at every step, make sure to read the comments and be careful. I managed to do the process fast without any problems, but thanks to the comments that warned me enough on the risky steps.
Euronymous -
This guide surely helped me breath upgrade and bring some new life into my macmini. Thanks to all who contributed.
Cameron Hasell -
can one of you give me the link for the screw drivers please?
Gerardo Ramirez -