Introducción

Sigue esta guía para reemplazar el disco duro de tu iMac. Reemplazar el disco duro requiere separar la pantalla y mover el altavoz izquierdo.

Esta guía también incluye pasos para actualizar el disco duro de tu iMac con un SSD. Describe cómo instalar el sensor de temperatura de la SSD para que los ventiladores de la Mac funcionen a la velocidad correcta.

Antes de comenzar cualquier trabajo en tu iMac: Desenchufa la computadora y mantén presionado el botón de encendido durante diez segundos para descargar los condensadores de la fuente de alimentación.

Ten mucho cuidado de no tocar los cables del condensador o cualquier unión de soldadura expuesta en la parte posterior de la fuente de alimentación.
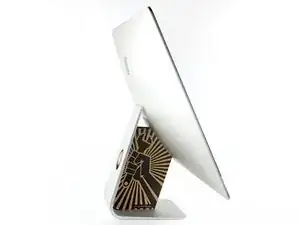
  1. qvnTkhMj1Khcw1SW

    What’s the point of this? You run the wheel around the outside, and then you lay it down anyway to pull the glass and do the rest. The wedge is not needed.

    ebay -

    I have a story to tell about this teardown. It all went wonderfully well until after I completed the process and attempted to format my new SSD drive only to discovery that the capacity of the drive was 256GB… not the 2TB I was sure I had ordered. iFixit was very supportive and helpful in sending me a new set of sticky tape strips and and RMA to return the SSD and some of the other parts.

    I finally had received my new set of strips and the 2TB SSD…. I figured, piece of cake… I already know how to do this… but I watched the video again and started following the teardown…

    …apparently the new sticky tape strips was way more powerful that the original tape and while using the pizza cutter tool and not advancing much, I proceeded to use one of the iFixit credit card style wedges…. I now have 2 pretty severe cracks on the glass of my display, which as clearly explained by @mayer can only be replaced by an entire display… which runs at about $500. Cosmetically it looks horrible, but it works… for now.

    Erich Hentschel -

  2. KHov5rIJNDb1qRAi
    KHov5rIJNDb1qRAi
    WWstOTxbT6Mg4GMZ
    ea1NVoLORufoKsnn
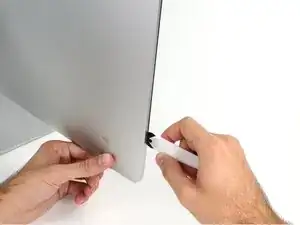
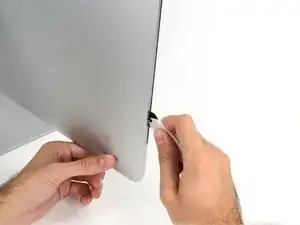
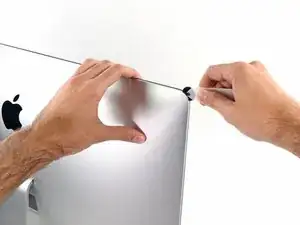
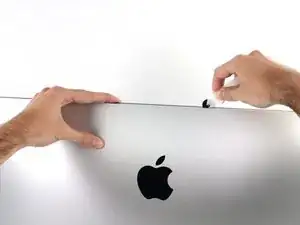
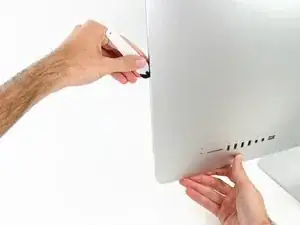
    • Comenzando a la izquierda de la pantalla, cerca del botón de encendido, inserte la herramienta de apertura de la iMac en el hueco entre el panel de cristal y la carcasa posterior.

    • El encaje de la herramienta de apertura de la iMac evitará que empujes la rueda demasiado hacia adentro. Si utilizas otra herramienta, no la insertas más de 9.5 mm (3/8") en la pantalla. Corres el riesgo de cortar los cables de la antena y causar daños graves si insertas la herramienta demasiado lejos.

    Should you run a hair dryer along the edges first?

    Al Val -

  3. q3CZ1tidMXlcgoIQ
    q3CZ1tidMXlcgoIQ
    rHnjd1yBayLNqTtN
    KTtVR5DtVkPVYd4Y
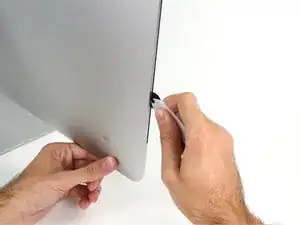
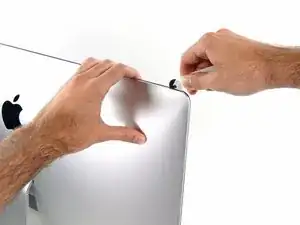
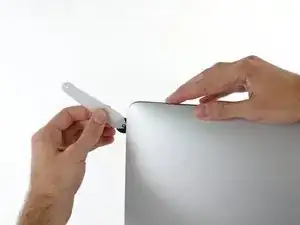
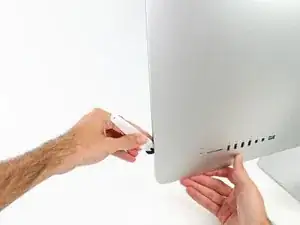
    • Usa la herramienta como un cortador de pizza, pásala por el hueco y cortará el adhesivo de espuma por el centro.

    • Asegúrate de empujar siempre con el mango detrás de la rueda de corte. Si tiras, la rueda podría salirse del mango.

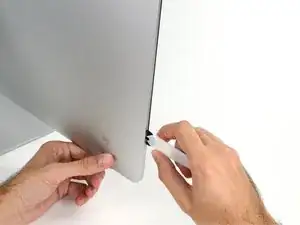
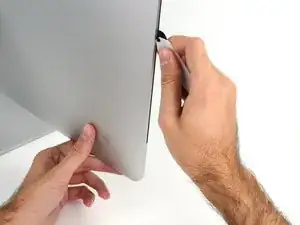
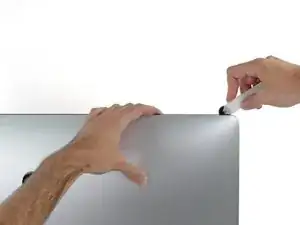
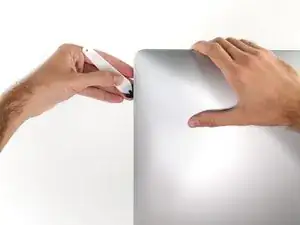
    • Pasa la herramienta por el lado izquierdo de la pantalla.

  4. DL3Vsl22hJBiEQUC
    DL3Vsl22hJBiEQUC
    I1sSvQIKZKIxUJQP
    ZqrgUXS1FMYYPMSS
    • Continúa rodando al herramienta alrededor de la esquina superior izquierda.

  5. uIQeQKO2wRSFOchP
    uIQeQKO2wRSFOchP
    gvmN6noZV1RF3Jja
    • Corta el adhesivo a lo largo de la parte superior izquierda de la pantalla.

  6. ZbtM1gnKNMLvApGO
    ZbtM1gnKNMLvApGO
    xGLHuViOG6iiZRHR
    • Continúa a lo largo de la parte superior de la pantalla.

    • Puede que quieras pasar la herramienta de un lado a otro a través de lo que ya has cortado unas cuantas veces, para asegurarte de que consigues separar tanto del adhesivo como sea posible.

  7. PsXMW5CoXDyhXHAM
    PsXMW5CoXDyhXHAM
    JAULK1Cx3kdL1sMN
    vXTTvMMJZXJmbkPC
    • Empuja la herramienta a lo largo de la esquina superior derecha de la pantalla.

  8. HdQnP2Gt2blNM1Na
    HdQnP2Gt2blNM1Na
    HtXaMYaxdshMTDgI
    • Baja la herramienta a lo largo de la parte derecha de la pantalla.

  9. kSSS26DZATfnLk3Q
    kSSS26DZATfnLk3Q
    SyVUroLGO1X5mAkC
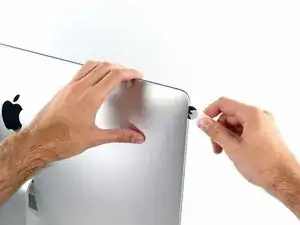
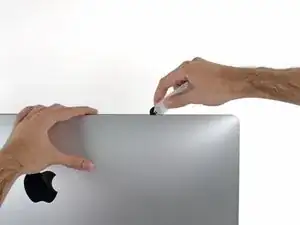
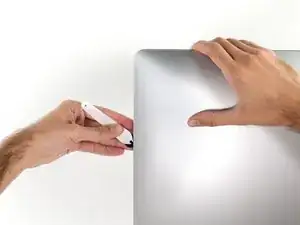
    • Termina de empujar la herramienta de apertura a la parte inferior del lado derecho de la pantalla.

    • En este punto, querrás volver a pasar la herramienta por toda la pantalla, para asegurarte de que cortas la mayor cantidad de adhesivo posible.

  10. vGGIOBrvwJMnSBdS
    vGGIOBrvwJMnSBdS
    jobdKF3VfjwEEE6o
    kXQQFeUFGZvmMM5y
    • Aunque la herramienta de apertura hizo la mayor parte del trabajo, la pantalla seguirá estando ligeramente adherida a la caja. Será necesaria una tarjeta de plástico para liberar lo que queda de este adhesivo.

    • Coloca laiMac boca arriba sobre una mesa.

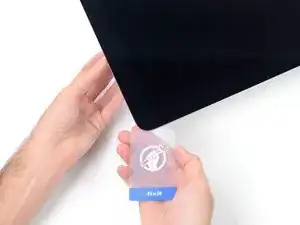
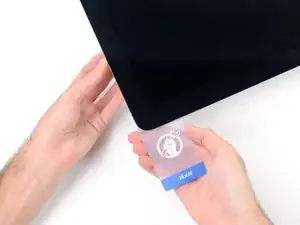
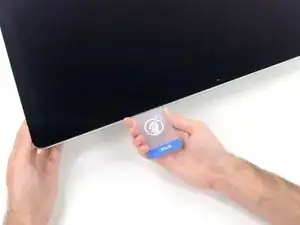
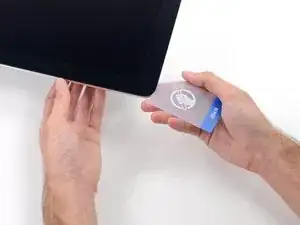
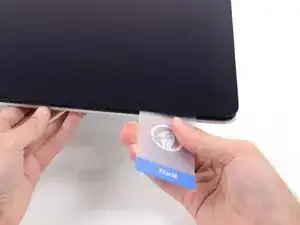
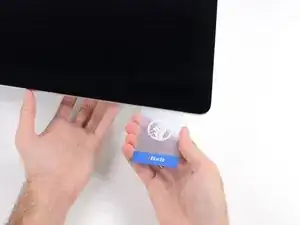
    • Empezando por la esquina superior derecha del iMac, inserta una tarjeta de plástico entre la pantalla y el marco.

    • Ten cuidado de no insertarla más de 9.5 mm o podrías dañar los componentes internos.

  11. ut5JD6JtjXxJqQML
    ut5JD6JtjXxJqQML
    PAssQDYLvD2G5iO3
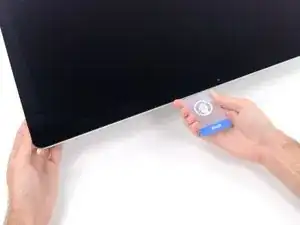
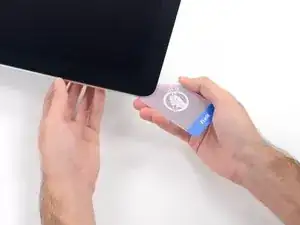
    • Gira suavemente la tarjeta de plástico para abrir el espacio entre la pantalla y el marco, y corte cualquier adhesivo restante cerca de la esquina.

    • Usar demasiada fuerza romperá el cristal. Trabaja con cuidado, y no intentes crear un espacio más grande que unos 6 mm.

  12. NNcaKcnyNAISxxiX
    NNcaKcnyNAISxxiX
    j6rG1dfuABOu2dO1
    nJGOGJvmpMQJkiQj
    • Asegúrate de dejar de cortar antes de la cámara iSight en este paso, o podrías dañarla.

    • Desliza la tarjeta hacia el centro de la pantalla, para cortar cualquier adhesivo restante.

  13. YS6FqSpRAiDQG4GQ
    YS6FqSpRAiDQG4GQ
    WqsOKXvG5huAPhKo
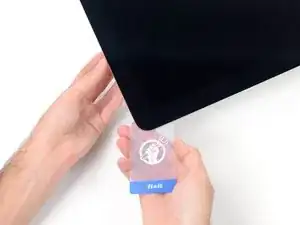
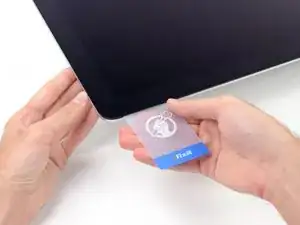
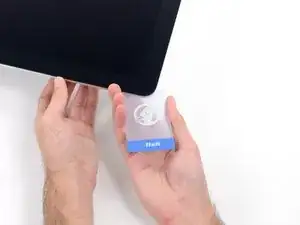
    • Pon la tarjeta en la esquina de nuevo y deje que se quede ahí para evitar que el adhesivo se reajuste.

  14. 21PJZCMtdxPdvyWG
    21PJZCMtdxPdvyWG
    21su2lVZdmdMqNFj
    NVhkQUfEdwlSkUcY
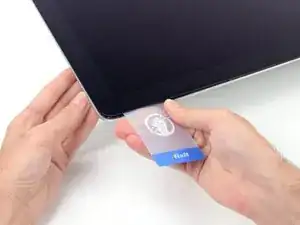
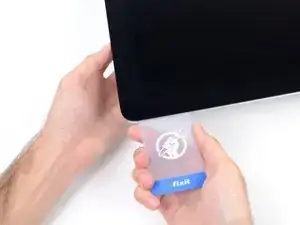
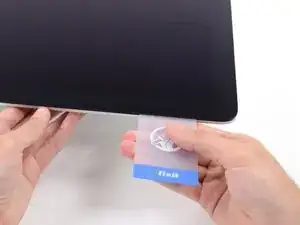
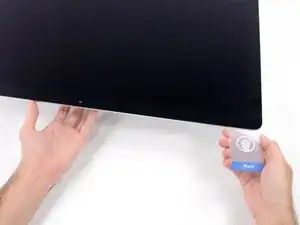
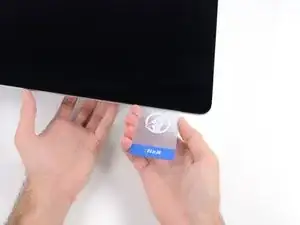
    • Inserta una segunda tarjeta en el espacio entre la pantalla y el marco en la esquina superior izquierda.

  15. e3ydZGUAg4tGPxpq
    e3ydZGUAg4tGPxpq
    4asZcENj1YWTTAaQ
    • Gira suavemente la tarjeta, aumentando ligeramente el espacio entre la pantalla y el marco.

    • Al igual que con el otro lado, muévete lentamente para permitir que el adhesivo se rompa, y ten cuidado de no sobrecargar el vidrio de la pantalla.

  16. saNDXDREhnqVr5IH
    saNDXDREhnqVr5IH
    yUMykLfSY4dkyBvj
    35ISowkckhE1MThI
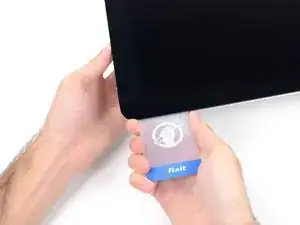
    • Desliza la tarjeta plástica hacia el centro, deteniéndote de nuevo justo antes de la cámara iSight.

  17. Y1GSYcC32e6ll2cv
    Y1GSYcC32e6ll2cv
    swIMklGvuLiQZHEA
    • Inserta la tarjeta de plástico en la esquina superior izquierda

  18. CTHcNsvR2JSpycOK
    CTHcNsvR2JSpycOK
    DkPAlq1IRaSXjP41
    2lBkebhXZXHQfJx5
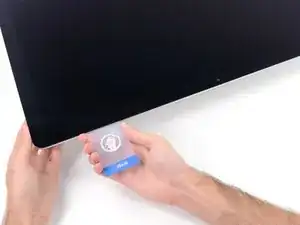
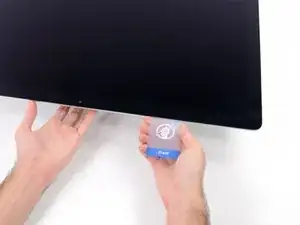
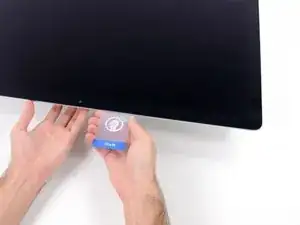
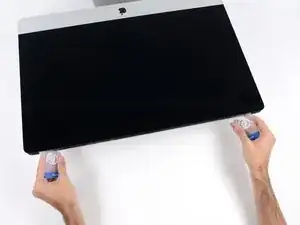
    • Con las tarjetas insertadas como se muestra cerca de las esquinas, gire suavemente las tarjetas para aumentar el espacio entre la pantalla y la caja.

    • Si hay alguna sección que parece pegarse y no se separa, deje de retorcer y usa una de las tarjetas para cortar el adhesivo en el área del problema.

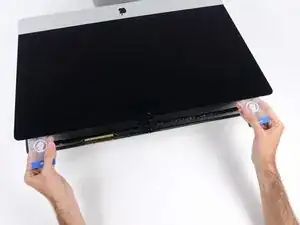
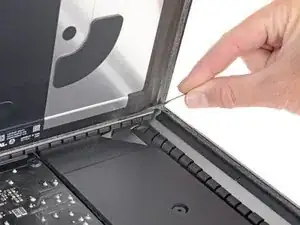
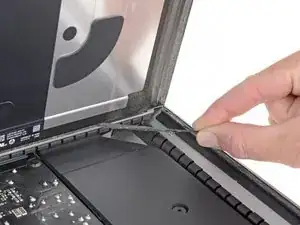
    • Comienza a levantar la parte superior de la pantalla del marco.

    • Levanta la pantalla sólo unos centímetros, ya que aún está unida a la iMac por cables de datos y de alimentación.

  19. Q2TfC5UwSkEOSikR
    Q2TfC5UwSkEOSikR
    MTrFTqNJOBVdqV4H
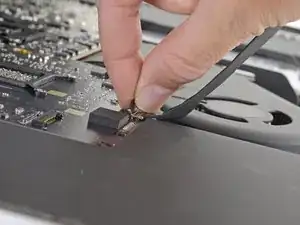
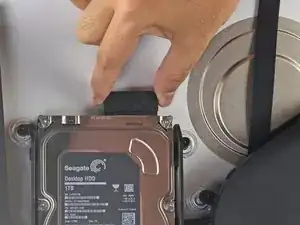
    • Mientras sostienes la pantalla con una mano, use la otra para desenchufar el cable de alimentación de la pantalla.

    • Levanta la pantalla lo suficiente para tener fácil acceso a las conexiones, pero no tanto como para estirar los cables y tensar sus conexiones (aproximadamente 8").

    Der Stecker muss seitlich wie die meisten anderen Stecker in diesem Modell komprimiert werden, um ihn aus der Buchse auf dem Logicboard zu ziehen. Die Zugrichtung ist parallel zum Logicboard in Richtung Oberkante des iMac. Ziehen ohne seitliches Zusammendrücken der Backen am Stecker könnte den Stecker oder die Buchse beschädigen.

    Ernest Bumblebee -

    These instructions are unclear. They imply the cable can just be pulled out but this step had me stuck for a bit. Searching the webs, I discovered that there are little tabs on either side of the connector. I used my prod tool and poked one side and the connector came out a little. I poked the other side the connector came out without a fight.

    Peter Akey -

    The instruction for this step state this but I was still not expecting two cables. Finally figured out there is a Display Power and a separate Display Data cable.

    wsrb -

  20. PLwxTC26uh2GhoR5
    PLwxTC26uh2GhoR5
    jrJVRXjytJ522PLN
    r2qVa6WfDjnC3vLQ
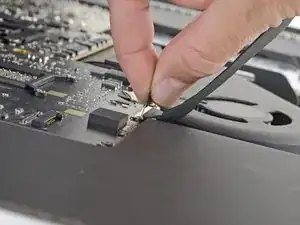
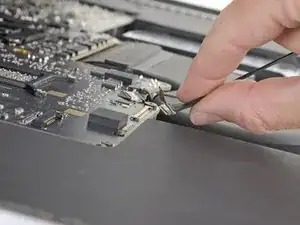
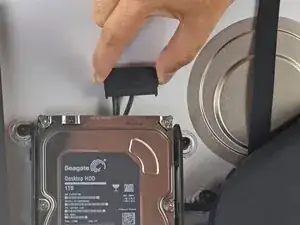
    • Levanta el soporte metálico de retención del cable de datos de la pantalla.

    • Desconecta el cable de datos de la pantalla.

    • Esta es una conexión delicada que puede romperse fácilmente. Asegúrate de sacar el conector del cable de datos de la pantalla directamente de su zócalo, hacia la parte superior de la iMac.

  21. OukCaMppueWJwd5o
    OukCaMppueWJwd5o
    EuGUiTLe2sAHCQxO
    • Levanta la pantalla hasta una posición casi vertical.

    • En este punto todavía hay una tira de adhesivo a lo largo de la parte inferior de la pantalla que sostendrá la pantalla al marco como una bisagra. Puedes aflojar este adhesivo trabajando la pantalla hacia arriba y hacia abajo unas cuantas veces.

    After rocking the display back and forth a bit, I found it helpful to use my iMac opening tool to gently slide ever so slightly underneath the bottom of the glass to cut the adhesive. This was with the display lowered back into it its normal position. I just worked about 1 millimetre deep at a time and eventually cut through the ~8” adhesive strip at the bottom centre.

    Henry Rose -

  22. ObipUvMrOdU6OUwe
    ObipUvMrOdU6OUwe
    dLOfRlONnG5YXXrL
    UjMBTMMcp2AMhUyw
    • Ten mucho cuidado de no tocar los cables del condensador o cualquier unión soldada expuesta en la parte posterior de la fuente de alimentación (en la caja en rojo).

    • Agarra la pequeña pestaña al final de una de las tiras adhesivas de la pantalla del borde inferior y tira del adhesivo hacia la parte superior de la iMac para quitarlo.

    • Repite este paso con la otra tira adhesiva y quítala.

    • Si alguna de las tiras adhesivas se rompe antes de retirarla, usa una tarjeta plástica para cortar el adhesivo restante.

  23. fTayOtWEDOrUUstD
    fTayOtWEDOrUUstD
    mU65ktCEPdrocgSE
    TAnlppXI4q4GQblK
    • Ten mucho cuidado al manejar la pantalla, es grande, pesada y está hecha de vidrio. La pantalla tiene bordes frágiles. Evita levantar la pantalla por las esquinas.

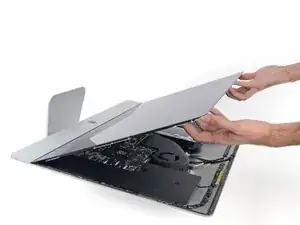
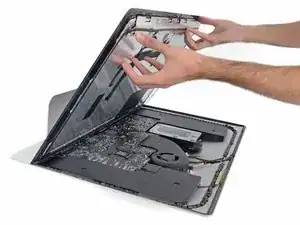
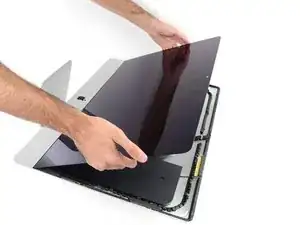
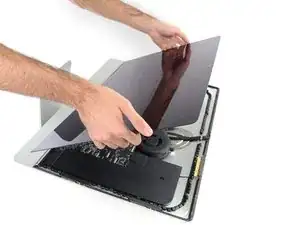
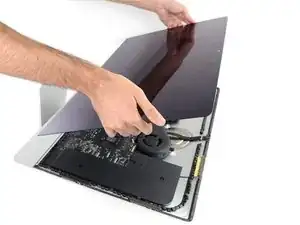
    • Levanta la pantalla del marco y sácala del iMac. Coloca la pantalla boca abajo sobre una superficie plana y suave.

    • Puede que sea necesario levantarla lentamente por un lado, para despegar el adhesivo restante.

    • Después de cortar el adhesivo, no se puede utilizar para volver a sellar la pantalla en su lugar. Sigue esta guía cuando termine la reparación para reemplazar las tiras adhesivas que fijan la pantalla a la carcasa trasera.

  24. e2SQbENy6wul345Z
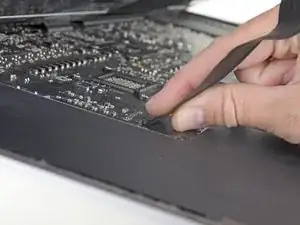
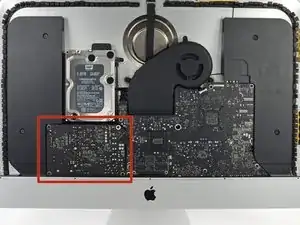
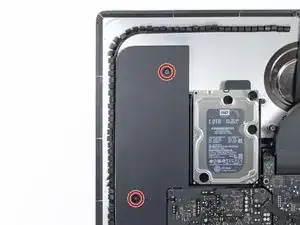
    • Usa un destornillador T10 para remover los dos tornillos de 10 mm que sujetan el altavoz izquierdo.

  25. gKDsSsIWR4f4QgCp
    gKDsSsIWR4f4QgCp
    q3ZAsbgkhQTmAtIL
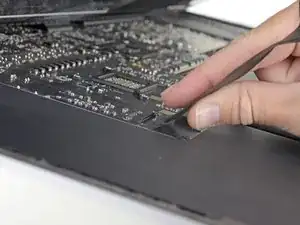
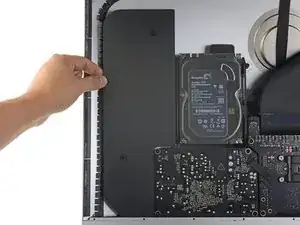
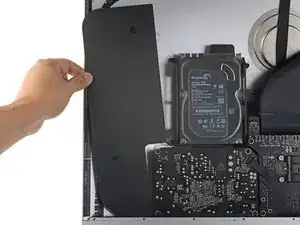
    • Desplaza el altavoz izquierdo aflojado hacia la izquierda, lo suficiente para descubrir los tornillos del soporte del disco duro.

  26. POLboPSR6wDCQOrL
    POLboPSR6wDCQOrL
    AuX1HgDZFljPrFOA
    • Tira directamente del cable combinado SATA para desconectarlo de la unidad.

    Where can I purchase this cable if my iMac only came with the m.2 SSD?

    Julien Dal Col -

  27. WtNqEsuv3qXHIWhA
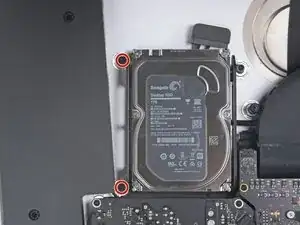
    • Utiliza un destornillador T8 para quitar los dos tornillos de 7.3 mm que fijan el soporte izquierdo del disco duro a la carcasa trasera.

    they are T9 for 2012.

    sean_gizzle -

  28. 46GMbQrdWuRMOhBW
    46GMbQrdWuRMOhBW
    pWdfnFTdXvxQueB4
    rD6ULDdslihryxhY
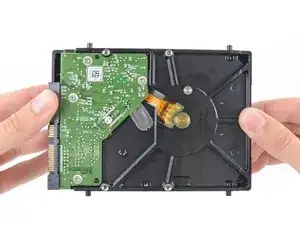
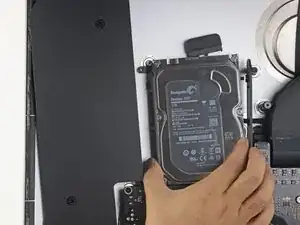
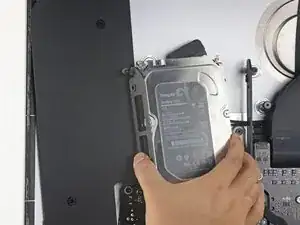
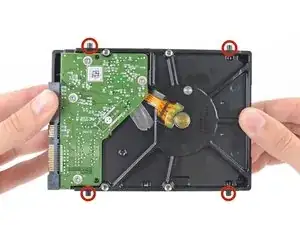
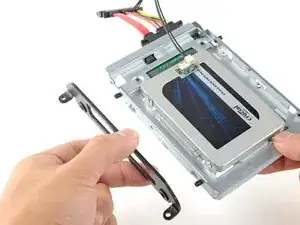
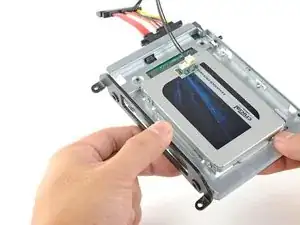
    • Agarra el disco duro y deja el soporte del disco duro junto.

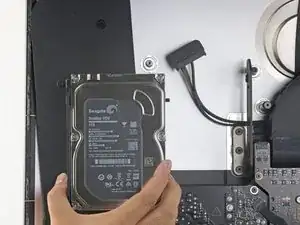
    • Inclina el lado izquierdo alejándolo de la caja trasera, y desliza el ensamblaje hacia la izquierda.

    • Retira el disco duro y el soporte izquierdo del iMac.

  29. pL5C6Rk6VPJbItnW
    pL5C6Rk6VPJbItnW
    T33jCoZ6yOCtdDi3
    • Remueve el soporte izquierdo del disco duro.

  30. BHci35AvSBmp2sp6
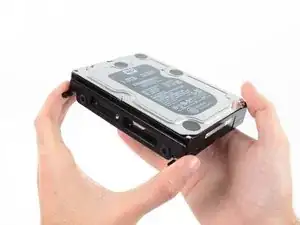
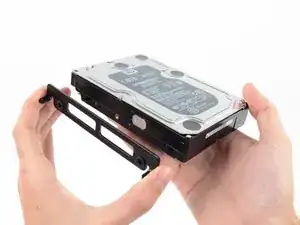
    • Quita los cuatro postes de tornillo T8 de 8.1 mm del disco duro y transfiérelos al receptáculo de la unidad de reemplazo.

    In my case these were T9 screw posts. Late 2012 iMac. They had traces of Loctite on them.

    rsnadd -

  31. HKQbp12ZISQhNfAv
    HKQbp12ZISQhNfAv
    C535jLFwdCXbrulv
    wDWxsjpZCDD5vCjk
    • Sigue los siguientes pasos si vas a sustituir tu disco duro por un kit de SSD.

    • Si la caja de la SSD se parece a la primera imagen, sigue esta guía en su lugar.

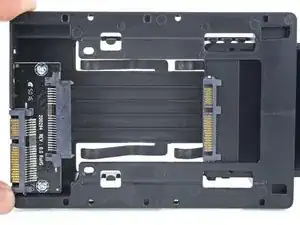
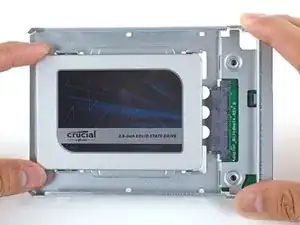
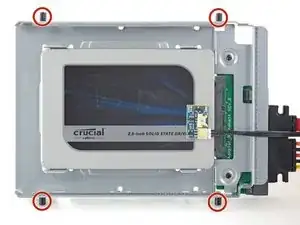
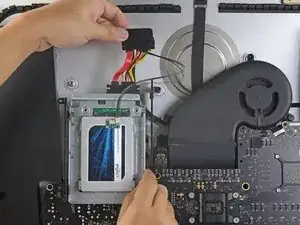
    • Alinea los conectores de la SSD con las tomas de la caja metálica.

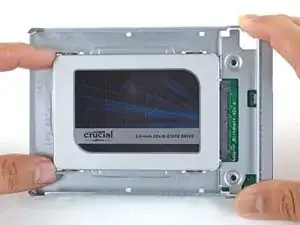
    • Presiona la unidad contra las tomas de la carcasa hasta que la SSD quede firmemente asentada.

    • La SSD se conecta con la carcasa en una sola dirección. Si los conectores no se alinean, gira la SSD e inténtalo de nuevo.

    what if I’m installing a hard drive?

    Troy Garcia -

    Didn’t bother with the SSD caddy. Some 3M sticky pads did the trick!

    James Clive -

    Two thoughts on SSD replacement/upgrade:

    1) It would help if some references were made to help us determine what we need in terms form factors. I’ve never used an SSD and see a 2.5” one that would work, but I don’t know if 2.5” SSDs are different (in form factor) from 2.5” HDs. A lot of us are still learning about SSDs and isn’t that what this site is about? (Learning new things about hardware and using hardware?)

    2) I’m not clear if I definitely need a new temperature sensor if I put in an SSD or if

    Hal Vaughan -

    Can I buy the kit without the SSD. I'm thinking of replacing my 3TB hard drive with a 4TB SSD.

    Also, would you happen to know what the maximum hard drive dimension that can fit inside of this iMac? I may try a 14TB hard drive instead.

    Larry -

  32. FtBOnUuDYZJTjvey
    FtBOnUuDYZJTjvey
    RvVXsqFVNCWuybvj
    UmyFUVECjaDZNRjp
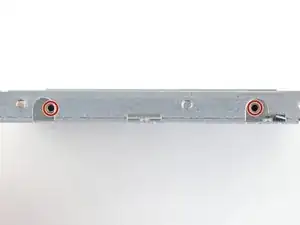
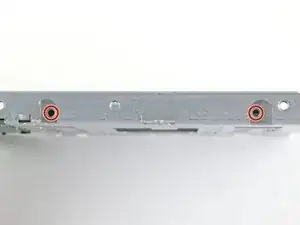
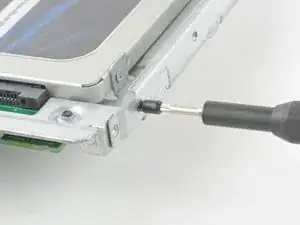
    • Usa un destornillador Phillips para instalar los cuatro tornillos plateados (dos de cada lado) a lo largo de los bordes del SSD para fijarlo a la caja.

  33. quopgXjU6RgRFYYW
    quopgXjU6RgRFYYW
    6FVtDs36uVFQAEUg
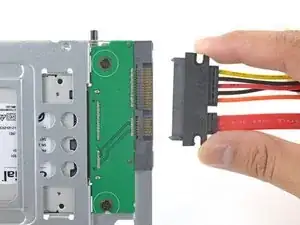
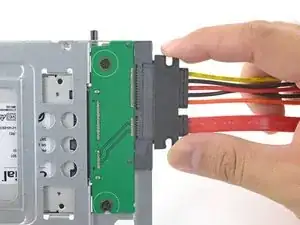
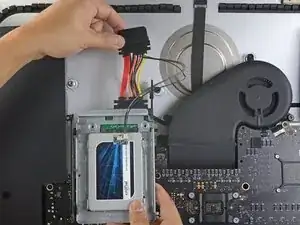
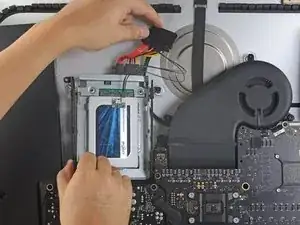
    • Conecta el cable de alimentación SATA habilitado para sensores incluido en el puerto del recinto.

    • El cable está enchavetado para conectarlo en una sola orientación. Si no puedes conectar el cable, gíralo 180° e inténtalo de nuevo.

    Is the thermal sensor needed? I fitted a replacement SSD and it’s all back together and the iMac’s fans are fine. They don’t go into full max speed mode.

    James Clive -

    If you have a problem with the fans, you can always use Macs Fan Control (free) to set the speed. The sensor is not needed.

    maccentric -

  34. nFPHEiNHZQZIIWir
    nFPHEiNHZQZIIWir
    25p6UPH1X2Hpm1ut
    kZJrQ2FKFMAo4eGZ
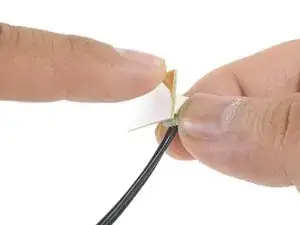
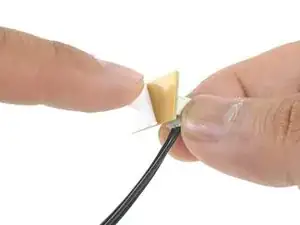
    • Despega el revestimiento blanco de la parte posterior de la pequeña placa del sensor de temperatura para exponer el adhesivo.

    • Pega la placa del sensor de temperatura a una superficie metálica expuesta del SSD, cerca del conector SATA.

    • Dobla los cables del sensor de temperatura sobrantes para que estén fuera del camino mientras instalas la caja.

    Great pics ! Is that “temp sensor board” is already on my HDD IMAC ?? Or must I buy one ?

    kenclark200 -

    Don’t bother with the thermal sensor. I didn’t fit one and the iMac is working fine and no fans are kicking in.

    James Clive -

    Instructions say to attach sensor to the SSD, but all pictures show it being attached to the SSD carrier. This may not represent accurate SSD temp as much of the carrier dissipates the heat absorbed from the SSD

    chris byrne -

    Confirmed, no need for the extra temp sensor on Mid-2015 iMac. (EMC 2806, Mid-2015 27" iMac). Just changed the old 1TB HDD to SSD, no extra fan RPM after power on.

    Laszlo Nyirfa -

    The adhesive on the sensor is very weak. My sensor fell off after a couple of days. Is there a safe glue to use to adhere it to the SSD? Super glue?

    estyle18 -

    FWIW I bought a 4TB Western Digital Blue SSD. The entire case of the SSD is plastic- there is no metal. Hoping the temp sensor adheres to it okay.

    Kupe -

  35. TB3g2BfZthZmgZof
    TB3g2BfZthZmgZof
    UZXpLNW61PfcoLXO
    • Utiliza un destornillador T8 para instalar las clavijas de montaje del viejo disco duro en los lados del recinto.

  36. KBSB2H5m4afo1XQb
    KBSB2H5m4afo1XQb
    yaSlbXuRWxuB6UEm
    • Coloca los soportes de montaje que se hayan retirado del disco duro antiguo en el recinto.

  37. SldWU16exyqkJemL
    SldWU16exyqkJemL
    UjNyOhADTniaGyRe
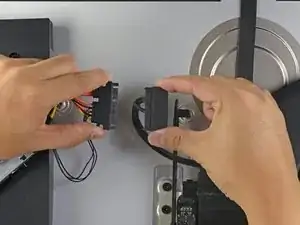
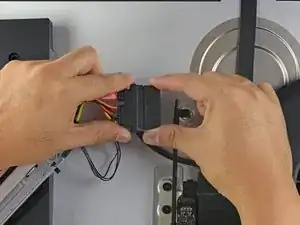
    • Conecta el cable de alimentación SATA del iMac al otro extremo del nuevo cable SATA habilitado para sensores.

  38. YJqasivdZRKDWMjy
    YJqasivdZRKDWMjy
    FI6EqbMtmSvAcIM6
    DpsoNu5h3obcGm6g
    • Las imágenes utilizadas en este paso provienen de una iMac 2017. Sus cables pueden parecer ligeramente diferentes, pero el procedimiento sigue siendo el mismo.

    • Desliza el recinto del SSD en el espacio que ocupaba anteriormente el disco duro.

    • Encamina los cables SATA para que no interfieran con ningún otro componente.

    • Intenta mantener los cables libres de cualquier curva pronunciada, y dirígelos de manera que no queden apretados.

    The SATA cable on my Late 2012 was not long enough to comfortably attach to the end of the temperature sensor array after it was plugged into the new SSD. I had to fold the array and slide it under the SSD and housing. There was much resistance to the folding so I took it slowly to let the wires adjust gradually to the fold so they would not break.

    Bob Enders -

    Unfortunately, the adapter that comes with it isn't long enough to avoid pushing against the screen in the front. One week after upgrading to SSD my screen fell off shattering and breaking the power connector on the systems board. A new screen is ordered but I'm hoping the power connector isn't damaged beyond repair. I'm going to try to adhere the HD adapter to the back inside of the case with 3m adhesive to avoid pressure against the screen.

    Erik Johnson -

    As a newbie, the only other upgrade I have done is to replace my iPhone 7 battery. I had trouble on reassembly.

    This is a great upgrade guide, but it would be important to me to see the reassembly instructions including the cautions.

    For example, I had issues with reattaching the plugs in the phone. I could see having an issue with them here, as well as repositioning the display back into the cabinet.

    I do PCB board repair work and repair pinball machines. But I won’t try this.

    Larry Hamm -

    how do i glue on the new screen? which glue is used?

    Marc Seeh -

    Try 3m double sided tape from Amazon, it available in 3mm width which is ideal for iMac screen. It has a very thin foam and is much better quality than the cheap Chinese kits available on Amazon. You will have to trim it to size with a sharp craft blade as you fit. Don’t risk your screen falling off from using cheap tape in the so called fitting kits!

    Tony Street -

Conclusión

Compara tu nueva pieza de repuesto con la pieza original; es posible que debas transferir los componentes restantes o quitar los respaldos adhesivos de la nueva pieza antes de instalarla.

Para volver a armar tu dispositivo, sigue los pasos anteriores en orden inverso.

Lleva tus desechos electrónicos a un [[E-Waste|centro de reciclaje certificado

¿La reparación no salió según lo planeado? Consulta nuestra Comunidad de respuestas para obtener ayuda para solucionar problemas.

Adam O'Camb

Miembro Desde 11/04/15

179525 Reputación

8 comentarios

Hello, I have an iMac (Retina 5K, 27-inch, 2017) and I would like to change my hard disk, which is a 3.5GHz 1TB Fusion Unit, for an SSD disk, would you recommend doing it? And if so, what reference or brand do you recommend to do it?

Julio Cesar Ortiz Soto -

I can confirm the OWC thermal sensor cable is not needed for HDD to SSD upgrade. I successfully upgraded my 2017 5k iMac fusion drive’s HDD to WD blue 2TB SATA3 ssd without it and the fans speeds don’t ramp up at all. Anyhow thanks for your guides Ifixit on how to DIY. I successfully upgraded my 128gb NVME to a 1TB NVME and to a SATA3 ssd for storage. Transfer speeds are insane and my boot up time now only takes 12 seconds compared to 32 seconds previously. I also upgraded my cpu from the i5-7600k to the i7-7700k. My 2017 5k iMac is blazing fast now. Thanks again ifixit.

Andy C -

Successfully upgraded to a 2TB SSD from the 2TB Fusion drive. As soon as I turned on Bootcamp, the Fusion drive went nuts for a few weeks I think because it prioritized the Windows side onto the SSD and the Mac side onto the spinning drive. It eventually corrected itself but it was a helluva time. And it was time for a fresh hard drive anyway. $500 is much cheaper than a new iMac. Highly recommend this one. This was way easier than my upgrades to the 2009 and to a Mac Mini.

Michael Higdon -

Excellent instructions. The process is straightforward - the only tricky bit is reinstalling the screen accurately. There seems to be some conflicting views on the internet about the best way to do it and which adhesive strips to use - the 2012-2015 strips now seem to be supplied for later models, and they worked fine on my 2017 iMac.

My advice is just to take take it all very steadily and always read one stage ahead before you start on your next stage just to know where you are going next. I installed a 2TB Crucial SSD and the results are very good.

Roland Denning -

i not understand how the temperature sensor work. its connected with three wires on power connector (two negative one positive 5v) i think this powering the sensor. but i not understand how its comunicate with the mainboard the temperature releved.

calecad -

ive been looking for info on the blade drive as wiping a newly installed SSD and installing OS works, but what is best practice for this? what do we use the blade for after, is it just wiped and left redundant? - as for the temp control, just install Macs Fan Control.

Pete Gypps -

i did this but then my imac showed a folder with a question mark on it

Nehemiah Whipple -