
Introducción
Usa esta guía para reemplazar o actualizar tu disco duro.
-
-
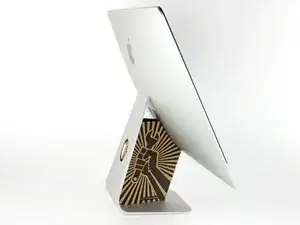
Si estás utilizando la cuña de servicio de cartón iFixit, sigue estas instrucciones de ensamblaje para armarla.
-
-
-
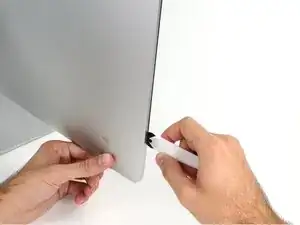
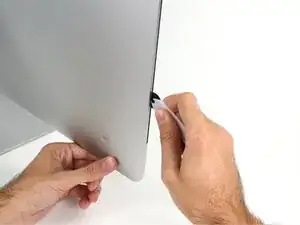
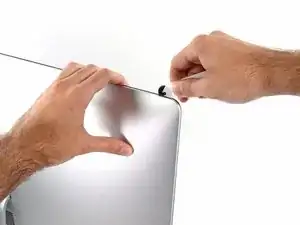
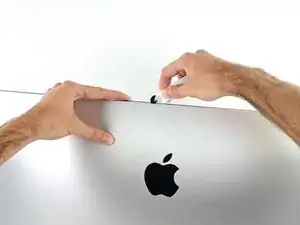
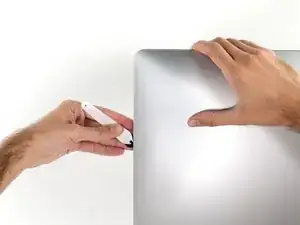
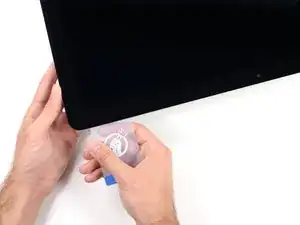
Comenzando a la izquierda de la pantalla, cerca del botón de encendido, inserta la herramienta de apertura de iMac en el espacio entre el panel de vidrio y la carcasa trasera.
-
-
-
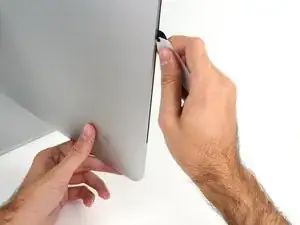
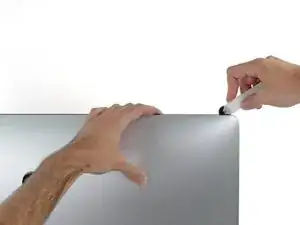
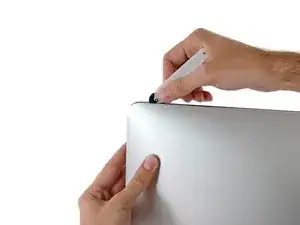
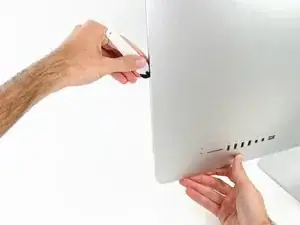
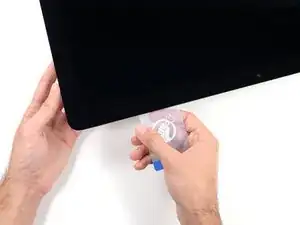
Usa la herramienta como un cortador de pizza: enróllala a través del espacio y cortará el adhesivo de espuma por el centro.
-
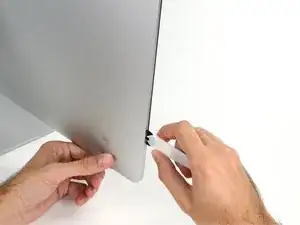
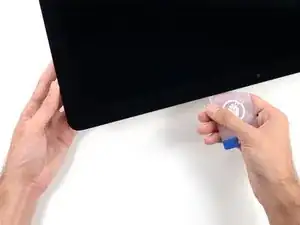
Ejecuta la herramienta hacia arriba a lo largo del lado izquierdo de la pantalla.
-
-
-
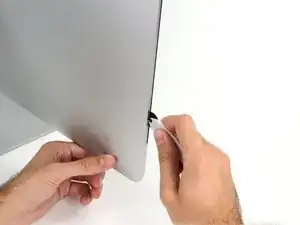
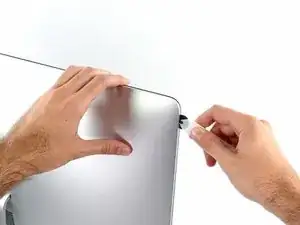
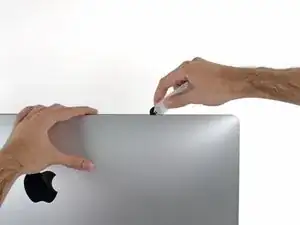
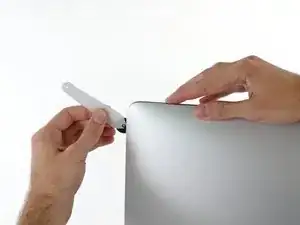
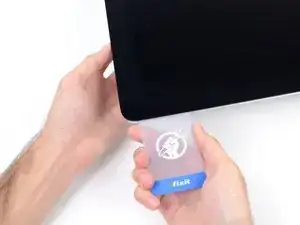
Continúa por la parte superior de la pantalla.
-
Es posible que desees ejecutar la herramienta de un lado a otro a través de lo que ya ha cortado varias veces, para asegurarse de separar la mayor cantidad de adhesivo posible.
-
-
-
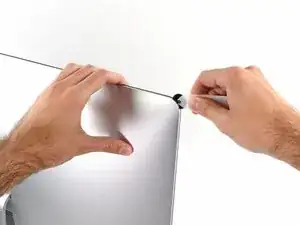
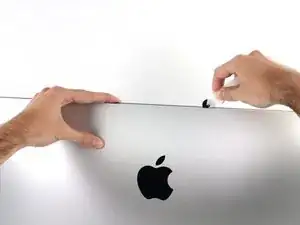
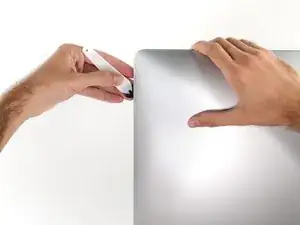
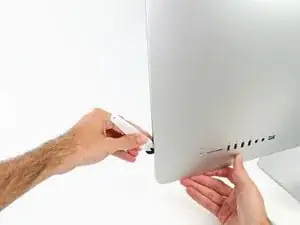
Termina de empujar la herramienta de apertura hacia la parte inferior del lado derecho de la pantalla.
-
-
-
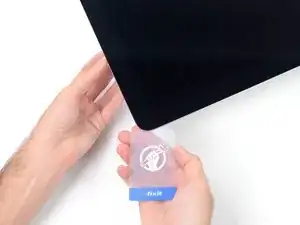
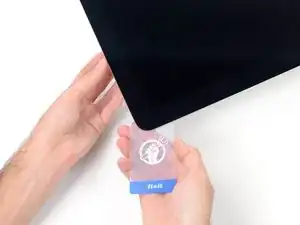
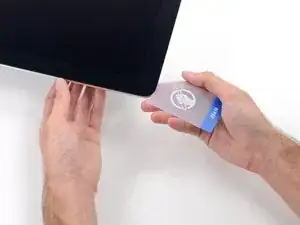
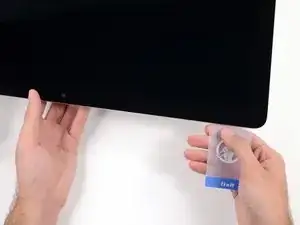
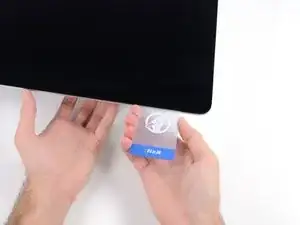
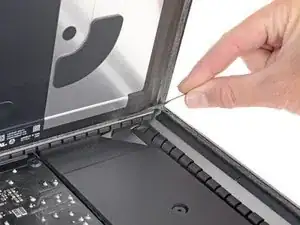
Comenzando desde la esquina superior derecha del iMac, coloca una tarjeta de plástico entre la pantalla y el marco.
-
-
-
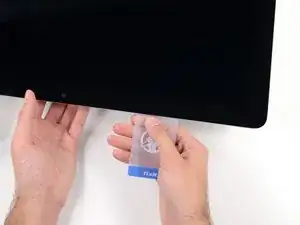
Gira suavemente la tarjeta de plástico hacia los lados para crear un espacio entre la pantalla y el marco.
-
Muévete lentamente y ten cuidado de no estresar demasiado el cristal de la pantalla; solo necesitas hacer un espacio de aproximadamente 1/4 ".
-
-
-
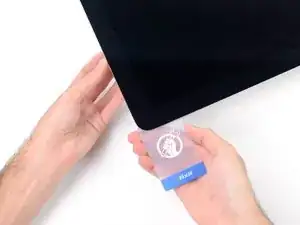
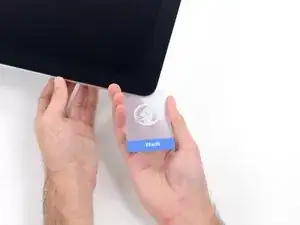
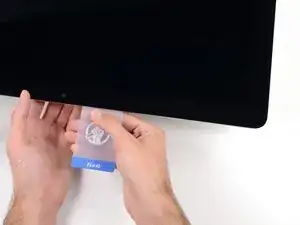
Desliza la tarjeta hacia el centro de la pantalla para cortar el adhesivo restante a lo largo de la esquina superior derecha del iMac.
-
-
-
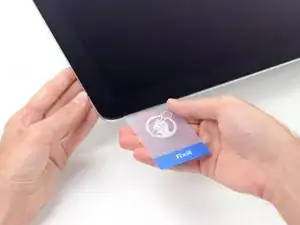
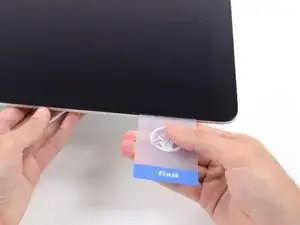
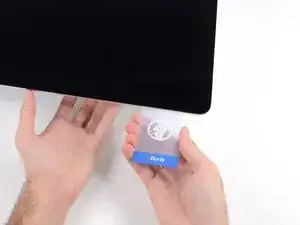
Vuelve a colocar la tarjeta de plástico en la esquina superior derecha y deja que permanezca allí para evitar que el adhesivo se vuelva a colocar.
-
-
-
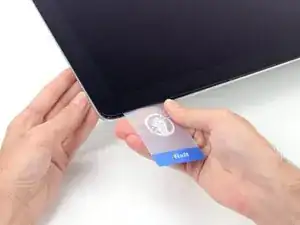
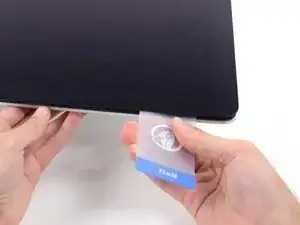
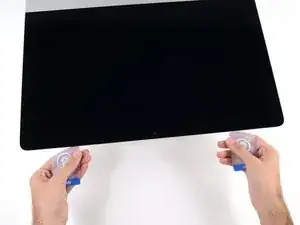
Inserta una segunda tarjeta de plástico en el espacio entre la pantalla y el marco ubicado en la esquina superior izquierda del iMac.
-
-
-
Gira suavemente la tarjeta hacia arriba, aumentando ligeramente el espacio entre la pantalla y el marco.
-
-
-
Desliza la tarjeta de plástico hacia el centro, deteniéndose nuevamente justo antes de la cámara iSight.
-
-
-
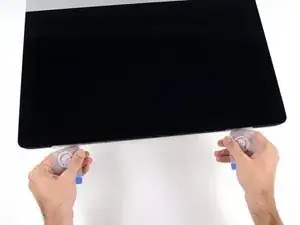
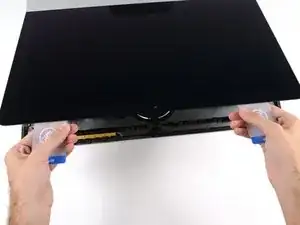
Con ambas tarjetas de plástico insertadas como se muestra cerca de las esquinas, gira suavemente las tarjetas hacia los lados para aumentar el espacio entre la pantalla y la caja.
-
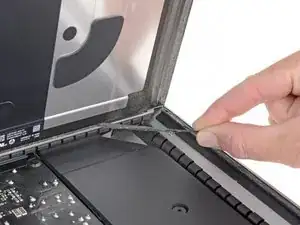
Comienza a levantar la parte superior de la pantalla desde el marco.
-
-
-
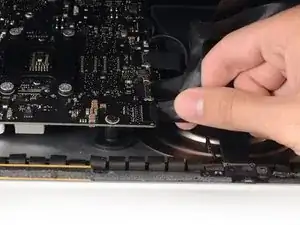
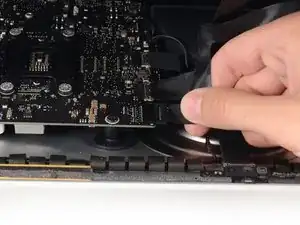
Mientras sostienes la pantalla con una mano, usa la otra mano para desconectar el cable de alimentación de la pantalla. Asegúrate de sacar el cable de la lengüeta de plástico y no tirando de los cables de color.
-
-
-
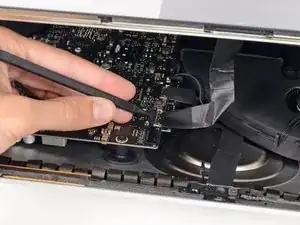
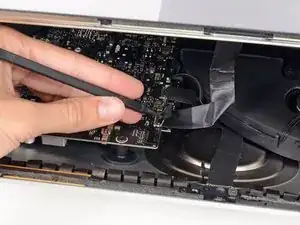
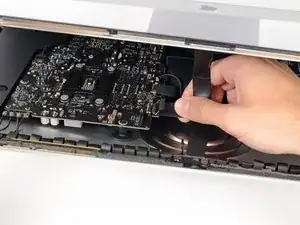
Usa la punta de un spudger para voltear el soporte de retención de metal en el cable de datos de la pantalla.
-
Tira con cuidado del cable de datos de la pantalla de su zócalo en la placa lógica.
-
-
-
Toma la lengüeta pequeña al final de una de las tiras adhesivas de la pantalla del borde inferior y tira del adhesivo hacia la parte superior del iMac para quitarlo.
-
Repite este paso con la otra tira adhesiva y retírala.
-
Si cualquiera de las tiras adhesivas se rompe antes de quitarla, usa una tarjeta de plástico para cortar el adhesivo restante.
-
-
-
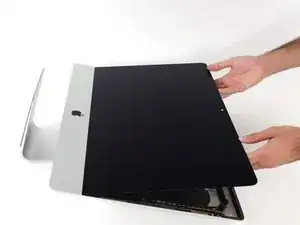
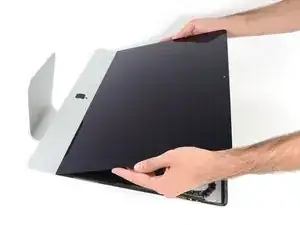
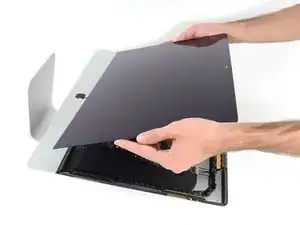
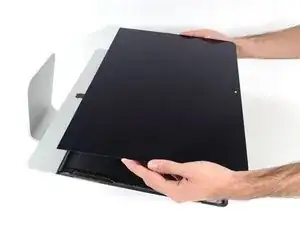
Levanta la pantalla del marco y retírala del iMac.
-
Puede ser necesario levantarlo lentamente de un lado para pelarlo contra el adhesivo restante.
-
Durante el reensamblaje, dirígete a nuestra guía de adhesivos para pantallas para instalar el nuevo adhesivo.
-
-
-
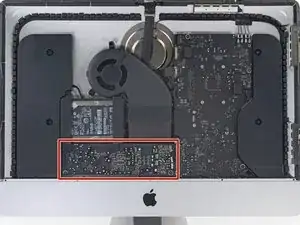
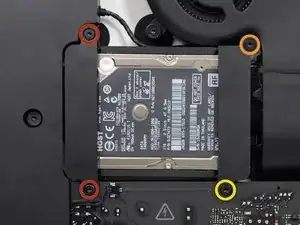
Remueve los siguientes tornillos que aseguran el soporte del disco duro a la carcasa posterior:
-
Dos tornillos Torx T10 de 21 mm de la izquierda.
-
Un tornillo Torx T10 de 9 mm.
-
Un tornillo Torx T10 de 27 mm.
-
-
-
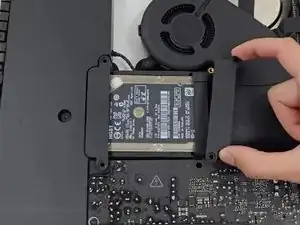
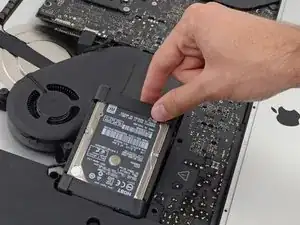
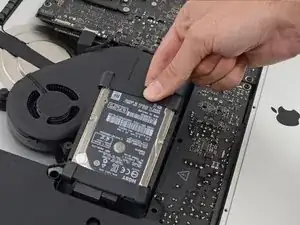
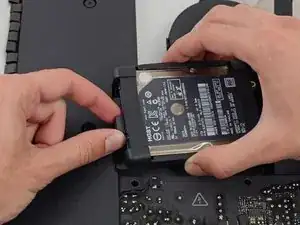
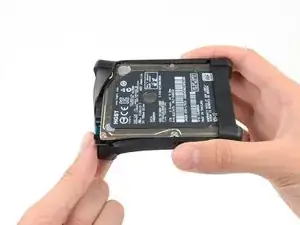
Levanta el disco duro desde el borde más cercano al ventilador y extráelo un poco del hueco.
-
-
-
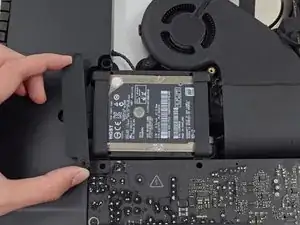
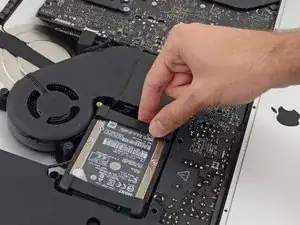
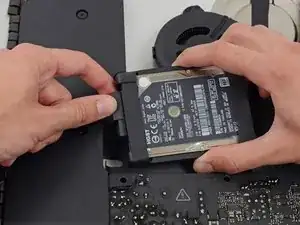
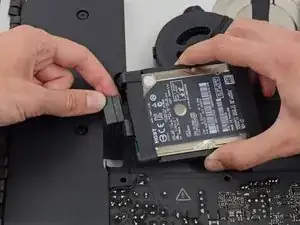
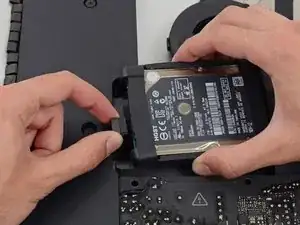
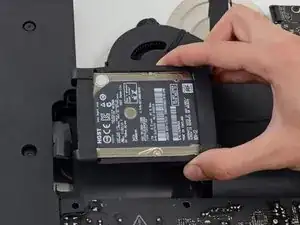
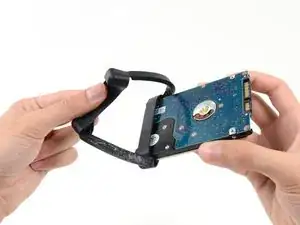
Continua despegando la funda del disco duro del adhesivo que lo sujeta al disco duro.
-
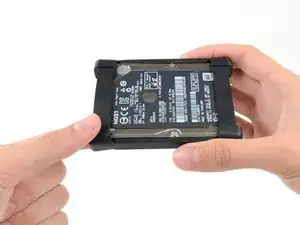
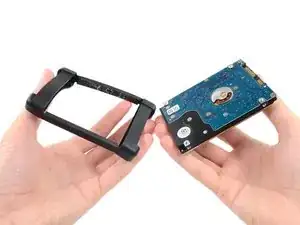
Quita la funda del disco duro.
-
Lo queda es el disco duro.
-


Para volver a armar tu dispositivo, sigue estas instrucciones al revés y usa nuestra [guía | 15854 | Guía de tiras adhesivas] para volver a colocar el cristal de la pantalla.

40 comentarios
I used the iMac Opening Tool just as shown in this guide to separate the tape. DISASTER! The screen cracked! I used the tool slowly and carefully and despite this, the screen cracked. I should have simply used a guitar pick. That said, while I was inside my iMac replacing the Harddisk with a SSD, which was pretty easy to do, I decided to also see if I could replaced the 8GB RAM with 16GB RAM WITHOUT removing the logic board, as shown in other instructions on this site. I found that by simply removing the fan assembly, this makes enough room to reach behind the logic board and unclip the 2 memory modules. I installed 2 8GB modules (1600MHz DDR3L SO-DIMM PC12800 204 Pin) without much trouble. I used a plastic stick to reach behind the logic board and unclip the existing memory modules, then carefully inserted the new ones and clipped them into place. This is much easier than removing the power supply and logic board and all of the associated connectors and screws.
gcortesi -
I had to replace the HD as it failed after less than two years. It was a good opportunity to increase the RAM from 8 to 16 GB. So I ordered the RAM chips from Kingston and a 256 GB SSD from Angelbird.
The repair went smoothly: to anyone trying this, please carefully follow the iFixit step-by-step guide. I recommend reading at least twice the whole procedure *before* beginning. Check all the photos. During the operation itself, I had the guide open before my eyes on my iPad and followed it step by step. The opening tool is a bit fragile, the wheel got damaged after the operation, but I guess it was designed to be used only once. After all, the adhesive strips can also be used only once!
For those replacing the hard-disk with an SSD: I highly recommend the Angelbird model "SSD wrk for Mac" (http://www.angelbird.com/en/prod/ssd-wrk...), for several dollars more you spare yourself the need to use additional software to enable TRIM or persuade the fans of your Mac that the HD's temperature is Ok.
lix -
Thanks for the tip on the Angelbird, working smoothly so far!
Elling -
Hi! Thanks for the tip! Do you know if can I put an SSD on an imac 21.5 in late 2012 ?
after changing the hard drive the monitor no longer works. Apple won't fix it because I opened it, and third-part wants to charge me $300-500. Hope you guys have better luck!
max -
I have (21.5 inch, mid 2017, 2.3 ghz) base model same as this but not 4k. How much max ram can I install in my iMac??
Narendra Verma -
This guide contains many extra steps for what should be a straight forward, simple parts replacement without disturbing more than the display, left hand speaker and removal of 4 logic board screws for play. Nothing else except for the left hand speaker wire & iSight cable from logic board, the lower support bracket and loosening the speaker so as to move it around a bit.
For the ram, I bent a pair of cheap tweezers long ago supplied with these replacement kits to the perfect angle for holding, locating and inserting the ram into the slots under the logic bd after moving each retainer w/spudger and popping out the old. Pay attention to the orientation of the ram when removing/inserting the ram! An automotive mirror is handy along with a small flashlight for closeups. Once the ram is aligned properly substitute your fingers for the tweezers, ease it into the slot, push up & engage! Reinstall screws and all else. I have done this job successfully this way countless times. For a tweezers pic contact me!
Ross Elkins -
Additionally, if a blade is present, I install the OSx system on the blade and everything else, apps and home folders on the new SSD. You get the very fast boot off of the blade and the full ssd for all else!
Ross Elkins -