Introducción
Solo pre-requisito
-
-
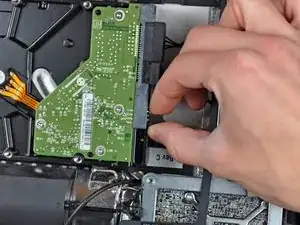
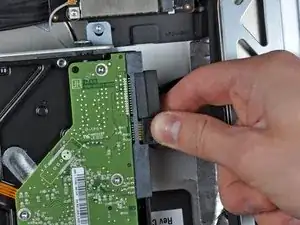
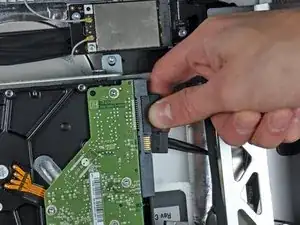
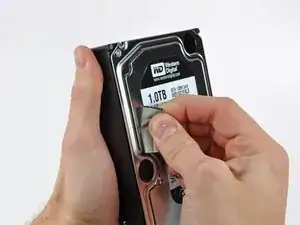
Desconecta los cable del sensor térmico, de la energía SATA y de los datos SATA tirando de los conectores fuera de sus zócalos en el disco duro.
-
-
-
Quita los dos tornillos Torx T10 que sujetan el soporte del disco duro superior a la carcasa exterior.
-
-
-
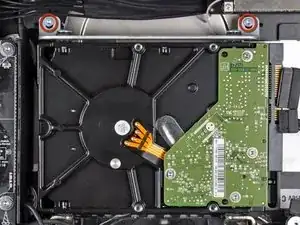
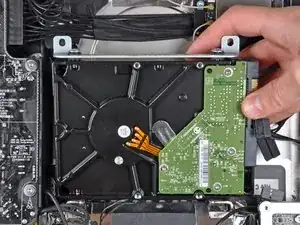
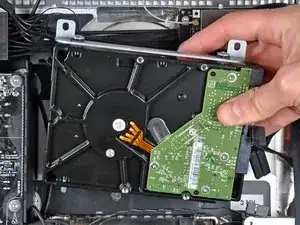
Gira ligeramente el disco duro hacia fuera de la carcasa exterior.
-
Levanta el disco duro de sus dos pines de posición y sácalo de la carcasa exterior.
-
-
-
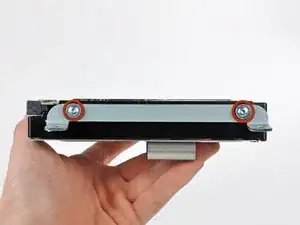
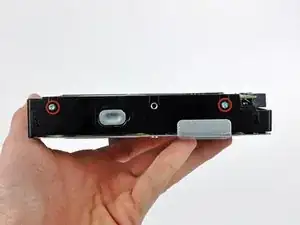
Quita los dos tornillos Torx T8 que sujetan el soporte superior al disco duro.
-
Quita el soporte superior del disco duro.
-
Conclusión
Para volver a montar tu dispositivo, sigue estas instrucciones en orden inverso.

To avoid a crazy spinning Fan, if you replace the HD by a SSD, without the fancy kit, just shortwire the plug. I used a copper from a CAT5 ethernet cable. Warning: you override the temperature sensor! I never had any trouble with that.
it4art -
@it4art
What does that mean, to shortwire the plug ? I’m planning to put a SSD into an old iMac soon.
Novak -
The thermal sensor cable is just two wires - it4art is suggesting plugging a tiny wire jumper between the two holes in the cable to create a short-circuit. I do not know how this impacts the system. I tend to use “Macs Fan Control” for these types of things.
johann beda -
The thermal sensor cable has just two wires, grey and black. Grey face top and black face bottom of my screen. Or grey is closest to SATA Connector. my new Seagate SSHD connector has 4 pins and different connector so could not connect thermal sensor cable due to size difference. However easily cut piece off cable connector to fit(with mini hacksaw holding with pliers). Instruction says if multiple pins the grey should be close to SATA connector. This did not work for me. google the correct connector cable for your new drive and you will see where the black and grey wires should connect to. Mine are the two pins furthest from SATA connector. Black bottom and grey top again. You don’t need to buy the new/correct cable! This whole procedure has worked a treat and my 2010 mac is now incredible fast. Thanks so much!
Kieran Hobbs -
I always find that it helps me when I reassemble all this computer electronics if I photograph the connectors as they are when I find them with my cell phone so I can see where and how they were originally installed. My memory is awful but the photos really help. I also put a little bit of blue masking tape at each port and on the part of the plug that is facing up.
peter -
Unfortunately the Seagate Barracuda drive has a completely different set of connections for the thermal sensor compared to the old drive, so I’ve just had to leave it disconnected for now.
Paul Guinnessy -