Introducción
Esta guía te ayudará a reemplazar / actualizar el disco duro.
Esta guía también incluye pasos para actualizar el disco duro de tu iMac con un SSD. Describe cómo instalar el sensor de temperatura del SSD para que los ventiladores de la Mac funcionen a la velocidad correcta.
Antes de comenzar cualquier trabajo en su iMac: Desenchufa el ordenador y mantén presionado el botón de encendido durante diez segundos para descargar los condensadores de la fuente de alimentación.
Ten mucho cuidado de no tocar los cables del condensador o cualquier junta de soldadura expuesta en la parte posterior de la fuente de alimentación.
-
-
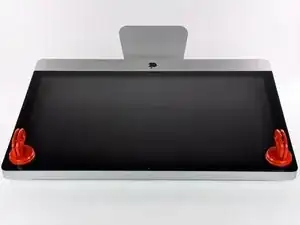
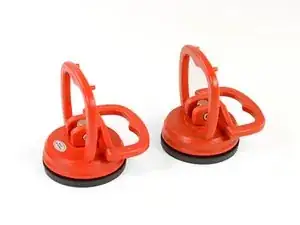
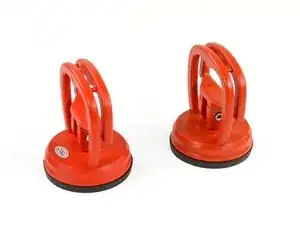
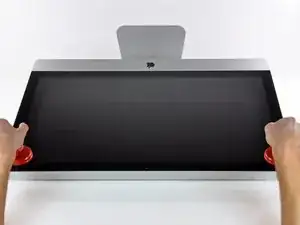
Coloca una ventosa para trabajos pesados cerca de cada una de las dos esquinas superiores del panel de vidrio.
-
Mientras sujetas ligeramente la ventosa contra el vidrio, levanta la manija móvil hasta que quede paralela con la otra manija (como se indica en la tercera imagen).
-
-
-
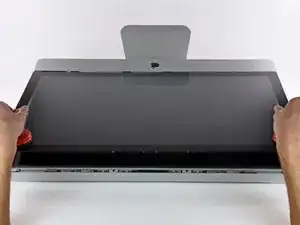
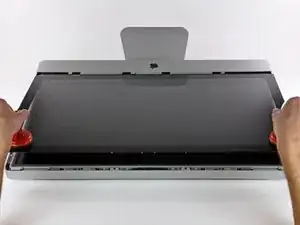
Levanta suavemente el panel de vidrio perpendicular a la cara de la pantalla LCD, lo suficiente para despejar las clavijas de montaje de acero unidas a lo largo de la parte inferior del borde superior del panel de vidrio.
-
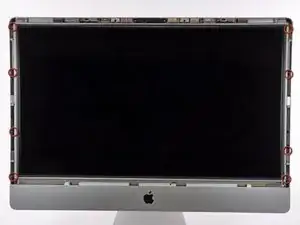
Tira del panel de vidrio desde el borde inferior del iMac y cuidadosamente déjelo a un lado.
-
-
-
Cuidadosamente coloca el iMac boca abajo sobre una superficie plana.
-
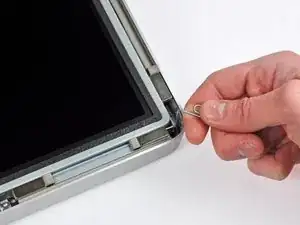
Usa una herramienta delgada con gancho para levantar un lado del borde superior de la pantalla por su marco exterior de acero.
-
Levanta y sostén la pantalla lo suficientemente alto como para acceder a los cables.
-
-
-
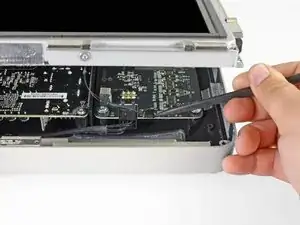
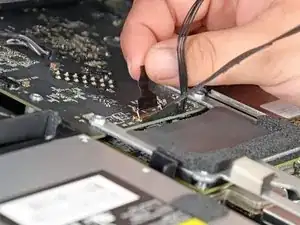
Desconecta el cable de sincronización vertical en la esquina superior izquierda de la pantalla. Usa la punta de un spudger para empujar las pestañas laterales del conector y sácalo suavemente de su zócalo.
-
-
-
Desconecta el cable del controlador de retroiluminación LED con la mano presionando la pestaña hacia abajo y deslizándola hacia la parte inferior de la pantalla.
-
-
-
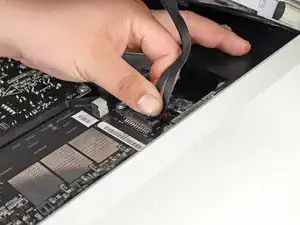
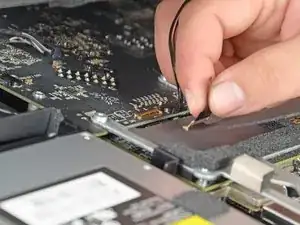
Tira de la pestaña negra hacia arriba para desconectar el pestillo del conector ZIF del cable de datos de la pantalla.
-
Continúa tirando de la pestaña negra hacia la parte superior del dispositivo para desconectar el cable de datos de la pantalla.
-
-
-
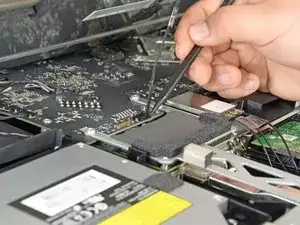
Usa la punta de un spudger para desconectar el cable de alimentación de la pantalla junto al cable de datos de la pantalla.
-
-
-
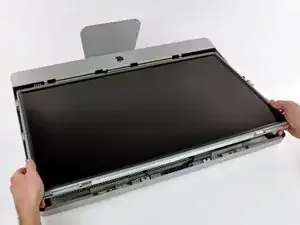
Tira con cuidado de la pantalla hacia el borde superior de su iMac y sácala de la carcasa del iMac.
-
-
-
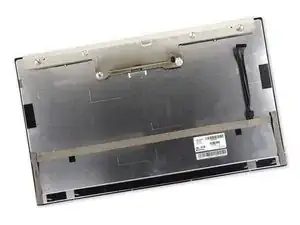
Coloca la pantalla boca abajo sobre una superficie plana y suave.
-
Si hay un cable o cable debajo de la cinta adhesiva, siempre retira la cinta primero. No tires del cable directamente.
-
Si el cable está pegado al chasis, usa un iOpener calentado o un secador de pelo para suavizar primero el adhesivo. Luego puedes deslizar una púa de apertura debajo del cable para aflojarlo. Nunca tires de los conectores delicados.
-
Desliza una púa de apertura debajo de las piezas del cojín de espuma para separarlas de la pantalla y retíralas suavemente. Es posible que necesites cinta adhesiva de doble cara para volver a colocarlos en la nueva pantalla.
-
-
-
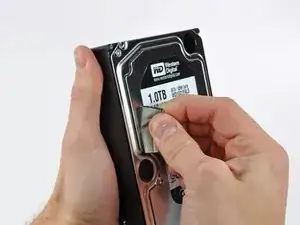
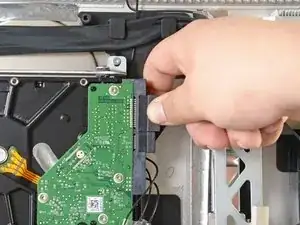
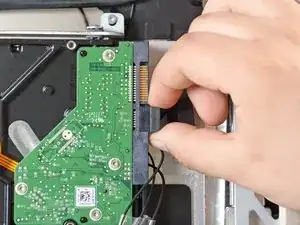
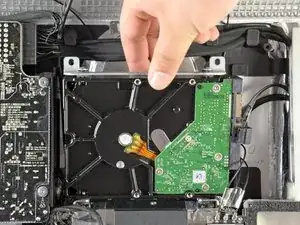
Desconecta los cables de alimentación y datos SATA del disco duro tirando de ellos directamente del disco duro.
-
-
-
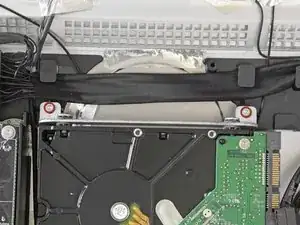
Quita los dos tornillos Torx T10 que sujetan el disco duro al marco del iMac.
-
Haz rotar ligeramente el borde superior del disco duro lejos de la carcasa exterior.
-
Levanta el disco duro de sus dos pasadores de posicionamiento inferiores y retíralo de la carcasa exterior.
-
-
-
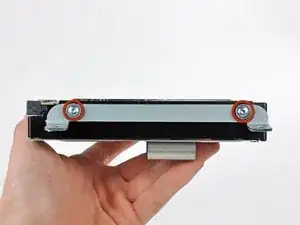
Quita los dos tornillos Torx T8 que sujetan el soporte superior al disco duro.
-
Quita el soporte superior del disco duro.
-
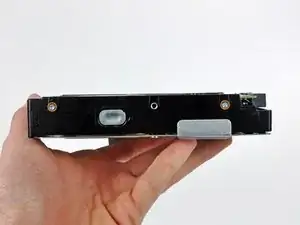
Quita los dos pines Torx T8 del otro lado del disco duro.
-
-
-
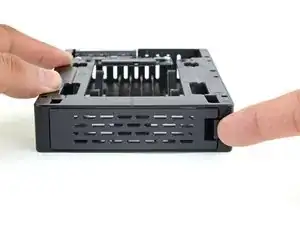
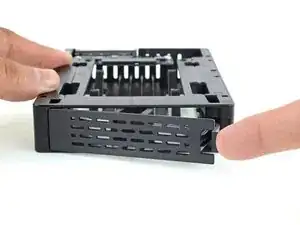
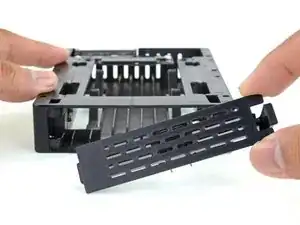
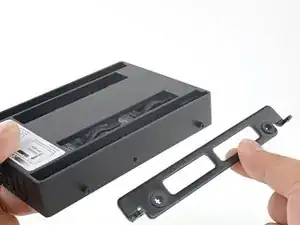
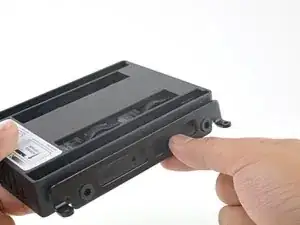
Empuja el pestillo de la placa delantera de la carcasa con tu dedo. Mientras sujetas el pestillo pulsado, saca la placa hacia fuera.
-
Quita la placa delantera.
-
-
-
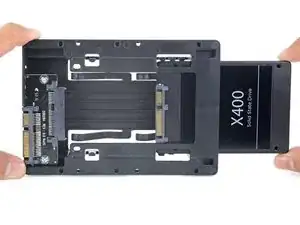
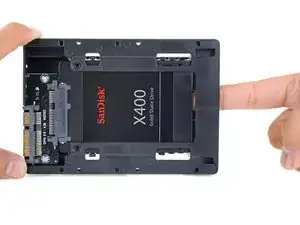
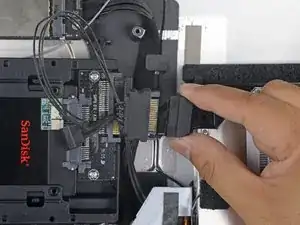
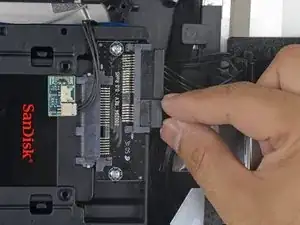
Alinea los pequeños conectores SATA para que el lado estrecho del conector en el SSD coincida con el lado estrecho en el conector del receptáculo.
-
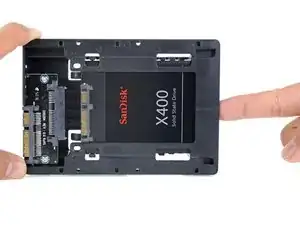
Desliza la unidad hacia dentro a través del frontal del receptáculo hasta que el conector SATA quede totalmente dentro.
-
-
-
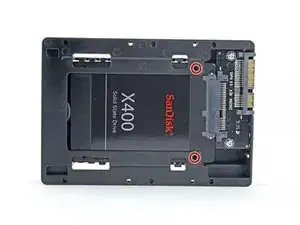
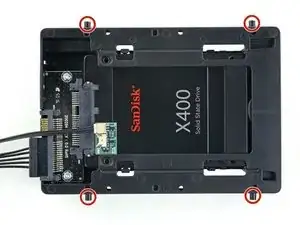
Puedes, opcionalmente, instalar dos tornillos Philips #1 que vienen en el kit del receptáculo para fijar el SSD en dicho receptáculo.
-
-
-
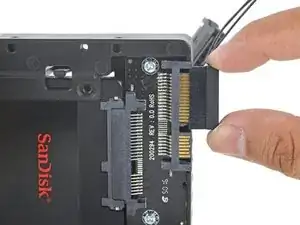
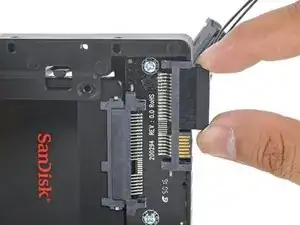
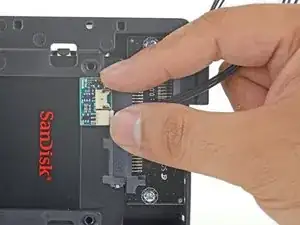
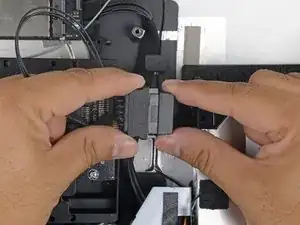
Enchufa el cable de energía SATA con sensor en el lado ancho del conector SATA del receptáculo.
-
-
-
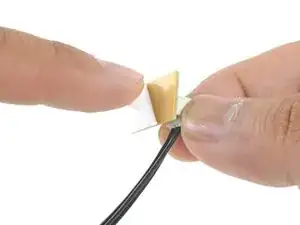
Despega el reverso del adhesivo de la pequeña placa del sensor de temperatura.
-
Adhiere la placa del sensor de temperatura a un área de metal despejada en la superficie del SSD, tan cerca como sea posible del conector SATA.
-
Dobla el sobrante de los hilos del sensor de temperatura para que no queden en medio cuando instales el receptáculo.
-
-
-
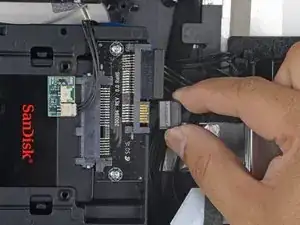
Conecta el cable de energía SATA del iMac con el nuevo cable de energía SATA con capacidad de temperatura.
-
Guía los los cables SATA por donde no interieran con ningún otro componente.
-


Para volver a armar tu dispositivo, sigue estas instrucciones en orden inverso.

62 comentarios
Note that if you are replacing the hard drive with a non-Apple hard drive, then you will have problems with the fan running full speed constantly (see http://blog.macsales.com/10206-further-e...). Basically, you'll need to either install a $30 piece of software to control the fans or short out some wires.
jashugan -
You don´t need to short out the wires, just install the free SSD FAN CONTROL app from EXIRION.NET und you´ll be fine :D
remember after the glass, to get the aluminum front off, remove the bay for the memory upgrade on the bottom first before you remove the torx screws ans lift to access the bottom case (Between step 2 and 3)
I'm looking to replace my 3.5" HDD in my iMac (mid-2011) with a 2.5" SSD. Will I need an adapter for this?
Absolutly. You can buy a official one on the Apple Store. I reccommend the dual-drive (HDD & SDD) tho.
I used the newertechnology 2,5–3,5-Adapter for 16 bucks from amazon and it fits 100 %!
You can easily lift the glass panel off the magnets with only your fingernails (or something thin like a credit card or a guitar pick). No need to buy suction cups you will only use once.
Nick Caron -
Yes, you don't need the specific suction cups to remove the display cover - it's held on by magnets, and if you start at the center by the iSight you can work out to the edges and remove it. I had an iPhone screen suction cup around and it helped with balancing the screen when you pull it out fully, but by no ways is it required.
jtowner -
Great guide and pretty straight forward the only thing that took me ages and I didn't manage to undo were the power btn cable (step 28) and the thermal sensor (step 25) Seemed like they were glued on! Very difficult to remove and obviously conscious so I didn't break anything!
Eddie -
Thanks!!! Worked excellently.
I used a plunger (clean first ;-) to get the screen off, and http://exirion.net/ssdfanctrl/ for fan control.
Then, i did not take out the whole display and left it in the hinges on the bottom side and held it up with two small cardboard boxes. Easy enough to disconnect the hdd then.
I replaced with an ssd, put that into a ssd enclosure. Had to drill an extra hole in it to fasten the pins that hold it in place.
Used Carbon Copy Cloner to make an image from the old hdd, with the sad connected via usb. Checked it of it booted via System Preferences > Startup Disk. It worked so the took the imac apart and replaced the disk. Booted, everything was working as always, only faster!
Frank303 -
I'm replacing my optical drive too. what exactly needs to be plugged into the SSD? I don't have the kit - as I am not sure one is required if I buy something like this: http://www.amazon.com/gp/product/B0056OB...
Can you please advise? Can I do it with this piece, or do I need to get the entire bracket kit?
Allen Borza -
My display data cable forks, with a smaller section going up near the camera board. Where it forks, it is attached to the aluminum plate that attaches around the cpu board. I haven't seen any images that look similar, and I'm stumped at how to remove this second section of the cable. 2010 i7 build to order
Awolf -
Agree with the other comments here. Despite buying suction cups, not sure they were necessary as the screen removed very easily. A sat nav suction cup would do the job fine.
Stuart Bloomfield -
I can confirm that it is possible to remove the front glass using fingernails rather than suction cups. It isn’t easy, but if you try you should be able to pry off the glass.
I did this twice: once at the beginning of the procedure and once again at the end, when I realized that a big pice of lint was trapped under the glass.
gordonhamachi -
Don’t use suction cups. totally unnecessary. screen pops off with fingernails.
Kieran Hobbs -
The reason for caution about suction cups tends to be making sure you don’t apply uneven pressure on the edges of the glass and crack it in the process of removal. I do agree however that some pretty small suction cups would do fine. These suction cups can be had at your local princess auto (Harbor freight) for a few bucks and are useful elsewhere as well. if you use your fingernails or other items just try and do it evenly :)
Abirinder Brar -
good duct tape or gaffer tape wrapped around your hands makes an excellent glass removal 'tool'. Even clear packing tape works a charm.
Stu Blair -
A great first step that minimizes that first gust of dust migration when the glass is lifted is to clean the glass, sides *and the back* before lifting the glass, and then lift SLOWLY. Most of that dust is already trapped inside and pulled up as the screen lifts, but with care you can keep it there (or gently vacuum out with a micro vac…).
John -
before starting any of this…there is a device that you can use that comes with the IFixit kit to format and either clone or restore your hard drive to the new drive…it will save you a lot of headaches..it is a SSD enclosure that you can plug into your existing computer …
Tom Richter -
Thanks for the instructions. Before doing this the first time, suggest to everyone, read through at least twice. This is the easiest step, as you’ll soon see. As for removing the glass, USE suction cups, either the ones the sell here, or others. DON’T skimp. Also wear gloves when handling the glass. Don’t take chances.
ECJohansen -
Duct tape works too!
Dani -