Introducción
Usa esta guía para reemplazar el ensamblaje de altavoz en tu Samsung Galaxy S7.
-
-
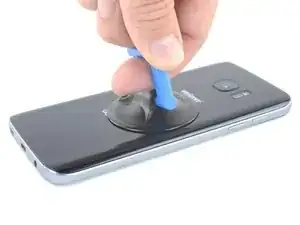
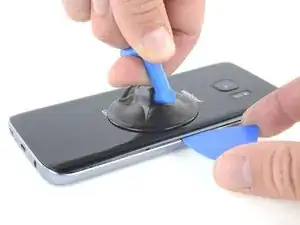
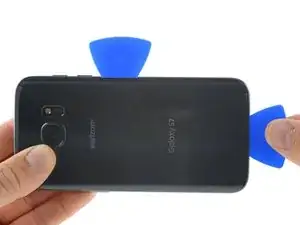
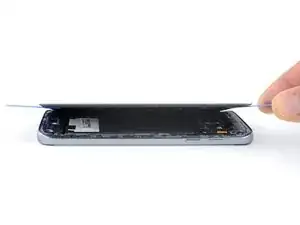
Una vez que el panel esté lo suficientemente caliente al tacto, coloca una ventosa lo más cerca posible del borde calentado, evitando la parte curvada.
-
Levanta de la ventosa e inserta un spudger Haldberd o púa de apertura debajo del cristal trasero.
-
-
-
Una vez que esté firmemente introducida la púa, vuelve a calentar y aplicar el iOpener para ablandar el adhesivo.
-
-
-
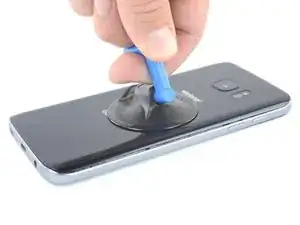
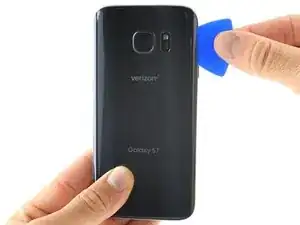
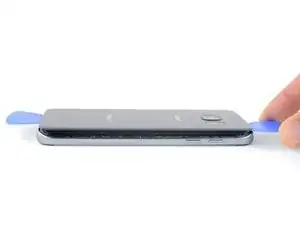
Desliza la púa de apertura a lo largo del borde del teléfono separando el adhesivo.
-
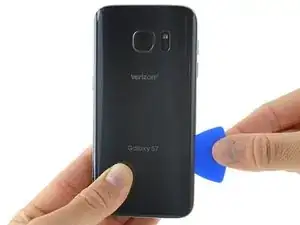
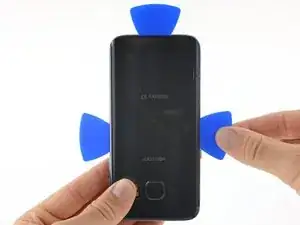
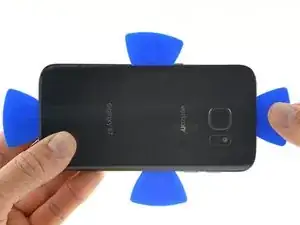
Deja la púa en su lugar y toma una segunda púa mientras continúas con el próximo paso. Si dejas la púa insertada previenes que el pegamento que has separado se vuelva a adherir.
-
-
-
Repite el paso previo de calentado y corte del adhesivo en los tres bordes restantes.
-
Deja una púa de apertura en cada borde del dispositivo mientras continúas para evitar que se vuelva a unir con el adhesivo.
-
-
-
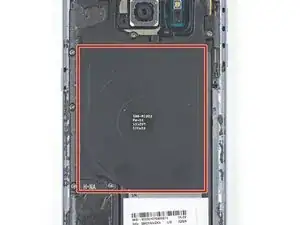
Si estás limpiando superficie intermedia con alcohol isopropílico, sé muy cuidadoso de no derramar nada de alcohol en el módulo de carga inalámbrica. El recubrimiento de carga inalámbrica puede dañarse si entra en contacto con el alcohol.
-
-
-
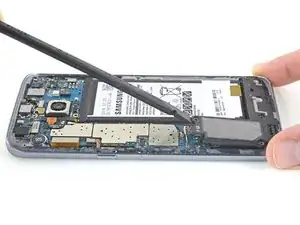
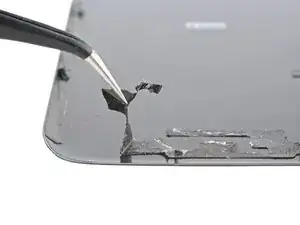
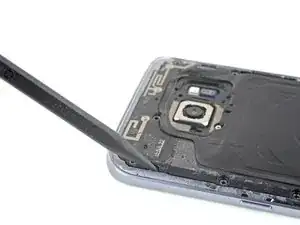
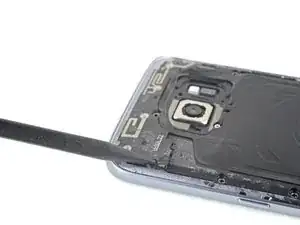
Inserta la punta de un spudger en la muesca del lado izquierdo del ensamble de la antena, y levanta el ensamble hacia arriba y afuera del marco
-
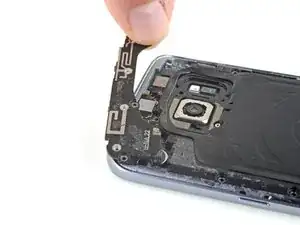
Retira el ensamble de la antena.
-
-
-
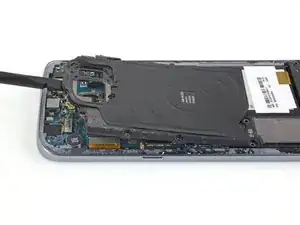
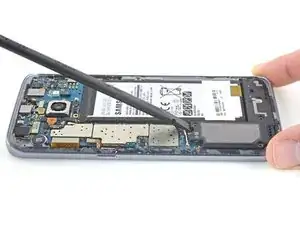
Usa el lado plano de una spudger para levantar el ensamble de la bobina de carga inalámbrica afuera del teléfono.
-


Para volver a ensamblar tu dispositivo, sigue estas instrucciones en orden inverso.

Un comentario
Hey, I've got a question regarding the last image of this tutorial. Right on the speaker assembly you can see this shiny material. I scrapped that while doing a repair and it had a ton of silvery stuff in it. Do you know if it is harmful?
P529 -
I used a heat gun and heated it a little too much. The color of the rear glass is just a sticker on a clear cover. Due to this I tore the sticker off. Now the back cover is see through, which isn’t a bad thing but the repair was for a customer.
Kevin Bishop -
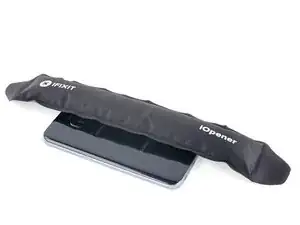
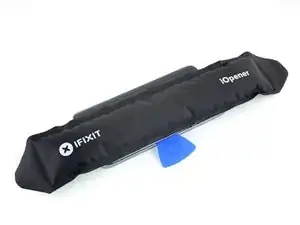
When using the iOpener, you may need more than 30 seconds, especially in compact or low wattage microwaves. Take this slowly, though, and be extremely careful, as it is easy to overheat your iOpener. Remember, you can always heat it up a tad more, but you cannot undo overheating it.
Jacob Pratt -
I used an adjustable heat gun and set it to 400 degrees (F). That was enough to seperate the glass without having to worry about exposure times of the heat. The front of the phone was just fine. Just be ready to use a bunch of picks to slide in between because they will be needed this way.
Ryan Schumerth -
I went from the bottom center up, using one ifixit tools, one suction cup and one pick.
Pick just popped in with some minor pressure.
Laid heat pack along base of phone 2 mins first and worked up slowly, rotating picks as I went. Had to heat iopener over several 30 second bursts
Lauren Burt -
This is useless because the phone does not recognize the new battery and will behave like on the old one
Search for “battery count xda"
Albert Einstein -
That is an interesting discovery! Thanks for pointing it out—I’ll have to look into it.
Even if this is true, replacing the battery should still give restore a significant amount of life, since the max voltage affects a minor amount of the battery’s capacity. If you charge a worn battery and a new battery to the same lower max voltage, the worn battery’s voltage will dip more under use and will be depleted faster.
Arthur Shi -
Thanks for the guide! It helped me replace a friend's battery with no problems!
Darren Crook -
I will never replace a screen again, and don’t recommend it. Not for phones nowadays. Once upon a time everything was screwed together, and you might even get the same quality or better screen when buying from eBay. And having the phone repaired was nearly the cost of the phone. Now, it’s the reverse. Removing the glued back and screen and cleaning off all the glue for a clean re-seal is an ordeal that takes multiple hours, AND, often the screen you buy on eBay is NOT OLED, but an LCD, and a blurry one at that. And the local phone repair store will replace the screen with an OLED, reliably, same day turn around, for not much more than the cost of an actual OLED screen, because they have the parts in bulk, and the tools and experience to do it quickly. Never again!
domarius -
have you ever had one that just wont open at all? i can not get mine to open to replace the battery i have heated with a heat gun and attached suction cup and it will not lift at all
Carla James -
Hi Carla,
I've definitely had that experience before. The adhesive is very strong, and the curved back makes getting the initial seam very difficult. I'd suggest focusing on one small area on the edge. Apply steady force when you pull, and repeat a few times to loosen the adhesive. Eventually it will give and present a small gap.
Arthur Shi -