Introducción

Sigue esta guía para cambiar el ensamblaje de carga en un mando Sony Playstation Dualshock 4 CHU-ZCT2U.

  1. tUikjiOGBaxcOEkP
    tUikjiOGBaxcOEkP
    TmnKQyKCNFSJTcJc
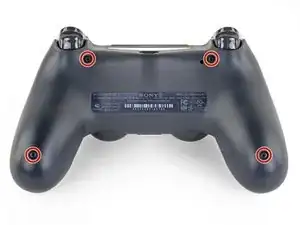
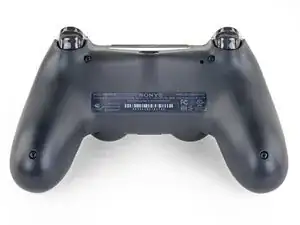
    • Usa un destornillador Phillips para remover los cuatro tornillos de 6.4 mm de largo del panel trasero.

  2. w1bkfQZMxAAHtQgX
    w1bkfQZMxAAHtQgX
    plRPM3kHcVdnHKKr
    • Cuatro frágiles clips de plástico mantienen unidos los paneles. Puedes ver sus ubicaciones más claramente en esta guía.

    • Los clips ayudan a mantener juntas las costuras. Si rompes estos clips, el controlador seguirá funcionando.

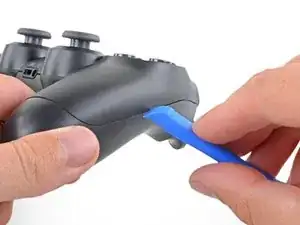
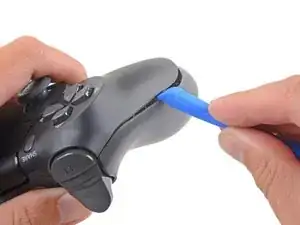
    • Inserta una herramienta de apertura en el pliegue donde se unen el panel frontal y el trasero, empezando por el borde exterior de cualquiera de las manijas.

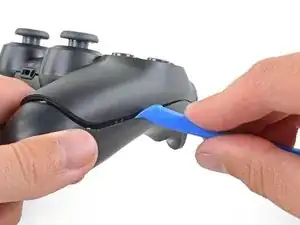
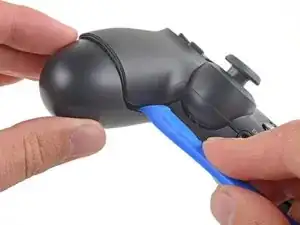
    • Suavemente saca el panel trasero del panel frontal hasta que se separen parcialmente.

    easy, but quite brute way of opening the rear panel without the opening tool: https://www.youtube.com/watch?v=wYybiBBL...

    watch the opening from the back part only, then return here.

    christianviali -

    That worked but a couple clips broke in the process. Beware for people trying this method.

    Bryan Remely -

    There are 4 tab clips total, 2 at the top corners (very easy to break) and 2 at the bottom near the ports. The screws will keep it together even if they do break but be careful if you don’t want to break them.

    Fungi -

    I've written a guide to help others find the clips and unlatch them.

    Paso importante para abrir el DualShock 4 CUH-ZCT2U

    Richard -

    Hi Richard,

    Thanks for writing this up! I'm going to link your guide into the step.

    Arthur Shi -

  3. DIJIOhITDeiAwtRH
    DIJIOhITDeiAwtRH
    NF4xVXtPZufVHicc
    QeIjsGkBIonmDXX1
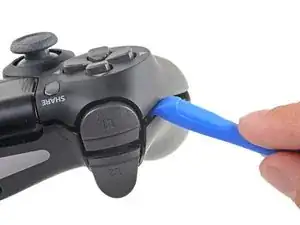
    • Utiliza la herramienta de apertura para separar los paneles soltando los clips de plástico alrededor del perímetro del controlador.

    I've written a guide to help others find and unlatch these clips

    Paso importante para abrir el DualShock 4 CUH-ZCT2U

    Richard -

  4. omi15NXRmqNu43A2
    omi15NXRmqNu43A2
    UitmPy1NEmiWWRpI
    • Levante el panel trasero directamente del controlador.

    • No retires completamente el panel trasero. Todavía está unido al controlador por un cable de cinta.

  5. Ro5UWfFl1lrsvuAV
    Ro5UWfFl1lrsvuAV
    GAGBgDPAAaZIEyLA
    • Usa tus dedos para sacar suavemente el cable plano de su conector en la placa madre.

    • Como la lengüeta de este cable es demasiado pequeña para agarrarlo con los dedos o pinzas, agarra el cable mismo. De lo contrario, utiliza las lengüetas siempre que sea posible.

    • Durante el reensamblaje, agarre el cable plano por la lengüeta azul y presione suavemente el cable directamente en el conector.Empuje la lengüeta azul en lugar del propio cable plano.

    I'm struggling getting the ribbon to connect back in. Why might that be?

    David Clair II -

  6. 6IWKg4VxLacIktqP
    6IWKg4VxLacIktqP
    KQAX4SsHe5LjYOOA
    NBc5xJawXvLXqtsT
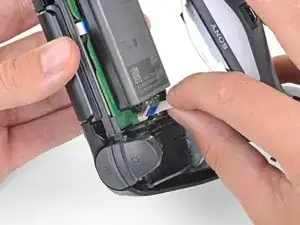
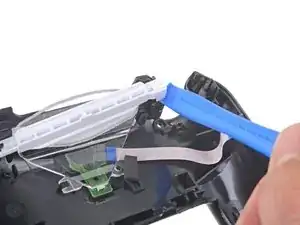
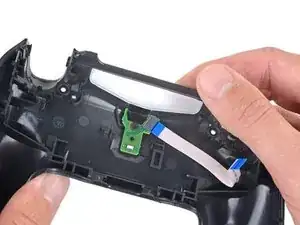
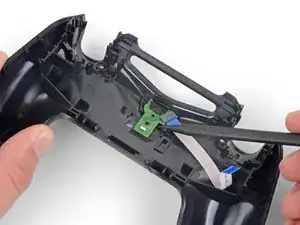
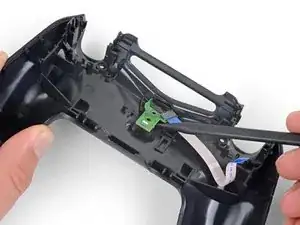
    • Usa una herramienta de apertura o spudger para separar la barra de plástico blanco del panel posterior.

  7. LirWpwHsEKlW53rP
    LirWpwHsEKlW53rP
    PfMlFCqGYZZaJSKj
    • Extrae la barra blanca de plástico.

  8. GjR4rUck4bONaW3J
    GjR4rUck4bONaW3J
    tnLTIGOVtRa2a3MK
    2vdPotLhbaQ6whlQ
    • Separa la guía de luz de la carcasa inferior para extraerla.

    • Durante el montaje, alinea la guía de con el panel trasero mediante la muesca situada cerca de la parte inferior izquierda.

  9. JmYKPTgSbbPJCjyA
    JmYKPTgSbbPJCjyA
    iV6HrfZ4P3Ypmpyx
    gyRXtqpM5wXrQlbk
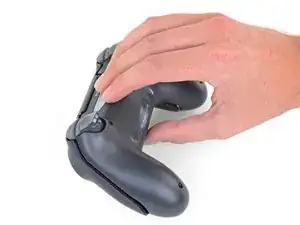
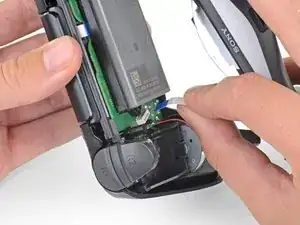
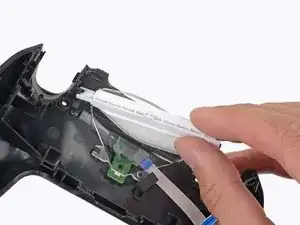
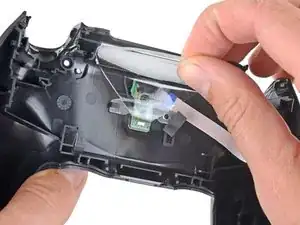
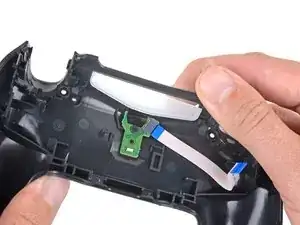
    • Presiona con los dedos la pieza de plástico translúcido a través de la parte superior del mando.

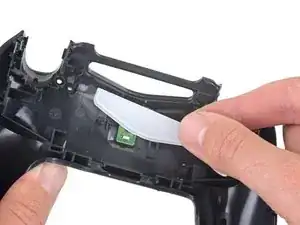
    • Extrae la pieza de plástico translúcido.

  10. 5QcYYAfdNpu1DPa4
    5QcYYAfdNpu1DPa4
    WwuPsHvNJofAmgbk
    • Usa un destornillador Phillips para extraer el tornillo de 4,4 mm. del ensamblaje de carga.

  11. Ub1PaeIttiQSTWWM
    Ub1PaeIttiQSTWWM
    kdXZLIXUffSXReFV
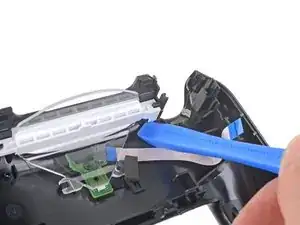
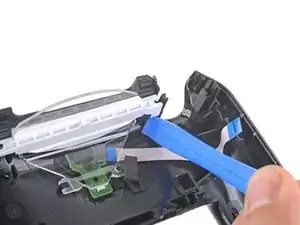
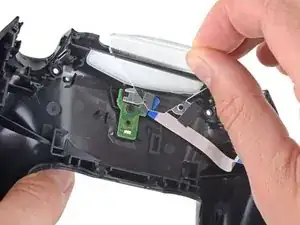
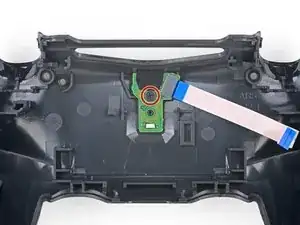
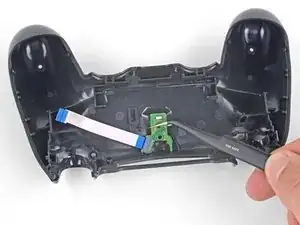
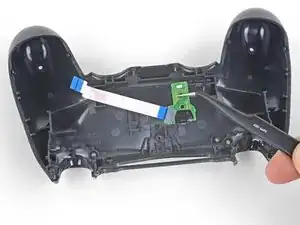
    • Utiliza el extremo puntiagudo de un spudger para levantar el conjunto de carga del panel posterior.

  12. MIAoXGbhLeNBmBFC
    MIAoXGbhLeNBmBFC
    hj4FlIGFiOKtiOXl
    • Usa unas pinzas para extraer el circuito de carga de la carcasa inferior.

Conclusión

Para montar este dispositivo, sigue estos pasos en orden inverso

Lleva tus residuos electrónicos a centro de reciclaje certificado.

¿La reparación no salió como esperabas? Consulta comunidad de respuestas para pedir ayuda.

Sam Omiotek

Miembro Desde 25/02/19

59803 Reputación

2 comentarios

Question:

I have a ps4 controller model CUH-ZCT2U. My charging board model is jds 050.

Can I buy the jds 055 charging board and put that in? Is the jds 050 and the jds 055 charging board interchangeable?

I can't seem to find the jds 050 charging boards anywhere. Only the jds 055. Any help would be very much appreciated. Thanks.

Treadway Customs -

I have not tested the JDS-055 and JDS-050 in a ZCT2U so I cannot guarantee it will work. However, visually they appear to be the same part made by a different manufacturer. I suspect that it will work, but understand that it’s a gamble and make sure the store you buy from has a good return policy like iFixit. If you can wait, add yourself to the notify list for the JDS-050 and order once they become available again.

Sam Omiotek -