
Introducción
Utiliza esta guía para reemplazar el ensamblaje de pantalla en tu Samsung Galaxy Note8.
Antes de desarmar tu teléfono, descarga la batería por debajo del 25%. La batería podría incendiarse y/o explotar si es perforada accidentalmente, pero las posibilidades de que esto ocurra soy mucho más bajas si se encuentra descargada.
Esta guía involucra quitar la tapa trasera de vidrio, necesitarás reemplazar el adhesivo para colocar nuevamente la tapa trasera al teléfono.
Abrir el Samsung Galaxy Note8 dañará el sello resistente al agua en el dispositivo. Si no reemplazas los sellos adhesivos, tu teléfono funcionará normalmente, pero perderá toda protección contra agua.
Herramientas
Partes
-
-
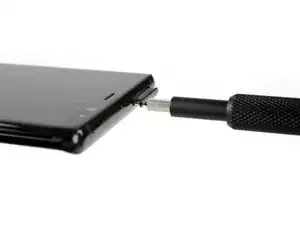
Apaga tu teléfono.
-
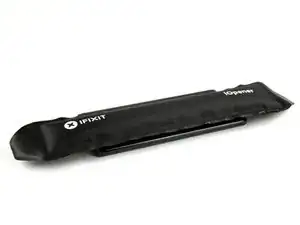
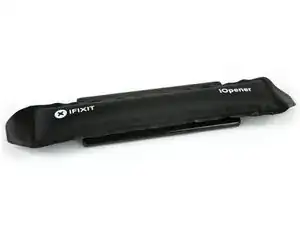
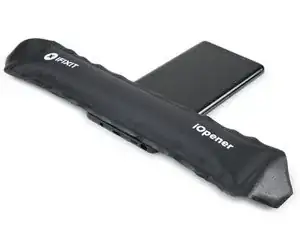
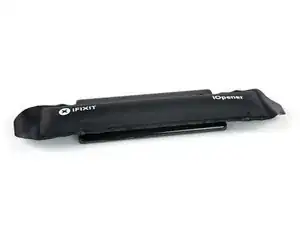
Prepara un iOpener para suavizar el adhesivo en la parte trasera de la Note8.
-
Aplica el iOpener atrás de la Note8 a lo largo del lado con el botón de encendido.
-
-
-
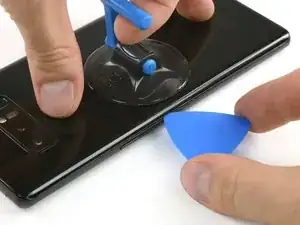
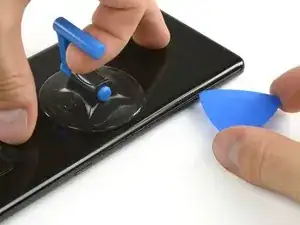
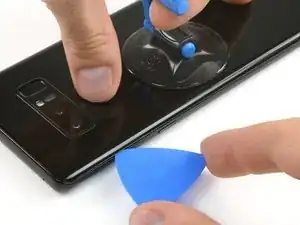
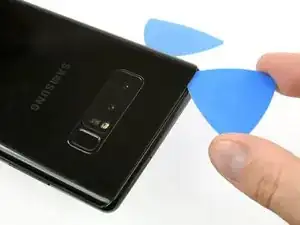
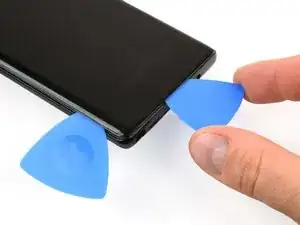
Usa una ventosa de succión para levantar la cubierta trasera y un lengüeta o punzón plástico para entrar en la abertura.
-
Empieza en la parte media de lado y corte el adhesivo mientras levanta la cubierta con la ventosa de succión.
-
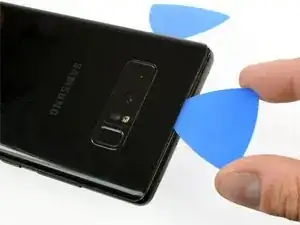
Mueve la lengüeta o punzón hacia la esquina inferior y déjela allí para evitar que el adhesivo vuelva a sellarse en la carcasa.
-
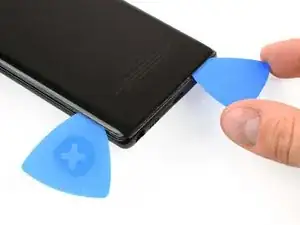
Utiliza otra lengüeta o punzón y deslízalo hacia la esquina superior.
-
-
-
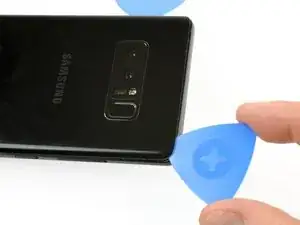
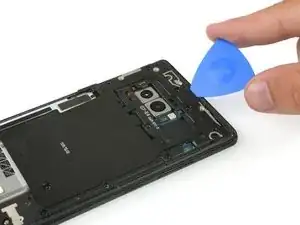
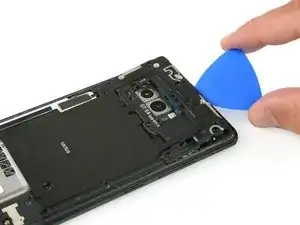
Nuevamente toma otra lengüeta o punzón plástico y cuidadosamente muévelo hacia la esquina y a lo largo del borde.
-
Recalienta la cubierta trasera con un iOpener de ser necesario.
-
Deja la lengüeta o punzón plástico en la esquina superior para que el adhesivo no se adhiera nuevamente.
-
-
-
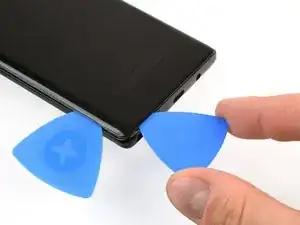
Rota el dispositivo y comienza a separar el adhesivo de la parte inferior con otra lengüeta o punzón plástico.
-
Deja una lengüeta o punzón plástico en la esquina inferior derecha para evitar que el adhesivo se adhiera nuevamente.
-
-
-
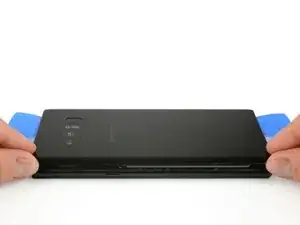
Cuando el adhesivo ha sido separado apropiadamente en tres lados podrás levantar lentamente la cubierta trasera.
-
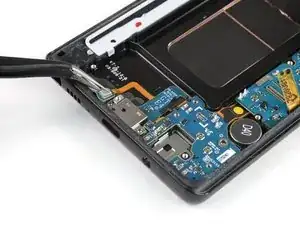
Presta atención al conector del sensor de la huella dactilar al abrir la cubierta trasera. Necesitarás desconectarlo como se describe en el siguiente paso.
-
-
-
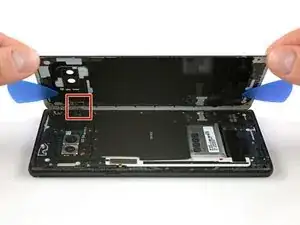
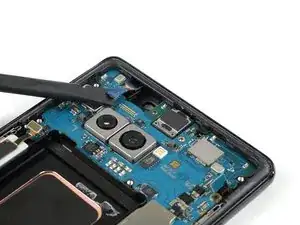
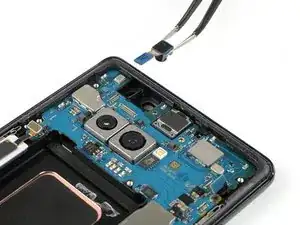
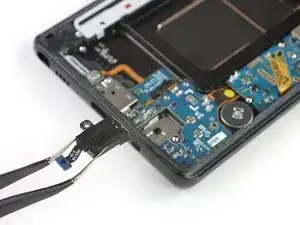
Ingresa una púa de apertura en el borde superior entre el ensamblaje de la bobina de carga y la antena NFC y la caja.
-
Levanta la parte superior del ensamblaje de la caja.
-
-
-
Prepara un iOpener y coloca sobre la pantalla por al menos dos minutos para soltar el adhesivo debajo de la batería. Recaliente y coloque nuevamente el iOpener las veces que sea necesario.
-
Alternativamente o cuando la batería esté inflada, puedes aplicar un poco de alcohol isopropílico bajo cada una de las esquinas de la batería y permita que el alcohol penetre durante varios minutos para ayudar a debilitar el adhesivo.
-
-
-
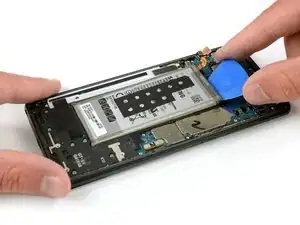
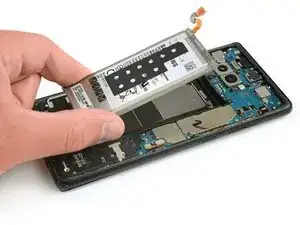
Usa la parte plana de un spudger para levantar la batería desde la esquina superior derecha.
-
Usa el calibrador para levantar la batería hasta que puedas insertar una lengüeta plástica para evitar que el adhesivo se adhiera nuevamente.
-
-
-
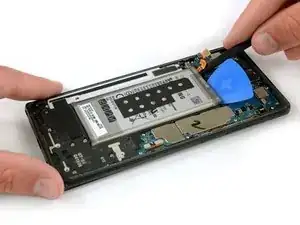
Utiliza la parte plana del spudger para generar palanca sobre la esquina superior izquierda de la batería donde el cable flexible se encuentra.
-
Desliza el spudger a lo largo del lateral de la batería para cortar el adhesivo restante.
-
-
-
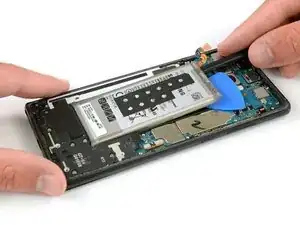
Retira la batería fuera de la carcasa.
-
Retira cualquier residuo de adhesivo del teléfono y limpia las áreas con pegamento con alcohol isopropílico y un paño libre de pelusas.
-
Consulta esta guía para colocar adhesivos nuevos y cortados a medida.
-
-
-
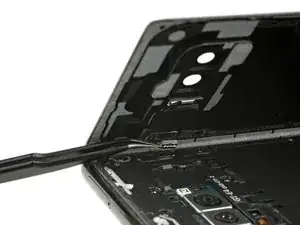
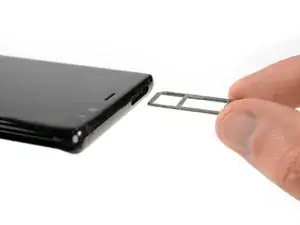
Inserta una herramienta de apertura de tarjeta SIM en el pequeño orificio en el lado izquierdo del borde superior del teléfono.
-
Presiona para expulsar la bandeja.
-
Remueve la bandeja de tarjeta SIM del teléfono.
-
-
-
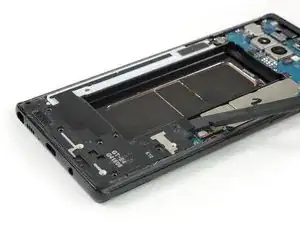
Remueve los seis tornillos Phillips #00 en el ensamblaje de altavoz en la parte inferior del teléfono.
-
-
-
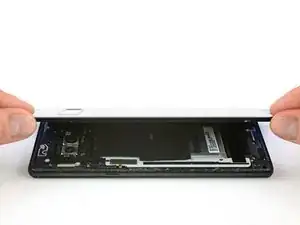
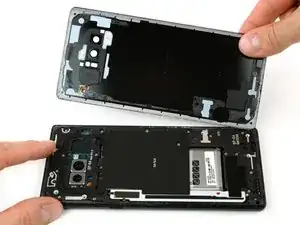
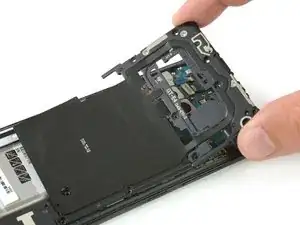
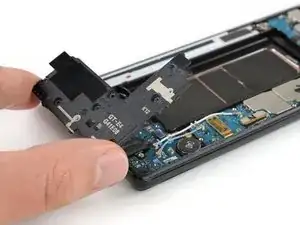
Usa el extremo plano de un spudger para levantar el ensamblaje de altavoz.
-
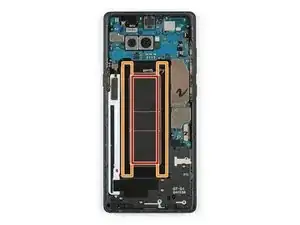
Remueve el ensamblaje de pantalla.
-
-
-
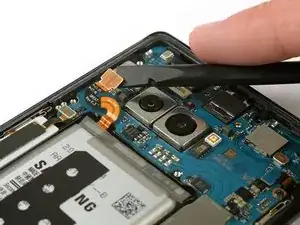
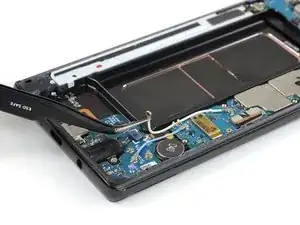
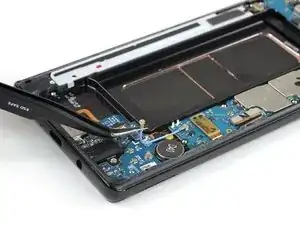
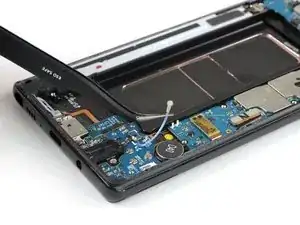
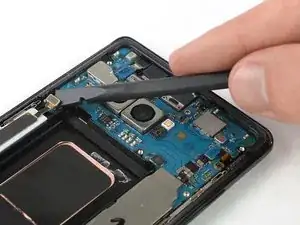
Remueve los dos cables coaxiales que van desde la placa hija a la placa madre.
-
Usa un par de pinzas para desconectar ambos extremos del cable coaxial blanco y removerlo.
-
-
-
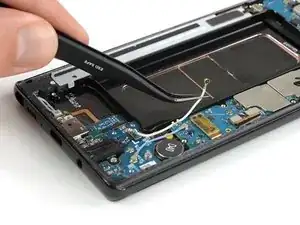
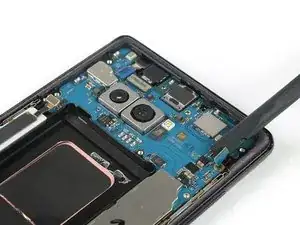
Usa un par de pinzas para desconectar con cuidado ambos extremos del cable coaxial azul y removerlo.
-
-
-
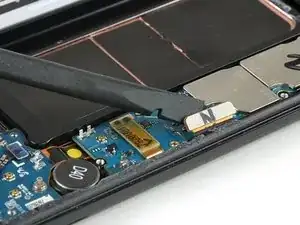
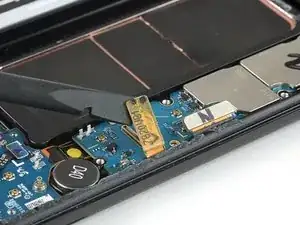
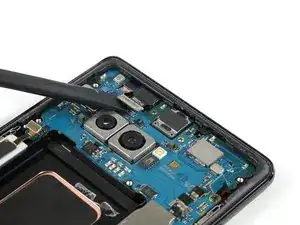
Usa el extremo plano de un spudger para desconectar ambos cables de pantalla y de pantalla táctil.
-
-
-
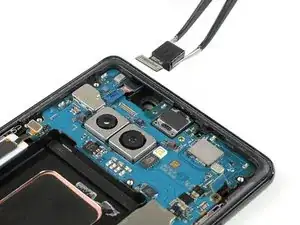
Usa el extremo plano de un spudger para desconectar el cable flexible de botón de encendido.
-
Desconectar el cable de flash y de sensor de proximidad.
-
-
-
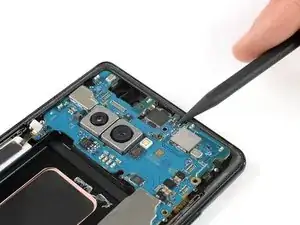
Usa el extremo plano de un spudger para desconectar el conector flexible de la cámara frontal.
-
Con cuidado remueve la cámara frontal con un par de pinzas.
-
-
-
Usa el extremo plano de un spudger para desconectar el conector flexible del escáner de iris.
-
Con cuidado remueve el escáner de iris con un par de pinzas.
-
-
-
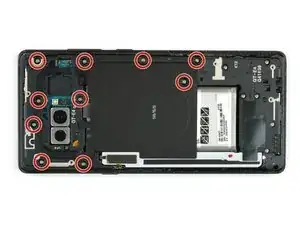
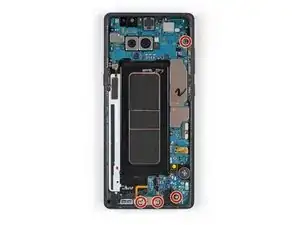
Remueve los cuatro tornillos Phillips #00 que sujetan la placa madre, la toma de auriculares y el puerto de carga.
-
-
-
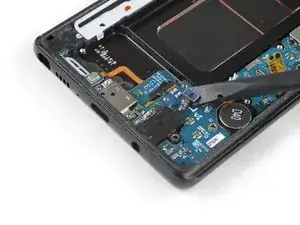
Usa el extremo plano de un spudger para desconectar el conector flexible de la toma de auriculares.
-
Con cuidado remueve la toma de auriculares con un par de pinzas.
-
-
-
Prepara un iOpener y aplícalo a la parte inferior del teléfono para ablandar el adhesivo por debajo del cable flexible del micrófono.
-
Usa un par de pinzas para levantar con cuidado el micrófono de su zócalo y suéltalo del marco medio.
-
-
-
Usa el extremo puntiagudo de un spudger para hacer palanca la placa madre hasta que tengas un buen agarre.
-
-
-
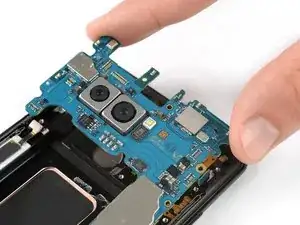
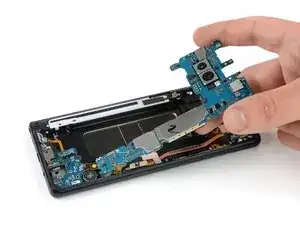
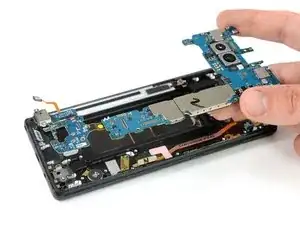
Con cuidado levanta la placa madre.
-
Para levantar la placa hija de su zócalo, jala ambos componentes despacio hacia el extremo superior del teléfono mientras la levantas.
-
-
-
Prepara un iOpener y aplica en todo el teléfono para ablandar el adhesivo debajo del motor de vibración en la parte inferior y el altavoz auricular en la parte superior.
-
-
-
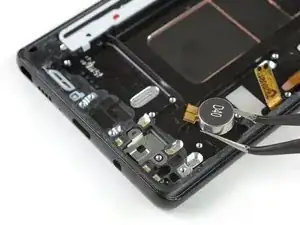
Con cuidado remueve el motor de vibración con un par de pinzas. Vigila el cable para no arrancarlo accidentalmente.
-
Remueve el altavoz auricular con un par de pinzas.
-
-
-
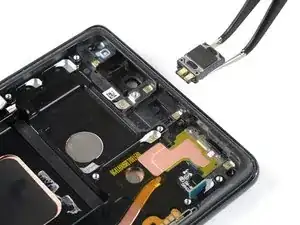
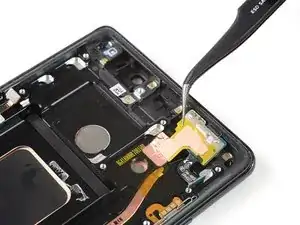
Usa un par de pinzas para levantar el cable de sensor de proximidad y flash con cuidado afloja la cinta que lo sujetan al marco medio.
-
Remueve el ensamblaje de flash y sensor de proximidad.
-
-
-
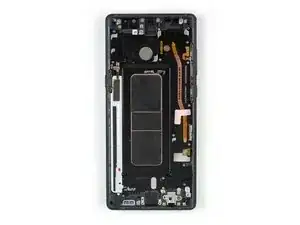
Para volver a ensamblar tu teléfono, transfiere todos los componentes que has removido al ensamblaje nuevo de pantalla con marco. Vuelve a aplicar adhesivo donde sea necesario.
-


Si es posible, enciende tu teléfono y prueba tu reparación antes de instalar adhesivo nuevo y resellar el teléfono.
Sigue estas instrucciones en orden inverso para volver a ensamblar tu dispositivo. Aplica adhesivo nuevo donde sea necesario.

10 comentarios
i would like to suggest a time of (52) Minutes and (36) Seconds plus thanks for the guide
check, plus you’re welcome :)
great guide!
Very excellent guide. Great pictures. Pictures must have been done in some sorta studio setting or edited for only what is needed for the illustration of every step. This was my first attempt at self repair on a cellphone, but I’m no slouch. I repair and refurbish all sorts of electromechanical devices and was once employed to do brain surgery on massive water cooled mainframe computers. Some of the same rules apply; have proven procedures, follow instructions, control your work space, and invest in the best tools. Since this was my first, I was not in a hurry. It took me all of 6 hours, but I was meticulous, repeated many steps to increase my confidence, and had all the time needed to do what I needed to do. Grateful for no longer being a slave to phone repair/insurance scams!! DIY forever!
I used a heat gun to soften the glue - worked it around the edges, moving the heat gun quickly. As this is my first attempt, I’m still calibrating on this - but other guides mention getting the back cover hot enough so as it’s just too hot to touch. I also have a temp probe on my multi-meter, and I measured appx. 75 deg. C.
One of the other guides showed using a electronics hot plate set to 105 deg C for 60 sec.
Phil Brooks -