Introducción

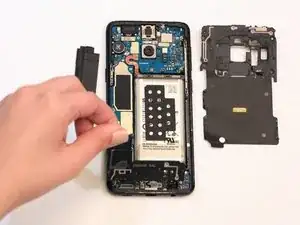
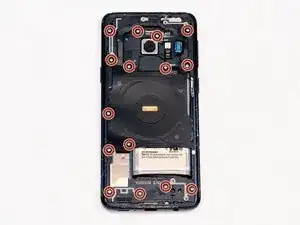
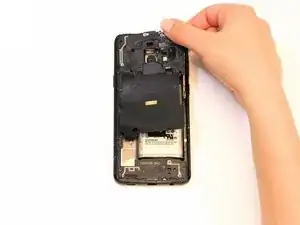
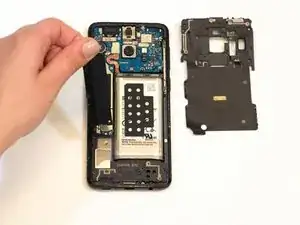
Usa esta guía para remover o reemplazar los marcos de plásticos que cubren las partes internas del teléfono, junto con los ensamblajes de antena y bobina de carga.

  1. CG2lTSgDh1ZZ2YAR
    • Retira quince tornillos de 4mm con un destornillador Phillips #000.

  2. NA52q3ap63TeadVS
    • Remueve el ensamblaje de la bobina NFC.

    This is not quite as easy as the simple statement “Remove the NFC coil assembly” would lead you to believe. The top and left side of the plastic bracket attached to the coil have tabs inserted into the frame of the phone and you can’t just pick the coil assembly up. It takes a bit of force, and I used a spudger to gently pry along the top from right to left to pop the tabs free, and then the tabs on the left came out more easily. Do not just pull on the coil and bend it up.

    drbenton815 -

    Yeah, for more detailed instructions, check the battery replacement guide and refer to steps 9 through 11.

    Evan Newman -

  3. LTeRVvgoAeGWnUiK
    • Remueve el soporte de la placa madre.

    My phone did not have a separate bracket covering the motherboard.

    jason boesiger -

    The NFC/wireless charging coil is adhered to the motherboard bracket, and in my case they both came off together.

    drbenton815 -

    Also, for safety, the battery connecter should be disconnected in this step rather than waiting until after removing the speaker cover/antenna assembly.

    drbenton815 -

    yeah, the coil assembly may take this off for you. pay attention!

    Evan Newman -

  4. NU5jI4KRBFqgPVWq
    • Remueve el ensamblaje de antena y tapa de altavoz.

    Forgot step to disconnect battery.

    Kara Monster -

    Hi Kara! If I remember correctly, we didn’t need to remove the battery. However, it’s been over a year, so I could definitely be wrong.

    Ani Svadjian -

Conclusión

Para volver a ensamblar tu dispositivo, sigue estas instrucciones en orden inverso.

Sam Azevedo

Miembro Desde 24/01/19

706 Reputación

0 comentarios