Introducción
Sólo prereq.
-
-
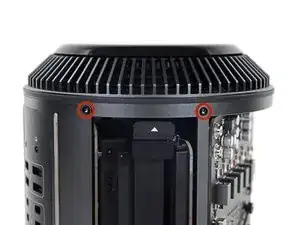
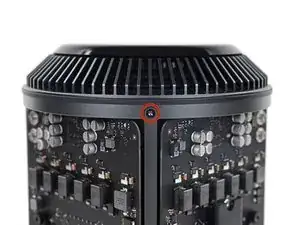
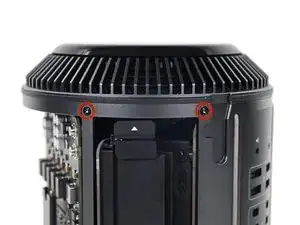
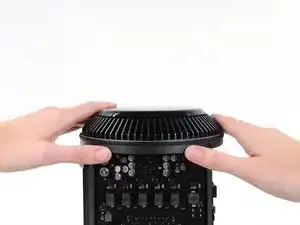
Quita los cinco tornillos Torx T10 de 5.1 mm de todo el perímetro exterior del ensamblaje del ventilador.
-
-
-
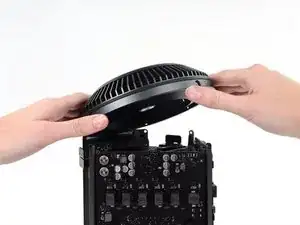
Mientras sostienes el ensamblaje del ventilador con una mano, afloja los dos tornillos cautivos T8 en el soporte del cable del ventilador.
-
-
-
Usa un par de pinzas para tirar del soporte del cable del ventilador y alejarlo del ensamblaje del ventilador.
-
-
-
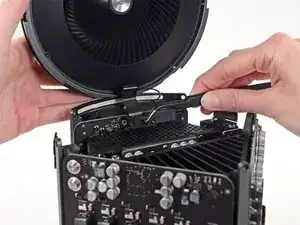
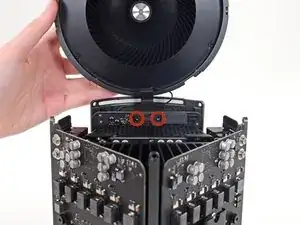
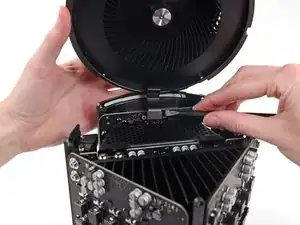
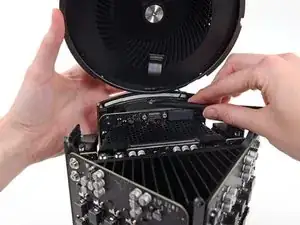
Utiliza el extremo plano de un spudger para desconectar el cable plano del ensamblaje del ventilador de la placa de E/S.
-
-
-
Desconecte el cable de la antena del ensamblaje del ventilador de la placa E/S.
-
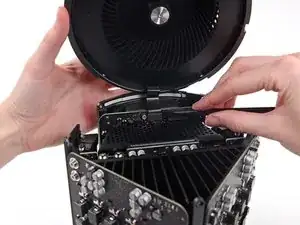
Retira el ensamblaje del ventilador del Mac Pro.
-

Conclusión
Para volver a ensamblar tu dispositivo, sigue estas instrucciones en orden inverso.
You don't have to remove the fan assy to get to the wifi board & card. It can be done with the fan assy still attached.
Fat Mango -
Fat Mango is correct. That said. If you do pull the fan assembly note that the screws are all held in with blue Permatex and breaking them free takes a fair amount of effort. Getting a good set of Torx screwdrivers is a must.
Jim WIlson -
Hey guys, what would happen if you only replace one card.. I have a D300 but the plan is to upgrade to D500 or D600. So If I can afford and install one instead of the pair would it increase something? or will it cause any conflict? I guess I don’t understand if I the Mac Pro has 2 D300 graphic cards that means each has 1GB? Same as If I would Install 1 D600 that would increase 3GB only? Thanks.
marcotamayo -
D300 = 2GB each card. Very few apps uses two cards at the same time.
Gio Cas -
The (5) Screws are Apple part number 923-0713
Steven Gier -