Introducción
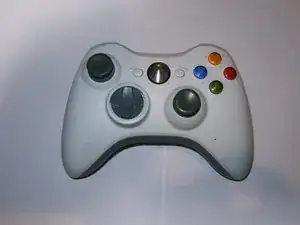
Reemplazo del joystick analógico en el controlador. Demasiado COD Black Ops puede dejarlo suelto y puede causar una deriva. La parte más difícil de esta reparación fue el desmontaje del controlador, ya que requiere un destornillador Torx T8h. Asegúrate de tenerlo antes de comenzar esta reparación.
Partes
-
-
El joystick izquierdo es el que más suele fallar.
-
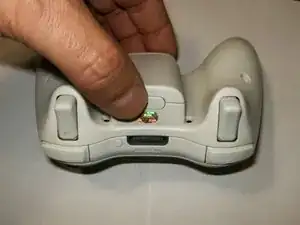
Oprime el botón de liberación de la batería en la parte superior del controlador. Quita el soporte de la batería del controlador.
-
Utiliza pinzas o un instrumento similar para despegar la etiqueta del código de barras del compartimiento de la batería.
-
-
-
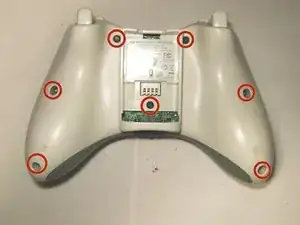
Retira los siete tornillos Torx de seguridad T8 de 9,3 mm que sujetan la carcasa trasera a la carcasa delantera.
-
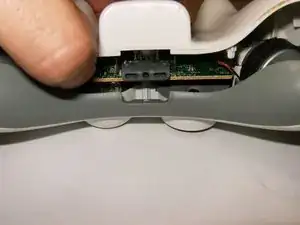
Inserta una herramienta de apertura de plástico entre las carcasas delantera y trasera a lo largo del borde izquierdo del controlador. Gira la herramienta hacia la parte delantera del controlador para separar las dos cajas.
-
Sujeta el controlador por el compartimento de la batería y el conector para auriculares. Levanta el compartimiento de la batería para separarlo del conector de auriculares, separando la carcasa trasera de la carcasa frontal y la placa lógica.
-
-
-
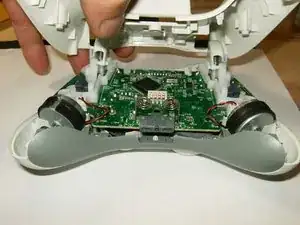
Inclina la carcasa inferior ligeramente hacia los botones de activación para deslizarla fuera de la carcasa superior.
-
Aquí se muestra una imagen del interior del controlador. Ten en cuenta los motores de vibración que tienen diferentes contrapesos.
-
Retira el conector del motor izquierdo (el controlador está colocado al revés; el controlador izquierdo se mostrará a la derecha, etc.)
-
-
-
Retira el conector del motor derecho.
-
Ambos motores están desconectados. Fíjate en la posición de los motores dentro de la caja para volver a armarlos.
-
Retira la placa lógica.
-
-
-
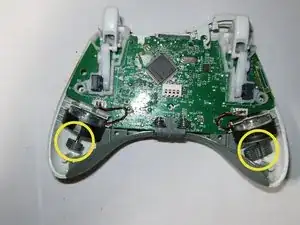
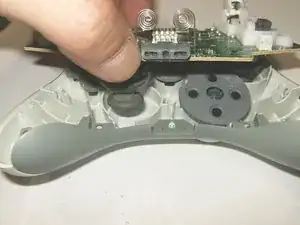
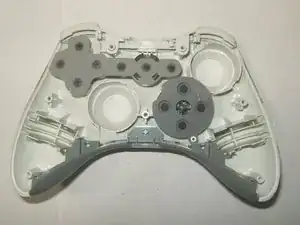
Observa la ubicación de las membranas de goma en la carcasa frontal para volver a ensamblar.
-
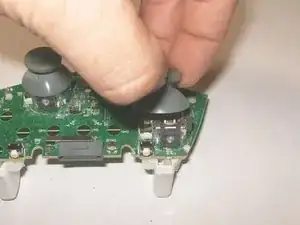
Para quitar las cubiertas de los joysticks analógicos, simplemente sácalos de las clavijas de montaje.
-
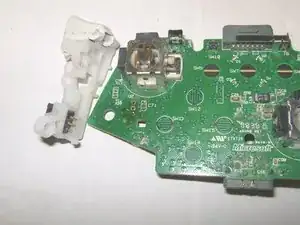
Imagen del joystick analógico izquierdo que se va a quitar.
-
-
-
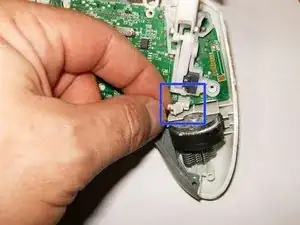
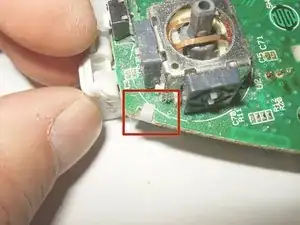
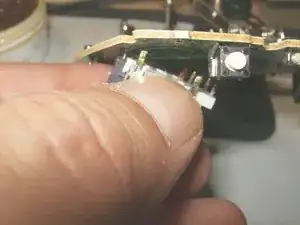
Para quitar el joystick analógico izquierdo, primero se deberá quitar el botón de activación izquierdo. Desolda los tres puntos de soldadura. Usa una mecha para desoldar y algo de fundente para quitar la soldadura.
-
Puntos de activación izquierdos sin soldar.
-
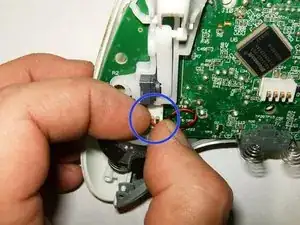
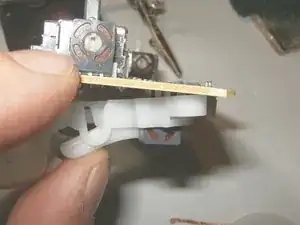
Hay 2 broches que sujetan la pieza del gatillo izquierdo en su lugar. Quítalos. Puede requerir un poco de fuerza, pero simplemente empuja el broche hacia arriba y hacia abajo.
-
-
-
Al quitar el gatillo izquierdo, asegúrate de que los puntos estén desoldados correctamente. Tira suavemente del gatillo hacia abajo.
-
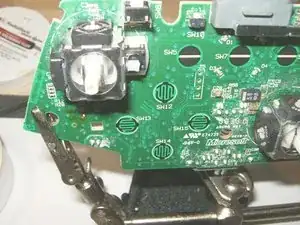
Se quitó el gatillo izquierdo.
-
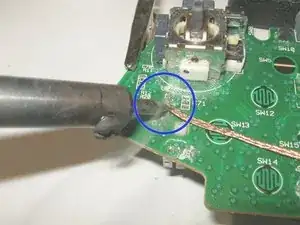
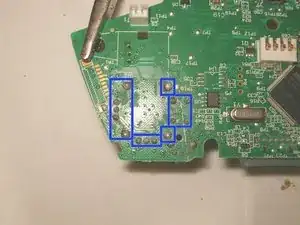
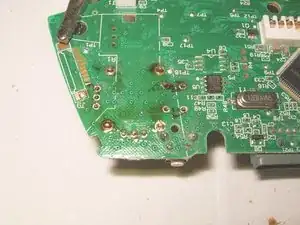
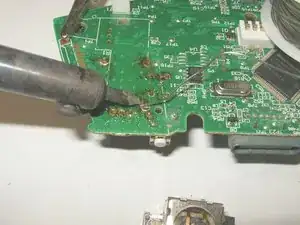
Con el gatillo izquierdo retirado, simplemente gira la placa lógica y busca las 14 conexiones de soldadura.
-
-
-
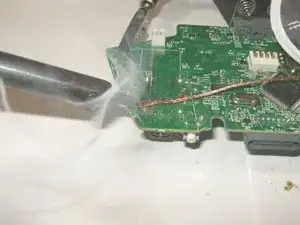
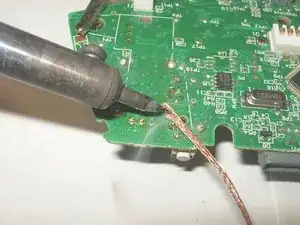
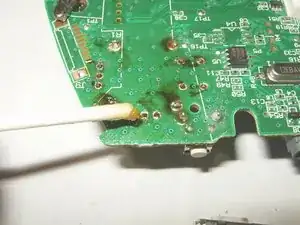
Utiliza una mecha para desoldar y algo de fundente para eliminar la soldadura.
-
Asegúrate de que ningún otro componente se desolde ni se dañe por el calor.
-
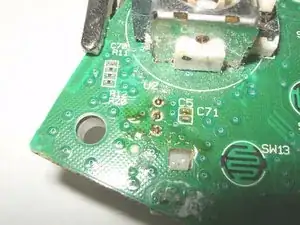
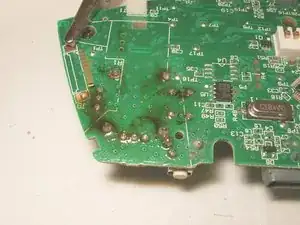
Aquí se han desoldado todos los puntos.
-
-
-
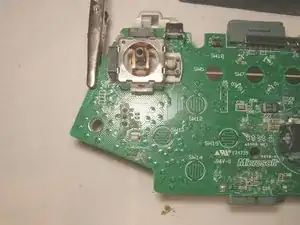
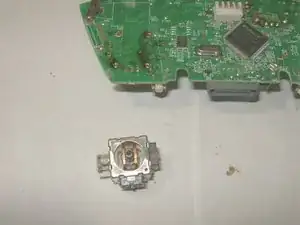
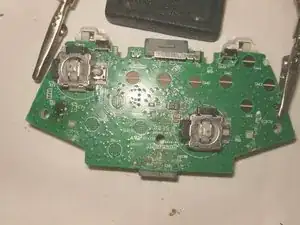
Retira la palanca analógica 3D con cuidado para asegurarte de que todas las conexiones de soldadura no estén soldadas.
-
Retira el joystick analógico.
-
Coloca el nuevo joystick analógico 3D en su lugar. Asegúrate de que esté asentado al ras contra el tablero.
-
-
-
Aplica un poco de fundente a los puntos de soldadura y a la pata del joystick analógico.
-
Solda las conexiones en su sitio.
-
Todos los puntos estarán soldados en su lugar. Los desechos negros líquidos son fundentes. Se pueden eliminar limpiando la placa con un poco de alcohol isopropílico después de soldar.
-


Para volver a ensamblar tu dispositivo, sigue estas instrucciones en orden inverso.

14 comentarios
My controller left stick is physically okew..but in gaming it is moving on downwards...
How can I fix this,I don't knew to do this repairing!:(
Nice work, excellenté!
I would like to note, you can unscrew the security screws with a 00 Flat head screwdriver. I just did it now and got all the screws out. Just gotta find the sweet spot, but it works.
What does .Ove mean
Dariel Rebollar -
No idea :-) but it’s fixed
oldturkey03 -