Introducción

Guía de pre-requisito solo para remover el marco medio en un Pixel 2.

  1. EZUdI4BmuOMhSJui
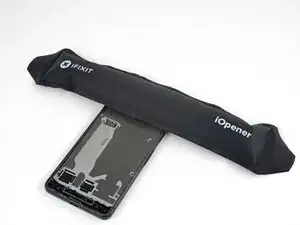
    • Aplica un iOpener calentado en el sensor de proximidad en el borde superior del marco medio del marco medio durante dos minutos para ablandar su adhesivo.

    Isopropyl alcohol worked quickly for this

    Raquel Smith -

  2. HbJNOR1kLALZjcTd
    HbJNOR1kLALZjcTd
    SrRrbyQwXyPacWk4
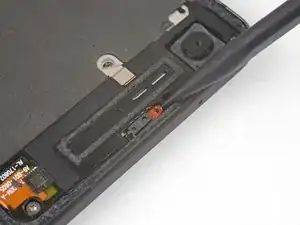
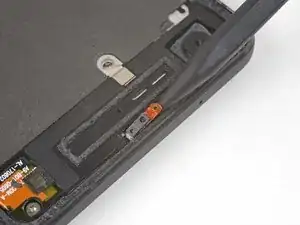
    • Desliza la punta de un spudger debajo del cable del sensor de proximidad comenzando desde el lado más cercano a la cámara frontal.

    • Con cuidado levanta el borde del cable del sensor hasta que el sensor esté perpendicular al marco medio.

    This piece is actually glued down - heat and rubbing alcohol really helped as at first I couldn’t figure out why I couldn’t get it to move.

    Dave Watts -

  3. DF6iCcXDep2Shj2C
    • Despega el pequeño trozo de cinta cubriendo el tornillo debajo del altavoz auricular. Pela cualquier otra cinta cubriendo tornillos igual.

    • Remueve los tornillos siguientes que sujetan el marco medio:

    • Once tornillos Phillips de 3.7 mm

    • Un tornillo T5 Torx de 4 mm

    On my Pixel 2, I also had to peel back a small strip of conductive tape that was directly above (and the same kind as) the “screw below the earpiece speaker” mentioned above. It appears to be a ground strap to the assembly underneath.

    Jonathan Dubovsky -

    Me too! Please change the photo?

    Andrew Hoeveler -

    If you don't peel the mesh tape up, it will year. I'm not sure if it plays into the screen potentially not working, but it seems to be a ground for the midframe and the display ribbon has a ground contact to the

    Wesley Krueger -

    Many of the screws would not come out due to the original threadlocker on the threads. I found that if I just kept moving them around with a toothpick, I could get the out. I also had one of those telescoping magnetic bolt grabbers that pulled the screws out.

    John Reagan -

    Would be nice if they included the correct torx bit in the tool kit... mine came with a T2 Torx...pretty useless...managed to get the display ribbon cable free as those screws were surprisingly not super tight - got them with the included Philips bit...pretty F$%^ED right here

    Jens Davidsen -

    @JensDavidsen, I'm sorry to hear that the kit came with the wrong bit. We do everything we can to make sure that our tool kits are kitted correctly. I've gone ahead and forwarded your information over to CS so they can get this fixed for you. In the future, if you have any questions or concerns, don't hesitate to reach out to us directly.

    Kris Rodriguez -

  4. HEw3eLh2pEVebIL6
    HEw3eLh2pEVebIL6
    LCQWWIipK2OVjkmP
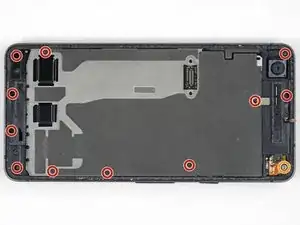
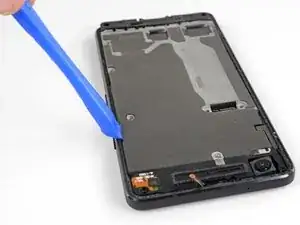
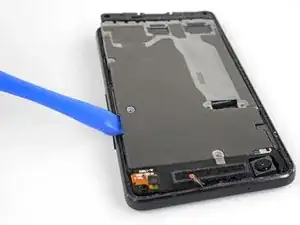
    • Inserta una herramienta de apertura en la muesca en el marco medio cerca del botón de espera.

    • Levanta el marco medio lo suficiente para crear una grieta entre el marco medio y la caja del teléfono. El marco medio no puede ser removido completamente aun.

    This is to pop a securing tab out it's place

    Wesley Krueger -

    On re-assembly make sure the securing tab, near the notch you use to open it, is inserted back under the frame again - this caused me to have to re-open my phone as my screen didn’t sit back down properly after I had put everything back together.

    Dave Watts -

    It is more effort than I anticipated. I really thought I was going to break it, but it was fine.

    John Reagan -

  5. OS6IR34P416u1kUn
    OS6IR34P416u1kUn
    bZXWgUSBDVDpCf1y
    qvUYTFk3VKDRNlOb
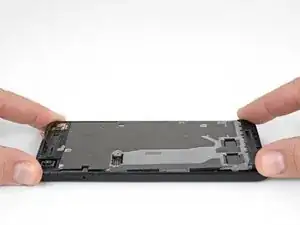
    • Levanta el marco medio comenzando desde el borde inferior.

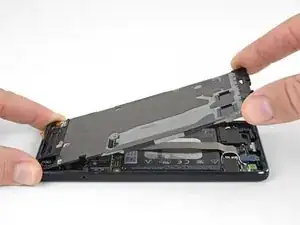
    • Cuando el marco medio comienza a hacer aproximadamente 45° con el resto del teléfono, levanta el marco medio y aléjalo del teléfono.

    • A medida que levantas el marco medio, guía con cuidado el sensor de proximidad a través de la pequeña ranura en el marco medio.

    While not shown here in the photo, there is a short braided cable between the midframe and the motherboard near the front facing camera that prevents separating the midframe completely (ground?). Be careful not to damage this cable when completing the remaining steps or carefully remove before trying to separate the midframe completely.

    ericdowens -

    As ericdowens says above, there’s a small silver sliver of a connector (next to the front-facing camera). The guides on youtube said it was a grounding wire. This guide doesn’t mention it. Mine broke when I removed the midframe. No big deal. I stuck it back down with some tape when I put it all back together. Phone works fine.

    Alex Lawson -

    I had a heck of a time levering up the midframe. I had popped the side with the opening tool, but the other side was really stuck. I used some alcohol along the edge thinking there was some adhesive. Not sure. I eventually used a dental pick to pop it loose.

    And when reinstalling, don’t forget to move the short braided cable back out of the way so you don’t trap it inside.

    John Reagan -

    STOP! Before you lift the midframe, the ground strap mentioned by ericdowens and Alex Lawson definitely will break if you don’t remove it from the midframe before lifting. I didn’t quite know what they were talking about, so thought I’d look for it as I was lifting the midframe, as I was sure if I was careful I’d spot it before it would break. I was very gentle, and I still broke it before realising what they were talking about. Look for some silver mesh tape on the midframe, near the forward-facing camera, same kind of tape as over the screw shown in Step 14. I’m going to try and carefully tape mine back together as Alex Lawson did, but it will be very fiddly, wish I hadn’t broken it in the first place!

    Jamie Lamb -

    I broke mine... then proceeded to pilfer about 2mm worth of the tape depicted in step 18 because it's a silvery adhesive.

    Jens Davidsen -

Conclusión

Para volver a ensamblar tu dispositivo, sigue estas instrucciones en un orden inverso.

Adam O'Camb

Miembro Desde 11/04/15

179525 Reputación

0 comentarios