Introducción

Guía solo prerequisito para remover el marco medio del Moto G4 para acceder los componentes internos para reparación.

  1. amtvddjAmwhmrnqH
    amtvddjAmwhmrnqH
    OWi4m4XCxfEBgDMt
    EwJnFXXfcwhAWbTc
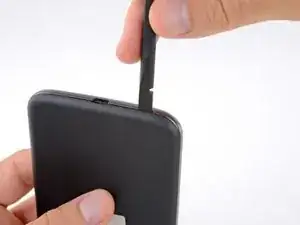
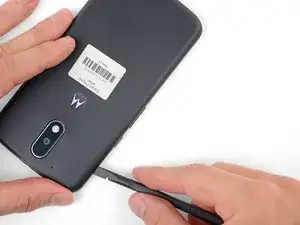
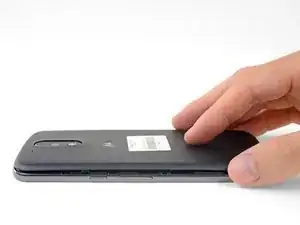
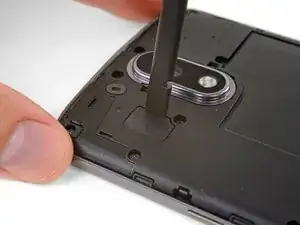
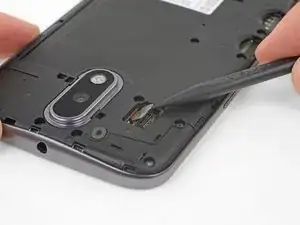
    • Inserta una uña o un spudger en el muesca en el borde inferior del teléfono cerca del puerto de carga.

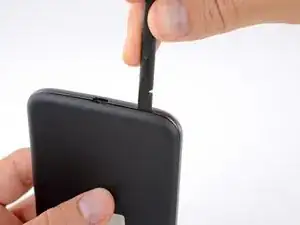
    • Con cuidado tuerce o levanta para abrir un pequeño orificio entre la tapa trasera y el cuerpo del teléfono.

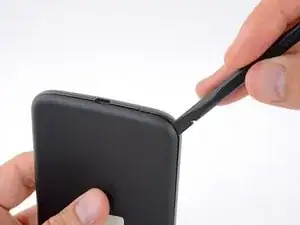
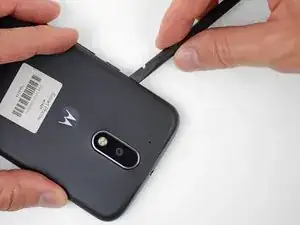
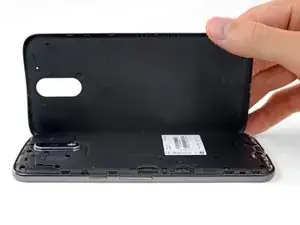
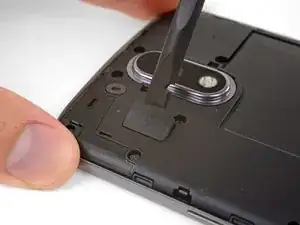
    • Mientras mantienes tu herramienta (o uña) insertada en el espacio libre entre la tapa trasera y el cuerpo del teléfono, deslízala alrededor de la esquina para comenzar a soltar los clips de plástico que sujetan la tapa en su lugar.

  2. HLqMHMbmASfwFDVU
    HLqMHMbmASfwFDVU
    wkbdCQWZyeoURicu
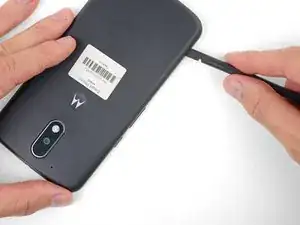
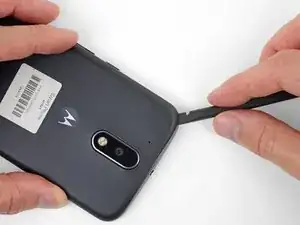
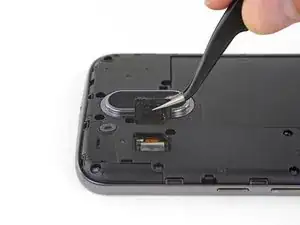
    • Desliza tu herramienta a lo largo del borde del teléfono para separar más los clips que sujetan la tapa trasera.

  3. IRICjJRMR1eUHQvd
    IRICjJRMR1eUHQvd
    frOdNGBIe3yRUYUQ
    DJCAEbwhl6ZN2xON
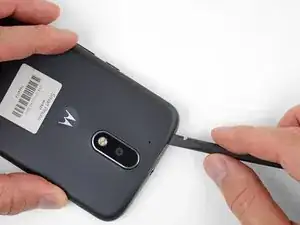
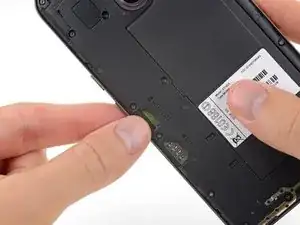
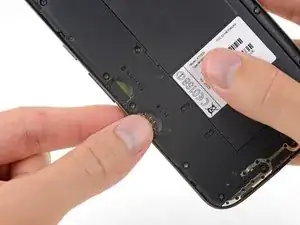
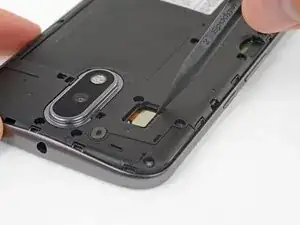
    • Mantén tu herramienta insertada ligeramente bajo la tapa trasera y deslízala alrededor de la esquina superior.

    • Si es necesario, continúa haciendo palanca alrededor de los bordes restantes del teléfono hasta que liberes la tapa trasera.

  4. pTETy5GBsJCUgxsO
    pTETy5GBsJCUgxsO
    vKqBpOYKSASlbQkv
    • Remueve la tapa trasera.

    • Para instalar la tapa trasera, con cuidado posiciona la tapa por sobre el teléfono y luego presiona gradualmente alrededor de todos los bordes hasta que sientas que los clips se encajen en su lugar.

  5. ffDFM5MxvYRYGd3M
    ffDFM5MxvYRYGd3M
    KLonmPJiytRfZMPP
    • Desliza y remueve las bandejas de las tarjetas MicroSD y SIM.

  6. CblUBFHebOPfmwHn
    CblUBFHebOPfmwHn
    Y5AmMCGdT5C4OWM1
    • Usa un spudger para levantar la tapa de goma para el conector flash de cámara.

  7. MBcHXGXsJATGCWMj
    • Remueve la tapa de goma.

  8. 2PT4qZOgF5piDHIy
    2PT4qZOgF5piDHIy
    OALHZ2QuglNBlykt
    • Usa un spudger para desconectar y levantar directamente el conector flash de la cámara.

  9. R52jISsgc6PJMUYW
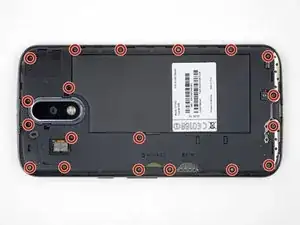
    • Usa un destornillador T3 Torx para remover los 19 tornillos idénticos de 3.1 mm que sujetan el marco medio.

    In my kit, the T3 Torx bit came in the ‘repair part’ box, while a T5 Torx bit was in the ‘repair tools’ box.

    Joseph Albert -

    my phone had t4, not t3

    Donald Smith -

    Screws are stuck quite hard, apply a hefty amount of pressure when removing. Otherwise you’ll destroy the thread

    face -

    unable to remove 8 of the screws. any suggestions?

    wayne malcom -

    My T4 is the tool that fit. I can see why people strip these. They were dam tight for such little screws.

    I also had a tough time getting them out of the socket once loose. Magnet in the tool was not very strong. I used my tweezers, and scratch the screw heads. That means they are real soft steel, and strip easy.

    P 38 -

  10. CdvPqSLWgj4YR1Im
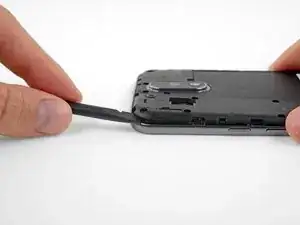
    • Inserta un spudger debajo del marco medio en la esquina izquierda superior y con cuidado tuerce para separarlo del cuerpo de teléfono.

    I couldn’t get the spudger in, but had success with the opening pick instead.

    Bernd Mast -

  11. D5HjSM3XUBUJOE6T
    • Remueve el marco medio.

    During the midframe removal, be careful and do not put too much torsional stress on the loudspeaker pickup wires (to the right of the main camera). It’s not that difficult to crush or shear the pickups there. Doing so will render your phone silent.

    Kevin Kwan -

    Exactly what happened to me. Both contacts broke off and if just loosely put where they were, they can't make proper contact anymore.

    There should be a warning about this in the guide itself!

    Simon Vetter -

Conclusión

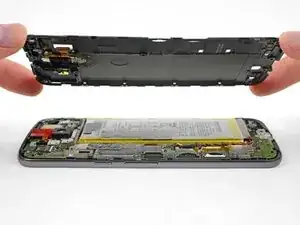
Para volver a ensamblar tu dispositivo, sigue estas instrucciones en orden inverso.

Jeff Suovanen

Miembro Desde 06/08/13

407914 Reputación

0 comentarios