Introducción
Retira el panel frontal de la pantalla superior para reemplazarlo o para acceder a los componentes dentro del ensamblaje de la pantalla superior.
Si solo estás reemplazando el panel superior de la pantalla, puedes calentarlo, sacarlo e instalar uno nuevo. No es necesario desarmar todo en la parte inferior para reemplazar el cristal.
Herramientas
-
-
Desatornilla los cuatro tornillos Phillips #00 a lo largo de la parte superior de la tapa trasera.
-
-
-
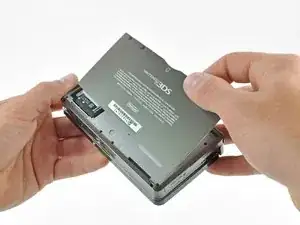
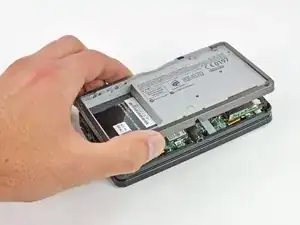
Sujeta el borde superior de la cubierta posterior con la mano opuesta para que la cubierta no vuelva a caer en su lugar.
-
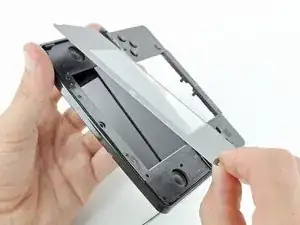
Tira de la tapa trasera hacia arriba y hacia afuera del resto del dispositivo para quitarla.
-
-
-
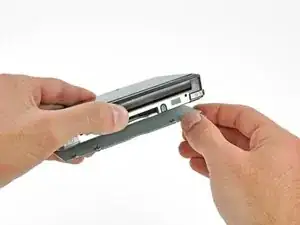
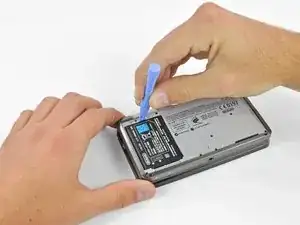
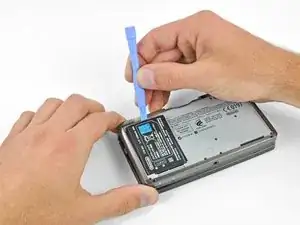
Inserta una herramienta de apertura de plástico en la muesca de la carcasa inferior sobre la batería.
-
Haz palanca en la batería con la herramienta de apertura de plástico.
-
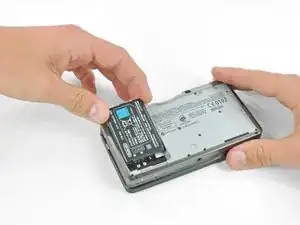
Toma el borde superior de la batería y levántala para sacarla de la carcasa inferior.
-
-
-
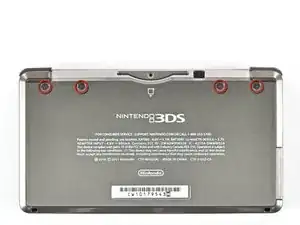
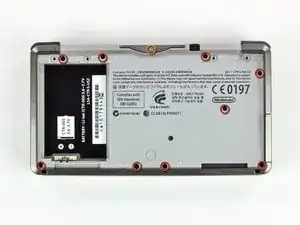
Retira los nueve tornillos Phillips negros de 6,3 mm de la carcasa inferior.
-
Retira el tornillo Phillips plateado de 2,4 mm que se encuentra sobre la ranura del cartucho de juego.
-
-
-
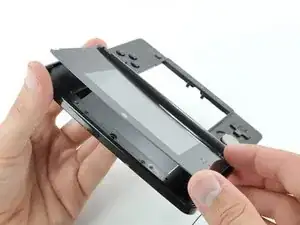
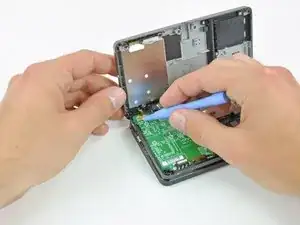
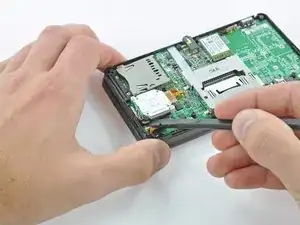
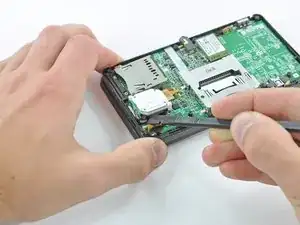
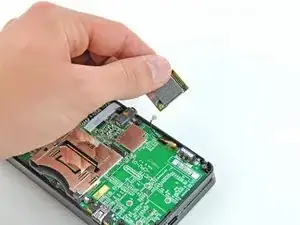
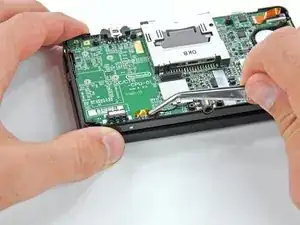
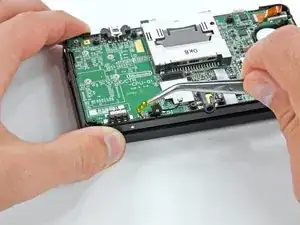
Levanta el borde inferior de la caja inferior del resto de la 3DS.
-
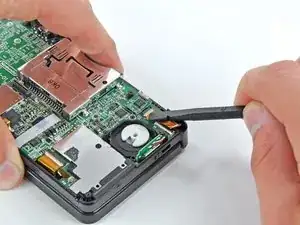
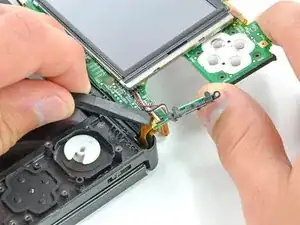
Usa una herramienta de apertura de plástico para hacer palanca en los cables planos de los botones laterales de sus zócalos en la placa base.
-
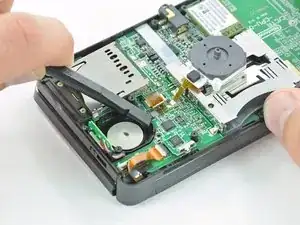
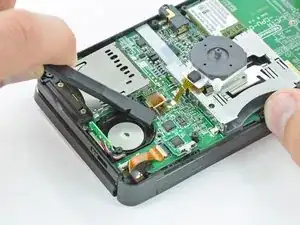
Retira la carcasa inferior del dispositivo.
-
-
-
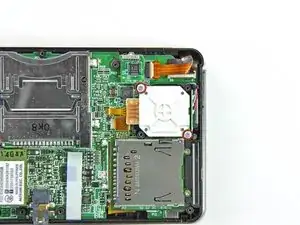
Retira los dos tornillos Phillips de 7,7 mm que sujetan la parte posterior del Circle Pad a la placa base.
-
-
-
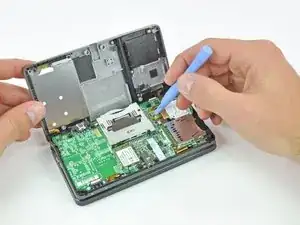
Usa el extremo plano de un spudger para sacar la parte posterior del Circle Pad de la placa base.
-
Levanta el joystick Circle Pad de la placa base y colócalo boca arriba de modo que se pueda acceder al conector del cable plano.
-
-
-
Usa el extremo plano de un spudger o la uña para levantar la solapa de retención en el conector ZIF del cable plano Circle Pad.
-
Levanta el joystick Circle Pad de la placa base.
-
-
-
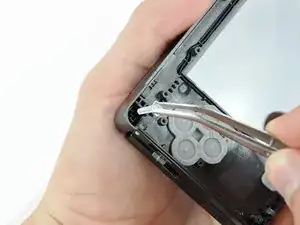
Usa un spudger o un destornillador para levantar las almohadillas y sacarlas del dispositivo.
-
-
-
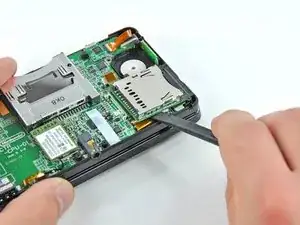
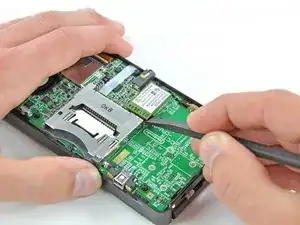
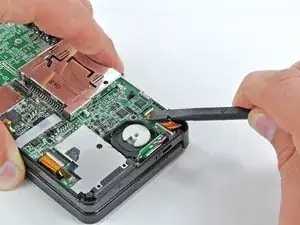
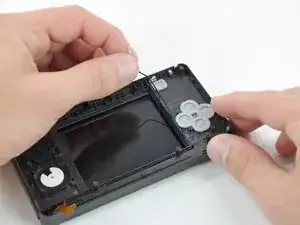
Usa el extremo plano de un spudger para sacar el conector del cable plano de la placa SD de su zócalo en la placa base.
-
-
-
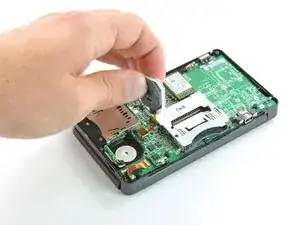
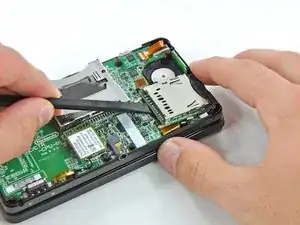
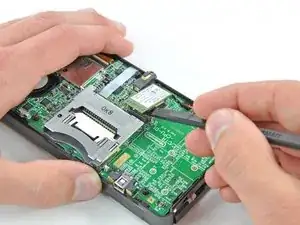
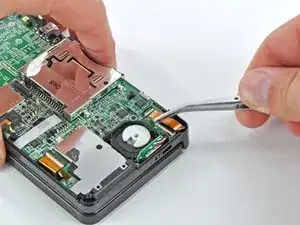
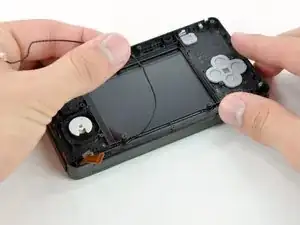
Inserta el extremo plano de un spudger entre la placa SD y la placa base.
-
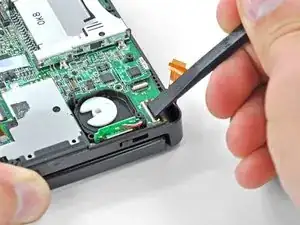
Pasa el spudger por los lados de la placa SD para liberarla de la almohadilla adhesiva que la mantiene en su lugar.
-
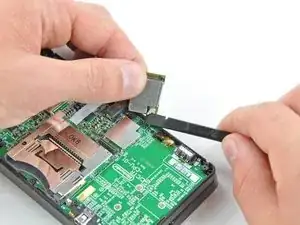
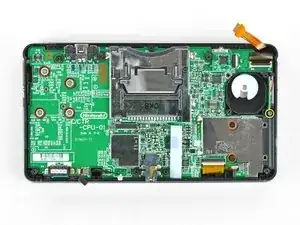
Una vez liberada por completo, levanta la placa SD directamente de la placa base.
-
-
-
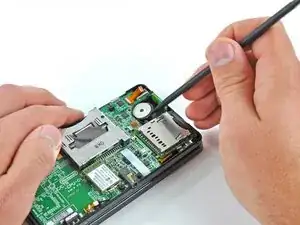
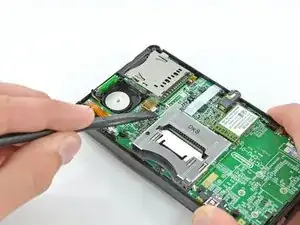
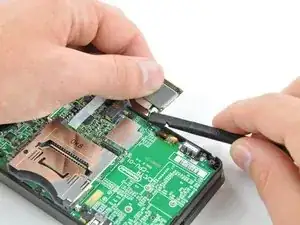
Desliza el extremo plano de un spudger debajo de la esquina de la placa Wi-Fi y levántalo para separarlo de la placa base.
-
-
-
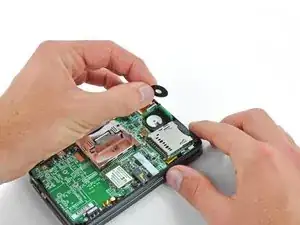
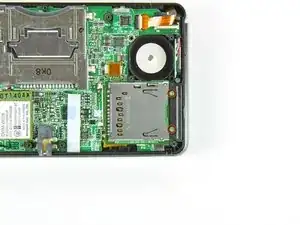
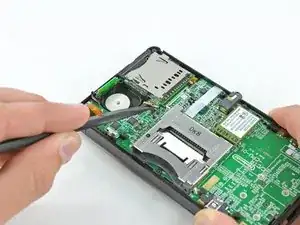
Usa el extremo plano de un spudger para sacar el conector del cable de la antena Wi-Fi de su zócalo en la placa Wi-Fi.
-
Retira la placa Wi-Fi del dispositivo.
-
-
-
Sujeta el cable de cinta del micrófono cerca del micrófono con un par de pinzas.
-
Tira del micrófono hacia arriba para sacarlo de la carcasa superior.
-
-
-
Usa el extremo plano de un spudger o la uña para levantar la solapa de retención en el conector ZIF del cable plano del ensamblaje del altavoz.
-
Desconecta el cable plano del ensamblaje del altavoz con un par de pinzas.
-
-
-
Usa el extremo plano de un spudger o la uña para levantar la solapa de retención del conector ZIF del cable plano de la cámara.
-
-
-
Retira los siete tornillos Phillips que sujetan la placa base a la carcasa superior:
-
Cuatro tornillos dorados de 2,5 mm
-
Dos tornillos negros de 3,5 mm
-
Un tornillo plateado de 2,5 mm.
-
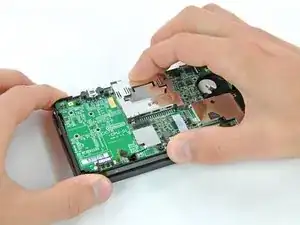
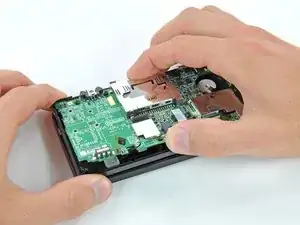
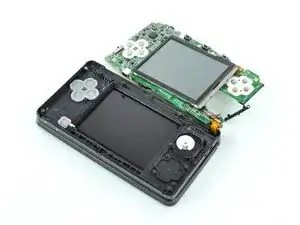
Levanta el lado de la placa base que se encuentra a lo largo del borde inferior de la 3DS.
-
-
-
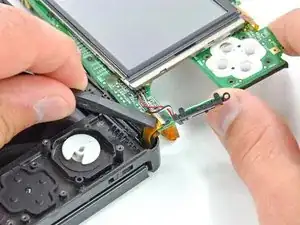
Usa el extremo plano de un spudger o la uña para levantar la solapa de retención en el zócalo ZIF del cable plano LCD.
-
-
-
Antes de continuar con el desmontaje, usa un par de pinzas para quitar el difusor de plástico transparente del LED de notificación inalámbrica. Es probable que la pieza pequeña se caiga por sí sola y puede ser difícil de encontrar si cae al suelo.
-
-
-
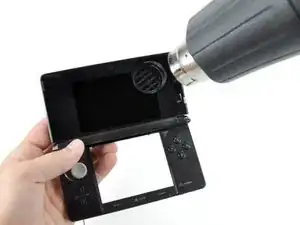
Calienta los bordes del panel frontal superior de la pantalla con un secador de pelo o una pistola de aire caliente para ablandar el adhesivo que lo sujeta al bisel de la pantalla.
-
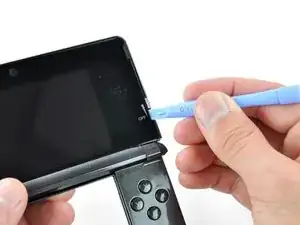
Comienza haciendo palanca en los bordes del panel frontal con una herramienta de apertura de plástico.
-
-
-
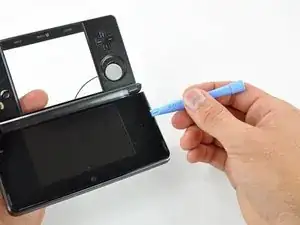
Continúa haciendo palanca en los lados restantes del panel frontal deslizando la herramienta de apertura de plástico hacia abajo en cada borde.
-
-
-
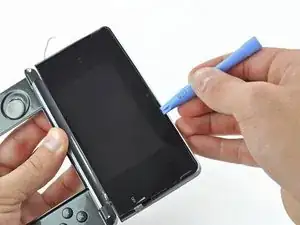
Con todos los lados libres, levanta el panel frontal de la pantalla superior del bisel de la pantalla.
-


Para volver a armar tu dispositivo, sigue estas instrucciones en orden inverso.

3 comentarios
Why remove the entire motherboard just for the upper screen? That seems completely unnecessary; just be careful with the heat gun.
Tehy remove the whole motherboard because if you pay attention ribbon cables attaching things from the top to the bottom, like the ribbon cable for the lcd that you cant remove from its socket without removing the other parts. They even have pictures on these guides… just focus a little more on paying attention and you will be alright
Just to replace the front panel you don’t need to remove anything else, its just held down with adhesive, only reason to take apart is to replace the lcd itself which isn’t what this is about.
#00 screwdriver is too big... probably need a #000
thomascroguennec -
#00 will work - but you must press down firmly and sort of jerk the screw out a few degrees at a time. If you don't press firmly, the screws strip very easily. Using #000 will strip the screws more easily.
Tai -
I used a #0 without any issues and 0 stripped. I used the #0 for all screws internally and externally. The head was sharp and I applied adequate amounts of pressure when loosening the screw.
Ben Kevan -
The correct screwdriver should be a JIS, or you can get a screwdriver specific for the 3DS from other sites for less than $2
Oscar -
do you have to buy it
deeznuts -
Where would I buy a screwdriver specifically for the 3DS? Also would it work on the DS? I need to replace the battery for my DS.
Caitlin Lumsden -
I used Phillips #000 and it worked like a charm, i need to order a new SD board or do you guys think i should send it. What happened is that it got water damaged and everything works fine when i opened it everything looked fine no signs of water corrosion everything on the 3DS works exept it always give me a message saying the SD card is locked and i know for a fact it isnt locked i already tried using 3 different SD cards and none of them are lock protected and yes they are formatted as well. I need help
Leo Torres -
there's a switch on the SD card, switch it and it will be unlocked again. it happened to me once too.
Bagel -
david hodson you are incredible. literally all you need to do is heat the screen up and pry it off and you make them take apart the whole thing
melody -
You've done this?
magykmaster -
I have to ask the same question. If just the glass display is broken, and you're heating it up to remove the glass, is it really necessary to remove everything? Doesn't like like it is necessary
Wade -
I just did it your way and it went fine. didnt even have to remove the battery. This is incredible misstep on the authors part.
patrick -
only take out the screen for a motherboard removal? Are you using the wrong guide or was this guide used for two different repairs?
Reed Deemer -
I used a PH0x50, but it wasn't easy.
John -
This may be a dumb question but where do I buy the 3DS upper screen?
John -
eBay... Just do a search for the 3DS Upper screen. $9.49 & it comes with the tools.
Gary Darnell -
The LCD screen I ordered came with all the tools I needed except a pair of tweezers. All in all it was about $14.00 and a little bit of my time.
Gary Darnell -
Does anyone know where I can find the right bumper button for a 3ds? I can't find it on ebay must of damaged it playing smash bros.
Steven Castro Parrilla -
Really wish I had read the comments first... How about instead of the warning saying to press down hardly and go slow, you say to use the correct screwdriver size like others mentioned in the comments. I not only stripped multiple screws, even after putting a glove on for more pressure, I bent my screwdriver from pressing down so hard. Granted it's a cheap jeweler's kit screwdriver, but it still would've been nice to not have that problem and be informed of the right size in the first place.
hockeymorgan35 -
Got my tools one day after ordering, as I live a couple hours away from the supplier, Will post again when i try guide.
nintendokakashi -
I tried doing this with a #00 Philips but it just didn't turn
Acrobatic Mars01 -
Hello there, I need some assistance I have done a full housing replacement I have everything working except the 3d slider . The 3D option is always on can someone let me know which flex it is or what I am forgetting . Thanks guys !
Noe Ibarra -
The 3D light lets you know there is a 3D option available for the current game you’re playing. Usually, it is always on, except when you’re playing a game that doesn’t support 3D. Turning the 3D slider off does not turn off the 3D LED.
Scott D -
I've always been lucky with these four, and at the time it was my first disassembly so I didn't know what stripping a screw was!
FarmYard Gaming -
These screws don't strip easily, however, the screws at step 4 do.
TheBlueInkling -