Introducción
Usa esta guía para remplazar una fuente de poder dañada.
Herramientas
Partes
-
-
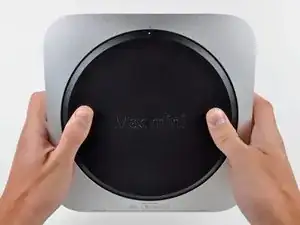
Posiciona tus dedos en las depresiones marcadas en la cubierta inferior.
-
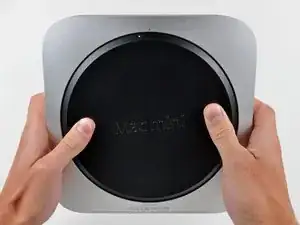
Rota la cubierta inferior en sentido contrario a las agujas del reloj hasta el el punto blanco pintado en la parte inferior esté alineado con el anillo inscripto en la carcasa exterior.
-
-
-
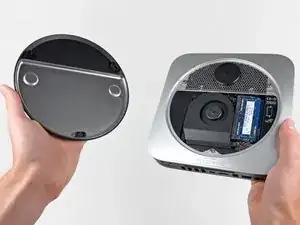
Inclina la mini lo suficiente para permitir que la parte inferior se separe de la carcasa externa.
-
Remueve la cubierta inferior y déjala separada a un lado.
-
-
-
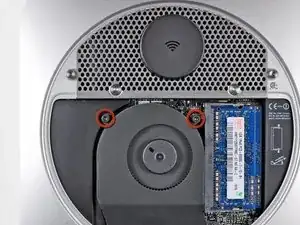
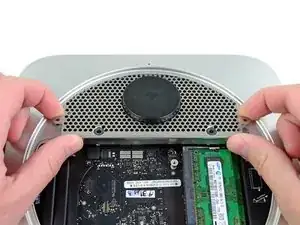
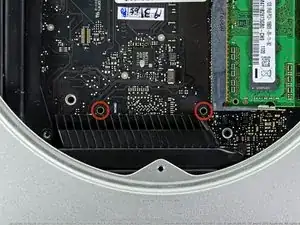
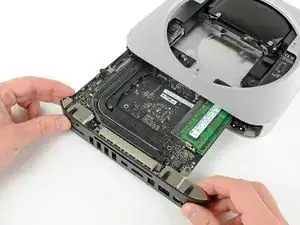
Remueve los dos T6 de 11.3mm tornillos Torx que aseguran el ventilador a la placa lógica cercanos a la bandeja de la antena.
-
-
-
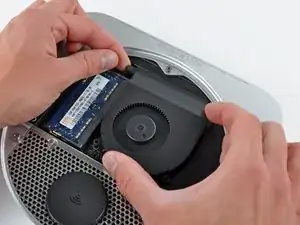
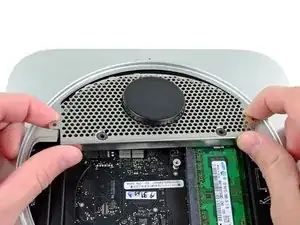
Levanta la oreja del ventilador cercano a la RAM hacia arriba del soporte asegurado a la carcasa externa.
-
-
-
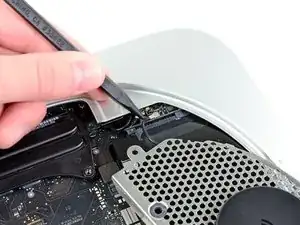
Levanta el ventilador de la mini para tener suficiente espacio para acceder a su conector.
-
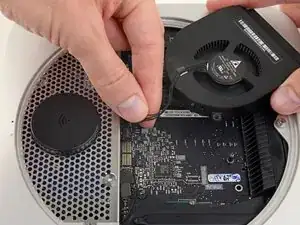
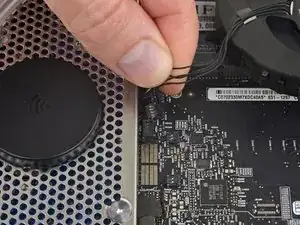
Toma todos los cables y gentilmente tira hacia arriba para desconectar el ventilador de la placa lógica.
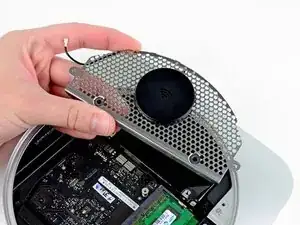
-
Remueve el ventilador.
-
-
-
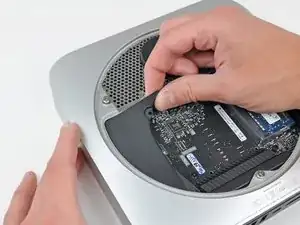
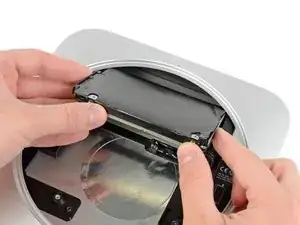
Levanta la cubierta desde la parte más cercana al plato de la antena.
-
Rota la cubierta lejos de la carcaza externa y remuévela de la mini.
-
-
-
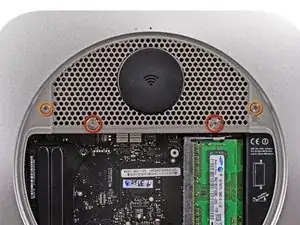
Remueve los siguientes tornillos que aseguran la chapa de la antena a la Mini:
-
Dos tornillos Torx T8 de 6.6 mm
-
Dos tornillos Torx T8 de 5.0 mm o tornillos Hexagonales de 2.0 mm (cualquier destornillador funcionará)
-
Cuando los coloques de vuelta juntos:
-
-
-
Delicadamente levanta la chapa de la antena del extremo más cercano a la RAM.
-
Con cuidado tira la chapa de la antena fuera del borde circular de la carcasa exterior.
-
-
-
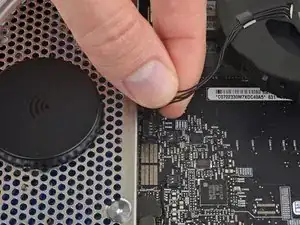
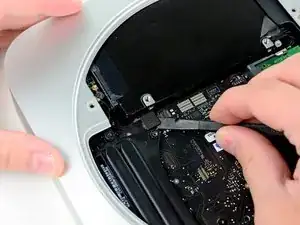
Usa la punta de un spudger para levantar cuidadosamente el conector de la antena de su zócalo en la tarjeta AirPort/Bluetooth.
-
-
-
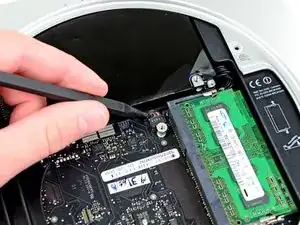
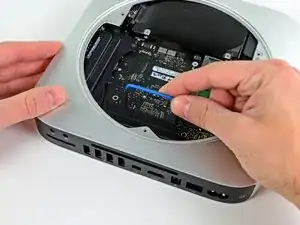
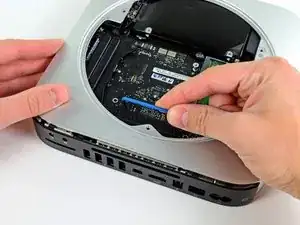
Usa la punta plana de un spudger para levantar el conector del disco duro de su zocalo en la placa lógica.
-
-
-
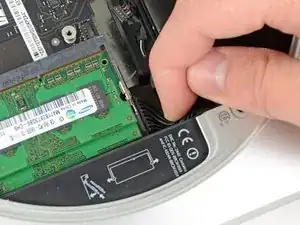
Usa la punta de un spudger para levantar el conector del sensor de infrarrojos y sacarlo de su zócalo en la placa lógica.
-
-
-
Remueve los siguientes tres tornillos:
-
Un tornillo Torx T8 de 5.0 mm o tornillo Hexagonal de 2.0 mm (los dos destornilladores funcionaran)
-
Un tornillo Torx T6 de 16.2 mm
-
Un tornillo Torx T6 separador de 26 mm
-
-
-
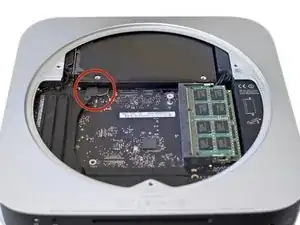
Inserta la Herramienta Removedora de Placa Lógica del Mac mini en los dos hoyos resaltados en rojo. Asegura que haga contacto con la parte superior de la carcasa exterior antes de proceder.
-
Cuidadosamente tira hacia la placa E/S. La placa lógica y el ensamble de la placa E/S debería deslizarse ligeramente de la carcasa exterior.
-
Remueve la Herramienta Removedora de Placa Lógica del Mac mini.
-
-
-
Extraiga el conjunto de la placa de E / S / placa lógica de la carcasa exterior lo suficiente para acceder al conector de alimentación.
-
Use sus dedos para desconectar el cable DC-In de la placa lógica.
-
Tire del conector del cable de alimentación hacia el lado frontal del mini.
-
-
-
Cuidadosamente desliza el ensamble de la placa lógica afuera del mini, teniendo en cuenta algunas cable que pueda atascarse.
-
-
-
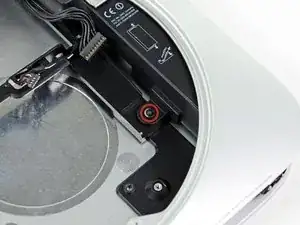
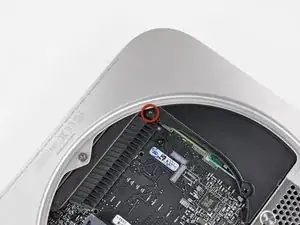
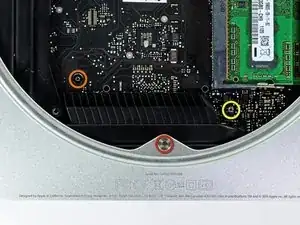
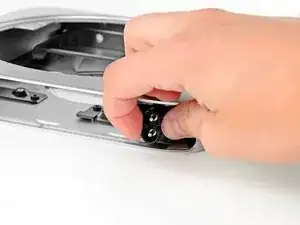
Quite el tornillo Torx T6 de 7,9 mm que sujeta la fuente de alimentación y la bandeja del disco duro a la carcasa exterior.
-
-
-
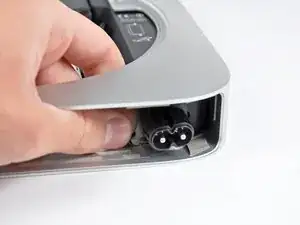
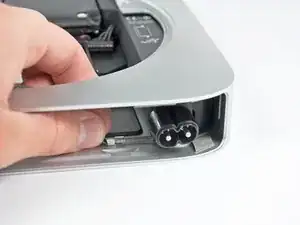
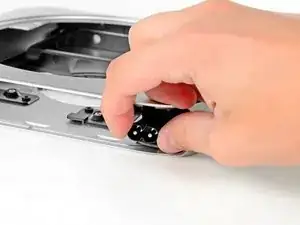
Tira del retenedor de metal plateado del AC-In hacia el lado de la carcasa exterior y remuevelo del mini.
-
-
-
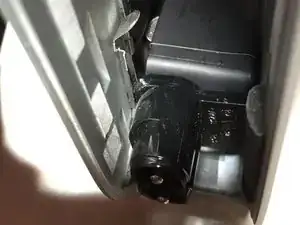
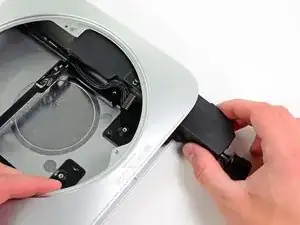
Desliza la fuente de poder afuera del mini, teniendo en cuenta algunos cables que puedan atascarse.
-

Para re-ensamblar tu dispositivo, sigue estas instrucciones en orden inverso.

2 comentarios
I replaced the power supply with a refurbished apple oem supply and it is STILL rebooting. New lithium PRAM battery, new known good RAM, new SSD, clean install of El Capitan, zapped the PRAM and reset the smc all to no avail. STILL REBOOTS even after shut down.
Val -
Huge help in my power supply conversion. A+
gefski -
This took a lot of force on my Mac mini. A lot.
nh3 -
I agree. It took a crap ton of force from my thumbs to twist the bottom off.
sleeve -
I accidentally broke the little things that hold the cover to the case. Is there a cheap replacement to the cover? Those clips are held onto it very weakly.
Jacob Halton -
Don't just use your thumbs... Use your whole palm to twist it, with maybe a thumb in one of the recesses, applying slight downward pressure.
markbart -
Wish I would have read this comment before I did it!
I found that what markbart said works best. one palm one thumb (and my knees) My thumbs would do it. It was a bit at a time.
Same difficulty getting it back on.
Would be handy if this (difficulty) was mentioned in the guide
Also would be nice to mention the safe practice of pressing the power button for a few seconds after disconnected to rid the system of any residual power, working in a clean static free environment & they say on the crucial website to touch a metal surface of the machine before touching the RAM
Nancy -
I think it depends, I have seen some that are very difficult to open and some super easy. But I see them everyday. I wish there was a tool that fit in the holes.
Justin Weathersbee -
When seating the bottom RAM chip you may have to apply a little extra side force to get it to seat properly. I put in the new RAM and just got a beeping sound upon starting. I then put the old RAM back in and got the same result.
Here is the solution I found on the Apple discussion board.
"Take a small flat head screwdriver and after you put the memory in slot 0, put the screwdriver between the top of the mac mini and the memory then turn the screwdriver a little to exert pressure on the memory into the slot. Do it on both sides of the memory."
This worked for me.
littlemas2 -
I remember this when I was changing my memory ... I realized (after opening) that more you push, more force it take to open the cover. As you push down you force the cover "to rub" the casing and possibly other things inside. If you "lightly" hold the cover it comes right off ... Remember: less is more! :-)
Have fun!
Radek -
We found it hard to use the thumbs but if you put the casing on a carpet and one person is holding the case while the other is using his palm of one hand to turn the cover it comes off quite smoothly and without much downward pressure.
Alexander -
If you're upgrading to an SSD, before you even take this first step, I'd recommend putting the SSD into an external drive case, using USB and format the SSD first before trying to swap your existing hard drive or implementing a fusion drive. The external drive case will come in handy later so you can use the old drive as extra storage anyhow.
Once that SSD is internal, the Mac errors out during the formatting process. Once it was formatted externally, then installed inside the Mac again, there was no problem.
Orange Girl -
The first time I did this it hurt! The second time my mac mini 2012 had been running so was warm. VERY EASY WHEN WARM. No fun when cool!
Nancy -
Forget about those 2 circle indents. if you consider the 2 marked dots (open and close) as position 12 o’clock, place your thumbs at 11 and 1 o’clock on the outer rim of the cover and rotate from that position.
juicer52 -
No way was I getting the back off. So I made a tool. Took a large wrench longer than the Mac mini. Superglued 2 rubber feet on the wrench at the same location as the thumb indents. Put the Mac on the ground, between my knees and used my body weight to turn the cover. Worked like a charm.
Mark -