Introducción
Tu Nano se cayo? Usa esta guía para remplazar su panel de cristal curvo.
Herramientas
Partes
-
-
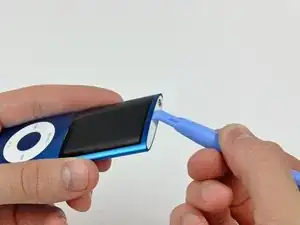
Inserta el borde de una herramienta de apertura de iPod entre la brecha de la carcasa exterior y el bisel superior.
-
Has palanca en el bisel superior separándolo del adhesivo asegurandolo al retenedor de la pantalla.
-
-
-
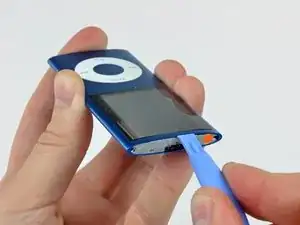
Introducir la herramienta de apertura del iPod entre la carcasa exterior y el contenedor del display.
-
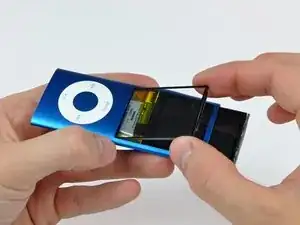
Usar la herramienta para deslizar ligeramente el display ensamblado de la carcasa.
-
-
-
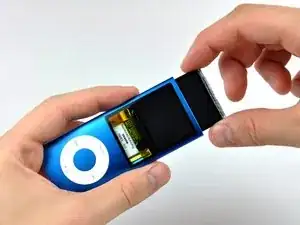
Deslizar la pantalla fuera del iPod. Se puede mover unas 5" hasta que el cable del display llegue a su limite de tensión.
-
-
-
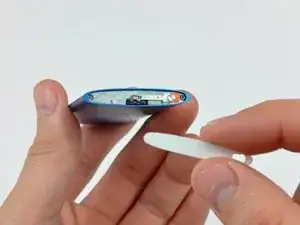
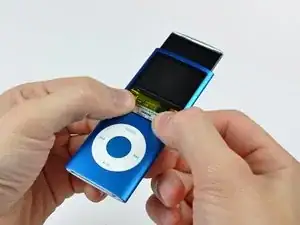
Con la pantalla fuera de la carcasa lo máximo posible, presionar en la parte baja del cristal hasta que se suelte ligeramente (~1mm).
-
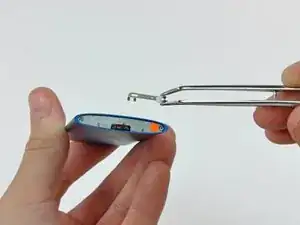
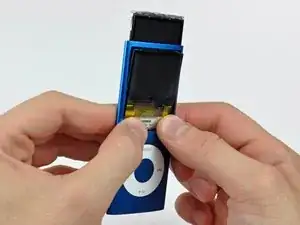
Usar los pulgares para deslizar el cristal por debajo de la carcasa hasta que la parte superior se separe.
-
Para re-ensamblar tu dispositivo, sigue estas instrucciones en orden inverso.

Be sure to use the smaller iPod opening tool and press it in FIRMLY in order to get enough leverage to get under the bezel and pry it off. Adhesive is very strong, so don't be afraid to use a little bit of force.
captcarl13 -
Tool broke before I could get the cover off !!! So I’m done before I even started !!
linda45p -
I have a Apple iPod Nano 4th gen(Green) and I only have 7 tech pieces to the iPod and I may/might have the small philips screws and I am not sure how to fix the iPod nano
Nick Davies -
I also had Problems to remove the bezel. The solution was to start with a very small screw driver from the hole of the switch. There I could lift it a bit and get the plastic tool in between. Than it was easy.
Michal Niewiadomski -
After replacing the battery, the old glue would lump up too thick, and also become too weak to fix the panel back to the outer case. I have scraped all the old glue off using a small flat head screw driver, and affixed a double sided adhesive tape cut into small strips, which was successful in both aspects.
diytradjazz -
TIP: Use a plastic tool and pull it out through the hold switch. This may break the top bezel, but this was the only way to get it off.
Caleb Murphy -