Introducción

Esta es una guía solo prerrequisito! Esta guía es parte de otro procedimiento y no debería ser utilizada sola.

  1. RbmrWltVkpaGW11U
    RbmrWltVkpaGW11U
    CkxuUjhFPneXWyEv
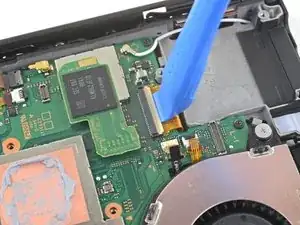
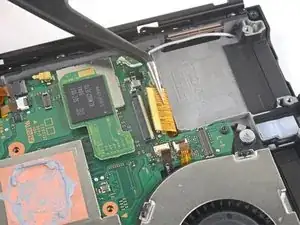
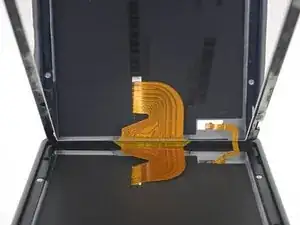
    • Utilice una herramienta de apertura, una espátula o su uña para levantar la pequeña solapa de cierre con bisagra del conector ZIF del cable plano de la pantalla LCD.

  2. wl1oxp2ib3ceMWSP
    wl1oxp2ib3ceMWSP
    yMiQL6D2eW5xIlUR
    • Utiliza unas pinzas para sacar el cable plano de su conector en la placa madre.

    I’ve torn a few ribbon cables in my time. Use your tweezers to nudge the tabs on either side of the ribbon cable and “walk” the ribbon cable out of the ZIF connector - slowly!! This should help prevent any tears in the ribbon cable when using tweezers.

    nin10doh -

  3. VJSVoLhdRLOAh6rH
    VJSVoLhdRLOAh6rH
    ApARThvZqebnbE1s
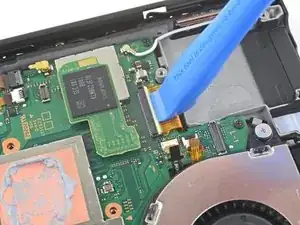
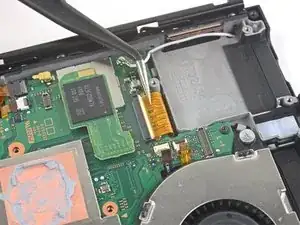
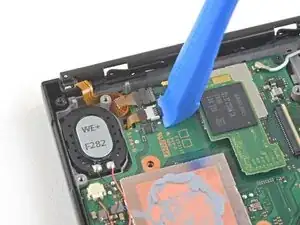
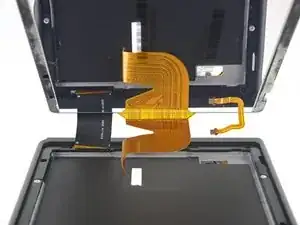
    • Usa una herramienta de apertura, una espátula o tu uña para levantar la pequeña solapa de cierre con bisagra del conector ZIF del cable plano de la pantalla LCD más pequeño.

  4. 5dLvNxLCpydNSDnk
    5dLvNxLCpydNSDnk
    HDPMA6m4AuqpqrDa
    • Utiliza unas pinzas para sacar el cable plano de su conector en la placa madre.

  5. SYMUWYU1eNPKFnSd
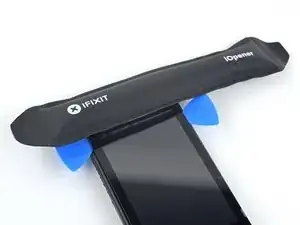
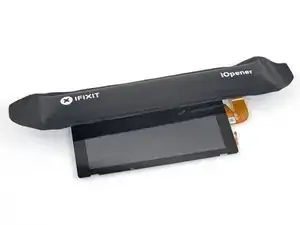
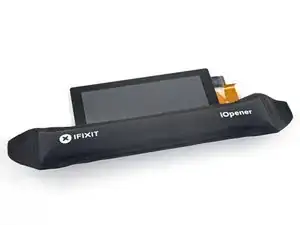
    • Calienta un iOpener y aplícalo en el borde inferior de la pantalla durante unos dos minutos para ayudar a ablandar el adhesivo.

    • También se puede utilizar un secador de pelo, una pistola de calor o una placa caliente, pero tenga cuidado de no sobrecalentar el dispositivo, ya que tanto la pantalla como la batería interna son susceptibles de sufrir daños por el calor.

    I used a hair dryer because I don’t own a microwave and didn’t like the idea of boiling the iOpener - which apparently doesn’t work that well anyway. For reference, the hair dryer I used was a CONAIR 1875 Styler. I also used an infrared thermometer, which you’ll absolutely need if you’re not going to use the iOpener. You need the infrared thermometer because you must know when to stop heating the digitizer. There are delicate components nestled in the top of the Switch’s faceplate - right where you’ll be putting the heat. To begin:

    1. Prepare your work area by clearing the surrounding surfaces of anything plastic, metal, or electronic - surrounding areas are sure to reach temps of up to 110 °F (43 °C).

    2. Get something non-conductive like a small cardboard box to rest the disassembled Switch on top of. This will help to target the heat on the specified area, depending on which step you’re on.

    nin10doh -

    3. Grab a piece of cardboard and cut it to the shape of the Switch screen, or around the same size. You will need this cardboard to protect the LCD and delicate internals.

    4. Set your infrared thermometer to the side or somewhere close to the spot where you’ll be heating the digitizer.

    5. Grab your hairdryer and set that to the side as well.

    6. Position the Switch on the cardboard box so that you are ready to begin heating the first side of the digitizer as specified in Step 28. I found that it was easier to have the heated side facing me, so that I can hold the hairdryer more comfortably.

    7. Begin heating the bottom of the digitizer, starting on the lowest setting of your hairdryer. You’ll want to hold the hairdryer just close enough that you have about three or so inches between the heat and the Switch itself. Heating the digitizer will take some time, so do not expect the temperature to rise rapidly. A rapid rise in temperature can damage sensitive internal components, even with the cardboard piece in place.

    nin10doh -

    8. After 1 min 30 sec, check the digitizer temperature and make sure that the surface temperature (the opaque black border, not the actual screen) registers at 130 °F (54 °C) or higher. Continue heating on Low until a temperature of 130 °F (54 °C) or higher is reached.

    9. When a temperature of 130 °F (54 °C) or higher has been reached, raise the hairdryer another two to three inches from the digitizer. Switch your hairdryer heat setting to High ( or Med, for three-temp hairdryers) and continue heating until a temperature of 161 °F (71 °C) has been reached. Check the temperature every 2 secs to ensure even, consistent heating. Once a temperature of 161 °F (71 °C) has been reached, do not heat the digitizer any further. Doing so could damage the LCD, internal antennas, or faceplate.

    10. Repeat steps 6 thru 9 alongside the guide (Steps 28 thru 38) to complete the digitizer adhesive softening process.

    Good luck! If this causes anyone any problems, reply here and I’ll try to respond as quickly as possible.

    nin10doh -

  6. QSxShAsDC4CBTr6R
    QSxShAsDC4CBTr6R
    BkQjFZiLYGDQcImA
    tGxUC3dMm6PjNthr
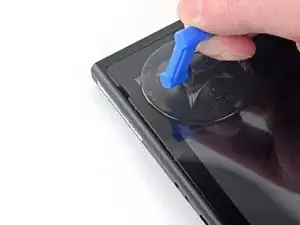
    • Aplica una ventosa en la esquina inferior izquierda de la pantalla.

    • Tira de la ventosa hacia arriba con una fuerza fuerte y constante para crear un hueco.

    • Dependiendo de la edad de tu dispositivo, esto puede ser difícil. Si tiene problemas, aplica más calor y vuelve a intentarlo.

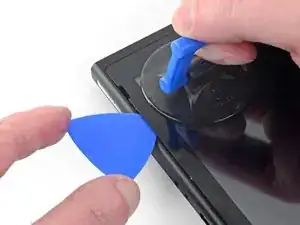
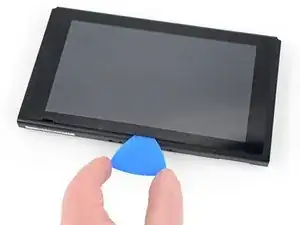
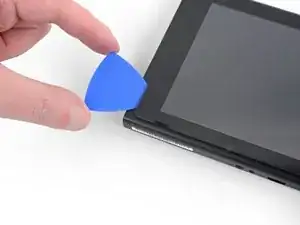
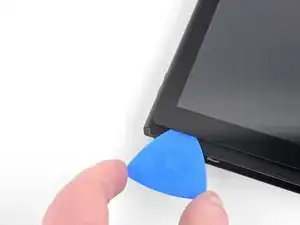
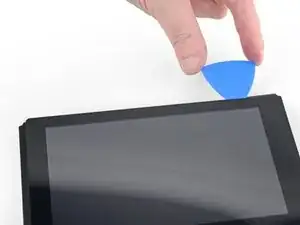
    • Introduce la punta de una púa de apertura en el hueco, asegurándote de introducir la púa sólo unos 5 mm.

    Used a heat gun at 3/4 power for TWO 2-min bursts. The remainder of the sides each took a single 2-min burst.

    Jaxon Lee -

  7. LNwVoBtmdjpKYxGd
    LNwVoBtmdjpKYxGd
    HAnMUQr1uqonkDOt
    XiTVlnpbl5RdGCTP
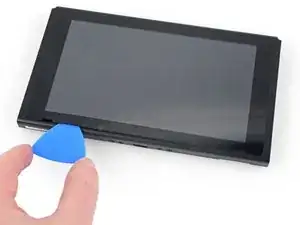
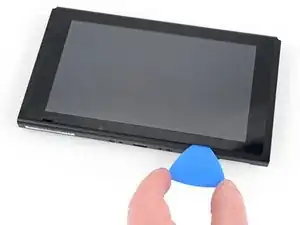
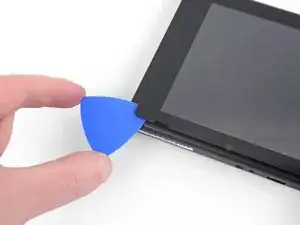
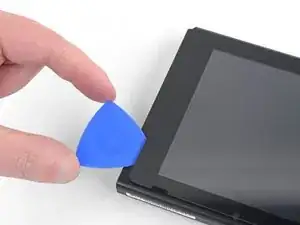
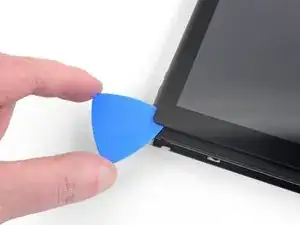
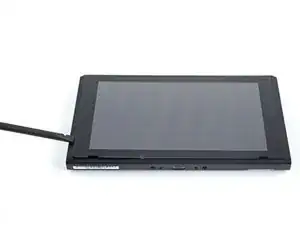
    • Desliza la púa de apertura a lo largo del borde inferior de la pantalla para cortar el adhesivo.

    • Deja la púa insertada para evitar que el adhesivo se vuelva a adherir al marco.

  8. j6ESoVHXv26NZpWG
    j6ESoVHXv26NZpWG
    HOWcI4jxL1qLxQHl
    E4EtWbdsmPkiEjUI
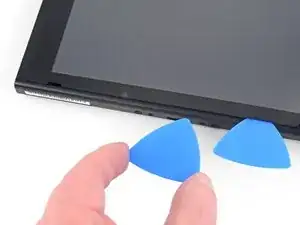
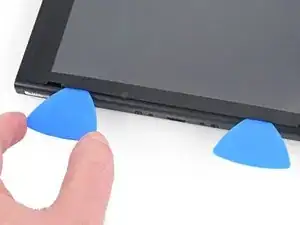
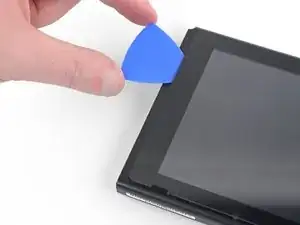
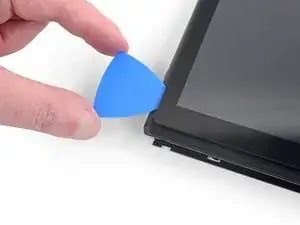
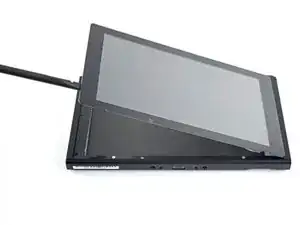
    • Inserta una segunda púa de apertura en la grieta a la izquierda de la primera púa.

    • Desliza la púa de apertura hacia el lado izquierdo del aparato.

    • Deje la púa de apertura insertada.

  9. QNWtxZVfaiuyvuoq
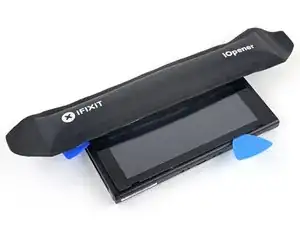
    • Calienta el borde izquierdo de la pantalla durante unos dos minutos para ayudar a ablandar el adhesivo.

  10. CQPKH5sJeudYnVOY
    CQPKH5sJeudYnVOY
    ahdVwu4YrouGLeEF
    Cj3mpBIyZGpSpPog
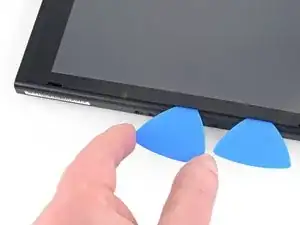
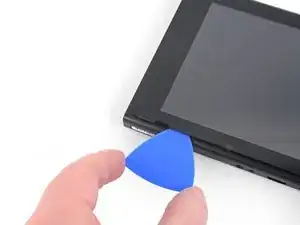
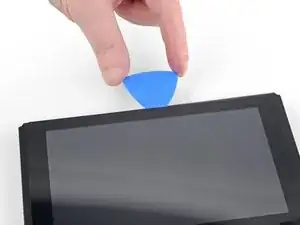
    • Continúa deslizando la púa de apertura alrededor de la esquina inferior izquierda para cortar el adhesivo.

  11. HhYlvBlrEfEaVdpv
    HhYlvBlrEfEaVdpv
    wvwqXOk1eIkRKASX
    • Continúa deslizando el pico de apertura a lo largo del borde izquierdo de la pantalla para cortar al adhesivo.

    make sure to follow exactly which side it says to do... i just sliced straight through the digitizer cable doing this ^^" whoops

    qu in n -

  12. OBieIWRVVp6IsAgX
    • Calienta el borde superior de la pantalla durante unos dos minutos para ayudar a ablandar el adhesivo.

  13. QsB2EgXNrmOy6miw
    QsB2EgXNrmOy6miw
    HKJjreMPEbE6KIHE
    tiTCWVwEOcYBJGOs
    • Continúa deslizando la púa de apertura alrededor de la esquina superior izquierda de la pantalla para cortar el adhesivo.

  14. HUWMDCnQUDWXLwAo
    HUWMDCnQUDWXLwAo
    T23SgH5QgWS3lP6u
    fPnpmuy3SgE5uvPG
    • Continúa deslizando la púa de apertura a lo largo del borde superior de la pantalla para cortar el adhesivo.

  15. 2fRCRfoBlYXEJkXI
    2fRCRfoBlYXEJkXI
    UOpOdIvdpZ6mNHj1
    GWcSpklbnpnyhUHr
    • Calienta el borde derecho de la pantalla durante unos dos minutos para ayudar a ablandar el adhesivo.

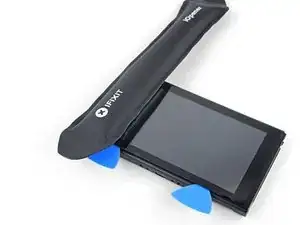
    • Coloca el extremo plano de un spudger en el hueco del borde izquierdo de la pantalla.

    • Levanta con cuidado y lentamente el borde izquierdo de la pantalla, abriéndolo como un libro.

    My digitizer separated from the lcd screen during this step. Wasn’t a problem. Just something to be aware of

    Jaxon Lee -

  16. 5yABpCyYxvEIRjVG
    5yABpCyYxvEIRjVG
    QwpUXp2UwnJqcw6k
    q5hENjHUxQdZ3KXj
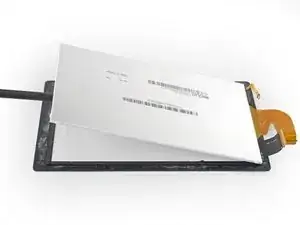
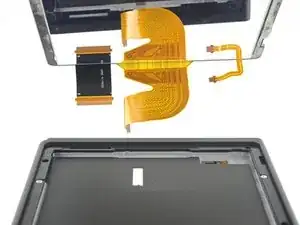
    • Levanta el borde derecho de la pantalla para sacarla del aparato, pasando los cables de cinta por el marco.

    • Ten cuidado de no enganchar ninguno de los cables planos en el marco mientras retiras la pantalla.

    • Puedes reutilizar el adhesivo de la pantalla si todavía está pegajoso. De lo contrario, reemplaza el adhesivo con cinta de doble cara como la cinta Tesa.

    What kind of glue is required to re-assembly the screen?

    Deedend 77 -

    only thing missing. I am scraping the old adhesive off and trying to re-use

    Jaxon Lee -

    UPDATE: So, I was able to peel off the re-apply the old adhesive. It seems pretty secure, but we’ll see. Otherwise, this step needs an additional detail about what type of adhesive would be ideal to finish this.

    Jaxon Lee -

    Hi Jaxon!

    Thanks for the suggestion! I added an extra bullet for the adhesive.

    Arthur Shi -

    thank you for the help

    Cifiboy -

    How many mm wide Tesa tape should I purchase?

    Keishin Tamaki -

  17. AECG1FZwiLspinuH
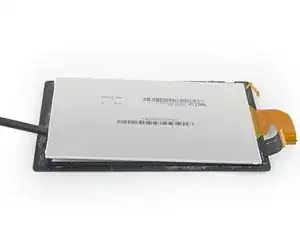
    • Calienta el borde superior del ensamble de la pantalla por alrededor de dos minutos para ayudar a suavizar el adhesivo sosteniendo el panel LCD al digitalizador.

  18. iOQi1PpKRiZxWgiG
    iOQi1PpKRiZxWgiG
    QDUcBqaTS1m4aikp
    tgTUqpADpcMOShYY
    • Voltea el ensable de la pantalla.

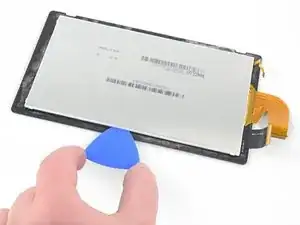
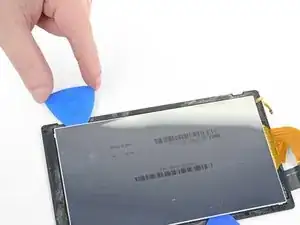
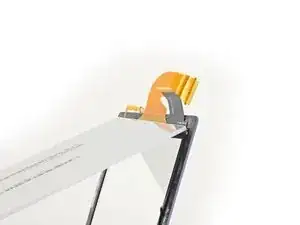
    • Inserta una púa de apertura en la esquina izquierda superior entre el panel LCD y el digitalizador.

    • No importa que tan profundo tu insertes la púa de apertura, pero alrededor de 5 mm es suficiente para cortar todo el adhesivo.

    • Puedes doblar ligeramente el digitalizador para crear una brecha más grande, pero ten cuidado de no doblarlo demasiado para causar daño al digitalizador si lo estas reutilizando.

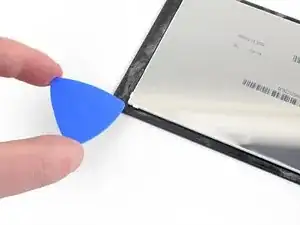
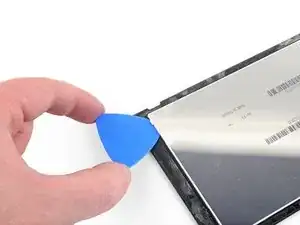
    • Desliza la púa de apertura alrededor del borde superior del ensamble de la pantalla para cortar el adhesivo.

  19. eLIej4LcPZxgfKCt
    eLIej4LcPZxgfKCt
    TsPHOKZgDrqPgvO4
    UEYHDUr6yBj2uZgf
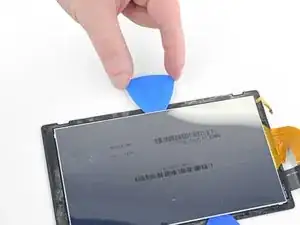
    • Continúa deslizando la púa de apertura alrededor del borde superior para cortar el adhesivo.

  20. fOY2Fualwu6ap5hN
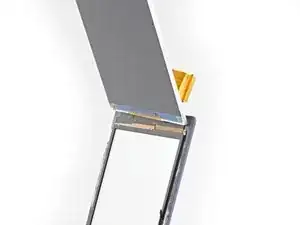
    • Calienta el borde izquierdo del ensamble de la pantalla por alrededor de dos minutos para ayudar a suavizar el adhesivo.

  21. YHPigdyfoVjTYdOl
    YHPigdyfoVjTYdOl
    lb4x1baOaXDI5NPy
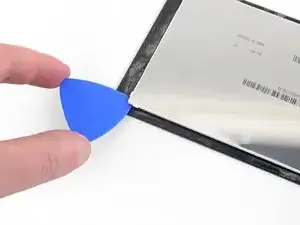
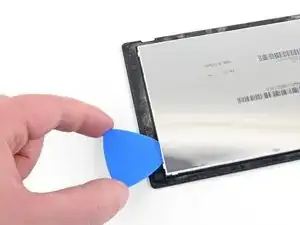
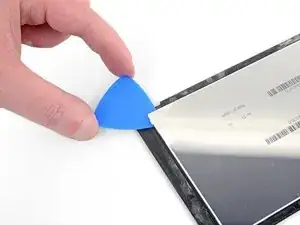
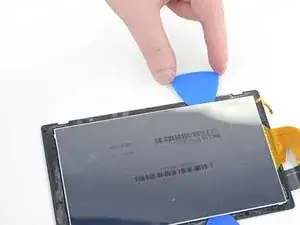
    • Inserta y desliza la pua de apertura alrededor del borde izquierdo del ensamble de la pantalla para cortar el adhesivo.

  22. baf2JOTKFTTWnO6y
    baf2JOTKFTTWnO6y
    mOkIajAZXjykGC5R
    fSq2I2tBrq3CyGXl
    • Continúa deslizando la púa de apertura alrededor de la esquina izquierda inferior del ensamble de la pantalla para cortar el adhesivo.

  23. UstkFHvNBQHAfRCU
    • Calienta el borde inferior del ensamble de la pantalla por alrededor de dos minutos para ayudar a suavizar el adhesivo.

  24. BtkLmLaIYQfuFDPv
    BtkLmLaIYQfuFDPv
    JiZHkFshpLsuEW4R
    fmIgPDWACKZTnYx4
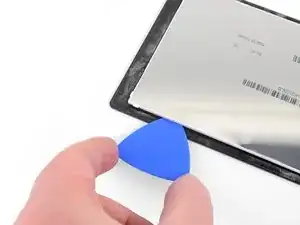
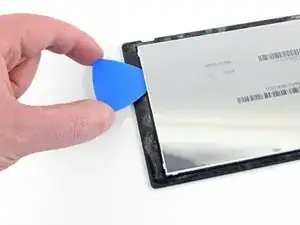
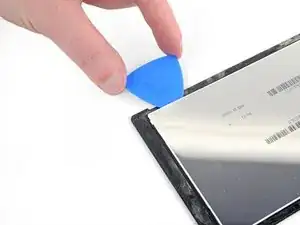
    • Continua deslizando la pua de apertura alrededor del borde inferior para cortar el adhesivo.

  25. 5HbXMRtVC5VPl5YJ
    • Calienta el borde derecho del ensamble de la pantalla por alrededor de dos minutos para ayudar a suavizar el adhesivo.

  26. FtmW3cuLR1ivoH6m
    FtmW3cuLR1ivoH6m
    1KoC3FITfZVuwscx
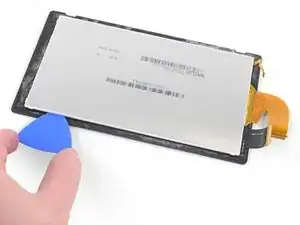
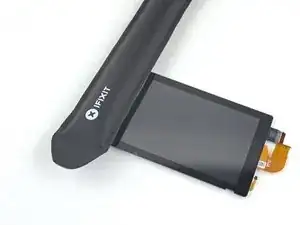
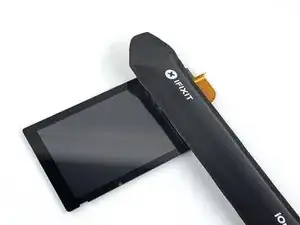
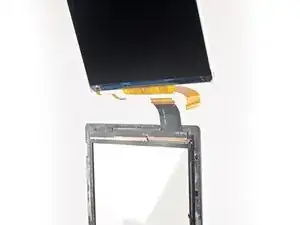
    • Inserta el lado plano de un spudger entre el panel LCD y el digitalizador alrededor del borde izquierdo del ensamble de la pantalla.

    • Cuidadosamente y lentamente levanta el lado izquierdo del panel LCD, abriéndolo como un libro.

  27. nmv1RCA6FkpnbyjR
    nmv1RCA6FkpnbyjR
    iHSPxahZJEP16rvK
    m3EyfuFT53uQv1j6
    • Continua levantando el panel LCD alejándolo del digitalizador para separar los dos componentes.

    • El cable plano del LCD esta adherido ligeramente al digitalizador. Si no se remueve fácilmente, aplica mas calor a esa area y trata de nuevo.

Conclusión

Para re-ensamblar tu dispositivo, sigue estas instrucciones en orden inverso.

Craig Lloyd

Miembro Desde 10/02/16

30254 Reputación

0 comentarios