Introducción
Esta guía te mostrará cómo reparar un DualShock 4 con un botón que no funciona. Esta guía es SOLO para los modelos de placa base JDM-001 / JDM-011. (Controladores CUH-ZCT1)
- Antes de pedir la pieza de repuesto, abre tu controlador usando la guía de desmontaje para determinar el número de modelo de tu placa base (generalmente detrás de la bandeja de la batería).
- No tengo ninguna responsabilidad por pedir el modelo incorrecto. ¡Te lo adverti!
Herramientas
Partes
-
-
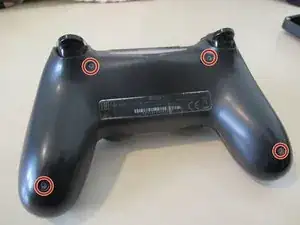
Desatornilla estos 4 tornillos PH0 para abrir la tapa trasera.
-
Con cuidado, haz palanca alrededor de la tapa con un spudger. Tira de la parte trasera para abrir la carcasa.
-
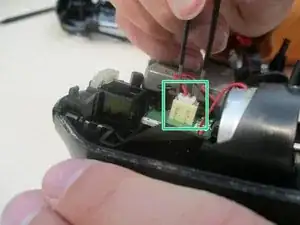
Desconecta el cable plano de la barra de luces.
-
-
-
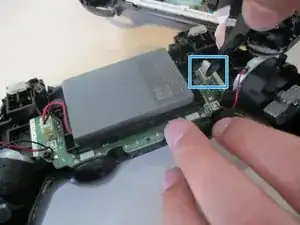
Desconecta el conector de la batería y retira la batería.
-
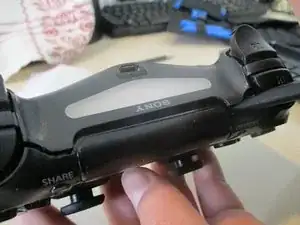
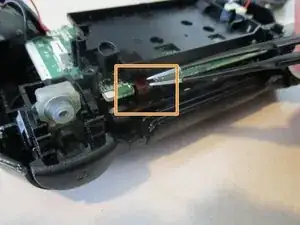
Y el cable de la barra táctil. Empuja el cable con cuidado a través del pequeño orificio en el marco medio de plástico.
-
-
-
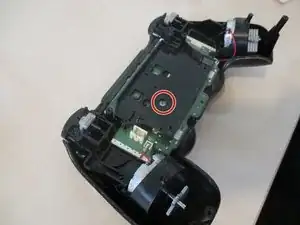
Retira el tornillo solitario PH1 que sujeta la placa base y el marco medio.
-
Retira la cubierta frontal del marco medio. Si se atasca, es posible que debas mover los joysticks.
-
-
-
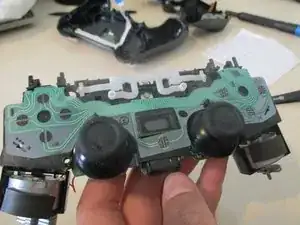
Comenzando desde abajo, retira con cuidado la placa de estos 4 pestillos. También podrías quedar atrapado en la parte inferior de la rejilla del altavoz.
-
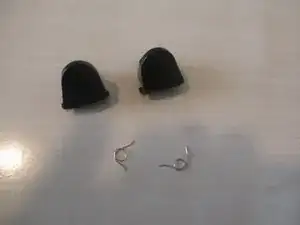
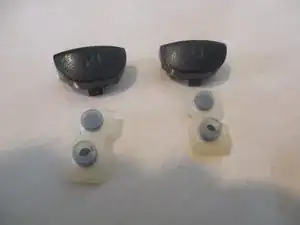
Luego, retira los botones del parachoques y las almohadillas de contacto hacia afuera para ellos y los gatillos. Se debe aplicar una ligera fuerza.
-
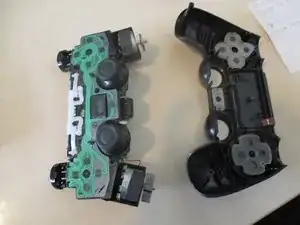
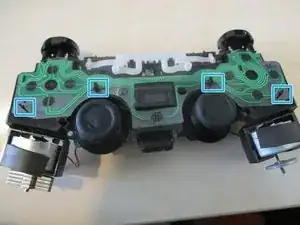
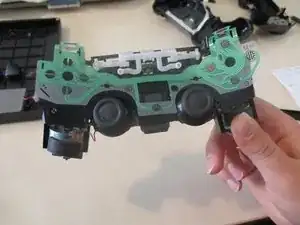
La parte superior de tu controlador ahora debería verse como la imagen. 3 Luego, desengancha el tablero desde allí también
-
Continuará...
-
-
-
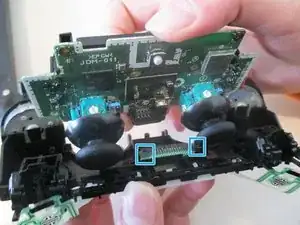
Ahora que tu controlador se parece a la imagen 1, abre el marco medio parcialmente.
-
Retira los dos pestillos más a los lados de las clavijas de contacto.
-
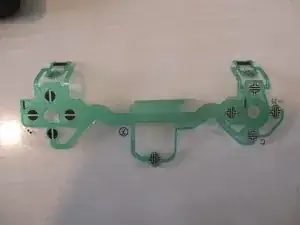
Extrae la placa con cuidado.
-
-
-
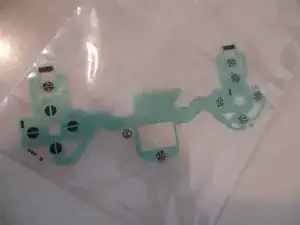
Consigue tu nueva botonera y sigue los pasos en orden inverso para volver a montar tu dispositivo. Si necesitas ayuda para volver a instalar los botones del gatillo (créame, es difícil hacerlo), sigue esta guía: Reensamblaje del gatillo PS4 Dualshock 4
-
Para volver a armar tu dispositivo, sigue estas instrucciones en orden inverso.
9 comentarios
I’ve changed two flex boards from two different sellers, and I keep having a battery drain of about 25mA after i installed them. The battery drain is not present with the original flex board, any ideas?
Ok no, little update. the battery drain is present even if I disconnect the flex board, the touch connector and the led . It’s something on the main board I think, but I can’t figure out what is it. Is there some insulation that I may have lost when changing the flex board the first time?
That sounds really weird. I don’t remember any insulation on this specific model of controller. I don’t have this anymore as it was a repair for a friend and I also hadn’t noticed or measured such a drain.
Devnol -
The only other thing I can think of is a failure on one of the components soldered on the main board, but 20mA in standby condition are VERY high!
The warning regarding the rumblers being hard soldered and the wiring is delicate honestly should be in step 4, jiggling joysticks to remove the front cover can easily cause the rumblers to be disconnected and require some time consuming resoldering to reattach them.
sefog -
Good point! From the fact that I used the word "again" in step 6, I may have had that in at some point but something happened and I accidentally removed it. I'll add it back. Thanks a lot for the feedback!
Devnol -