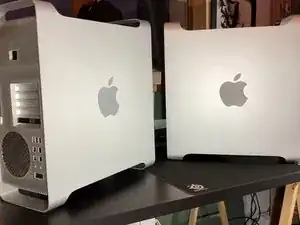
Introducción

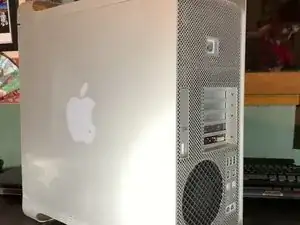
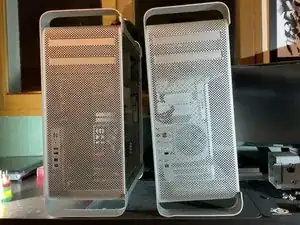
Si tu Mac Pro tiene la carcasa rayada o dañada, aquí tienes un tutorial para sustituirla por completo.

Cualquiera puede hacerlo, solo que el desmontaje y el montaje son pasos muy largos. La paciencia es la clave del éxito.

  1. KMpqMEtAbnVdygwu
    KMpqMEtAbnVdygwu
    TQXqRCdIDFjn1CUC
    uK2aKBEKNw6WkOFw
    • Para abrir el Mac Pro, tendrás que levantar una solapa en la parte posterior de la carcasa.

    • ¡Deja la solapa abierta durante todo el desmontaje!

  2. RMQwwPpmOOxtxx5w
    RMQwwPpmOOxtxx5w
    MyGEuxTG1qapmAVO
    • Con la solapa en la posición hacia arriba, el panel debe separarse de la caja sin forzar

  3. 25KRIKhSjWYvhtnp
    25KRIKhSjWYvhtnp
    KFV5kpyxg4xFNaeV
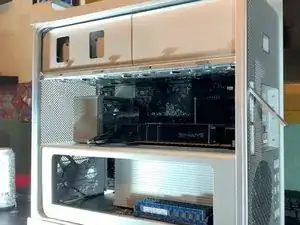
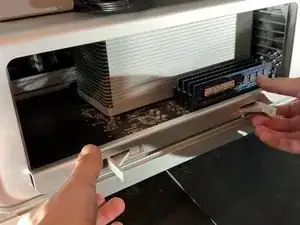
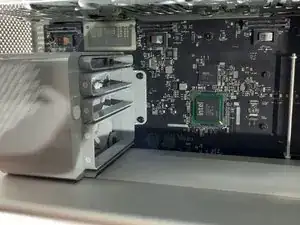
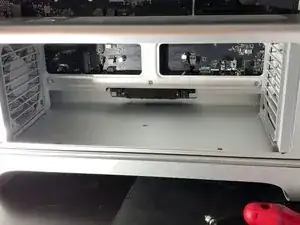
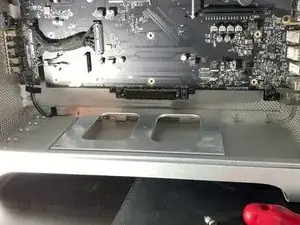
    • A continuación, debes retirar los discos duros, para eso nada podría ser más sencillo: tira de ellos hacia ti forzando un poco

  4. 3KJcjpQra3WtTLle
    3KJcjpQra3WtTLle
    ryYiPvgPVtjnvntt
    DPIHuMrvwqoTVxMH
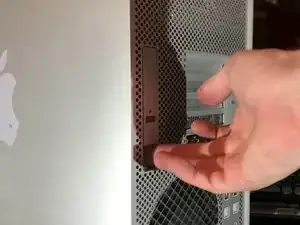
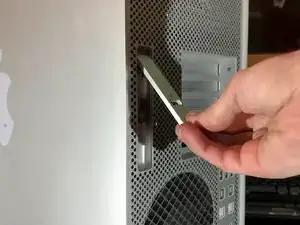
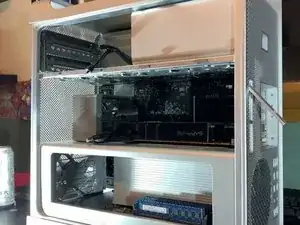
    • Muy sencillo, tira del soporte del reproductor de DVD hacia ti, debe venir hacia ti con un poco de fuerza.

  5. TofnldQFBL6lrD6H
    TofnldQFBL6lrD6H
    cJqyXpn3YbCVNPEI
    XiAJborotfxYmOfE
    • Presiona los dos pestillos para desbloquear el soporte.

    • Luego tira hacia ti

    • Normalmente este paso se hace sin forzar

  6. UGFR2tNW1OqjpNx4
    UGFR2tNW1OqjpNx4
    ickheqqOYcPtKbOv
    • Retira los conectores de 6 u 8 pines de tu tarjeta gráfica

    • Este paso es opcional, depende de la tarjeta gráfica de tu Mac Pro

  7. iwPBd4QMuPYkMFsQ
    iwPBd4QMuPYkMFsQ
    QCDvESQIkRsnk2qJ
    MYGZDQAhRIoQSYVE
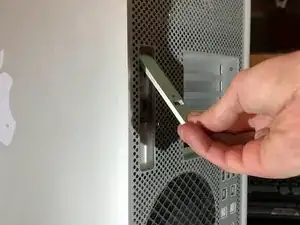
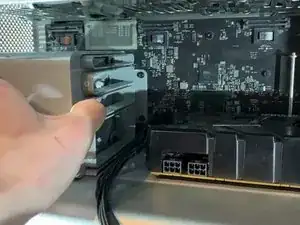
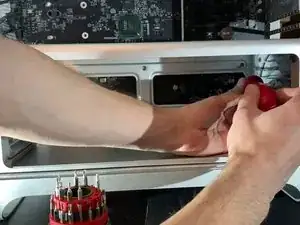
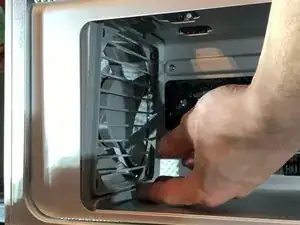
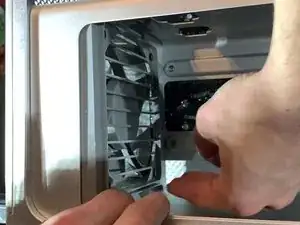
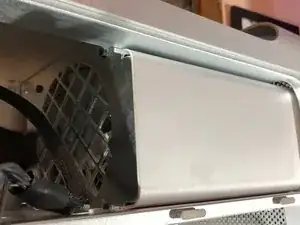
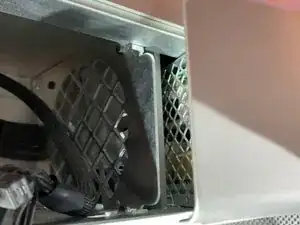
    • En el soporte del ventilador hay una especie de botón, presiónalo y podrás mover el soporte hacia la izquierda (ver imagen)

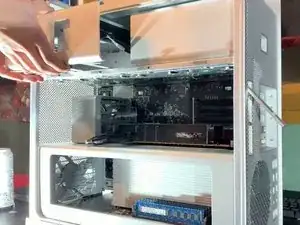
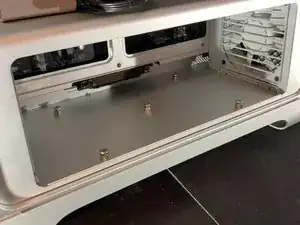
    • Solo tienes que tirar de la tarjeta gráfica hacia ti para sacarla de la caja

    • Este paso es opcional, depende de la tarjeta gráfica de tu Mac Pro

    That is not the power supply but rather just a fan shroud. It is important to move that back to release any PCIE cards that have the rear locking tab as it also moves the metal bat shown on the right side of the picture to release the lock from the tabs.

    Kevin Youngblood -

    Hello, the cable between the grey block and GPU is my GPU alimentation (mini 8-pins), so for unplug this alimentation, you need to move the fan shroud

    Please read the whole tutorial, just after this step, I explain how to unplug this cable

    remitouch -

  8. AURq3u2SyLGGTqgP
    AURq3u2SyLGGTqgP
    OxtkGCXMhVVlGBsY
    • Desconecta los cables PCI-e de la placa base

    • Este paso es opcional, depende de la tarjeta gráfica de tu Mac Pro

  9. y15OKQQTrhx2uED6
    y15OKQQTrhx2uED6
    QqyphuBaneJhvsQQ
    wt5X2wDDrDZaYfKy
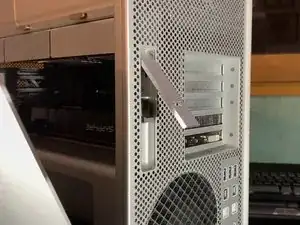
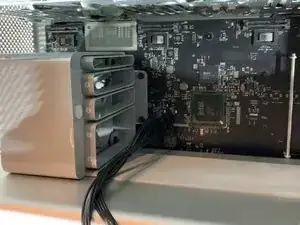
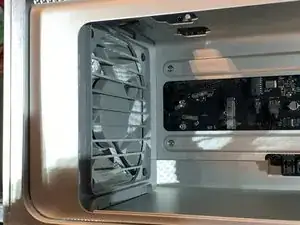
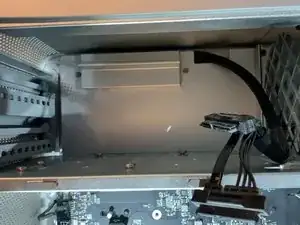
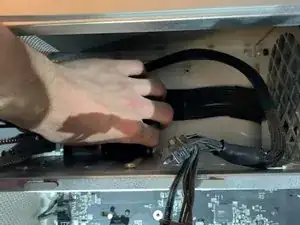
    • Con el destornillador desatornillamos los dos tornillos que sujetan el soporte del ventilador

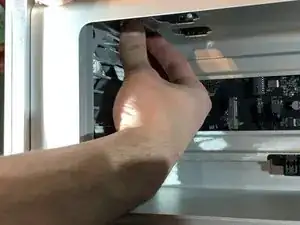
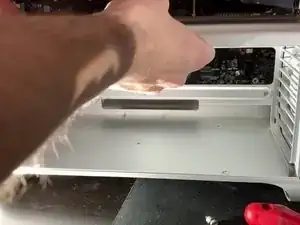
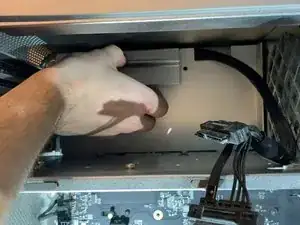
    • Luego tira hacia ti para liberarlo del estuche.

  10. Vbsn6GGleRLyLe3G
    Vbsn6GGleRLyLe3G
    aVNVJmtJsC4nAfoZ
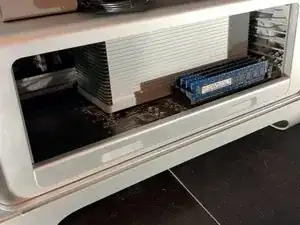
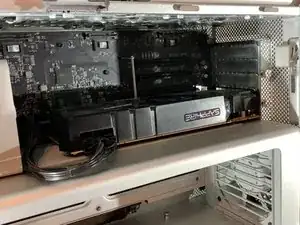
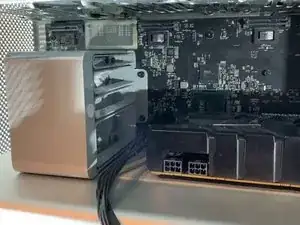
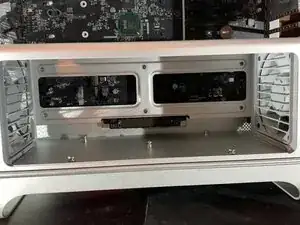
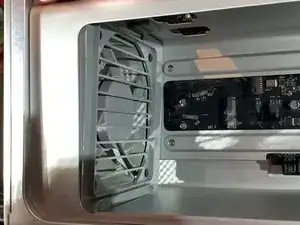
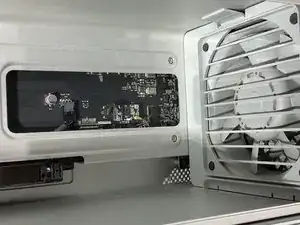
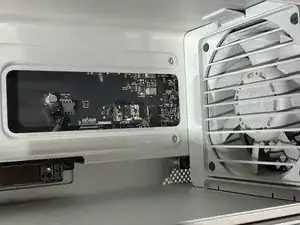
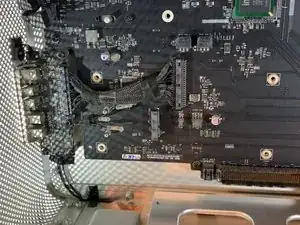
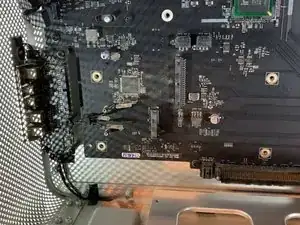
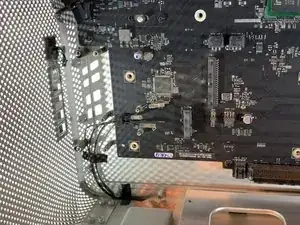
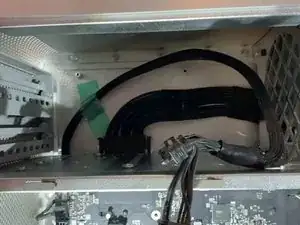
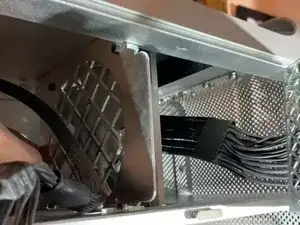
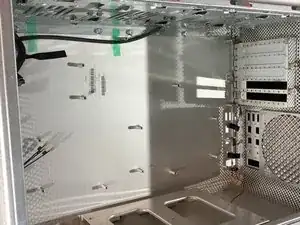
    • Detrás del soporte del ventilador hay 2 cables SATA, una fuente de alimentación de 4 pines mini y un ventilador de 4 pines

  11. 3YmNXLK2FZRBAimP
    3YmNXLK2FZRBAimP
    1MAtjcnSo6NGeIAS
    EdWeMijcTdChF4Ty
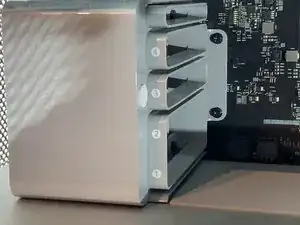
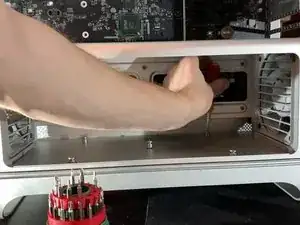
    • Con un destornillador H2.5 destornillar los tornillos de la parte inferior del soporte (foto 2)

    • Con un destornillador Phillips, desenrosca los tornillos en la parte inferior de la caja (foto 3)

    The bottom screws are H2.5

    John Zheng -

    corrected, thk

    remitouch -

  12. 31AY4bPtHgJaCpDv
    31AY4bPtHgJaCpDv
    hCR6xnKnrQRaNcqS
    yCGPIVcMNWN46hyv
    • Saca los clips en la parte superior del ventilador.

    • Tira un poco del ventilador

  13. 2b1NPWHgTtv5kskA
    2b1NPWHgTtv5kskA
    J6ySinUBoPx1JINL
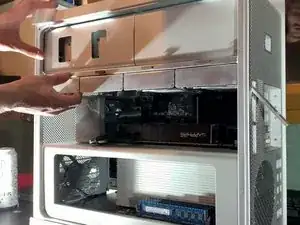
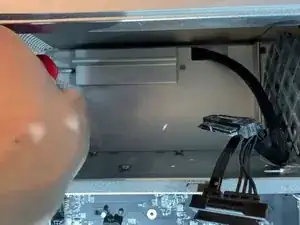
    • Luego, como en la foto, levanta ligeramente la parte inferior del ventilador para soltar los clips inferiores.

    Where tf os the clip at the bottom???????

    Dan man5000 -

    It is only necessary to move both fans about 1 cm towards the centre of the computer box. You then need to disconnect the plugs for both fans the the loudspeaker in order to slide out the cpu unit. Do not attempt to remove the fans!

    frank booy -

  14. KkDHxfJVOUTUxols
    KkDHxfJVOUTUxols
    MJbhwrKWfeMX6CvO
    rdKAvsqPfSxfF1dE
    • Desconecta 2 x 4 pines (ventiladores) y 1 x 2 pines (altavoz)

    • ¡No olvides este paso a riesgo de dañar tus conectores en la placa base y dejar inutilizables los ventiladores y el altavoz!

    Wtf hot the !&&* do you get those out. There like stuck

    Dan man5000 -

    - You need to disconnect/seperate the retaining catch on the motherboard connecting shroud from the retaining clip on the cable connector.

    - To help do this, you can Very Lightly use a spudger/prying tool or cut some piece of scrap recycled plastic off a bottle to slide between the two on the top side of the connector, parallel to the motherboard.

    - Once you have to two interlocking halves held apart, then you may be able to

    * wiggle the connector off

    * use a small flat headed screw driver or similar tool to Again Lightly help start to push from between the motherboard and cable connectors

    * and/or, Gently use a hobby plyers or large tweezers to lightly grab the cable connector from the short edges for a better grip while wiggling

    - If this still doesn’t make sense, then you might try searching for images of “motherboard cable connector retaining clip” or some such.

    Hope that helps.

    Chris Alby -

  15. RqTN51k1qkA55LNC
    RqTN51k1qkA55LNC
    qZkDekL1iTjBmnrX
    CCnS4cDYRvAs2ZIx
    • Normalmente tira del soporte de la CPU hacia ti

    • ¡No fuerces durante este paso, si este es el caso, verifica que los ventiladores no interfieran con la salida del soporte!

  16. 1sBTRV3WN3apfwrP
    1sBTRV3WN3apfwrP
    dsVWVVETtsCEQVSZ
    CUEJglssQxGTfTew
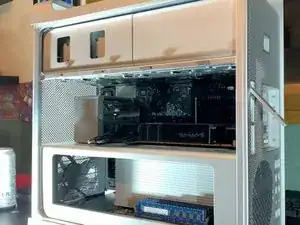
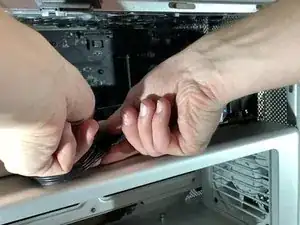
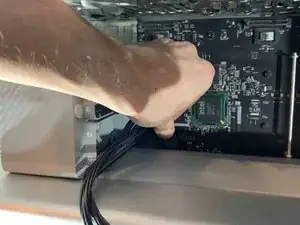
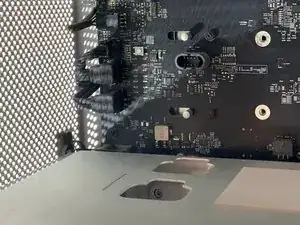
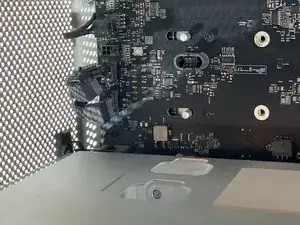
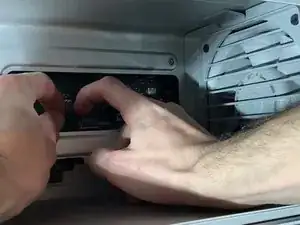
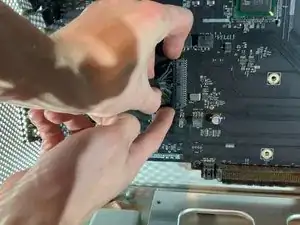
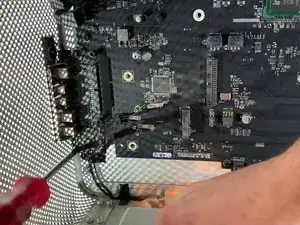
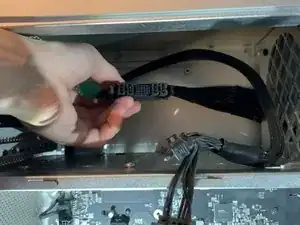
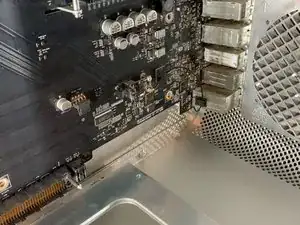
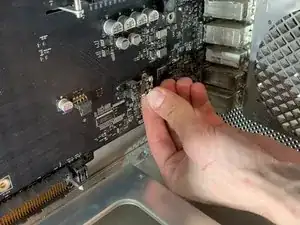
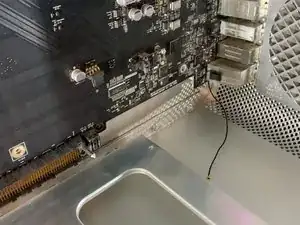
    • Retira el cable que conecta la placa base a la tarjeta de expansión (USB, Jack, Power Off, etc.)

    • ¡Cuidado, hay que quitar el cable para no doblar los pines que hay en el conector de la placa base!

  17. jPnRKAlSI56UPOC1
    jPnRKAlSI56UPOC1
    JHOAJHOkSkGWtNDL
    MLNaByFmurFLlCZl
    • Desatornillar los 6 tornillos que sujetan la tarjeta.

    • ¡Ten cuidado de desconectar el botón de encendido de la tarjeta!

  18. YLim3Mh6WDRchnNi
    YLim3Mh6WDRchnNi
    nUKESAtjqR32TqMC
    Z1c5xmFwo4UoirCY
    • Retira los dos tornillos para quitar la tapa.

  19. g2JlutGawZmqWjOB
    g2JlutGawZmqWjOB
    HobOeJmoraFf5nAy
    XxPQQtKIWEwbPbyA
    • Presiona los dos ganchos para desbloquear el conector de alimentación

    • No fuerces, si presionas bien el conector debe salir sin forzar

  20. 5QVYaywnS11FECTJ
    5QVYaywnS11FECTJ
    b5ovrRMFKJgcl3gW
    • Desatornillar los 4 tornillos que sujetan la fuente de alimentación.

  21. NULAZQSvgKuA1LS2
    NULAZQSvgKuA1LS2
    HLd2ayoipQWBxu2F
    VHxhAsNNeaTCmSQ3
    • Solo tira del bloque hacia ti

    • Atención, tira siguiendo el conector

  22. SkhTArwTIB3pyjya
    SkhTArwTIB3pyjya
    YXBgDUq6XMElBVlV
    sKlcWIbYJdN6YRuk
    • Desengancha la antena bluetooth

  23. 54dBOcmvBAuBlFuf
    54dBOcmvBAuBlFuf
    AWSDiLRcOxte1F5u
    upvZGC51NAexHFKb
    • Retira los 10 tornillos que sujetan la placa base.

  24. Jlim6XgiMOQP45ZZ
    • ¡Simplemente repite los pasos inversos para volver a armar!

    Great instructions.

    Easy to follow

    Andrew Schmetterling -

    Thanks for posting this teardown! Worked out great!

    Used this to replace all the cooling fans in my macpro5,1

    Andrew Clark -

    how can i take apart the case further as in Taking off the latch and the Wifi and the top piece that holds the PSU?

    CaffeinatedMac -

    how can i take apart the case Further as in the latch and the plastic parts the cheese grater front panel ect.

    CaffeinatedMac -

Conclusión

Para volver a armar tu dispositivo, sigue estas instrucciones en orden inverso.

remitouch

Miembro Desde 12/10/16

979 Reputación

6 comentarios

Bonjour, j’ai un mac pro 5,1 de 2010 dont les clapets (ou les trappes, j’ignore le terme exact) de la baie des lecteurs de disques restent ouverts à chaque fois qu’ils sont actionnés. Je n’ai pas réussi à les démonter, et les 2 gouttes de 3 en 1 sur les glissières latérales n’ont rien changé au problème. Je n’ai trouvé aucun tutoriel, ni même aucune occurrence de ce problème sur le web. Pourriez-vous me donner quelques conseils ? Merci.

Gabriel Fracque -

Amazing explanations and perfect picture track on each move made.

Thanks much - this was very helpful :)

Dennis.

Dennis OBrien -

Hello sir , I have a problem with my Mac Pro 5,1 mid 2010 Xeon 6core Cpu 64 GB Ram RX580

I erase SSD Hard Drive and I want to reinstall mojave OS and it does not work still appear ‘Missing Operating System’

I try to use all commends on startup like (Option) (Commend+R) (Option+Commend+R)(Option+Commend+R+P) and more commends

but nothing work with it … please I want help . I need your help please , please …

Hussain Khan -

You’d probably get an answer a lot quicker if you just posted that as a question.

Evan -

Thanks for posting this guide!

I used it to replace all the cooking fans in my macpro5,1. Worked great!!

Andrew Clark -

The "cooking fans", is your Mac Pro a flat top grill?

guardian10 -