Introducción
Usa esta guía para reemplazar la pantalla (también denominada "display") en una MacBook Air (M1) de finales de 2020.
-
-
Si tu MacBook está ejecutando Big Sur v11.1 o posterior, puede que no funcione la desactivación del arranque automático. Puedes proceder normalmente, pero asegúrate de desconectar la batería en cuanto estés dentro.
-
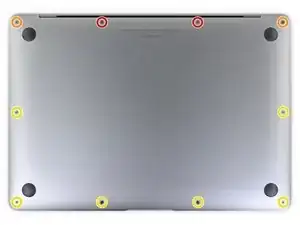
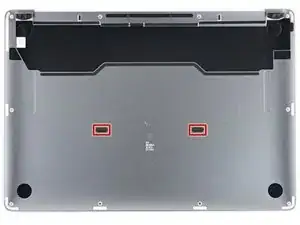
Usa un destornillador P5 Pentalobe para quitar los siguientes seis tornillos :
-
Dos tornillos de 7.9 mm
-
Dos tornillos de 7.1 mm
-
Seis tornillos de 2.6 mm
-
-
-
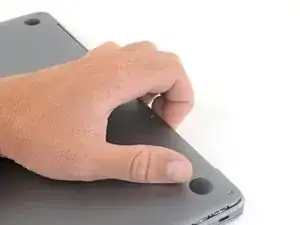
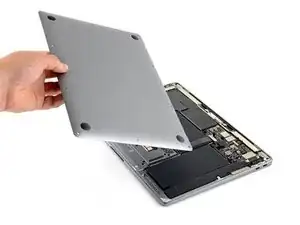
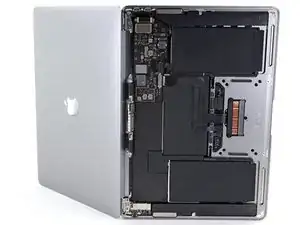
Pon tus dedos entre la pantalla y la caja inferior y tira hacia arriba para sacar la caja inferior de la computadora.
-
Remueve la caja inferior.
-
Pon tus dedos entre la pantalla y la caja inferior y tira hacia arriba para sacar la caja inferior de la computadora.
-
-
-
Utiliza el extremo plano de un spudger para hacer palanca y desenganchar el brazo metálico de bloqueo del conector de la batería.
-
Levanta el brazo metálico de bloqueo para sacar el conector de la batería de su alojamiento en la placa lógica.
-
-
-
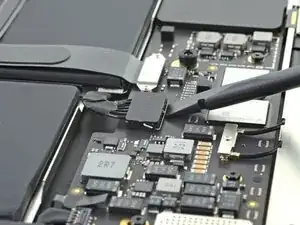
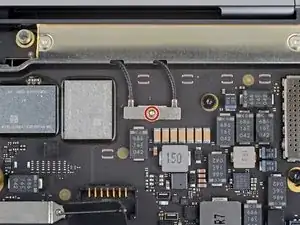
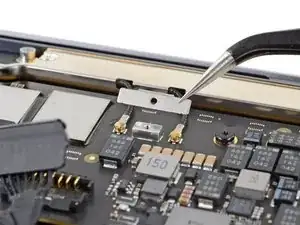
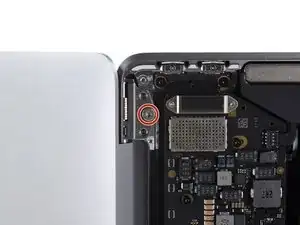
Usa un destornillador Torx T3 para retirar el tornillo de 1.4 mm que sujeta la cubierta del cable de la antena.
-
-
-
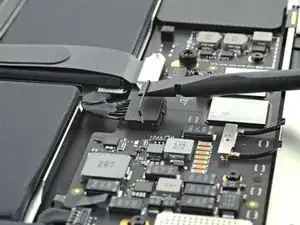
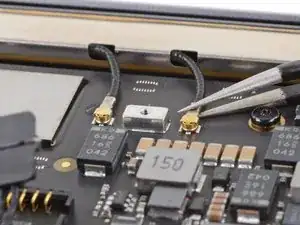
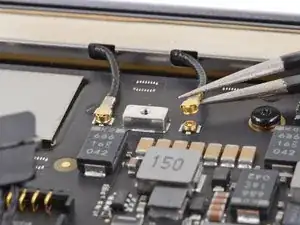
Usa unas pinzas para agarrar el conector de la antena cerca de su base.
-
Tira hacia arriba para desconectar el cable.
-
Repite la operación con el segundo cable de la antena.
-
-
-
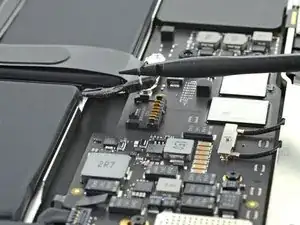
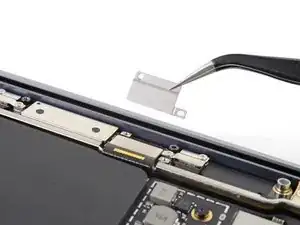
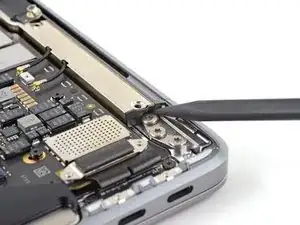
Usa un destornillador Torx T3 para retirar los dos tornillos de 1.5 mm que sujetan la tapa del conector del cable de la pantalla.
-
-
-
Utiliza el extremo plano de un spudger para separar el conector del cable de la pantalla de la placa de la antena y desconectarlo.
-
Para volver a colocar conectores de presión como este, alinea con cuidado y presiona hacia abajo en un lado hasta que encaje en su lugar, luego repítelo en el otro lado. No presiones hacia abajo en el medio. Si el conector está desalineado, las clavijas pueden doblarse y causar daños permanentes.
-
-
-
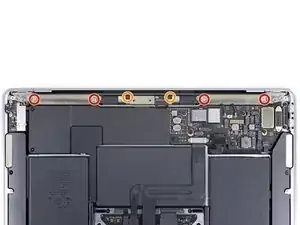
Utiliza un destornillador Torx T5 para retirar los seis tornillos que fijan la barra de la antena:
-
Cuatro tornillos plateados de 7,4 mm
-
Dos tornillos negros de 4.7 mm
-
-
-
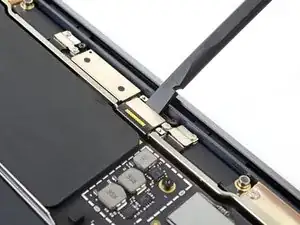
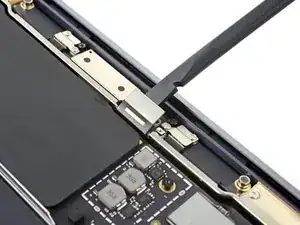
Gira el spudger contra la bisagra para levantar el extremo de la barra de la antena.
-
Gira el spudger contra la bisagra para levantar el extremo de la barra de la antena.
-
Repite la operación con el otro extremo de la barra de la antena.
-
-
-
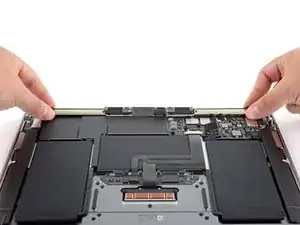
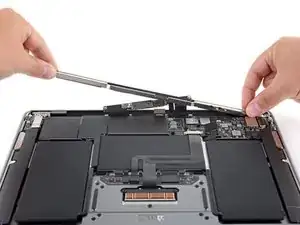
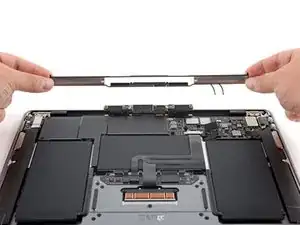
Utiliza los dedos para hacer palanca en la barra de la antena y separarla de la carcasa.
-
Pasa la placa de la antena a través de la abertura en el centro de la barra de la antena.
-
Remueve la barra de antena.
-
-
-
Usa un destornillador Torx T8 para quitar dos tornillos de 5.0 mm de cada bisagra (cuatro tornillos en total).
-
-
-
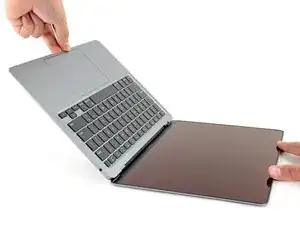
Con el MacBook todavía con la pantalla hacia abajo, levanta con cuidado la carcasa superior para abrir el MacBook lo máximo posible.
-
-
-
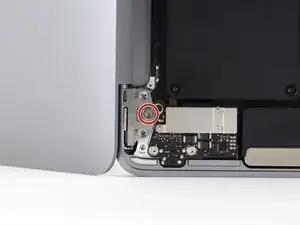
Utiliza un destornillador Torx T8 para retirar los dos tornillos restantes de 5.0 mm que sujetan la pantalla, uno de cada bisagra.
-
-
-
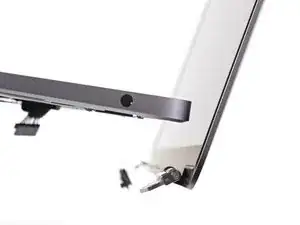
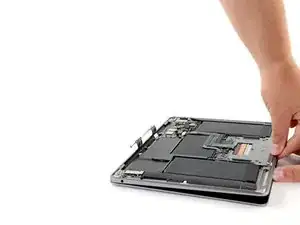
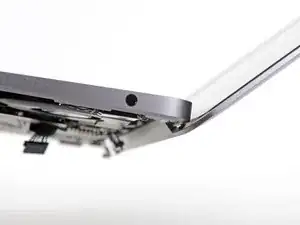
Comienza a cerrar la pantalla con cuidado hasta que forme un ángulo de unos 90 grados con la carcasa superior.
-
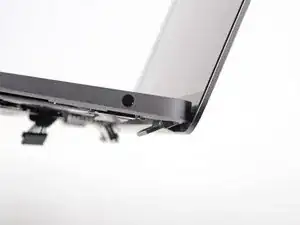
Manteniendo la pantalla en un ángulo de 90 grados con la carcasa, aleja la pantalla de la carcasa mientras la mantienes quieta, de modo que las bisagras se deslicen hacia fuera de la parte inferior de la carcasa.
-
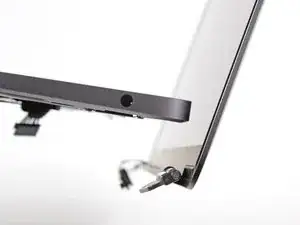
Retira la pantalla.
-
Cuando hayas instalado la pantalla de reemplazo, es posible que la MacBook no arranque hasta que conecte la fuente de alimentación.
-


Compara tu nueva pieza de repuesto con la original: es posible que tengas que transferir los componentes restantes o retirar los adhesivos de la nueva pieza antes de instalarla.
Para volver a montar el dispositivo, sigue los pasos anteriores en orden inverso.
Lleva tus desechos electrónicos a uncentro de reciclaje certificado.
¿La reparación no salió como pensabas? Consulta nuestra [enlace|https://www.ifixit.com/Answers/Device/Ma...|comunidad de respuestas] para obtener ayuda en la resolución de problemas

24 comentarios
How to make the True Tone working on the screen from another air?
Like iPhones does the display need to be programed to allow true tone to work?
Just did the replacement! Was a breeze, just be careful not to over tighten any of the screws past a firm twist. Accident broke the head off a 1.5mm screw using a T3 bit. Didn’t affect the plates ability to cover or apply a firm press downwards, but a unfortunate thing nonetheless.
ESD safe mat, plugged into ground, with a wrist strap, also grounded, are the best best to protect the logic board.
Robin Ray -