Introducción

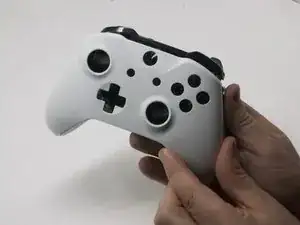
Esta guía te enseñará cómo quitar la placa de la cubierta frontal de tu controlador inalámbrico Xbox One. Inicialmente, no se verán tornillos. Sigue los pasos para ubicar cada tornillo de fábrica.

  1. CZmZL2YuctGTuPJd
    CZmZL2YuctGTuPJd
    KHyRlDiLSFSdhQPm
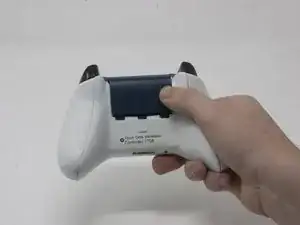
    • Desliza la tapa de la batería hacia la parte superior del control para retirarla.

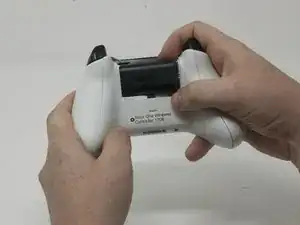
    • Levanta las pilas o el paquete de pilas del compartimento de las pilas.

  2. 1RnNtaoQqQZkbY2E
    1RnNtaoQqQZkbY2E
    wVNiZ3TUwVBoC2FL
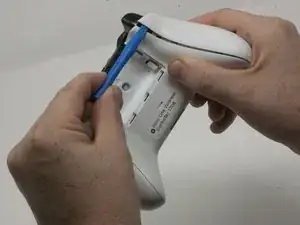
    • Inserta una herramienta de apertura de plástico en la costura superior y mueve suavemente la herramienta de apertura hasta la parte inferior del controlador.

    • Continúa usando la herramienta de apertura para sacar suavemente la placa lateral del controlador.

    • Repite este proceso para la segunda placa lateral.

    Only use a pry tool! The vibration motor wires are exposed and directly accessible from the side when opening. I attempted to open it with a small knife, expecting to be able to gently pry the clips open, accidentally sliced through my right motor’s wires.

    Sawyer Coe -

    Not a sharp of course.

    Kajus Slekys -

    If you have some Guitar picks laying around they work GREAT!

    Mike Beane -

  3. S6rlXDDRcqlumZ32
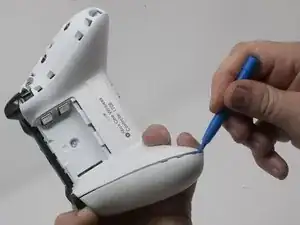
    • Despega suavemente la etiqueta de la batería o haz un agujero en el centro de la etiqueta en el compartimiento de la batería para revelar el tornillo oculto.

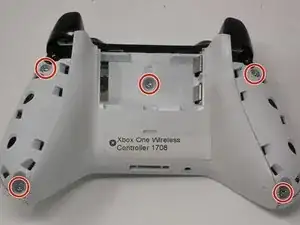
    • Retira los cinco tornillos de seguridad torx-9 de 9 mm de la parte posterior del controlador.

    Torx-8 security bits work as well.

    jahiamir -

    Torx 8 or 9 wasn’t working. I used 2.0 minus screwdriver

    richjlee -

    The 2.0 minus worked for me as well.

    metric -

    When sliding in the plastic cover during reassembly be sure it lines up with the battery compartment contacts. It can be really easy to not see it and bend the contacts. If you still encounter force during this step, depressing the triggers out of the way worked for me.

    Drew -

    Since mine is out of warranty I just broke out the security nib with a 2.0 standard bit. Then used a T8 torx.

    Tim LaCrosse -

  4. kfdJ5aNuDEUk4QSv
    kfdJ5aNuDEUk4QSv
    EaxhK2qZKFPa2bSP
    uLhJmZMFjIR1fmmF
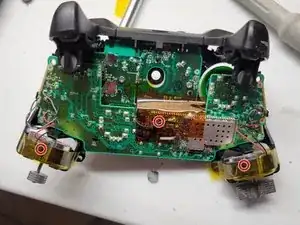
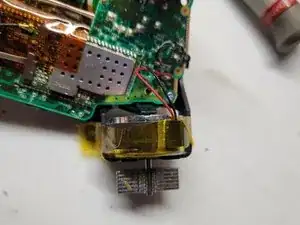
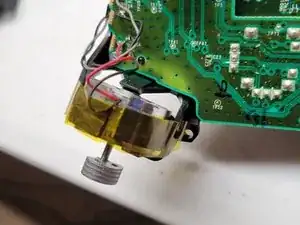
    • Pega con cinta los motores Rumbler/shock en su lugar.

    • Esto evitará que los motores se caigan.

  5. iqgdKTgD5ghZ2AiA
    iqgdKTgD5ghZ2AiA
    k5hd4bkef3GQZcnV
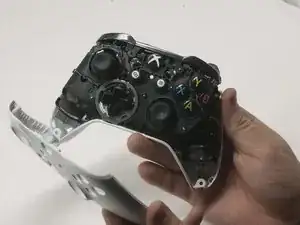
    • Orienta el controlador de modo que la placa frontal quede hacia arriba.

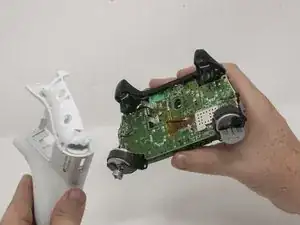
    • Levanta la cubierta frontal del controlador.

  6. jALZRgrIkQxcoU2w
    • Voltea el controlador boca abajo y levanta suavemente la placa trasera.

    Reassembly: When placing the back cover on: notice that the battery terminals need to slide inside the cover first. Then compress the triggers slightly, Then the cover will be aligned correctly. Then add the front cover and add screws so it doesn’t come undone.

    hunteil -

Conclusión

Para volver a armar tu dispositivo, sigue estas instrucciones en orden inverso.

Weston Gilmore

Miembro Desde 25/09/17

1666 Reputación

4 comentarios

i used a t8 and it worked

Rudy Bp -

T9 is VERY snug. T8 would probably be better but I don’t have one to try.

Craig Ferguson -

T9 barely fits, I couldn’t even get 2 of the screws to turn. I think T8 works better

Baron Kube -

One frustrating thing. All the guides I find on iFixit never give tips on reassembly. I'm having a difficult time getting the back plate back on. No help here, unfortunately.

Jim Pennington -