Introducción

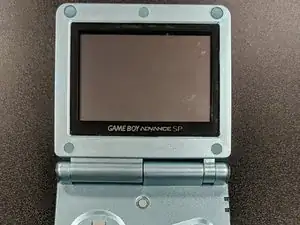
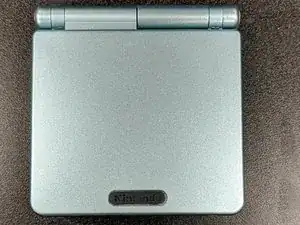
Si tu GameBoy Advance SP AGS-001 o AGS-101 tiene una carcasa deteriorada, o si quieres personalizarla, usa esta guía para cambiarla.

Antes de usar esta guía, conecta tu consola y cárgala durante unos minutos. Si la batería es demasiado vieja, puede empezar a expandirse y podría explotar. Si empieza a hincharse, tendrás que pedir una batería de repuesto, que puedes encontrar aquí:

https://www.amazon.com/Game-Boy-Advance-...

Antes de empezar el proceso de cambio, apaga la consola y desenchúfala de la toma de corriente si está enchufada.
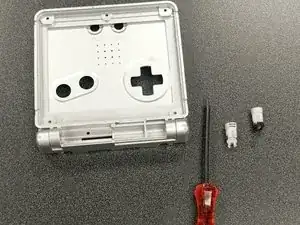
  1. SkEV2ReKxqTqWyJp
    SkEV2ReKxqTqWyJp
    fXPoACPeZkIMhIbv
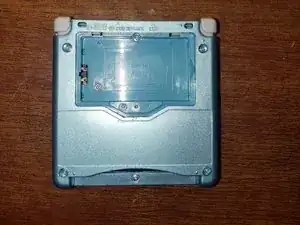
    • Desatornilla el tornillo del compartimiento de la batería con un destornillador Phillips #00.

    • Abre el compartimiento de la batería y extrae la batería.

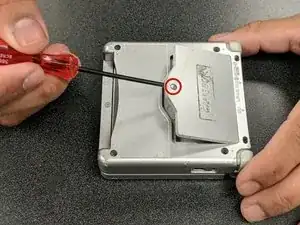
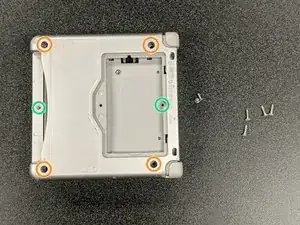
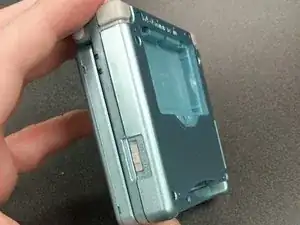
    • Quita los cuatro tornillos Tri-point Y00 de 6,45 mm de las esquinas del dispositivo.

    • Quita los dos tornillos Tri-point Y00 de 4,6 mm del interior del compartimento de la batería y los compartimentos del cartucho de juego.

  2. JsNnPmkqq4ZjFUUM
    JsNnPmkqq4ZjFUUM
    rPREXYeaynCrp2lN
    3L1NNjJeegrWOQfk
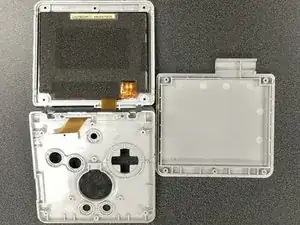
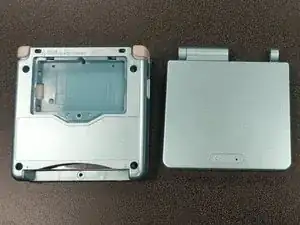
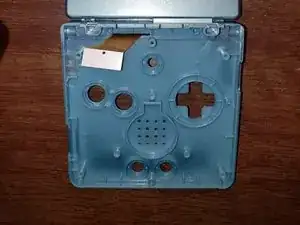
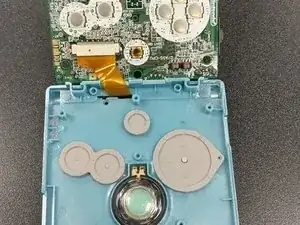
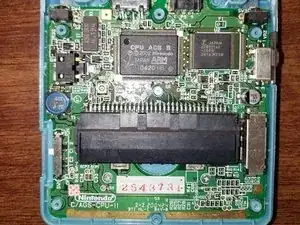
    • Levanta la carcasa inferior para exponer la placa base.

    • Si es necesario, usa alcohol isopropílico para limpiar los controles deslizantes de encendido y volumen.

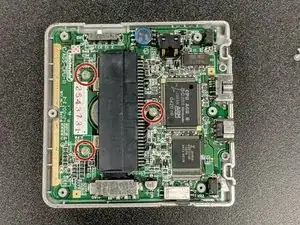
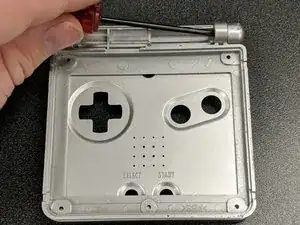
    • Quita los tres tornillos Phillips #00 de 4 mm de la placa base.

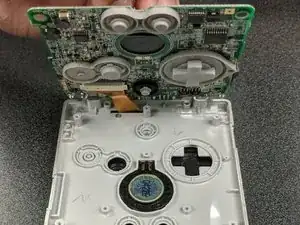
    • Levanta con cuidado la placa base y extrae el cable plano, tirando suavemente de los dos clips del costado hacia arriba y hacia el cable.

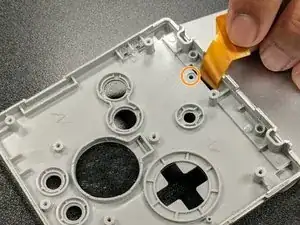
    • Quita el pequeño tornillo Phillips #00 que hay bajo el cable plano y que mantiene unida la carcasa de la pantalla superior.

  3. 5NanxmbYjgbPmIsY
    5NanxmbYjgbPmIsY
    YYAFNVWUoMIXG6Rr
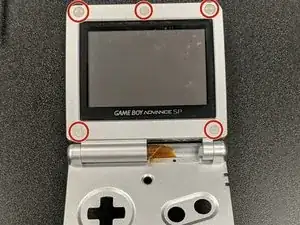
    • Abre la pantalla de la GBA SP y usa el extremo puntiagudo de un spudger para quitar las almohadillas de goma que hay alrededor del bisel de la pantalla.

    • Quita los cinco tornillos Tri-point Y00 ocultos bajo las almohadillas de goma.

    • Extrae el bisel de la pantalla con un spudger.

    • Ten cuidado de no tirar del cable plano cuando se desprenda el bisel.

    are all 5 screws the same size?

    scott lindquist -

  4. GFieZtPwdUqJcNR2
    GFieZtPwdUqJcNR2
    h2v1LCvu1f5riO3B
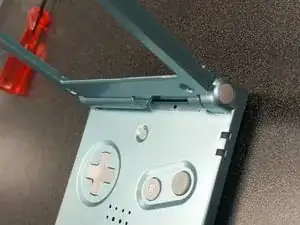
    • Quita las bisagras de la carcasa original. Este es el paso más difícil, ya que quitar las bisagras requiere mucha fuerza.

    • Aplica presión con el extremo puntiagudo de un spudger desde el interior, empujando hacia afuera con mucha fuerza. Es probable que las bisagras salgan volando de la carcasa unos cuantos centímetros, pero eso es normal.

    • Cuando hayas quitado las bisagras, quita las tapas que hay en el extremo de cada bisagra.

    • Ten cuidado con el spudger. Empujar las bisagras requiere una gran cantidad de fuerza y podrías lastimarte la mano por accidente si no tomas precauciones extra.

    Extremely careful here with the position of your hands as you’re pushing the hinges out. I managed to severely injure myself from the sudden jolt scraping my fingers on the case when the hinges gave in. Preferrably, position your hand and screwdriver around 30 degrees from the horizontal of the case to avoid this and press the case firmly against a table.

    Hector Carrera -

    the easier way to do this is to stand the case on it’s side on the edge of something, I just used my desk mat at the edge of my desk, place your spudger on the inner metal part and tap with a small hammer or something, I used a pair of pliers. Way less likely to hurt your hand because you don’t have to grip the case as hard or push as hard. Work smarter

    Kira -

    Interestingly enough, I found that, if you don't plan to use the old shell for anything else, it may be easier in some cases to cut the plastic around the hinges, which I did with a model kit cutting tool (the old shell was very brittle and broke apart into pieces too small for me to push the hinges out of). Eye protection is recommended.

    Nicholas -

  5. O5jv6yQLDojehilu
    O5jv6yQLDojehilu
    IPNsmvVoyDY1ZJwT
    • Saca la carcasa nueva.

    • Presiona las bisagras de la carcasa vieja en la ranura de la nueva hasta la mitad mientras la carcasa está cerrada.

    • Luego abre la carcasa y empuja las bisagras hasta el fondo.

    The hinges will need to be slotted into your new end caps before being pushed in

    Peter DeVita -

  6. e2v1XYeoKIg3SaiJ
    e2v1XYeoKIg3SaiJ
    QnhHSVxO6cgaRiCw
    mEqxERI5jJgtnKbE
    • Coloca la pantalla en la nueva carcasa y fija el bisel en su posición, el cable plano debe deslizarse a través del hueco como antes.

    • La carcasa debe hacer clic en su lugar y permanecer unida incluso sin tornillos. Puede que también quede un pequeño espacio entre la carcasa superior e inferior, algo común en las carcasas de terceros.

    • Vuelve a colocar los cinco tornillos Tri-point Y00 alrededor de la pantalla.

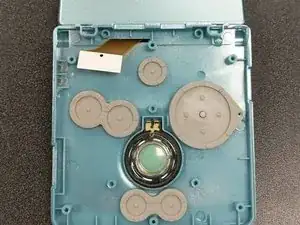
    • Vuelve a colocar el altavoz, los botones y las almohadillas de silicona en la carcasa inferior.

    I found it easier to reattach the screen ribbon cable before adding the buttons and speaker. Additionally, you’ll want to reattach the small half hinge part before the buttons too.

    Peter DeVita -

  7. aFAGoZFKjiMjacxR
    aFAGoZFKjiMjacxR
    OBHZ4Vvgcov6rFrw
    MYKYKJb3DCbxOykB
    • Vuelve a introducir el cable plano en la placa base y asegúralo en su lugar.

    • Coloca la placa base en la nueva carcasa y atorníllala con los tres tornillos Phillips #00 de 4 mm.

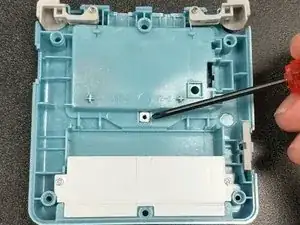
    • Coloca la arandela roscada cuadrada en la parte posterior de la carcasa. Ahí es donde se sujeta el tornillo del compartimiento de la batería, ¡así que es importante!

    There’s no mention of reinstalling the top hinge cover with that hidden little screw! It was important to do this before screwing the motherboard back down.

    Justin Gagnon -

    That’s exactly what I was going to comment. I had to go back and undo it all once I realised that I had left out the hinge cover. I might also suggest hooking in the ribbon before you put in the buttons. Mine fell out anyway. Also… make sure you put the speaker in the correct way. Trust me.

    Jiu Kyung -

  8. nbUvZZAkwIh23bOC
    nbUvZZAkwIh23bOC
    enYKJDoG14PaLTZ6
    EnyDTifANdFElSvS
    • Asegúrate de que los controles deslizantes de volumen y encendido estén en su lugar antes de colocar la carcasa posterior.

    • Coloca la carcasa trasera y presiona uniendo las dos partes.

    • Atornilla la carcasa con los cuatro tornillos Tri-point Y00 de 6,45 mm y dos tornillos Tri-point Y00 de 4,6 mm, y luego vuelve a instalar la batería.

  9. LxuhILpjd632nCE1
    LxuhILpjd632nCE1
    fqXwNDeSrAFBK4vR
    • Vuelve a colocar las almohadillas de goma alrededor del bisel de la pantalla, ya que evitan que la carcasa se roce con el interior.

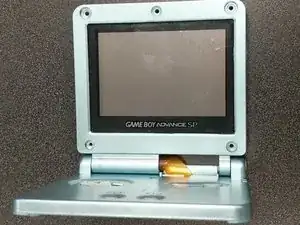
    • Encuentra la pegatina de recambio para el logotipo de "Nintendo" y colócala en su lugar.

    • Prueba la consola y ¡asegúrate de que funciona bien!

Conclusión

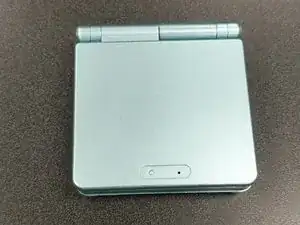
Cambiar la carcasa de la GBA SP ¡puede ser un proyecto divertido! No lleva mucho tiempo, y cuando hayas terminado, ¡tendrás una nueva y divertida consola personalizada! La facilidad en la dificultad y la oportunidad de poder expresarte hacen que valga la pena intentar este proyecto.

Rocko Bishop

Miembro Desde 01/10/20

498 Reputación

6 comentarios

Excellent guide thank you! My GBA is looking great now :)

Justin Gagnon -

Hello this guide is great but it has some flaws (missing some steps) but I used an eXtremeRate GBA SP shell and they are the best ones to go with because they have It molded in a way to remove the Nintendo logo sticker and so you can put in a ips screen with out needing to trim and it is made out of a high quality plastic and it better than other third party shell and I used purple/blue color

dead -

Thanks for the helpful guide! A couple things of note that I noticed along the way:


If you're replacing the screen lens, make sure you line it up properly so the end result isn't crooked.

Make sure to organize your screws, a mismatched screw can poke a hole through the shell.

Be gentle but firm when tightening a screw. I definitely messed up a screw or two being too forceful.

(I might be stupid) keep an eye on the battery lid screw hole. Mine ended up warping so I had to duct tape the lid to the shell.

If you're doing a button replacement too, be careful with the triggers.

Noah -

Der einzige Grund, warum ein schlechtes Spiel so viel Aufmerksamkeit erhält, ist sein Thema, obwohl es eine wirklich schöne Handlung hat. Das Abheben Ihres Geldes, nachdem Sie einen bedeutenden Jackpot oder einen saftigen Bonus geknackt haben, ist einer der schönsten Aspekte des Spielens in einem Online-Casino. Besuchen Sie https://casinotop.at/schnelle-auszahlung... um mehr über Online Casino Schnelle Auszahlung in Österreich zu erfahren. Aber zuerst müssen Sie den Auszahlungsprozess durchlaufen, um Ihr neu erworbenes Vermögen zu nutzen. Anfänger werden die Vielfalt der verfügbaren Auszahlungsoptionen für die schnellsten Auszahlungen zu schätzen wissen.

Norman GDrum -

Excelent guide, just a quick detail: you forgot to add the part when you put the screw under the screen ribbon, the one that afix the hinge in place. The rest was amazing, thank you very much.

Daniel -

If you have a GameBoy Advance SP AGS-001 or AGS-101 with a deteriorating shell, or if you want to customize it, you can follow this guide to replace the shell. However, before you start, make sure to plug in your console and charge it for a few minutes. By choosing this 토토사이트추천, you can rest assur If the battery is too old, it may start to expand and could potentially explode. If you notice any swelling, it's important to order a replacement battery. You can find replacement batteries online or at electronics stores. It's important to take the time to properly align the screen lens to avoid it being crooked. Keeping track of screws and their placement is also crucial to avoid any mishaps, and being gentle when tightening them is a good practice to prevent damaging the shell or the device. It's also worth noting that the battery lid screw hole can warp over time, so it's important to keep an eye on it during the replacement process. In case of warping, a temporary solution such as duct tape may be necessary.


Crest Pak -