Introducción
Esta es una guía rápida y fácil para cambiar la rueda de desplazamiento en un mouse para juegos Logitech G203 Prodigy. Leer esta guía te llevará solo de 10 a 15 minutos y solo necesitarás un destornillador pequeño y la rueda de desplazamiento de repuesto. Quita dos de los patines del mouse y vuélvelos a usar ya que por experiencia personal, no se nota la diferencia y vale la pena cambiar una rueda de desplazamiento que no funciona. Ten mucho cuidado cuando quites los patines porque afectará el funcionamiento dependiendo de cuánto dañes el patín.
Herramientas
-
-
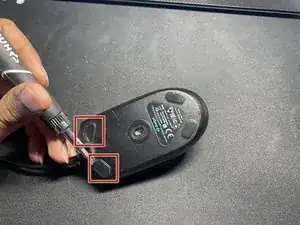
Con un borde afilado (un cuchillo o un destornillador de cabeza plana), retira los dos patines superiores del mouse encajando la herramienta que elijas debajo de los patines. Luego haz palanca y quita los patines.
-
-
-
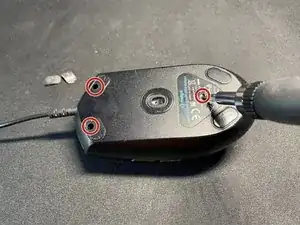
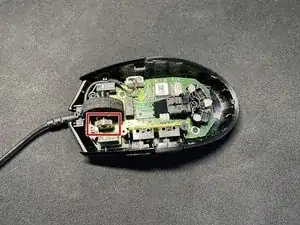
Quita los dos tornillos Phillips n.º 1 de 0,4 mm debajo de los dos patines superiores y el tercer tornillo Phillips n.º 1 de 0,4 mm debajo de la etiqueta adhesiva del mouse.
-
-
-
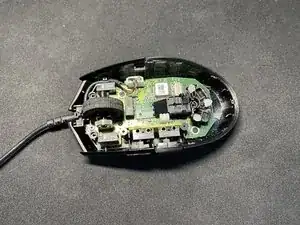
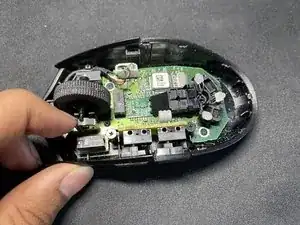
Separa las dos partes del mouse, la parte superior y la inferior, simplemente levantando la parte superior.
-
-
-
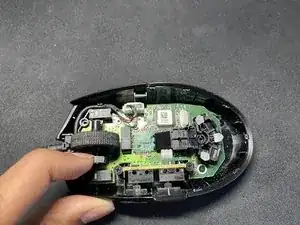
Usando stu dedo, separa la rueda de desplazamiento y el conector que mantiene la rueda de desplazamiento en su lugar. Una vez que hagas esto, simplemente deberías poder tirar de la rueda de desplazamiento hacia arriba.
-
-
-
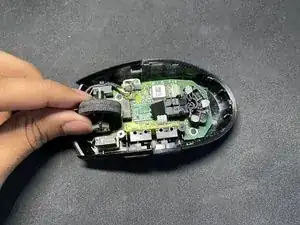
Inserta tu nueva rueda de desplazamiento en la misma posición en la que estaba la anterior. Deberás separar el conector una vez más para encajar la rueda de desplazamiento, pero ten cuidado de no dañar el conector.
-


4 comentarios
It's difficult to replace the part when the PCB board is still screwed in. When I would disassemble it, I would unscrew the side buttons first then the motherboard (the screws are highlighted in white circles). From there try to remove the broken part at ease (Lift the motherboard and the side button motherboard from the housing). DO NOT try to pry it on step 4. You might broke something for that.
There's also phone repair toolkits that sells it on a cheaper price I would only use #00 Philips Screwdriver only and a spudger or a flathead screw to put the cables back in place when I disassembled it
On Step 1: You don't need to remove the skates if you want to rescrew it later. you can unscrew it the screws both sides and cover it later then move to the bottom hole (Don't forget to put some kind of tape on it). The screws are small and they're easy to lose them if not careful.
Can one get a replacement wheel somewhere? Does that fix scrolling problems, I'd have thought it was a sensor issue??
pbhj -