Introducción

Esta guía es para reemplazar la rueda de desplazamiento de tu Logitech G700s

  1. TEL6wF4FV1dmmTVB
    • Retira las pilas del ratón.

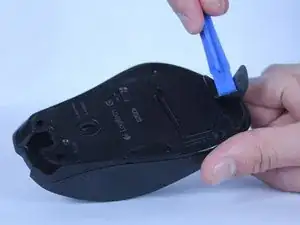
    • Usa una herramienta de apertura de plástico para despegar las cuatro patas del ratón.

  2. rhAqyJEOtq5DboQL
    rhAqyJEOtq5DboQL
    veptU16VIpvBdwyT
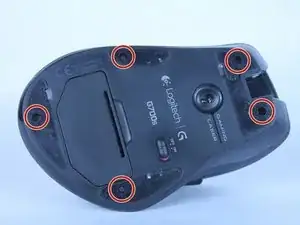
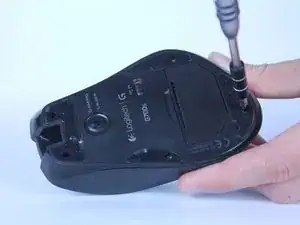
    • Retira los cinco tornillos Phillips #00 de 5,5 mm que se encuentran debajo de las patas del mouse.

  3. 1V332SIE6sPjZFaZ
    1V332SIE6sPjZFaZ
    JF3HhKRHFToFBfYQ
    RrXuSGbbdGdKQDFo
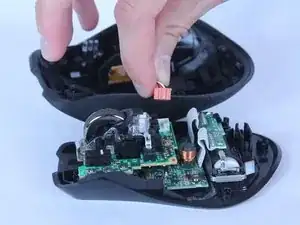
    • Saca la parte superior del mouse de la mitad inferior.

    • Hay un cable que conecta las dos mitades.

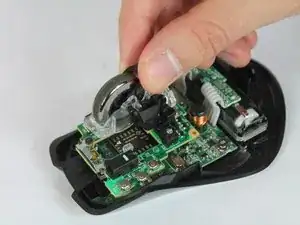
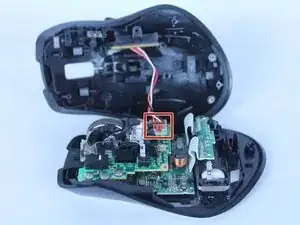
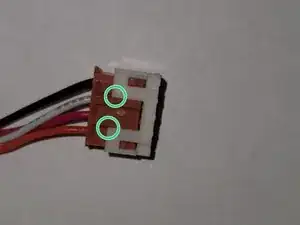
    • Desconecta los botones programables de la placa base.

    • La carcasa de la clavija blanca de la placa base puede salirse al desconectarla. En ese caso, usa una herramienta para hacer palanca en la ubicación indicada para separarlos e inserta la carcasa nuevamente en la placa base.

    I able to access the scroll wheel without removing the cable. If you do that, I recommend placing some sort of object against the top half of the mouse so that it doesn't move and pull on the cable. I have fairly small hands though so you might need to unplug the cable.

    Ash -

  4. 4JXJmUSXMXaknU6U
    4JXJmUSXMXaknU6U
    jmNXi2dN1ZDlvWEN
    GgDOrGjpje3Tvhac
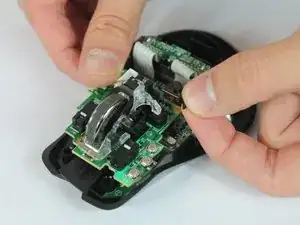
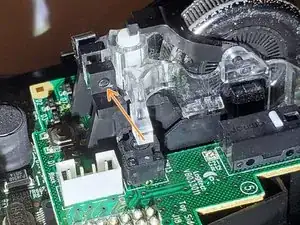
    • Retira el pin negro que sujeta la rueda de desplazamiento a la placa base.

    • La protuberancia en el lado inferior del pasador hace clic en el hoyuelo en la base.

    • Creo que la forma más fácil de quitar el pasador es usar el extremo puntiagudo del spudger para empujar este extremo del pasador.

  5. Yqv2XvXUNqSkN6mX
    Yqv2XvXUNqSkN6mX
    BjPMrL2WSVIu2p4i
    iVpYAmbWcgeU6u2q
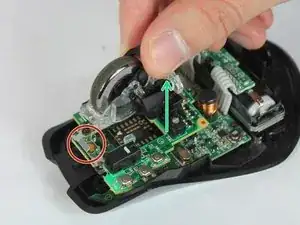
    • Primero, levanta el conjunto por la parte posterior (flecha verde), mientras mantienes la parte delantera de plástico transparente apoyada en los resortes (círculo rojo).

    • Luego, tirando muy levemente hacia atrás, levanta con cuidado la parte delantera de los resortes.

    • Podría saltar un poco de los resortes.

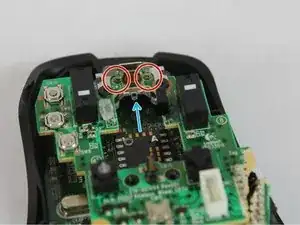
    • La parte frontal transparente tiene un orificio que se adhiere a un mordisco transparente justo debajo del soporte (flecha azul en la segunda imagen) para que la rueda de desplazamiento gira hacia la izquierda y hacia la derecha para la función de desplazamiento hacia la izquierda y hacia la derecha.

    • Aunque el punto de pivote no está unido demasiado profundamente. Al volver a ensamblar, alinea las marcas circulares en el frente con los resortes, luego presiona el lado posterior hacia abajo en el soporte y se alineará automáticamente.

    • ¡Tenga cuidado de no perder los dos resortes pequeños! ¡Son magnéticos y se pueden acoplar a cualquier destornillador de punta magnética!

    • Dejar un imán en el clip de metal podría ayudar a retener los resortes, aunque no lo he probado.

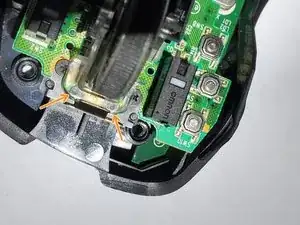
    • Retira los resortes y consérvalos.

    My problem was dirt accumulated in the clear plastic case of the wheel, making wheel hard to spin. I was able to disassemble and reassemble OK, but the difficulty was “hard”, and it took 20-30 minutes.


    Didn’t thought about taking photos and I’m not going to disassemble this again, maybe after another 2.5 years of use. Still, here’s couple of tips.


    Two tiny springs in the wheel assembly are tricky to assemble back correctly. Pay attention where each end of the spring is. You’ll need to pre-load them the same way or you gonna break the “clicky versus smooth wheel” mechanical button.


    The wheel axle is non removable. To detach the wheel, you need to apply outwards forces on the two clear plastic things holding ends of the axle. I used 2 flat screwdrivers, inserting them along the sides of the wheel. It’s easy to break plastic part by applying too much force, but I was lucky.

    Konstantin -

    I had this same issue, but what I did is take a piece of paper towel and used tweezers to force it between the mouse and the clear plastic casing. Then by forcefully scrolling, it pushed both the paper towel, and the dirt, out of the scroll wheel mechanism.

    Harrison Lee -

Conclusión

Para volver a armar tu dispositivo, sigue estas instrucciones en orden inverso.

Chase Tisinger

Miembro Desde 14/02/18

684 Reputación

Un comentario

Very good guide! The replacement scroll wheel I got on eBay did not have the black plastic part that sits on top, so I had to remove it from the original one. I did that by pulling the clear plastic part away slightly and removing it (do one side first and then the other side).

Ash -