Introducción

Los parachoques de un mando (controlador) inalámbrico Xbox One 1697 pueden volverse menos sensibles con el tiempo debido al uso y desgaste prolongados. Si los parachoques de tu controlador se aflojan con el tiempo o se rompen, usa esta guía para reemplazar los parachoques del controlador.

  1. vC1HAulr6S1W3TAY
    • Retira la tapa del paquete de baterías.

    • Retira las dos pilas AA.

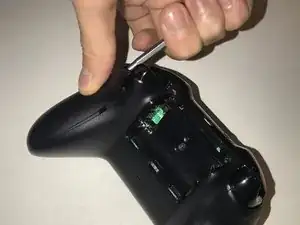
    • Retira con cuidado la etiqueta o pincha para revelar el tornillo.

    Note: Screw removal is in Step 3

    jkgarrett17 -

  2. CTyTRM3AVECmFEQn
    CTyTRM3AVECmFEQn
    lHWLG62JPqGEmInL
    nQawGyBwfXs1t1bv
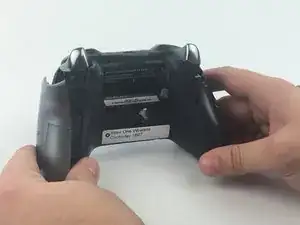
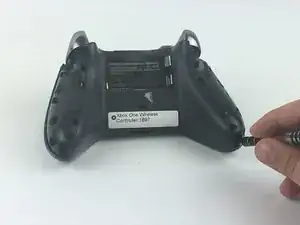
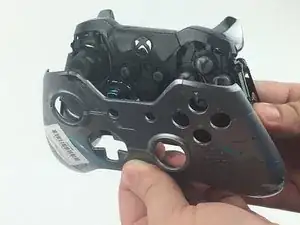
    • Retira las manijas laterales encajando el spudger alrededor de los paneles laterales.

    • Haz palanca en el panel lateral moviendo el spudger hacia adelante y hacia atrás. Debes hacer esto a lo largo de toda la costura para quitar el panel de la manija lateral.

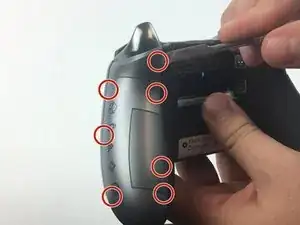
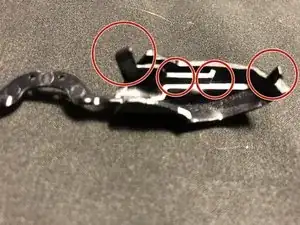
    • Hay siete clips que deben abrirse para quitar cada panel de la manija.

    Absolutely use the spudger to do this. DO NOT just lift up a bit at the bottom and then try to forcefully pull off this panel (as is shown and suggested on *multiple* YouTube videos). You WILL snap the clips. Maybe not all of them and *maybe* none of them, but as the instructions here detail, what you want to do is UNCLIP the clips where they are located, using the PLASTIC spudger. NOT a screwdriver. I watched three separate videos on YouTube where the person said “just stick a screwdriver in there and once you’re able to lift up enough to fit your finger inside, do so, and then just carefully pull the panel off.” That’s not how it works.

    Andrew Sauk -

  3. hKS3w1sepkXoyq2O
    hKS3w1sepkXoyq2O
    2TGpXcUlgetAgZ6b
    ZU4EASHE2puEJBbc
    • Quitar las manijas laterales permite el acceso para quitar la placa frontal.

    • Utiliza el destornillador TORX TR8 para quitar los cinco tornillos Torx TR9.

    you must also remove the T8 screw hidden under the label in the battery compartment to free the faceplate.

    Dennis Kim -

    Precised by Dennis Kim, but to remove the screws you need a TORX TR8 screwdriver (I guess it’s a Torx size 8)

    James Burton -

  4. TTYlEyoKIMFjqcVr
    TTYlEyoKIMFjqcVr
    XlucDgkdaGKNRCfW
    CqKIbhMBCNeV1Dtc
    • Ahora que los parachoques son fácilmente visibles, asegúrate de limpiar cualquier suciedad o mugre que pueda haber alrededor de los parachoques.

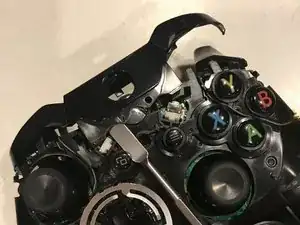
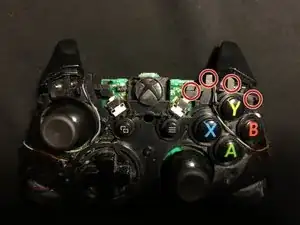
    • Los parachoques están conectados por una cubierta de plástico central que se encuentra alrededor del botón de inicio de Xbox. Retira esta pieza de plástico levantando la cubierta de plástico sobre los dos pines, presionando el botón de inicio y empujando la cubierta hacia la parte superior del controlador.

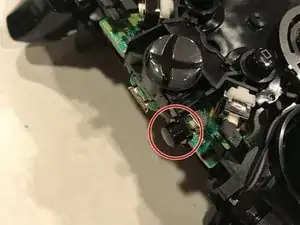
    • Ten cuidado con el botón de sincronización colocado debajo de la cubierta de plástico. Asegúrate de volver a colocarlo antes de volver a colocar el conjunto de parachoques/cubierta de plástico.

    • Retira el conjunto de parachoques actual tirando de ellos para sacarlos de la cubierta de plástico.

    you forgot to include directions for removing the central cover.

    Dennis Kim -

    And when you do, the connect button pops out, and now I have no clue how to put it back -_-

    Roel Binnendijk -

    The replacement part I bought fit OK but was too snug, with the result that the bumpers wouldn’t spring back so they wouldn’t click and unclick the tiny control switches they connect to.

    After a bit of examination I determined that if I cut out the middle arch section that joins the bumpers, but leaving enough plastic to go under the central plastic cover so that they would be held in place securely, that it was possible to reassemble the controller so the bumpers click and unclick freely.

    Perry Bonewell -

    I had the same issue, But i just shaved the little lugs that connect the button to the switch with a scalpel and used the original plastic black cover. Works a treat and i’ve no fear the button will fall out.. :)

    steve winter -

  5. 5DnoZdbtTOTDbXcZ
    5DnoZdbtTOTDbXcZ
    jnFCICyWB4ByLlmR
    yQfxM236hqQMmkMV
    • El controlador ahora está listo para el nuevo conjunto de parachoques.

    • Alinea los parachoques nuevos en la parte superior del controlador manteniendo presionados los gatillos y alineando los cuatro pines en ambos lados.

    • Coloca la nueva cubierta del botón de inicio sobre el puerto micro USB, presiona el botón de inicio y tira de la cubierta sobre los dos pines que se muestran.

Conclusión

Su dispositivo ahora está listo para ser utilizado.

Ryan Burroughs

Miembro Desde 25/09/17

1132 Reputación

10 comentarios

the bumpers take some finesse to remove, so be patient

Vincent -

You should add a security hex screwdriver to your tools list, along with the gauge that is required.

Travis Weston -

There is a fifth screw in the battery compartment that holds the faceplate on. Take an exacto knife and cut out sticker where the hole is.

Scott Williams -

Could you elaborate on the “remove the bumpers” part (last step) please, thank you.

r.d.huijsmans -

Great guide. Helped me easily fix a sticky bumper and save 60$

Bryon Crockett -

Thank you soooo much. Had a broken bumper for over a year and finally fixed it thanks to this great guide.

twisted-starlight -

It would be nice if the reserve was shown as well.

Ryan A -

How do you put them back on. The right button assembly seems to be different than the left for me

GildenScale -

I need to fix this bumpers on this same controller, does anyone know which is the type of bumpers that I need for this controller before I buy one set? I’ve found there are 2 types, one with a curve connection, and another with a flat straight connection bewteen bumpers.Thnx

Gzamo Z -

Instructions were fool-proof. Although, I didn’t have a new bumper to install, I was able to take my controller apart to verify it was broken. I will say, it took some cussing to get the handles off, lol. Those sucka’s wouldn’t budge for a little bit, haha.

Jenny -