Introducción

Vuelve a colocar el interruptor de encendido en la Nintendo DS Lite.

  1. VAkqhUG2ctFuiKKh
    VAkqhUG2ctFuiKKh
    eIKe4YBYXvQpmQZa
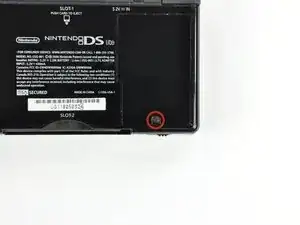
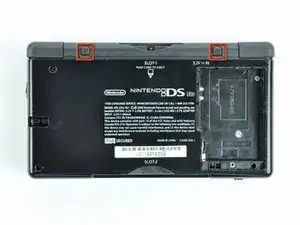
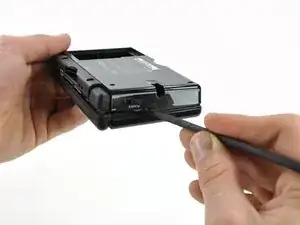
    • Desatornille el tornillo Phillips que sujeta la tapa de la batería a la carcasa inferior.

    • El tornillo permanece cautivo a la tapa de la batería.

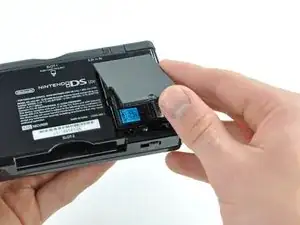
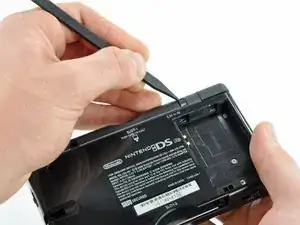
    • Haz palanca en la cubierta de la batería hacia arriba con un spudger o una uña y levántala para sacarla de la caja inferior.

    A Phillips #000 (PH000) seems to give a more secure fit (no slipping) than the stated Phillips #00.

    Ritchie -

    This will be good for mods

    Matthew Bevins -

    I'm having a problem getting the screw to unscrew. I have the right Phillips ( it was included with all the stuff I got this) Any tips. it doesn't look like the screw is spinning but i haven't played my Nintendo DS Lite for 3 years.

    whittlegirls -

    bonjour j’ai une petite question pour vous fais trés longtemps que j’ai pas utiliser mon nintendo ds lite et quand je le branche il allume 1 fois orange après il s’enteint même s’il est brancher ça veux tu dire qu’il faut que je change de batterie ? Merci

    Marie-Julie Richer -

    Soit un changement de batterie, soit la carte-mère a peut-être un court-circuit :/

    Polaris -

  2. 25sZ5YeYaes4dCMx
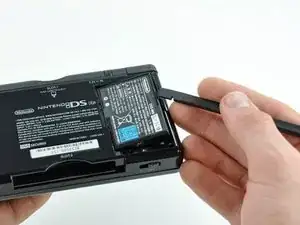
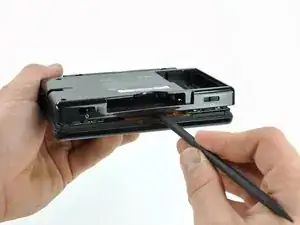
    • Introduce el borde de un spudger entre el costado de la batería y la carcasa inferior y haz palanca hacia arriba para sacar la batería.

    • Retira la batería del DS Lite.

  3. TgU6hRLWjWFK4TCK
    TgU6hRLWjWFK4TCK
    CMk1E2IEHDrjmKjB
    • Usa la punta de un spudger para levantar ambas patas de goma del DS Lite

  4. 5mujrSp3TuXlBfCh
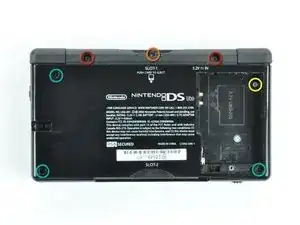
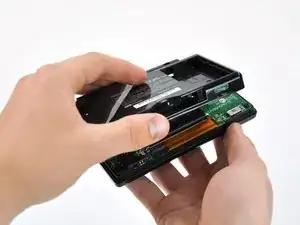
    • Quite los siguientes tornillos que sujetan la carcasa inferior al cuerpo del DS Lite:

    • Dos tornillos 4.3 mm gold Phillips

    • Un tornillo 3.9 mm black Tri-Wing

    • Un tornillo 3.3 mm silver Phillips

    • Tres tornillos 5.5 mm silver Tri-Wing

    Not mentioned is to remove the jumper/connector below the word "SLOT-2". Case WILL NOT separate otherwise.

    Kayla -

    In the separation step below, the third picture show the case with the jumper/connector removed.

    Kayla -

    I cannot remove the tri-wing screws.

    Zach Smith -

    Same to me. I tried opening the case by force. Broke several parts of the motherboard…

    Leon -

    I can't remove the final tri wing screw in the battery section and it looks like I grinded the screw out too much for any screwdriver to work.Is there anything I can do?

    Quintin Harbin -

    From what I know, the only solution is to drill the screw out with a very small-headed drill :/

    Polaris -

  5. wZxqpiHuTIdWhnk5
    wZxqpiHuTIdWhnk5
    RKCEoKJwEHK44LCO
    pSLANlQhrJj1jOZH
    • Retira la tapa de la ranura del Game Pak antes de continuar.

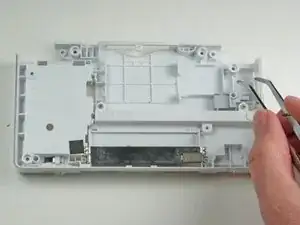
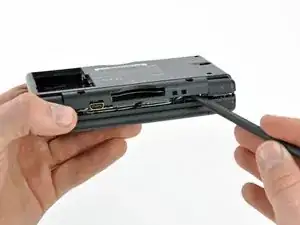
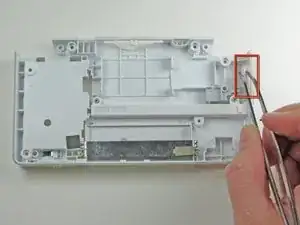
    • Inserta el borde de un spudger entre la caja inferior y superior cerca de la esquina superior derecha del DS Lite.

    • Pasa con cuidado el spudger a lo largo del borde derecho del DS Lite, creando una abertura en el proceso.

    • Continúa pasando el spudger por la parte trasera de la DS Lite hasta que la mayor parte de la caja inferior se haya separado de la caja superior.

    Don’t forget to remove the GBA cartridge placeholder before removing the backside

    Cees Jan de Boer -

    You forgot to mention to remove the battery compartment Phillips screw.

    nathan lowe -

  6. ogeB4h5PpuF5FBNh
    • Levanta la carcasa inferior del resto del DS Lite.

    • Tira con cuidado. Algunas unidades están selladas con adhesivo y tirar demasiado fuerte puede dañar el interruptor de encendido.

    • Al volver a ensamblar, asegúrate de que el interruptor de encendido y los controles deslizantes de volumen estén correctamente alineados con los interruptores de la placa base.

    When you reassemble, make sure that you have the volume and power buttons in place, and make sure they are in the right position to line up with the switches on the motherboard. If they are not aligned, you risk snapping off the tiny switches on the motherboard (in which case, you are in for some soldering work).

    Eric -

    I should have read the comments first - broke off the power switch because I didn't know about aligning it. No way I can do soldering, guess it's for the dustbin :-(

    Emma -

    Whoops, remembered the power button but forgot the volume slider.

    I'll do it later.

    analbonghits -

    There is no way that the fact you have to line up the volume and power switch toggles upon reassembly is not in this guide. I just carefully followed this guide to replace the shoulder buttons but ruined my DS lite because I didn’t read these (practically hidden comments due to the design of the website) comments and broke the power switch. Thankfully there are 150 million DS I can buy second hand but “repeat the steps backwards” wasn’t sufficient in this repair. And that’s what this website is for.

    Ryan -

  7. Pn1wbQhfDlZsrSfC
    • Usa un par de pinzas para quitar con cuidado el interruptor de encendido.

    Ummmm. My switch won’t go back in.

    Tak Toyota -

Conclusión

Para volver a armar tu dispositivo, sigue estas instrucciones en orden inverso.

Philip

Miembro Desde 21/01/10

520 Reputación

4 comentarios

What about replacing the soldered portion of the switch? The tip that moves with the plastic to turn the handheld on/off has broken off of mine

Wicked Gamer -

Yeah, what he said..

Tim Wardlow -

If the plastic tab has broken off of the soldered part of the switch, you could try to glue a replacement tab onto the internal sliding mechanism, but more likely you’ll end up gumming up the works and effectively destroying the part, but then again it’s not as if you have a lot to lose by trying.

Alternatively you’ll need to get a replacement switch and desolder the broken part then installing the new part. Be careful that you don’t get the iron in contact with the top of the switch as that may melt the moving parts together, potentially necessitating another replacement.

Emily H -

Just desolder the old faulty switch and solder in your new replacment.

BadassSunset -