Introducción

  1. 3TJCZrq5ELWWAUFV
    3TJCZrq5ELWWAUFV
    BjyGV5CMDIeVhvmj
    • Puedes quitar los paneles laterales con una herramienta de palanca.

    • No es necesario quitar la goma. La goma de este mando ya estaba mal

  2. 1opju56P6EkrT4sb
    • Retira los 5 tornillos Torx Security Bit (TR9)

    all the T8 screws on my controller have a clear filling in them, WTF?!?!?

    Patrick Henry -

    all my T8 screws have a clear filling in them, WTF?!?!?!

    Patrick Henry -

    I've never seen that, I can't advise much other than scrapping it out with an xacto knife

    EasyAsABC123 -

    My screws have a tiny metal pin in the center. Looks like I need a TR8 bit, not a T8. This might be what you are mistaking for a clear filling.

    Steve McGinn -

    Thanks it might be TR8 i’ll update the guide

    EasyAsABC123 -

    While a TR8 will work, they’re actually TR9 screws on mine (Model 1698, X912908-004).

    Daniel -

    @isbelldl thanks, updated to specify TR9

    EasyAsABC123 -

    TORX TR8 worked form the ifixit kit

    KRISTIAN KALLAWAY -

    My anolog stick is lagging on my elite 1 controller. Can I remove a anolog module from a normal xbox 1 controller and then put into the elite 1 controller would it be compatible. I have all the soldering irons and stuff. It's only that I dont have any money and wanted to no if thay would work . Thanks guy appreciate your time kris

    kriswadd@hotmail.com -

  3. 1LhEeI3qiQhNkbHj
    1LhEeI3qiQhNkbHj
    LeGSVTi1qpxlxOu3
    rXKydWRn5yLpQJQJ
    • Haz palanca en el panel junto al puerto de 3,5 mm

    • Ten cuidado de no rasgar la cinta que se muestra en el siguiente paso.

  4. kBhSWTEhAPEVD5yA
    kBhSWTEhAPEVD5yA
    ZUcv6TdiGcYZVboE
    • Ten cuidado de no rasgar el cable plano.

    • Puedes levantar el conector para quitar la cinta fácilmente

    • Cable plano

    My connector did not look like this and popping it up broke it

    Amarokstar -

    please post a picture of the connector so we can update this, you also might have a newer revision of the motherboard

    EasyAsABC123 -

    Is there any way to replace that connector bar or maybe an alternative to keeping the contacts down on the ribbon if it’s broken?

    Joe -

    @joe you can try tape, or even hot glue (easy to remove with rubbing alcohol), that might hold it down. I wasn’t able to find the connector but i’m sure if you count the number of pins and measure it you’d be able to locate a replacement connector on something like mouser.

    EasyAsABC123 -

  5. xYndZmGjfDV2tAWL
    • Retira los 2 tornillos Torx (T6)

  6. o3HhKPLSRfiY6UWQ
    o3HhKPLSRfiY6UWQ
    XqgEF5JcGjS5tolD
    • Desoldar los 4 cables de cada lado, estos controlan las vibraciones y el RT LT

    If you are just replacing the main power board there is no need to desolder at this point. The main power board can be removed with the controller board still in place.

    Malc Foy -

  7. RsDGGXPEn1T4VlXm
    RsDGGXPEn1T4VlXm
    a1P53NN3INNRo4Qr
    • Tira hacia arriba desde el lado "superior" del controlador en la placa hermana.

    Hi,

    I would like to know if I could get from you a Motherboard . In case you don' t have it, where could I find one?

    Thank you

    Alejandro Expósito -

    Hi, I have 2 not working controllers (both 1698 and 1708). The 1708 broke the bumper switch, I manage to fix it but as always, postponed. So, can I either swap Xbox One Elite comtroller (1698) into Xbox One (1708) shell/housing or vice versa??

    Or can I mix both motherboard together so I can make one of them working?

    Fitifazrul Rahman -

    It might work…it might damage one of the boards but probably wouldn’t

    EasyAsABC123 -

    I would like to buy a motherboard, can you please stock some up?

    davi_t -

    I don’t work for ifixit, I don’t know if they see comments on a private made guide.

    EasyAsABC123 -

    I decided to toss all this stuff in the trash at this point as I am not going to spend +$50 on equipment and replacement parts to fix a $60 controller. But thanks for the educational manual all the same.

    KRISTIAN KALLAWAY -

  8. 6YeZJ6NT1ecoGBFH
    6YeZJ6NT1ecoGBFH
    26sg5NOCpxsqIdZB
    5WE5131cARQDSYEd
    • Ten cuidado de no perder el botón de sincronización

    • Haz palanca en la sección central hacia arriba desde el lado del botón de inicio.

    • Esto también eliminará el LB y el RB, que es una sola pieza.

  9. HyeZticLYMGSxuBX
    HyeZticLYMGSxuBX
    vepsZku2eDZo3Kxm
    • Desatornilla los 6 tornillos Torx (T6)

    On the 2nd picture: the D-pad dome switches are covered by a clear plastic film: is possible to remove it/reattach that plastic film? I believe there might be something stuck underneath the dome switches that’s interfering with the d-pad buttons working reliably/consistently. I know I could just replace the daughterboard, but I’m trying to avoid doing that if I can just clean it some how/find a way around it

    [deleted] -

    This is just tacom tape :), feel free to buy more and replace

    EasyAsABC123 -

    Hi anyone know of where to find that rubber thing that goes on lb/rb trigger?

    kostas kazlauskas -

    rubber thing? You mean the lb and rb part itself? or the home button section?

    EasyAsABC123 -

    The lb/rb white rubber behind the button supoort rubber i dont know how its called

    kostas kazlauskas -

  10. YuKGdMjIOEbrwdmx
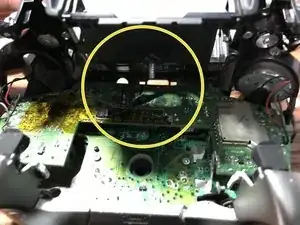
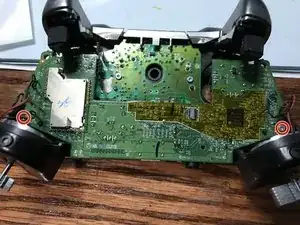
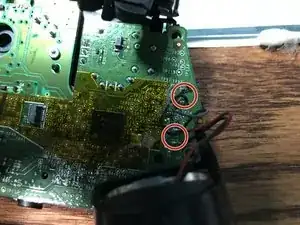
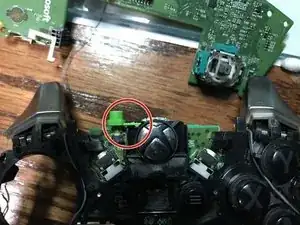
    • Desuelda el LED original de la placa base del mando (controlador). Haz esto para ambos lados del LED hasta que se elimine toda la soldadura vieja.

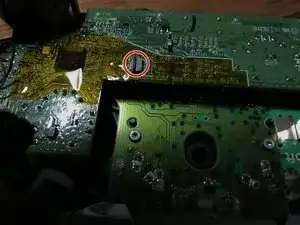
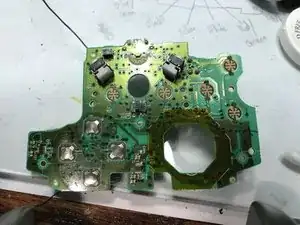
    • Suelda tu su nuevo LED.

    • Asegúrate de que esté instalado en la misma dirección que el LED anterior, o puedes quemar el LED nuevo.

Conclusión

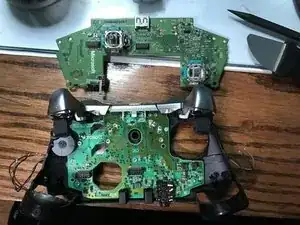
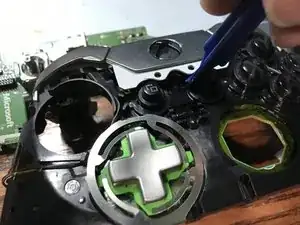
Para volver a armar tu dispositivo, sigue estas instrucciones en orden inverso.

EasyAsABC123

Miembro Desde 22/01/10

2273 Reputación

7 comentarios

So question I’m having troubles with my elite controller every time I go to plug it in and the charging port in the back of the controller it starts to smoke what’s my problem

Dustin Dykstra -

It sounds like it could be a lot of things…

smoke is obvious a dead stop (stop plugging it in until you repair it).

I would first check the charge port and make sure it is firmly attached if it isn’t you can easily replace the usb port. Next it could be the mainboard charging circuit. if it is this…replace the controller is likely the ideal solution.

EasyAsABC123 -

I was looking to do this mod for fun. Do you have or know where I can get the led part number? A schematic or bom would be nice. Thanks

Clayton Armagost -

0805 SMD LED Diode Lights

i bought these https://www.amazon.com/gp/product/B01CUG...

EasyAsABC123 -

Thank you. I ordered them so we will see what happens.

Clayton Armagost -

Worked like a champ. The original LED was a POS and melted when i applied the heat. I got it cleaned up and change with no other problem. Thanks for the guide.

Clayton Armagost -

Awesome I'm glad you had success!

EasyAsABC123 -