
Introducción
Esta guía muestra cómo quitar el panel trasero del iPod Touch de 1ª generación.
Herramientas
Partes
-
-
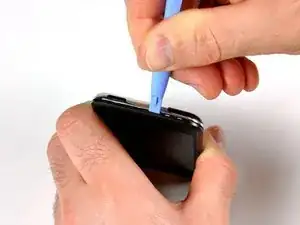
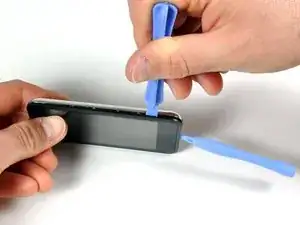
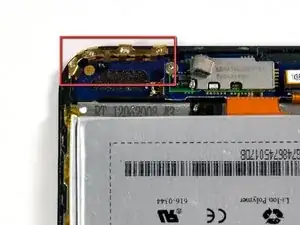
Inserta la pequeña herramienta de apertura de plástico en la costura entre el panel de plástico de la pantalla y el panel trasero de metal. El borde en ángulo debe apuntar hacia el panel trasero de metal.
-
Sostén la herramienta en su lugar una vez que esté encajada en el interior y los dos paneles estén separados.
-
-
-
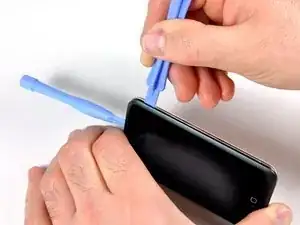
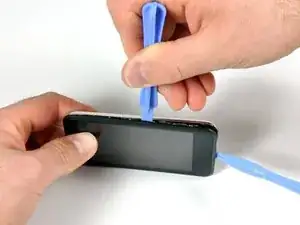
Inserta la herramienta de apertura grande en el lado derecho del iPod, con el borde de la herramienta apuntando hacia la parte posterior de metal.
-
Agranda suavemente la grieta existente moviendo la herramienta de apertura grande y moviéndola hacia la derecha.
-
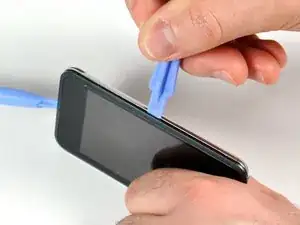
Continúa haciéndolo hasta que el lado derecho del iPod esté suelto.
-
-
-
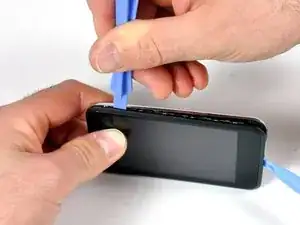
Cambia al otro lado del iPod.
-
Sigue el mismo procedimiento que en el paso anterior para soltar los siete clips que sujetan los paneles en su lugar.
-
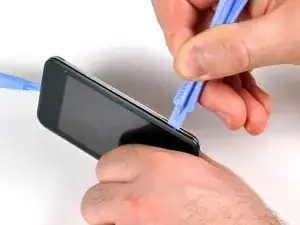
Una vez que se separan los paneles de este lado, el panel posterior se puede separar del resto del iPod.
-
-
-
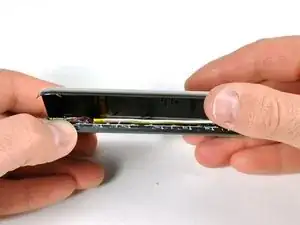
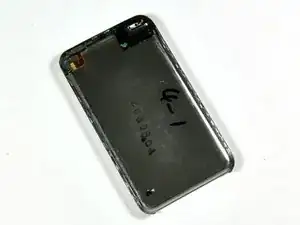
Levanta suavemente el panel posterior con los dedos.
-
La parte delantera y trasera del iPod ahora deben estar completamente separadas.
-

Para volver a armar tu dispositivo, sigue estas instrucciones en orden inverso.

I found the little plastic tools to be useless. I finally got the case apart using jeweler's screwdrivers, guitar picks, and believe it or not, a wood chisel to split the sides of the case open. And believe it or not, I got back together again - not quite as good as new, but good enough.
I'd REALLY love to know how Apple technicians get this little beast apart without damaging or nicking the case.
phinegan -
Who's betting the actually replace the back with a brand-spanker - if they repair them at all!
marc draco -
They do replace it with a new back, thats why they said that if you have words on the back (engraved) by someone other then apple, your going to lose those but if there done by apple then they'll do it again (when replaceing the battery they say that)
shadowfox00101 -
I replaced my battery in my 1st gen iPod and it still doesn't hold a charge for more then 5 min. Any ideas?
ae86keidori -
mine has the same problem. My 1st gen iPod touch dropped in water. after that It still works but can't hold a charge for more than 5 mins. I changed the battery and still the same.
One of my friend give me some advices, I simply clean the whole logic board with some non water alcohol, and it works. It works perfect now. You can have a try.
Liku -
I found a method that worked for me in opening the case. I started at the top, and used a sewing needle. I'm sure a straight pin world work also. Using some padding between the back of the needle and my hand, I worked the point of the needle between the casing and the metal back. Don't push straight into the gap, push on the edge of the gap down toward the back of the iPod. Once you feel the needle slip in, use it as a guide to get your prying tool in there.
Paul Jones -
Hey, I made it, it's open! My opener tool was useless. A swiss army knife and lots of brute force is your friend. My tool broke apart not resisting such force that is necessary.
http -
lol i dropped my iPod this fixedit because it had no back
elais -
Count get past step 1 :( began seperating the back but the metal back sooner bent than the clips letting loose. I heard something chip then the ipod started getting very hot so I think I punctured the battery :( its going to live outside for a while before I throw it out.
Mike -