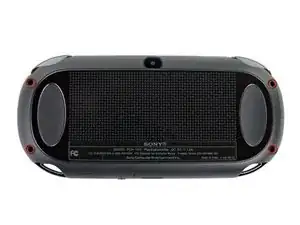
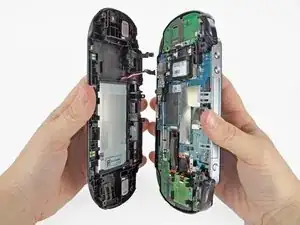
Introducción

Esta guía lo lleva a través del proceso de instalar el joystick izquierdo en la PlayStation Vita.

  1. bXHPdJvmOqwnRZ5W
    bXHPdJvmOqwnRZ5W
    Kxh4sK2xMaaiHQtJ
    • Apague y retire la tarjeta de memoria.

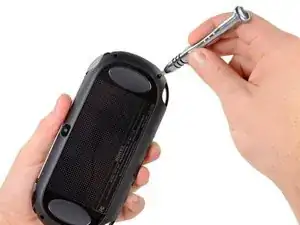
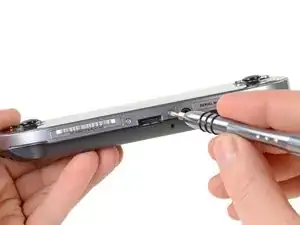
    • Usando un destornillador Phillips # 00, retire los cuatro tornillos de 6,4 mm en la carcasa trasera

  2. WwpKNcKBHnx3iwJP
    WwpKNcKBHnx3iwJP
    36FYDevnAqBvbNY3
    mjh2iFATaa2BKMEs
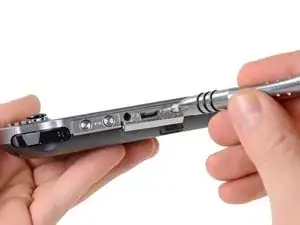
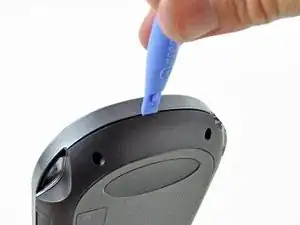
    • Usando la uña o un spudger, abra la cubierta del puerto de accesorios en la parte superior del dispositivo.

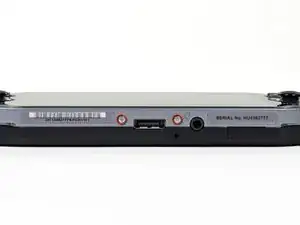
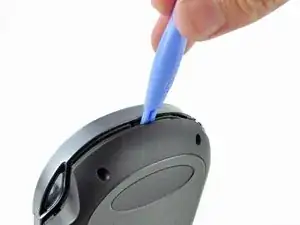
    • Usando un destornillador Phillips # 00, retire los dos tornillos de 5.4mm ocultos debajo de la cubierta del puerto de accesorios.

  3. AH6yWSkBJ4VWv3RB
    AH6yWSkBJ4VWv3RB
    aXih4BBWrQN2fmOK
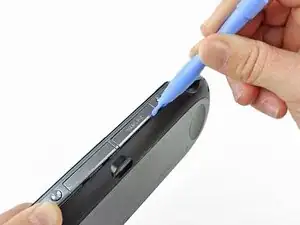
    • Retire los dos tornillos Phillips # 00 de 5.4mm en la parte inferior del dispositivo cerca del puerto de carga.

  4. bEJVmiEky4mHiDcb
    bEJVmiEky4mHiDcb
    aQOOn4pkOrVFR3hw
    vEQhcA4OEHFKVYLS
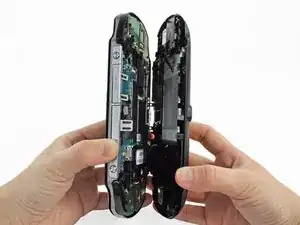
    • Comenzando a los lados del dispositivo, utilice una herramienta de apertura de plástico para separar la carcasa delantera y trasera.

    • Continue deslizando la herramienta de apertura al rededor del borde.

    • Todavía hay alambres que mantiene juntas las carcasas delantera y trasera. Usted puede dañar las conexiones si separa las carcasas de forma brusca.

  5. 3BBZJmwmjKVUDiJa
    3BBZJmwmjKVUDiJa
    EpjUlyY4L4GWcaLS
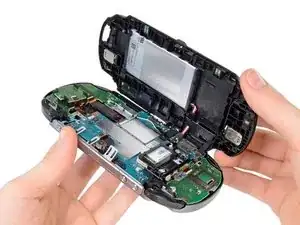
    • Suavemente separar las dos carcasas, teniendo en cuenta la batería y los conectores del controlador de pantalla táctil que mantienen las carcasas juntas..

    One of the shoulder buttons fell out when I was doing this step, along with the piece holding it in place. They go back in just fine when reassembling but make sure that they are oriented properly, of course.

    klung -

  6. NeowybD4slFqYmiM
    • Utilizando un spudger, libere el cable flexible del controlador de la pantalla táctil suavemente levantando la conexión.

  7. DtebpV1FIAkm4AUj
    • Libere el cable de la batería levantando suavemente la conexión con un spudger.

    Any idea what type of pcb header is on the board for the battery? I have a motherboard with a broken header but I cant source a replacement

    Jimbo Jones -

    This is where I screwed up so I recommend extra caution for other newbies. Only the black part is supposed to come off. Don't be an idiot like me and pry off too much...

    ylimakiminna -

    Yea I messed up there too. Is there a way to fix it?

    Alethia Henry -

    This component was far more stubborn than the screen connector when it came to removal. I opted for a smaller tool than the spudger (small flat-head) and managed to disconnect it after determining the best bit size for the job. Screwdriver is metal, obviously, so being gentle helps to avoid damaging anything.

    klung -

  8. fkyIaVUrPDRIlhZV
    • Separar las carcasas delantera y trasera.

  9. EEmLIrKv4dHKsk1j
    EEmLIrKv4dHKsk1j
    1pQo3KjHMVBOVnBC
    I2JYMM1x2igll1I1
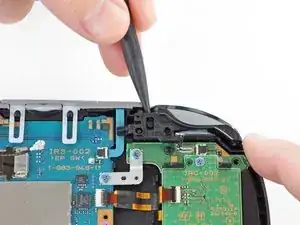
    • Levante la cubierta del botón del hombro izquierdo con un spudger.

    • Retire la carcasa del botón del hombro izquierdo.

  10. LrALDSbuNdoHWTZe
    LrALDSbuNdoHWTZe
    nDZW2JWWsSyM5MXI
    • Retire la tapa traslúcida de plástico del hombro.

  11. vpbObMcWUOMII432
    vpbObMcWUOMII432
    TbWqrYJPpsZJkeYf
    NMMqqFH2OmGJK1jZ
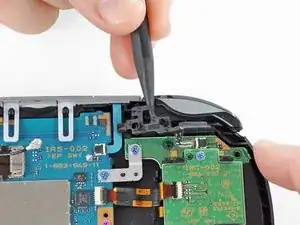
    • Suelte el zócalo del cable flexible del botón del hombro izquierdo usando un spudger para abrir la lengüeta.

    • ¡Tenga cuidado de no romper esta pequeña pestaña negra!

    • Con las pinzas, deslice el cable flexible del zócalo. ¡No tire de la lengüeta negra! En su lugar, tire del cable delgado flex de distancia del conector (a la izquierda en esta imagen).

  12. EuVHYx1UjbOAl4pq
    EuVHYx1UjbOAl4pq
    FHMI5vnO6qVuOuL6
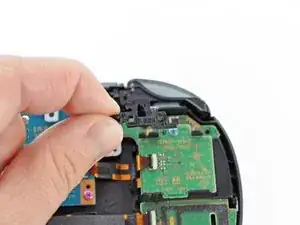
    • Usando un spudger, levante suavemente el botón del hombro izquierdo del adhesivo ligero que lo conecta a la carcasa.

    This step is unneccesary.

    Alexander Mayatsky -

  13. ReaLF5hNnDtB4hGY
    ReaLF5hNnDtB4hGY
    5VUcvMNLhHaOZQWv
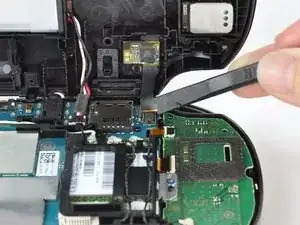
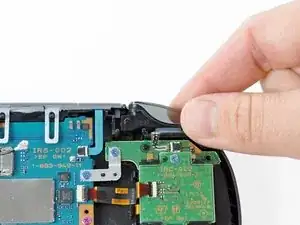
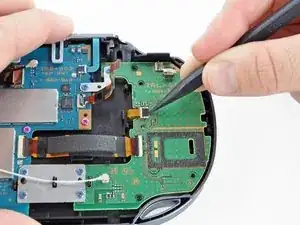
    • Usando un spudger, levante y suelte la lengüeta en el zócalo ZIF sentado en el lector de tarjetas SIM.

    • Extraiga con cuidado el cable flexible del zócalo ZIF y déjelo fuera del camino.

    Este paso NO es necesario si tu PSVita no tiene lector de tarjeta SIM. Ve directamente al paso 15.

    Parappa The Rapper -

  14. GrmEMEJIsv2VIsIY
    GrmEMEJIsv2VIsIY
    5gSGRVqGG3JHFJS6
    TjKFsL3RdxsmR6ae
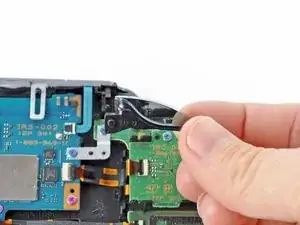
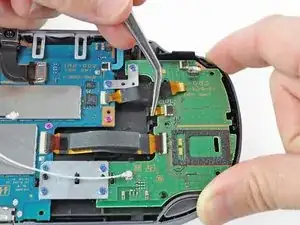
    • Utilice un spuder para liberar la lengüeta entre el lector de la tarjeta SIM y el conjunto de la carcasa trasera.

    • Levante el lector de tarjetas SIM del conjunto de la carcasa trasera.

    This board is not present in the Wifi only version, only the 3G/Wifi version.

    dodo -

  15. uhrPkiflxnJg1x1K
    uhrPkiflxnJg1x1K
    X4mQUe2LLVeVBTM2
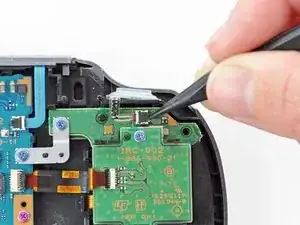
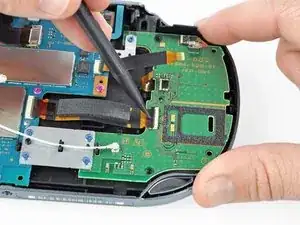
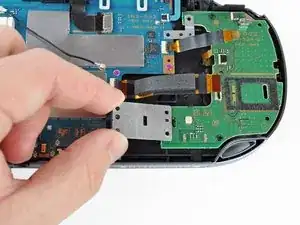
    • Suelte la lengüeta plástica en el zócalo pequeño del cable flexible levantándolo con un spudger.

    • Usando pinzas, retire suavemente el pequeño cable flexible del zócalo y déjelo fuera del camino.

  16. WQtNPDCbJhAFdhqf
    WQtNPDCbJhAFdhqf
    WJxCqSV5w2cyrrSd
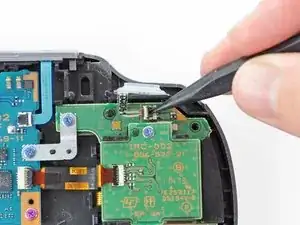
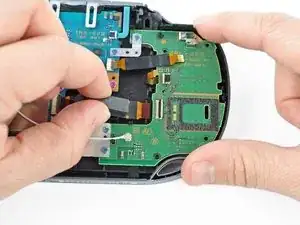
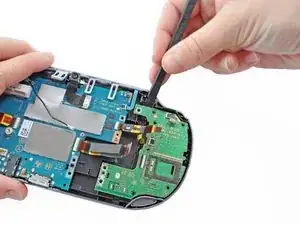
    • Utilice un spudger para levantar la pestaña en el zócalo ZIF grande.

    • Tire suavemente del cable flexible del zócalo ZIF y déjelo fuera del camino.

  17. 1IvJRIjs2t2Ufwng
    1IvJRIjs2t2Ufwng
    lOPyuvpuHacqOKkC
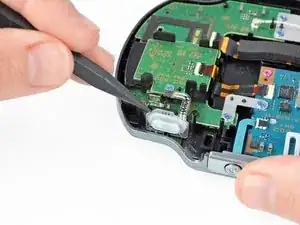
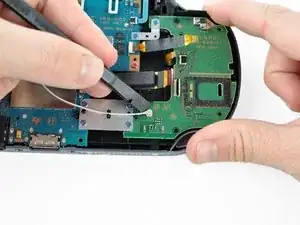
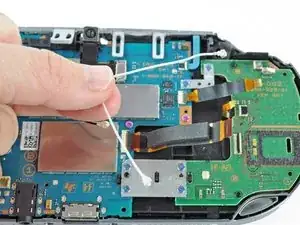
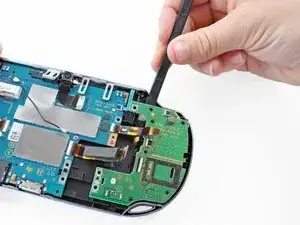
    • Desconecte el cable de antena Wi-Fi blanco con un spudger

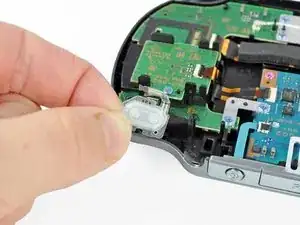
    • Retire el cable de la antena Wi-Fi.

    This connector isn't present in the Wifi only version, just the 3G/Wifi version.

    dodo -

  18. xSVxNWXXTUQvjnVx
    xSVxNWXXTUQvjnVx
    45TZfQiLNuShS2bB
    PZurSbIvaKUM5RZo
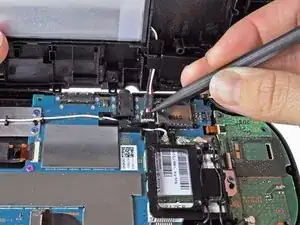
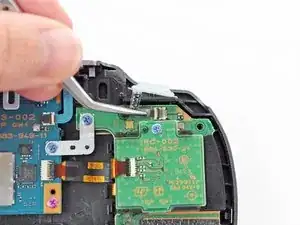
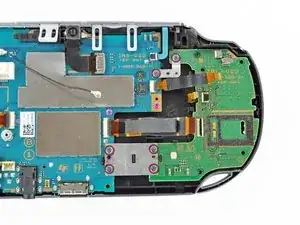
    • Usando un destornillador Phillips # 00, retire los seis tornillos de los dos soportes metálicos:

    • Dos tornillos de 5,0 mm, azules en el soporte en L que aseguran la placa superior izquierda del botón a la placa base.

    • Cuatro 5,0 mm, tornillos azules en el soporte cuadrado de fijación de la placa del botón izquierdo inferior a la placa base.

    What is the loose looking cable in this photo?

    Dallon Verhaeghe -

  19. jGlIgvoCnMQ5bla5
    jGlIgvoCnMQ5bla5
    sxyVEpnrjHWjEFyc
    FGXIOZ3D5s3Zu6PX
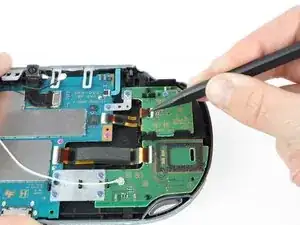
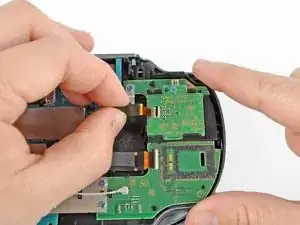
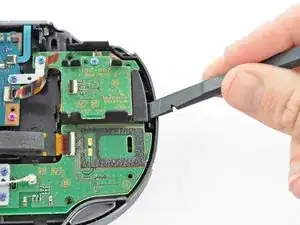
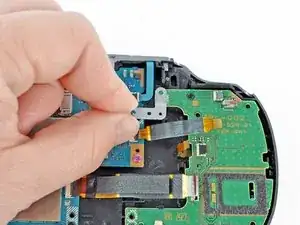
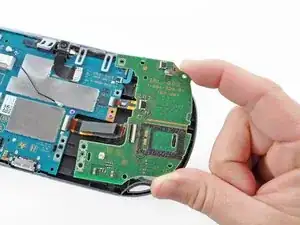
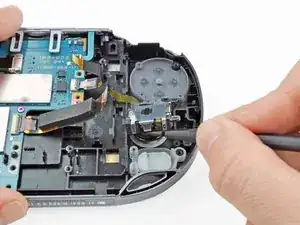
    • Iniciando en la esquina superior izquierda, use un spudger para levantar y quitar el tablero del botón izquierdo.

  20. 2Ty5mthRXDBnpI6K
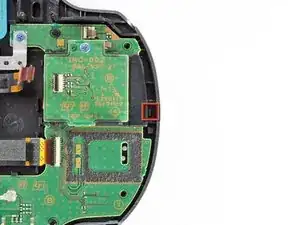
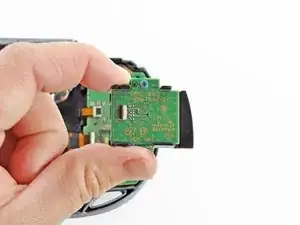
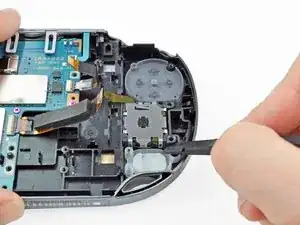
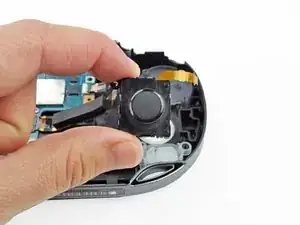
    • Con un destornillador Phillips # 00, retire los dos tornillos azules de 5,0 mm que unen el joystick izquierdo a la carcasa trasera.

  21. TmhloNs6buMdbGEZ
    TmhloNs6buMdbGEZ
    VxfYFQS6YfOwvmUO
    ZL1ym2soybWRlnUB
    • Usando un spudger, levante y quite el joystick izquierdo.

Conclusión

Para volver a armar el dispositivo, siga estas instrucciones en orden inverso.

Brittany McCrigler

Miembro Desde 05/03/12

88184 Reputación

10 comentarios

Is it possible to purchase new ps vita analog sticks to replace beaten up ones with?

kay -

Yes. I found them on dealextreme.com, but then saw that shipping could take awhile and double the price. I found a better deal on eBay-- $22 including shipping for a new analog stick.

dodo -

I Live in Kendall,Miami,Does anyone could tell me if there is a place where can I fix my PSVita (The left stick dosent work) Thanks

jamalonso94 -

I have followed these instructions

I have succeeded to replace the joystick but the psvita dont want to turn on and refuse to charge

before the fix the battery was charged to 80%

I have checked all the cables and everything is good

When I push on the power button, the PS light go to orange and stop when I relax the power button

Could you help me please?

mbouchet42 -

Turn on the system let it charge then put it back to sleep

travishenry318 -

is there anywhere i can go to pay someone to do this for me?

Nathan Baker -

is there any safer way

tonya.morse35 -

can i do most of these without a spudge?

karlo.maico -

Is there any way to disassemble, clean and reassebmle the analog module? My Vita has issues with the analog sticks and all the replacement analog sticks I’ve bought so far also have issues. Some people have suggested taking out the flex cable and cleaning the contact points, but I’m not sure how to do that.

vladmoraru97 -

Perfecto... ni diez minutos con esta gran guia... gracias.

Pequeño Francisco -