
Introducción
Actualice su disco duro para aumentar el espacio de almacenamiento.
Esta guía también incluye pasos para actualizar el disco duro de su iMac con un SSD. Describe cómo instalar el sensor de temperatura del SSD para que los ventiladores de la Mac funcionen a la velocidad correcta.
Antes de comenzar cualquier trabajo en su iMac: Desenchufe la computadora y mantenga presionado el botón de encendido durante diez segundos para descargar los condensadores de la fuente de alimentación.
Tenga mucho cuidado de no tocar los cables del condensador o cualquier junta de soldadura expuesta en la parte posterior de la fuente de alimentación.
-
-
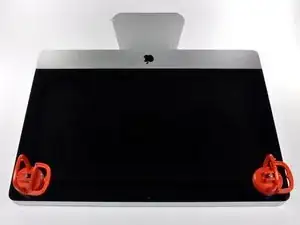
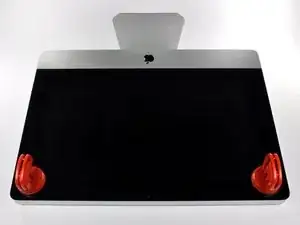
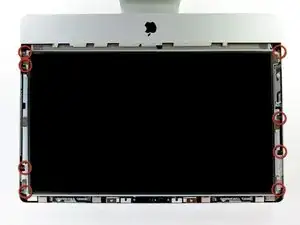
Adhiera una ventosa en los 2 angulos superiores del panel de vidrio.
-
Si sus ventosas no se pegan, limpie la superficie del vidrio y la goma de sus ventosas con un solvente liviano.
-
Insertar traducción aquí
-
-
-
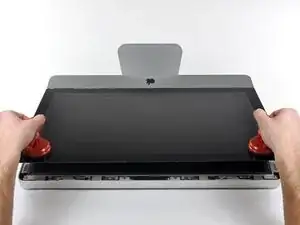
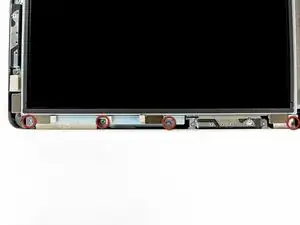
Tire despacio el panel de vidrio perpendicular a la cara del LCD con cuidado ya que hay pestañas de metal en la parte inferior del panel de vidrio.
-
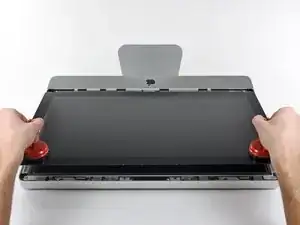
Remueva el panel de vidrio hacia arriba sacando cuidadosamente las pestañas de acero y coloque sobre una superficie limpia.
-
-
-
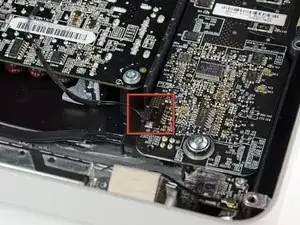
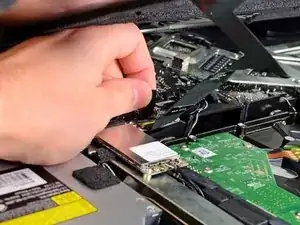
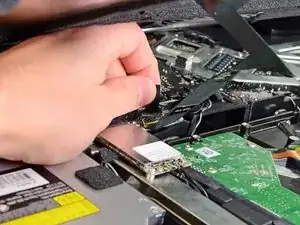
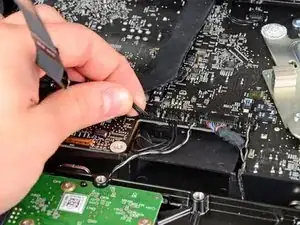
Extrae el conector del cable de sincronización vertical de su zócalo en la placa del controlador de LED cerca de la esquina superior izquierda de su iMac.
-
-
-
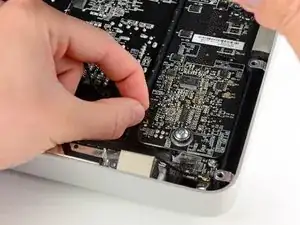
Gira la pantalla fuera de la carcasa exterior lo suficiente como para desconectar el cable de alimentación de la luz de fondo del LED de la placa del controlador del LED.
-
-
-
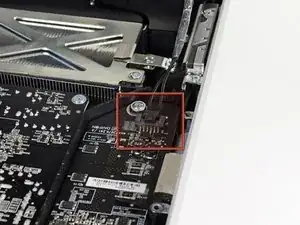
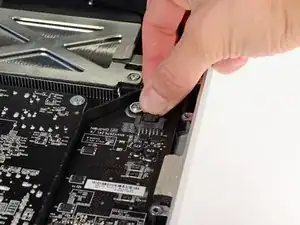
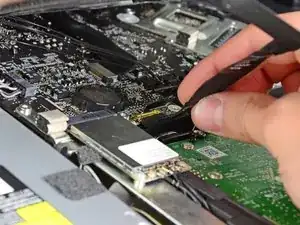
Agarra la lengüeta de plástico que está asegurada al bloqueo del cable de datos de la pantalla y gírala hacia arriba.
-
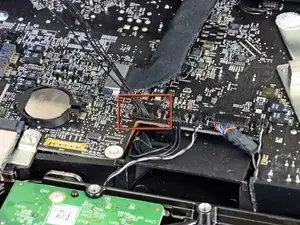
Extrae el cable de datos de la pantalla de su zócalo en la placa lógica.
-
-
-
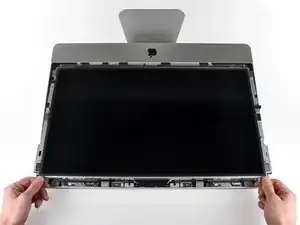
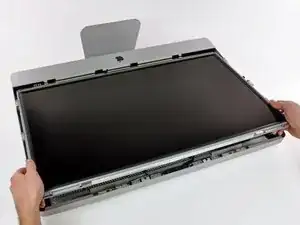
Tira con cuidado de la pantalla hacia el borde superior de su iMac y sácala de la carcasa exterior, sin importar los cables que puedan quedar atrapados.
-
-
-
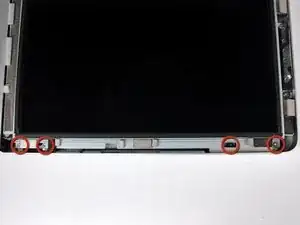
Quita los dos tornillos T10 Torx (9 mm) que fijan el soporte superior del disco duro a la carcasa externa.
-
-
-
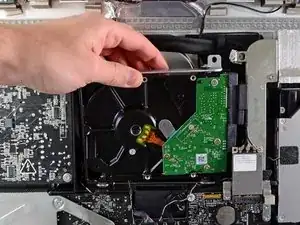
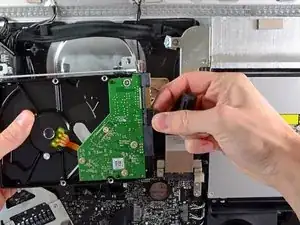
Rota el disco duro ligeramente para sacarlo de la carcasa externa, y levántalo de sus clavijas hacia la sección superior del iMac.
-
-
-
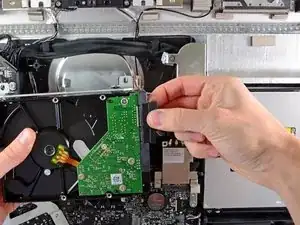
Desenchufa el cable de datos SATA y el conector SATA de sus respectivos conectores, tirando con cuidado de cada uno de estos cables de forma que los alejes del disco duro.
-
-
-
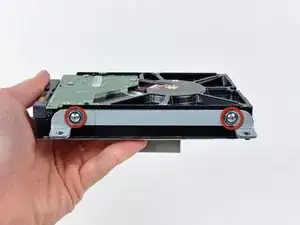
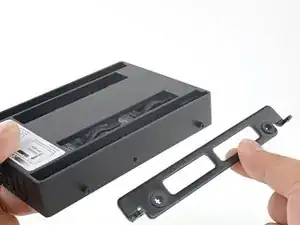
Quita los dos tornillos Torx T8 que sujetan el soporte superior al disco duro.
-
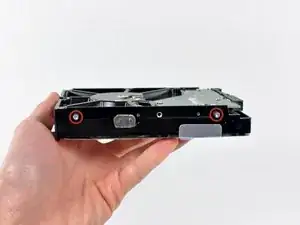
Quita el soporte superior del disco duro.
-
-
-
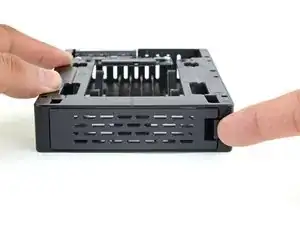
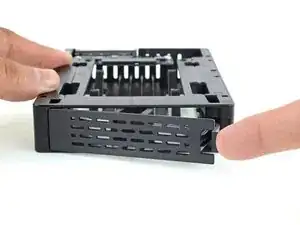
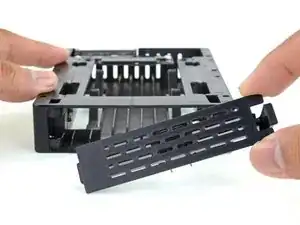
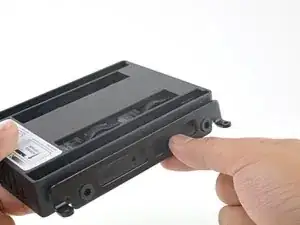
Empuja el pestillo de la placa delantera de la carcasa con tu dedo. Mientras sujetas el pestillo pulsado, saca la placa hacia fuera.
-
Quita la placa delantera.
-
-
-
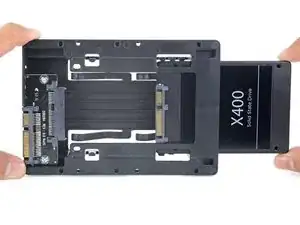
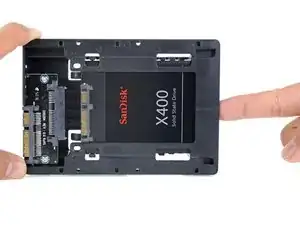
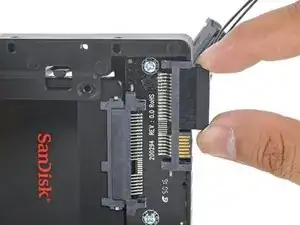
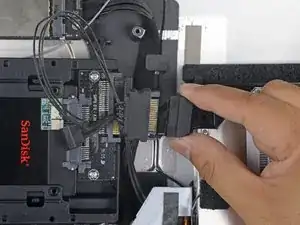
Alinea los pequeños conectores SATA para que el lado estrecho del conector en el SSD coincida con el lado estrecho en el conector del receptáculo.
-
Desliza la unidad hacia dentro a través del frontal del receptáculo hasta que el conector SATA quede totalmente dentro.
-
-
-
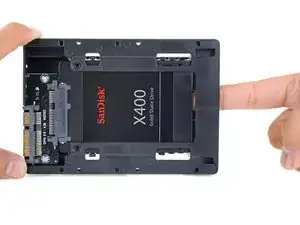
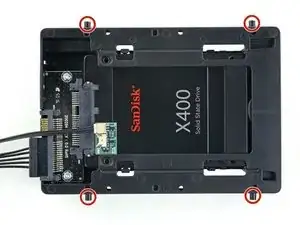
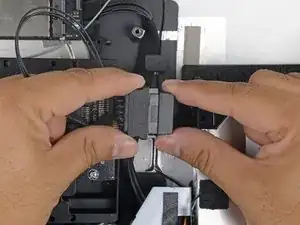
Puedes, opcionalmente, instalar dos tornillos Philips #1 que vienen en el kit del receptáculo para fijar el SSD en dicho receptáculo.
-
-
-
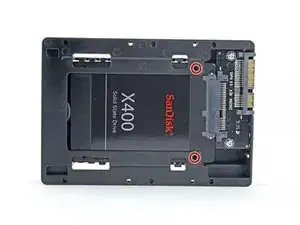
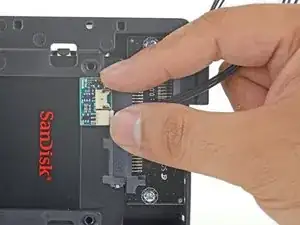
Enchufa el cable de energía SATA con sensor en el lado ancho del conector SATA del receptáculo.
-
-
-
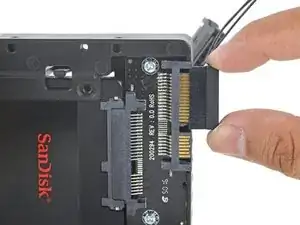
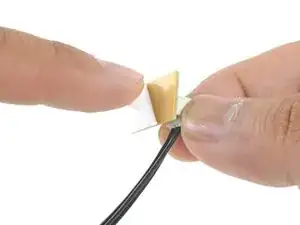
Despega el reverso del adhesivo de la pequeña placa del sensor de temperatura.
-
Adhiere la placa del sensor de temperatura a un área de metal despejada en la superficie del SSD, tan cerca como sea posible del conector SATA.
-
Dobla el sobrante de los hilos del sensor de temperatura para que no queden en medio cuando instales el receptáculo.
-
-
-
Conecta el cable de energía SATA del iMac con el nuevo cable de energía SATA con capacidad de temperatura.
-
Guía los los cables SATA por donde no interieran con ningún otro componente.
-


Para volver a armar su dispositivo, siga estas instrucciones en orden inverso.

80 comentarios
Hi guys, the tools arrived today and I did already chage the default harddisk against the WD Velociraptor 500GB. For now everything is working fine. The iMac is in the middle of restoring the time maschine backup. Everything worked out as described. Excellent! I was just a little surprised by the magnetic forces which one needs to overcome gently...
tholst -
Is there a temp sensor that monitors the HD? I did the upgrade but now my fan is always on. I must've done something wrong.
Did you use the same brand hard drive? Did check the instructions about cable orientation on the hard drive? Did you double check the LCD thermal sensor cable?
Take a glance at this page for full explanations:
http://www.hddfancontrol.com/imac-hard-d...
I had the same issue here (after replacing the original HDD by a 1TB WB Caviar Blue) and it has been fixed by this utility.
HTH,
In response to the software, that does work, however, it can be taken care of hardware wise if our recommendations are followed.
Hi, I'm no stranger to upgrading my Macs (been doing it since 1989). I've followed this guide too since the inside of my '11 iMac is a little less upgrade friendly and my fans spin up afterward as well even if the computer is just sitting there idle. I replaced my factory internal 500GB WD drive with a 2TB WD drive. It doesn't take long before my fans start to spin up. I've checked and rechecked all of the cable attachments. What else could I be doing wrong? What are your referenced recommendations that take care of this with a hardware solution? My best find so far is a donation based version of the above mentioned S.M.A.R.T. tool (http://exirion.net/ssdfanctrl/).
sash5 -
Another device fixed due to iFixit. One iPhone 4, 1 MacMini, 1 MacBook Pro and now an iMac! You guys are better than awesome!!!
ajayme44 -
Very easy to lift the glass out. Don't jerk too hard.
kctipton -
Another comment on DATA & LCD Temp. Sensor cables: I had to remove the vertical sync, and the backlight cable, however, if you have an assistant or/can carefully rotate the screen clockwise/and then have it held up about 5" to 6" at a slight angle, you do not need to remove LCD data cable or LCD thermal cable, however - IMPORTANT: you must have a second pair of hands/or way to securely prop up the LCD. Also, don't rotate too much, since then you will pull out LCD data cable, and it renders the whole exercise moot, or can damage the cable or connector.
MaximBorzov -
You don't need suction cups. The screen, held by magnets, can simply be pried off using a very thin blade such as a screw driver and fingers.
Deepsurvival -
That's a bad idea. using a metal tool to pry off glass is likely to end with an expensive broken front glass.
Suction cups are common. Find a couple and do it the safe way. I use some cheap ones that came with iPhone repair kit.
max damage -
No need for suction cups, I just stuck my nails (short like guys usually have) between the top part of the screen and body, and it came off easily. I've never done it before, so it seems to be very easy.
Nikolas Lintulaakso -
Nails worked for me too
Rob Dale -
Just completed the replacement of the optical drive with an SSD using an OWC Data Doubler kit. Attempted to remove the optical drive without disconnecting any cables but found it a bit fiddly to orient the screen for good access. I bit the bullet and disconnected them and found the process less daunting than I imagined. Reconnecting them was similarly straightforward if you're careful.
Tip: you can skip the step for removing the optical drive thermal sensor connector from the motherboard. Still need to remove the sensor from the optical drive but you can leave that hanging and reattach it to the SSD later.
osienna -
I use Garmin GPS suction cup. Work very well
jc3Dcx -
I’ve just successfully installed a 1TB SSD in place of my optical drive thanks to the information here- thank you to everyone who has contributed!
3 comments- the procedure described here seems to vary between HD replacement and dual HD/optical drive replacement. This can be confusing at times.
Expect there to be minor differences between the layout described and what you find when you open up your iMac. There are also, surprisingly, differences between the HD enclosure description, and the article provided by ifixit.
I was able to replace the DVD/HD enclosure single-handedly without fully removing the LCD, or deconnecting any of the cables (steps 5-11). It’s a bit cramped, and fiddly, but I was not happy removing any of the cables despite watching videos, etc., since they all seemed to involve applying more force than I was comfortable with. A more detailed description of how to release them might have helped, but even here, there may be minor variations even within the 2389 model.
Good luck!
ivan birks -
I did it several times with one suction cup at the end of a kitchen brush. Once with the blade of a swiss army knive, also ok. And i’m pretty sure it works with fingernails too
Tai -
Fingernails are all you need to free the glass from its magnetic hold. If you don’t have them, slip something thin and plastic, like a spudger, at a top corner.
Max Powers -
Minha dúvida é a seguinte: após o técnico trocar o HD do meu iMac de 21,5 polegadas, a câmera parou de funcionar. Seria por causa da troca do HD? Tem solução?
Claudio -
Creio que o cabo da camera não foi plugado ou deu mau contato… ou até danificado.
glecyo@gmail.com
glecyo medeiros -
I can’t get my glass to budge. I’m replacing a cracked one and now it’s about to shatter.
jamboxmitchell -
I know that I'm replying really late but I advise to use clear tape over any cracks so the cracks don't get bigger
Jace Holmes -
Check for chips in the glass BEFORE you do this step. If there is a chip when you pull up with the suction cups you will wind up with a jagged mess. If you do have a chip I would advise covering the screen near the chip with clear tape of some kind before lifting out. Mine shattered right at the chip and the resulting glass dust cloud got all over. My solution was buying a new glass screen.
BCam -