Introducción

Esta es una guía es solo un requisito previo para el reemplazo del panel frontal.

  1. XyCWjxekvWxnuqOQ
    XyCWjxekvWxnuqOQ
    1vvwCYQqVcoof5FC
    • Remueve toda cinta cubriendo el cable del conector del botón Home.

  2. 1nnYUS6q3BYBMGJE
    1nnYUS6q3BYBMGJE
    SfhjSPRKbgrNF4JP
    kPXHEA5apZYGGZUl
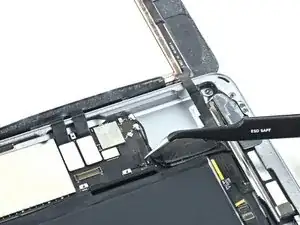
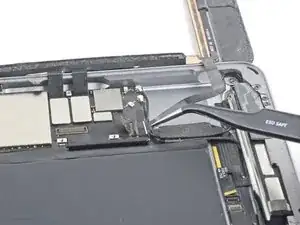
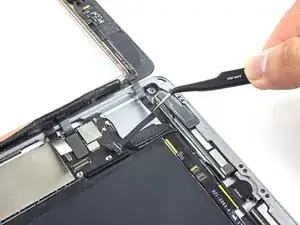
    • Usa el lado plano de un spudger para levantar la pestaña en el conector ZIF del cable plano del botón Home hacia arriba.

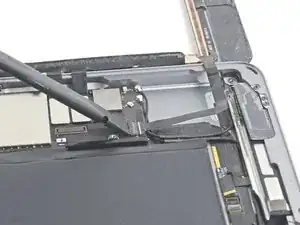
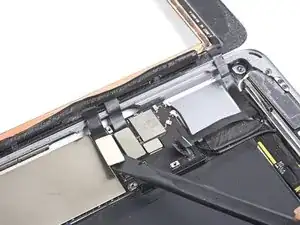
    • Cuidadosamente tira el cable plano del botón Home afuera del conector ZIF.

    I'm confused about the home flex cable connector required for the 6th generation iPad. It was my understanding that this model required an 18 pin connector. But these excellent pictures clearly show a 14 pin connector, just like the one for the first generation iPad Air AKA the iPad 5. I know this is not the primary focus of this guide, but can anyone clarify this for me?

    Bonnie Baxter -

    I did the whole repair but this part is the problem HELP !!! I unlocked it but it took me 1 hour to carefully pull out the HOME BUTTON RIBBON CABLE. It finally came out with tweezers but now I CAN'T GET IT BACK IN and as a result my touch I.D. won't activate. It seems there was a tiny bit of black tape overlapping the connector on the ribbon which I carefully cut off exposing only the connector on the ribbon itself but how the heck does it slide in before you lock it. It seems easy on Youtube videos but mine just doesn't slide in with hand or with tweezers. OR in fact is there another connector that controls the TOUCH I.D. ???

    Just a guy -

  3. bJwcDG4kFHJhGDIj
    bJwcDG4kFHJhGDIj
    ZdkVYykjGYHsGQGm
    XBHwTrTJUOej1eIU
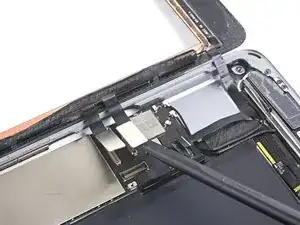
    • Usa el lado plano de un spudger o una uña para cuidadosamente despegar los dos cables del digitalizador de su conector.

    • Para evitar dañar tu iPad, tira solo del conector en sí, no en el zocalo en la placa lógica.

    • Durante el re-ensamble, asegura que estos conectores están completamente sentados en su zocalo, o puede que encuentras problemas con la pantalla.

    Where can I get a good used motherboard for a A1954 iPad 6 gen everywhere I look, there sold out ?...

    Trent Weaver -

  4. IZgunLOMRiiOPIQX
    IZgunLOMRiiOPIQX
    TdHG1uN6NbfujTC2
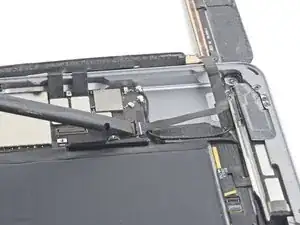
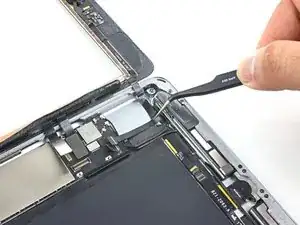
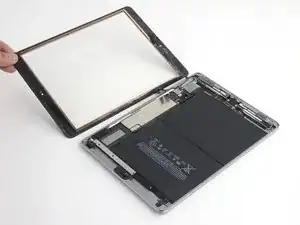
    • Cuidadosamente pela el cable plano del botón Home de su adhesivo manteniéndolo a la carcasa posterior.

    If you can make sure to not pull on the home button side, i would leave out this step. i replaced two displays so far, on the first i removed it, but left it connected on the second attempt. worked like a charm

    Tommy Wienert -

  5. WaJMIvf2e2QUlJsQ
    WaJMIvf2e2QUlJsQ
    vdolqRB3iEWSTWhO
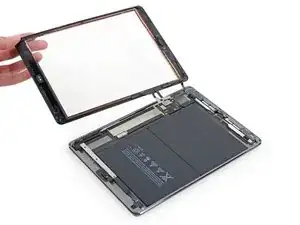
    • Remueve el ensamble del panel frontal.

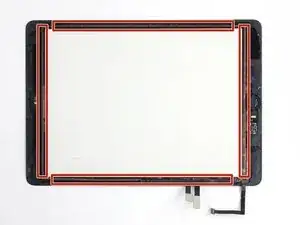
    • Si estas experimentando problemas "fantasma" o "espectro" con la entrada de touch en tu nueva pantalla, esto puede ser resuelto añadiendo una capa de cinta aislante muy delgada, como cinta (poliamida) Kapton, a las áreas destacadas en la parte de atrás del panel. Paneles de iFixit vienen con aislante apropiado, y no deberían requerir la adición de cualquier cinta.

    • Sin aislante apropiado, estas áreas del digitalizador pueden conectarse a tierra con otros componentes, causando problemas de la entrada de touch.

    • El aislante no es visible a simple vista, y es diferente de las tiras de barrera de espuma de polvo encontradas en muchas iPads.

Conclusión

Para reensamblar su dispositivo, siga estas instrucciones en orden inverso.

Sam Goldheart

Miembro Desde 19/10/12

457954 Reputación

0 comentarios