Introducción

Reemplazar una pantalla LCD dañada o que no funciona en un iPad 6.

"Advertencia: el método de aislamiento de la batería en esta guía está obsoleto, y puede resultar en un daño irreversible a los pines de la batería de la placa lógica, destruyéndola efectivamente. Si eliges aislar la batería de esta manera, presta atención a todas las advertencias y trabaja con extremo cuidado. Si decides completar la guía sin aislar la batería, evita utilizar herramientas metálicas excepto cuando sea completamente necesario (como cuando quite los tornillos) para evitar un cortocircuito en la batería y dañar el componente sensible del circuito.

  1. THxeZqAlU4lI3Dsj
  2. BRY15JSctKOZ3CkU
    BRY15JSctKOZ3CkU
    LLyoJyrOLVZBYT2x
    GwocxG65kALerIpv
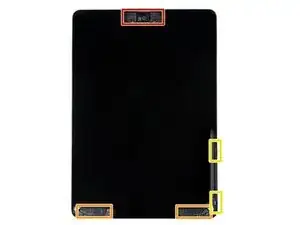
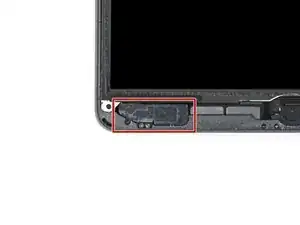
    • Mientras estas esperando a que se afloje el dispositivo, nota que las siguientes áreas son sensibles al palanqueo:

    • Cámara frontal

    • Antenas

    • Cables del display

  3. BKhTiWCLNw5gfZpV
    BKhTiWCLNw5gfZpV
    ZBBKsxR5VftA3VCb
    nxYibxNVffBRXEWL
    • Los siguientes dos pasos muestran el Anti-Clamp, una herramienta diseñada para hacer el procedimiento de apertura más fácil. Si no estás usando el Anti-Clamp, salta dos pasos para un método alternativo.

    • Para instrucciones completas de como usar el Anti-Clamp, checa esta guía.

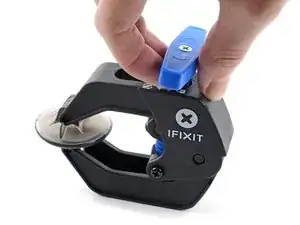
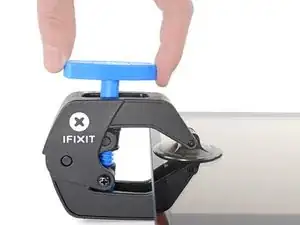
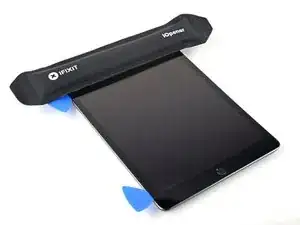
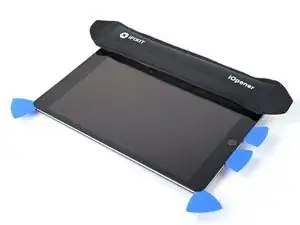
    • Jala el mango azul hacia la bisagra para activar el modo de apertura.

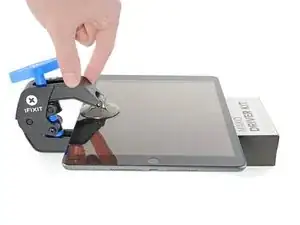
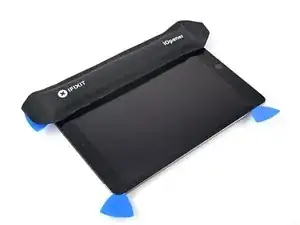
    • Levanta el iPad lo suficiente para que las bisagras del Anti-Clamp descansen por encima y debajo de la pantalla.

    • Posiciona las ventosas de succión cerca del borde izquierdo en la pantalla--una enfrente y otra detrás.

    • Presiona hacia abajo las ventosas para aplicar succión a la área deseada.

    • Si encuentras que la superficie de tu dispositivo está demasiado resbalosa para que el Anti-Clamp lo sostenga, puedes usar cinta de embalaje para crear una superficie más adherente.

  4. Swgw6vZfVodcAdSf
    Swgw6vZfVodcAdSf
    vBTl3xec5R11ODln
    6eTPKXJyPpiiiTte
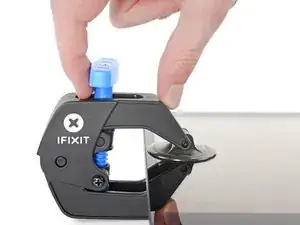
    • Empuja el mango azul lejos de la bisagra para activar el modo de apertura.

    • Gira el mango en sentido de las manecillas del reloj hasta que veas que las ventosas empiecen a estirarse.

    • Asegúrate que las ventosas de succión queden alineadas entre sí. Si empiezan a desalinearse, afloja las ventosas de succión y realinea los brazos.

    • Espera un minuto para darle oportunidad al adhesivo soltar y exponer un hueco de apertura.

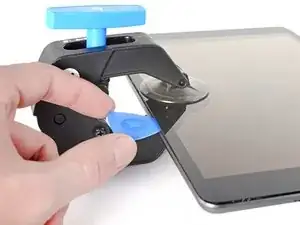
    • Inserta una púa de apertura debajo del digitalizador cuando el Anti-Clamp cree un huego lo suficientemente grande.

    • Si el Anti-Clamp no crea un hueco suficiente, aplica más calor al área y gira el mango media vuelta en sentido de las manecillas del reloj.

    • No gires más de media vuelta en una sola vez, y espera un minuto entre giros. Deja el Anti-Clamp y al tiempo hacer el trabajo para ti.

    • Salta el siguiente paso.

  5. J2IQvQOy1BYPtTom
    J2IQvQOy1BYPtTom
    mHcQZ3ybJlVWXZAX
    ZE5bLBVCycZZ4IXh
    • Si tu display está muy roto, cubrirlo con una capa de cinta adhesiva permite la ventosa de succión adherirse. Alternativamente, cinta muy fuerte puede ser usada en vez de la ventosa de succión. Si todo eso falla, puedes pegar la ventosa de succión a la pantalla rota.

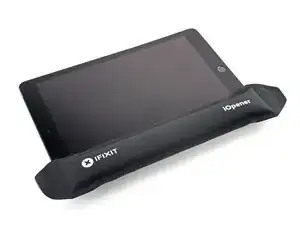
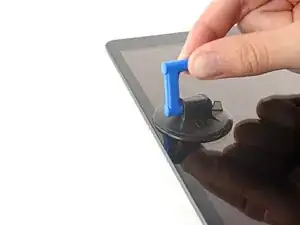
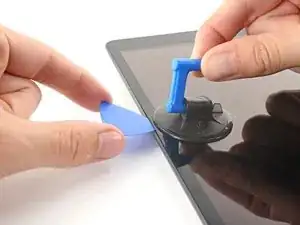
    • Una vez que la pantalla este caliente al tacto, aplica una manija de succión al borde izquierdo de la pantalla y lo más cercano al borde posible.

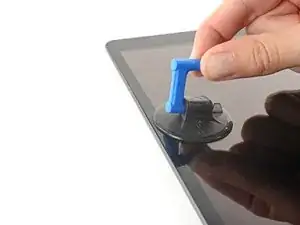
    • Levanta la pantalla con la manija de succión para crear un hueco pequeño entre el digitalizador y el marco.

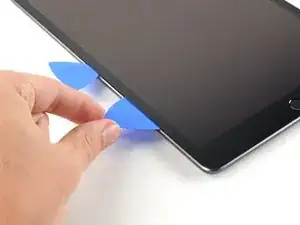
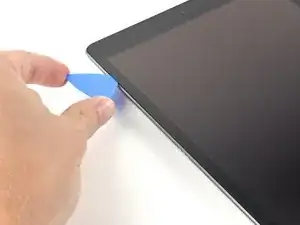
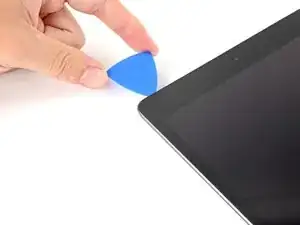
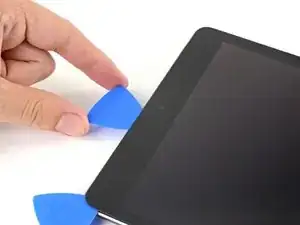
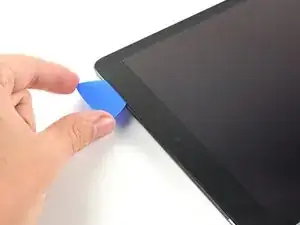
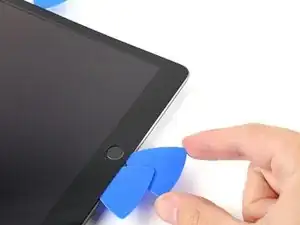
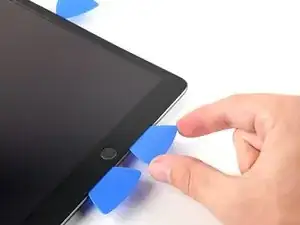
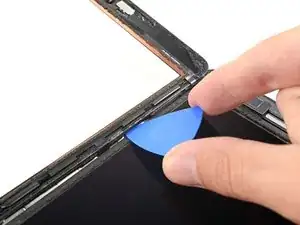
    • Inserta una púa de apertura en el hueco entre el digitalizador y el marco.

  6. x2uBdEGsXXD1UGux
    x2uBdEGsXXD1UGux
    dLpd1xH2K1QoGc6n
    2caJZKMEgJeYYxP4
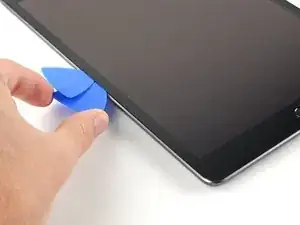
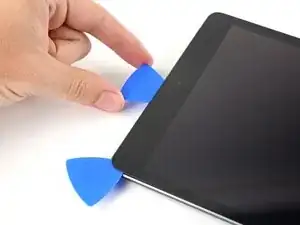
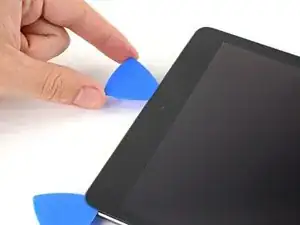
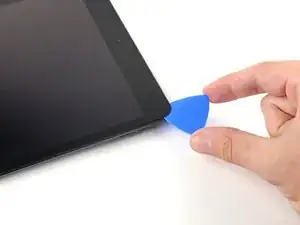
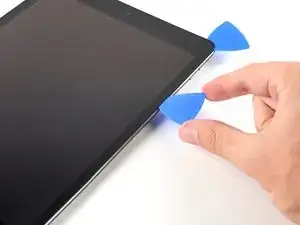
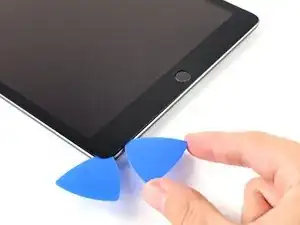
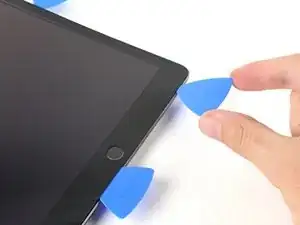
    • Inserta una segunda púa de apertura en el hueco que acabas de crear.

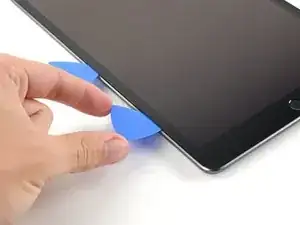
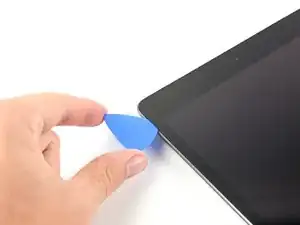
    • Desliza la púa hacia la esquina izquierda inferior en el dispositivo para separar el adhesivo.

    • Deja la púa en la esquina inferior izquierda para prevenir que el adhesivo vuelva a sellar.

    • No te preocupes si puedes ver la herramienta de apertura a través del digitalizador --solo jala la púa hacia afuera. La pantalla LCD no debería estar dañada, pero te arriesgas a dejar adhesivo difícil de limpiar.

  7. JPsPT5ML14VHRhGe
    JPsPT5ML14VHRhGe
    ultr2KYJ6Sc1kYaH
    ZATK6B6Fo1vrYUIw
    • Si la púa de apertura se atora en el adhesivo, "gira" la púa a lo largo del lado del iPad para continuar separando el adhesivo.

  8. EaRSxNw3vj5GpMur
    EaRSxNw3vj5GpMur
    yRXg6rNGAQgVf1Cf
    W26QbH5y1V5Kv2oM
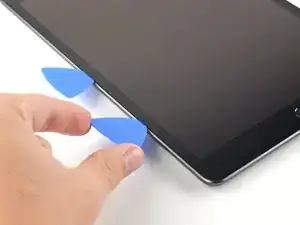
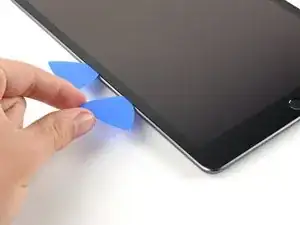
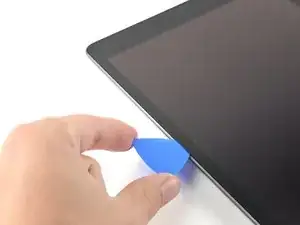
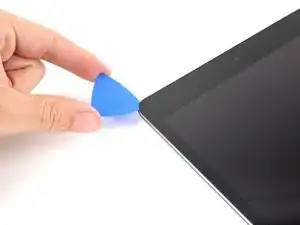
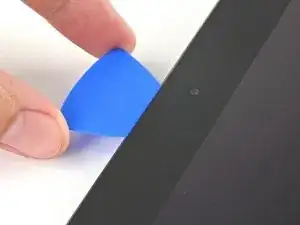
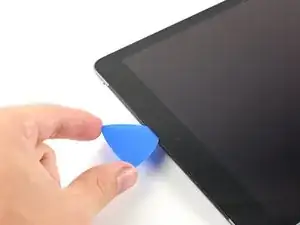
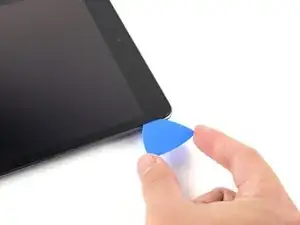
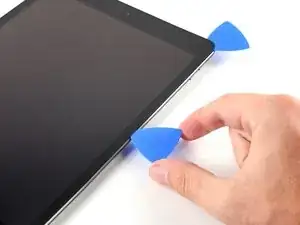
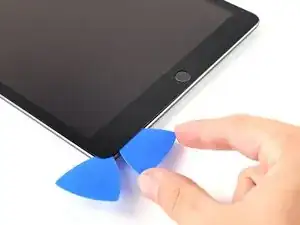
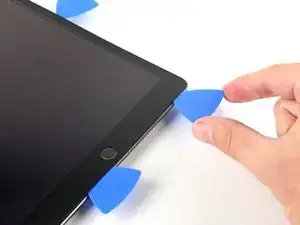
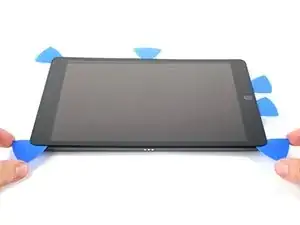
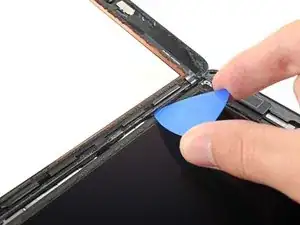
    • Desliza la primer púa de apertura hacia la esquina superior izquierda del dispositivo para separar el adhesivo.

    • Deja la púa en la esquina superior izquierda para prevenir que el adhesivo vuelva a sellarse.

  9. FLj6SpbOQdrvVpRi
    • Calienta el IOpener y aplícalo al borde superior en el dispositivo por dos minutos.

  10. p15tb6VN1vUscQ2N
    p15tb6VN1vUscQ2N
    SocgxgkXBnLnGSWX
    oPDYoHHMVRcxhVPT
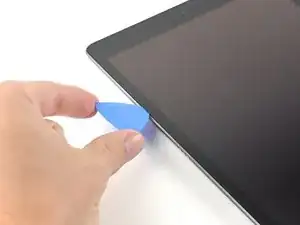
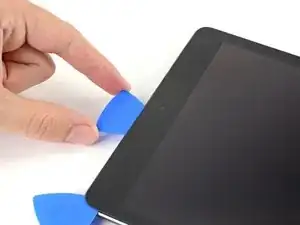
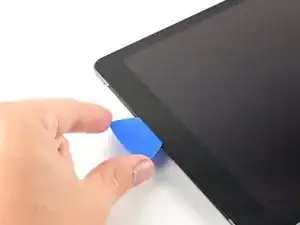
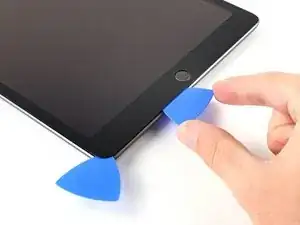
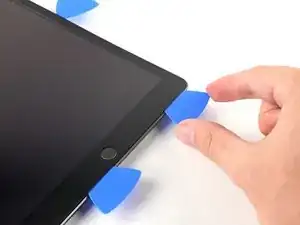
    • Rota la púa alrededor de la esquina superior izquierda en el dispositivo para separar el adhesivo.

  11. Jil3FKjTxdwCK5GP
    Jil3FKjTxdwCK5GP
    6nKHEJpQiZSaFBGo
    ROYjHt2LlrcPPDUx
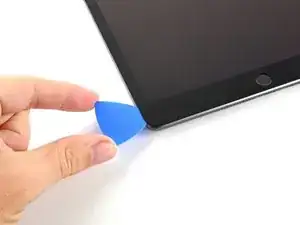
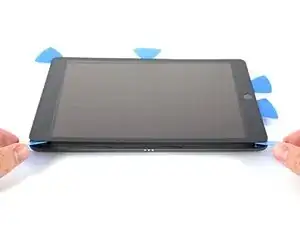
    • Desliza la púa de apertura a lo largo del borde superior del dispositivo, deteniéndote justo antes de llegar la cámara frontal.

    • Evita deslizar la púa sobre la cámara frontal, ya que puedes dañar los lentes. Los siguientes pasos mostrarán como prevenir esto.

  12. TioLriFFwlSWARE3
    TioLriFFwlSWARE3
    cBURkpbxyZsN2fs4
    fQWclYvRi615iGML
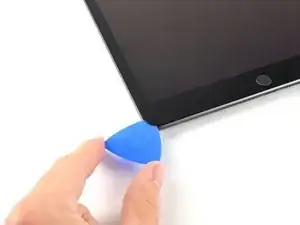
    • Jala la púa hasta que la punta este entre el digitalizador y el marco.

    • Desliza la púa sobre la cámara frontal para separar el adhesivo.

    • Deja la púa cerca del lado derecho de la cámara frontal antes de continuar.

  13. Jiwfe4BYASgflPlt
    Jiwfe4BYASgflPlt
    GNqQecAUKHkBQsFJ
    TjnBLTuM3hvFrh4t
    • Re-inserta la púa y deslízala hacia la esquina superior derecha en el dispositivo para separar completamente el adhesivo en el superior.

    • Deja la púa en la esquina superior derecha para prevenir que el adhesivo vuelva a re-sellar.

  14. ZHBh3M1LZI1RNTnX
    • Calienta un iOpener y aplícalo al borde derecho del dispositivo por dos minutos.

  15. IaiyPav5brNr6jCX
    IaiyPav5brNr6jCX
    IXOuHUPJMRyyp3gb
    wKVPV5jH516oONom
    • Rota la púa alrededor de la esquina superior derecha del dispositivo para separar el adhesivo.

  16. uMAkRgI5TwCTd4Ks
    uMAkRgI5TwCTd4Ks
    6R5iFXyAqocMYSU4
    n3WPFtEKy3pVcab1
    • Inserta una nueva púa de apertura y deslízala hacia el centro del borde derecho del iPad.

    • Los cables del display están localizados aproximadamente a medio camino de la parte inferior del iPad. Deja de deslizar una vez que alcances tres pulgadas desde la parte inferior del iPad.

  17. UGjYPQYXKPD6dNES
    • Calienta el iOpener y aplícalo al borde inferior del dispositivo por dos minutos.

  18. ZLBC4NKlQbk3OZTD
    ZLBC4NKlQbk3OZTD
    OMqDTrkrkwxwGI5M
    A51oePiIiC2OVqED
    • Desliza la púa den inferior izquierdo hacia la esquina inferior izquierda para separar el adhesivo.

    • No rotes completamente la púa alrededor de la esquina, ya que puedes dañar la antena.

    • Deja la púa en la esquina inferior izquierda antes de pasar al paso siguiente.

  19. TEwIBIf3sxmJiEN1
    TEwIBIf3sxmJiEN1
    xOEXNBRtCOWQeuFY
    22JRGthoRvQSYaRf
    • Inserta una nueva púa de apertura en el hueco que acabas de crear en el borde inferior del iPad.

    • Desliza la púa sobre la antena, deteniéndose antes del botón de inicio.

    • Solo desliza la púa hacia el botón de inicio y no lejos de él, ya que puedes dañar la antena.

    • Si necesitas deslizar la púa sobre esta sección nuevamente, remueve y re-insértala en la esquina inferior izquierda.

    • Deja la púa en la izquierda del botón de inicio antes de continuar.

  20. C2RdZwTKLextDlUC
    C2RdZwTKLextDlUC
    ZYORWWfQkWbQHeZk
    35FCdHGOd2P3tVJH
    • Inserta una púa de apertura en el hueco que acabas de crear.

    • Desliza la púa por debajo del botón de inicio y hacia la esquina inferior derecha, asegurándote que solo la punta esta entre el digitalizador y el marco.

    • Solo inserta la púa un mm para evitar dañar la antena derecha.

  21. EdcTHHvhSmUedM5X
    EdcTHHvhSmUedM5X
    aeho4dfNWsncrbYf
    CmWXujasluPDsXpH
    • Re-inserta la púa y desliza hacia el botón de inicio para separar completamente el adhesivo inferior.

    • Solo desliza la púa hacia el botón de inicio a no al contrario, ya que podrías dañar la antena.

    • Si necesitas deslizar la púa otra vez, remueve y re-inserta en la esquina inferior derecha.

    • Deja la púa a la derecha del botón de inicio antes de continuar.

  22. lwiCOncwPlKLg3a3
    • Calienta un iOpener y aplícalo al borde derecho de tu dispositivo por dos minutos.

  23. ABh5NOiTnhO15fgU
    ABh5NOiTnhO15fgU
    Ub5UlnWWBB6GLUth
    • Ten cuidado con este paso. Tomate tu tiempo, asegúrate que el adhesivo este caliente y débil, asegúrate que separaste todo el adhesivo con una púa. No tengas miedo de detenerte y recalentar.

    • Gira las dos púas de apertura en las esquinas izquierda del iPad para levantar el digitalizador un poco, separando la última parte del adhesivo en el proceso.

    • Si hay alguna cantidad de resistencia, recalienta los bordes y trabájalos a lo largo con una púa de apertura.

  24. H1yAsJZcQDoPHbPD
    H1yAsJZcQDoPHbPD
    YepL35FhpR6erNWD
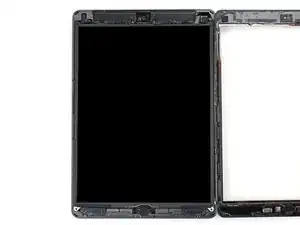
    • Levanta el borde izquierdo del digitalizador hacia arriba para separar el adhesivo que hay a lo largo del borde derecho del iPad.

  25. TuWcGklrctSA4vd1
    TuWcGklrctSA4vd1
    lCHklMQfQE6AZ6Gh
    kCab34QaCQWowvsm
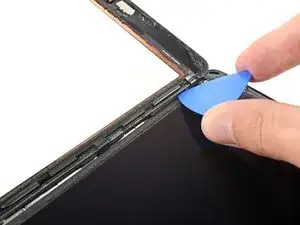
    • Mientras sostienes el digitalizador, desliza una púa de apertura entre los dos cables del display para separar lo que queda del adhesivo.

  26. d6WFtDjCYJBQvFcC
    d6WFtDjCYJBQvFcC
    vhSOEKyqAlrBFbwH
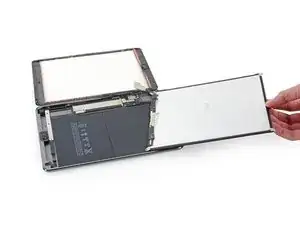
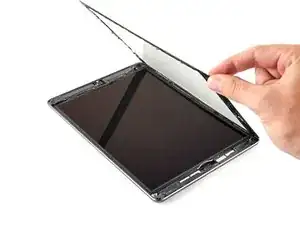
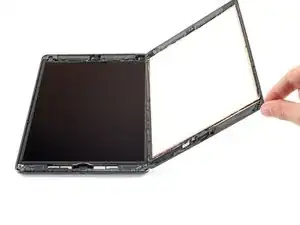
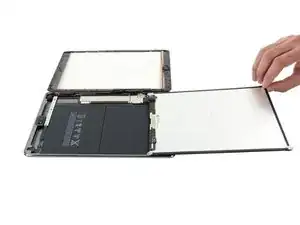
    • Una vez que todo el adhesivo ha sido separado, abre el digitalizador como un libro y déjalo paralelo al iPad.

    • Durante el reensamble, limpia el adhesivo restante del marco, --y del digitalizador si lo estás usando-- con alcohol isopropílico. Reemplaza el adhesivo con nuestras bandas de adhesivo o hojas de adhesivo precortadas.

    • Se consciente de los cables del display cuando reensambles el dispositivo. Asegúrate que están doblados propiamente debajo de la pantalla LCD para prevenir cualquier daño.

  27. UQQJiYXiSLt3Zr2u
    UQQJiYXiSLt3Zr2u
    OJTZ4aYLeO5gC61M
    TkO1pHHgA6i3OCYF
    • Remueve cualquier cinta adhesiva que obstruya los tornillos del LCD

  28. d3dgtSjjAxO1YiVE
    • Remueve los cuatro tornillos Phillips #00 de 4.3mm que mantienen el LCD

    Both of the iPad 6th gen models i have seen so for (note they were cellular also) had the LCD secured with a grey silicone kind of adhesive in each corner under the screws. So you can’t just lift the LCD as you normally would after removing screws, it would break. I found you could pick at the corner closest to the rear camera easiest, slightly lift that corner and gently separate the other side next to the headphone jack. Then while supporting the LCD , lever the other end free with a up-and-down motion making slight progress each time.

    Anvil Electronics -

    I found the same thing on my 32GB wifi only ipad. Was unable to lift the screen off once I’d removed the screws so followed the instructions above and gently prized the screen up from the top left-hand screw bracket and it came away. Then moved onto the top right hand one.

    mann134 -

    One YouTube video said to dig all that glue out. I didn’t and it seems to not hurt to leave it there but you do have to break free from it.

    Robin -

    On my iPad 6, there were small rubber tabs covering the two screws on the front camera side. I carefully held them out of place with tweezers while unscrewing the screws.

    Martin Winter -

  29. cR6vVoaWkLnrHZnU
    cR6vVoaWkLnrHZnU
    PjWMBMpFkiFMvo4h
    ycK5lK3MntiqbwwB
    • No intentes remover completamente el LCD del iPad, este sigue conectado por varios cables en la parte del botón inicio. levanta solamente de la cámara frontal.

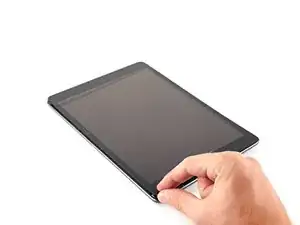
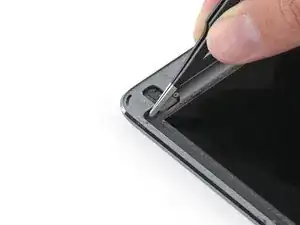
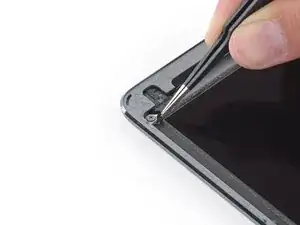
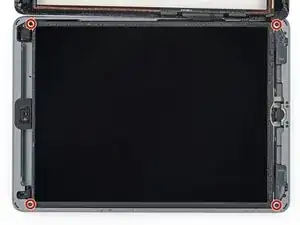
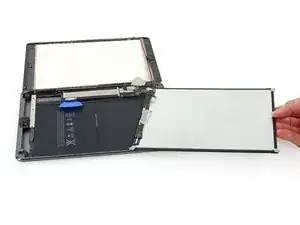
    • Usa la punta plana de un spudger para levantar el LCD de su lugar y poderla sostener con los dedos. Puede que haya pegamento alrededor de los agujeros de los tornillos que se tenga que cortar con un cuchillo

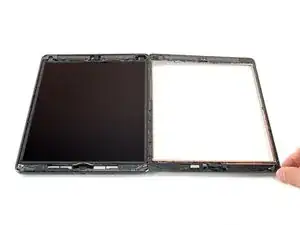
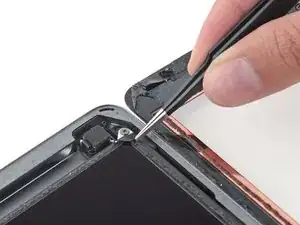
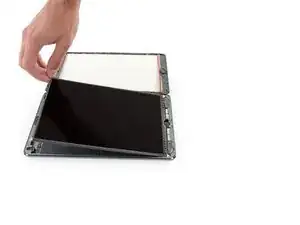
    • Gira el LCD levantando desde la cámara frontal hasta el botón inicio como si fuese un libro.

    • Se gentil y observa los cables del LCD mientras giras la pantalla.

    • Pon la pantalla sobre su cara para permitir el acceso a los cables.

    • Pon el LCD en una superficie limpia y suave para evitar daños.

    When you replace the LCD be sure to make sure it is screwed in fully. It is easy not, especially on the cornet where the digitizer cables are. The LCD is very sensitive and if you bend it then it can stop working. I was just pressing the digitized in place at the end of a repair and the screen was covered in white lines.

    hugh -

  30. GCxoFeK5h5SixExu
    GCxoFeK5h5SixExu
    Mm4BTgqqT56lZ4JY
    fbdcfAMbAPgEWNC1
    • Estas fotos muestras como luce un conector de batería debajo de la tarjeta lógica. Usa estas fotos como una referencia mientras desconectas con seguridad la batería.

    • Nota que el conector de la batería tiene muelles voladizos en la tarjeta lógica que presionan en contra de las almohadillas de contacto de la batería. Debido que la tarjeta lógica y la batería están pegadas, necesitarás deslizar algo delgado y flexible entre los puntos de contacto para desconectar la batería.

  31. TpXsLubuOLsZMUPg
    TpXsLubuOLsZMUPg
    LAcvxpjpfWIdE36i
    1QiOl5J5OubEbiYM
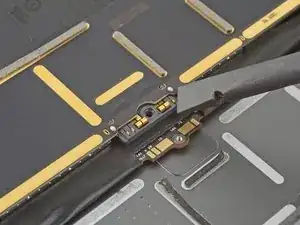
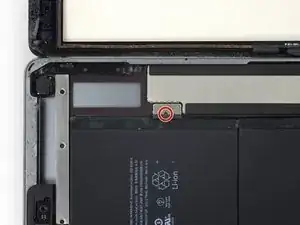
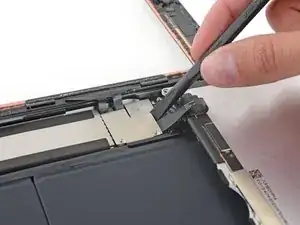
    • Remueve el único tornillo Phillips #000 2.3mm uniendo el conector de la batería a la tarjeta madre

    • Para reducir el riesgo de un corto usando una púa de insolación para desconectar la batería.

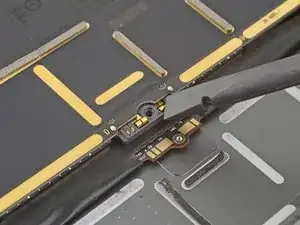
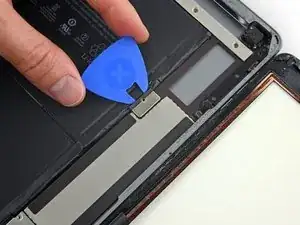
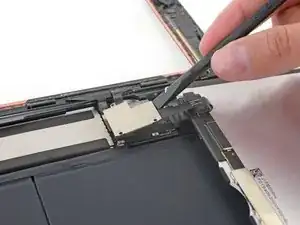
    • Desliza el bloqueador de batería por debajo del conector de la tarjeta lógica en un ángulo de 35 grados.

    • No empujes el bloqueador de la batería debajo del conector con demasiada fuerza. Si estas teniendo problemas colocando el bloqueador de batería debajo de la tarjeta lógica, puedes intentar usar un naipe en vez para desconectar la batería.

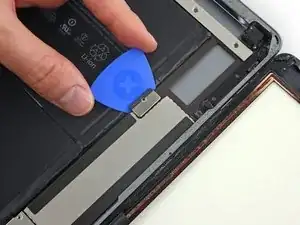
    • El bloqueador de batería o naipe idealmente debería deslizarse debajo de la tarjeta lógica sin encontrar algún bloqueo. Después de la inserción, debe descansar en un ángulo de 15 grados.

    • Deja el bloqueador de batería en este lugar conforme trabajas.

    If you insert a regular pick without a gap then you can damage this connector and will need a new motherboard. If in doubt just insert into the left corner enough to raise it a tiny bit. Arguably, if you are not sure, then it is safer just power off and don’t power back on until everything is fully connected. A photo of how this connector looks with its cover off would really help for people that have not seen this type of battery connector before. You just need to get it to lift a tiny bit, Do not try to slide anything under the contacts….

    hugh -

    I bumped this darn thing several times, it was twisted and skewed making me freak out but the iPad still works. I am thinking you should pull it out and put the screw back in right after the LCD is removed. Then use it again just before putting the LCD screen back in. The pick is sticking out there waitng to be be bumped.

    Robin -

    Hi Robin,

    Unfortunately, there is no easy way to pull the battery connector out of the logic board. If you try to pry this connector off, you will irreparably damage it. The easiest solution is to insert the battery blocker in-between to cut the power.

    Arthur Shi -

    The battery isolation pick or battery blocker is an outdated way of isolating the battery, as you risk damaging the battery pins underneath the logic board.

    So what is the new method?

    Wil Thieme -

    This is my question as well. Seems like this phrase contradicts the instructions. Confusing. Any reply?

    Melissa Hoffman -

    We are currently working on a better isolation procedure! In the meantime, I’ve updated the warning to hopefully clarify the issue.

    Arthur Shi -

    Why do you need to “To reduce the risk of a short”? There does not seem to by any risk of a “short” in this process. I can see other reasons for disconnecting the battery. I am an electrical engineer so I would appreciate a professional grade answer to this question.

    Rumboogy -

    I’ll give it a shot!

    When you remove the screw, it doesn’t disconnect the battery, as the connector uses spring contacts to touch the battery pads.

    If you leave the battery connected, it leaves the logic board energized. As there are many exposed traces and SMT components on the logic board, there is a chance that you accidentally bridge a trace with a metal tool, resulting damage. In addition, the display connector contains tiny pins, and the pinout is such that if you pry the connector from an energized logic board, there is a chance that a voltage rail pin may accidentally touch something it shouldn’t, blowing out the backlight circuitry.

    Arthur Shi -

    My battery was dead when i did the repair. Did not really need to perform this step

    Igor Kapitanker -

    Take a waterproof playing card, cut out the shape of the battery blocker and slide that under. Battery blocked and pins not at risk of damage. Got that from a YouTube video made by a microsolder repair tech fixing the damage caused by jamming a blocker in between the contacts.

    Melody Fraysier -

    Thanks for the tip Melody! I’ve updated the instructions to include the playing card method.

    Arthur Shi -

    I could not for the life of me get the playing card in there, but my iPad was turned off, so I decided to ‘risk’ a short, instead of potentially damaging the battery connectors by jamming the card in there as hard as possible. My repair went fine, no short, however I realized AFTER closing everything up that I forgot to put the battery screw back in. Really hoping this doesn’t become an issue long term, because I don’t want to pry this brand new screen off just to put the battery in.

    Janie Hughes -

    Let us know! I wasn't able to use the screw again after removing the battery blocker. Now my iPad turns off and on every so many minutes and when it restarts it's 1% and then shows actual charge.

    Martin Hinojosa -

    When you come to screw this back together, do not overestimate how little force it takes to strip the thread on this #000 screw. I did, and I now I can't screw this back down and have the problem where the iPad restarts every 3 mins 20 sec after you turn it on due to a poor connection here. I've used card to pack this out so the LCD puts a little clamping force on the terminal once you screw it back in, but it's not really enough so the iPad still suddenly restarts occasionally.

    Rory Condon -

  32. pSXagHwbWDIelll2
    • Quita los tres tornillos Phillips #000 1.4mm del soporte que mantiene los cables del LCD

    I believe these are also Phillips #00, not Phillips #000.

    Kevin Chatterton II -

    I lost a 1.4mm screw where can I buy these small screws and how big are they? 1.4mm x? flared or flat head

    ferdinando.gregis@gmail.com -

    Is this part important? It seems like I lost it.

    Will -

  33. CDkvW2pOADbCE5mp
    CDkvW2pOADbCE5mp
    bALHMflYomoDEAom
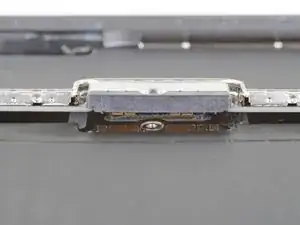
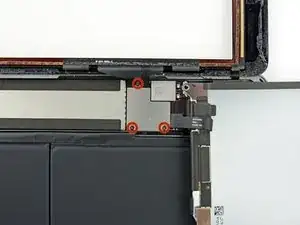
    • Usa la punta plana de un spudger para levantar con cuidado el cable y el soporte juntos de la tarjeta madre

    • El conector de la pantalla esta adherido a la parte baja del soporte, así que no metas mucho el spudger o posiblemente dañes el conector

  34. 2oYyLIWDGMDwn5ni
    • Remueve el LCD del iPad

Conclusión

Para volver a armar el dispositivo, sigue las instrucciones en orden inverso.

Sam Goldheart

Miembro Desde 19/10/12

457954 Reputación

11 comentarios

No comments…. No one is brave enough to attempt this :)

Tal Glazer -

I tried to replace the LCD with the iPad AIR 1 LCD and is NOT compatible. It fits and the connector is the same but shows just like tv static noise.

nazareno valentini -

I have same issue, but with LCD iPad 5, some idea to make it compatible.

Luis Prieto -

I replaced the front screen and now the number 9 on the passcode keypad isn’t working. I don’t get it.

Richard Lombardo -

I’m having the same issue! Different numbers, but same issue. Just certain sections of the screen won’t respond to touch.

Adriane Zaic -

I did this (screen replacement) on my iPad 6 LTE about a month ago. Was wicked difficult because my the screen was completely shattered and removing all of the shards was, well, a major PITA. It wasn’t all that bad otherwise as long as you TAKE YOUR TIME getting it apart in the first place. The only real issue I had otherwise was getting it back together with new adhesive strips because the screen doesn’t set on top straight down. You have to almost put one side down with the screen at an angle then lay it down but because of the adhesive strips, you can’t lay it down then adjust it. So that was not fun. Otherwise it wasn’t all that bad IF you are like me and savvy with electronics repair. *** also, once back together and fired up, I have some dead spots where there is zero registration of any touch on the screen. No clue as to why, and it’s frustrating because of the cost of these things and the replacement parts. Better than no usable screen I guess.

Please excuse any typos should you encounter any.

Bryan Purvis -

Hi Bryan,

If you haven’t yet, I would suggest checking two things. It sounds like either the digitizer cable may be having bad connectivity, or the digitizer may be shorting on something. Check, clean, and re-seat all of your display cable connectors as well as making sure the connectors have no debris. What is this (possibly conductive) gray foam adhesive called and where. Maybe that will remove the dead spots.

Arthur Shi -

This was extremely difficult! But it was a little easier for me as I am an IT professional. Some helpful pro tips: definitely spend time just heating the adhesives over a period of a couple of days. The hardest part of the repair was separating the broken screen from the rest of the ipad. On re-assembly, check to make sure that the home button and touch are functioning properly before putting on new adhesives. This way you can correct any mistakes. Otherwise, you will have to undo the work you just did. Take your time, don’t rush so that you don’t make mistakes or break anything. The guide is very helpful and I was able to repair my ipad 6th generation.

Kevin

Kevin Godfrey -

Ugh. This has been a PITA. I damaged the connector for lcd screen. bought replacement screen and now won’t work. HELP! Do I need to remove the old heat shield and attach it to the new lcd? What was I thinking?

Tera Virgin -

Ive used 3 brand new LCDs and can’t get any of them to show a picture, when i plug in the old broken one it lights up just fine but is shattered beyond use. im starting to wonder if you can’t just replace the LCD without some sort of trick that only apple knows about

Jessica Pickering -

at least you have some dead spots. I just replaced LCD and digitizer. LCD was fine except I threw the LCD cable bracket away because I thought it came with the new one as it was attached to the old one. Needless to say I have no LCD cable bracket. The digitizer does not respond at all though and LCD screen works.

Jacob Fulford -