Introducción
No dejes que tu Mac envejezca y quede obsoleto. Instala la versión compatible de macOS Mojave.
Por favor, ten en cuenta que si instalas cualquier actualización de Mojave de Apple en tu Mac, "bloquearás" tu máquina y se te pedirá que borres tu HDD / SSHD / SSD y comiences de nuevo.
Partes
-
-
Cuando la app ya se haya descargado completamente, abre el archivo .dmg y espera a que se monte.
-
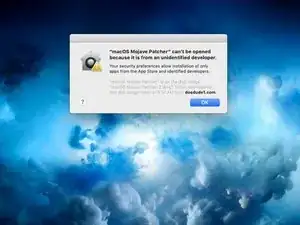
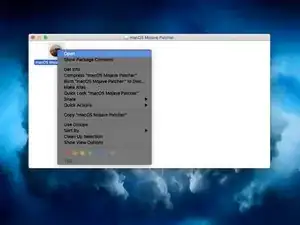
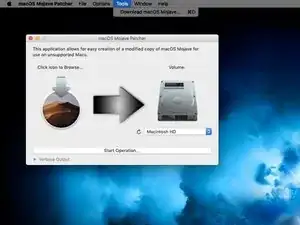
Dentro del archivo .dmg verás una aplicación llamada macOS Mojave Pathcher. Ábrelo pulsando dos veces sobre él.
-
-
-
Inserta tu pen drive en el Mac
-
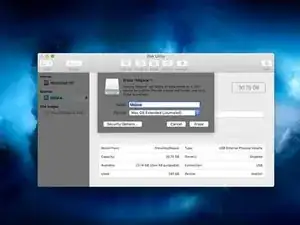
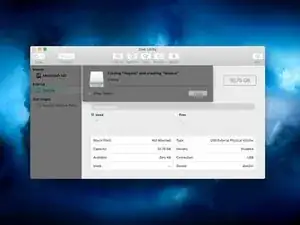
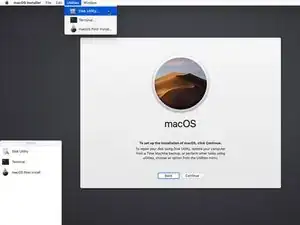
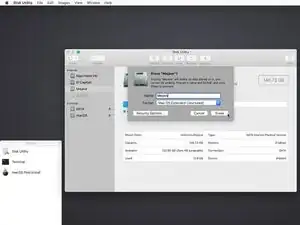
Abre el gestor de dispositivos (Disk Utility)
-
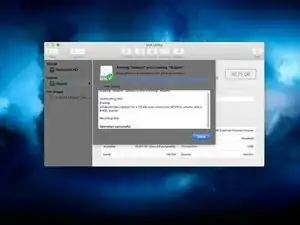
Borra todo lo que esté en el dispositivo flash (pen drive) y a continuación formatea macOS Extended (Journaled). El nombre del dispositivo no importa.
-
-
-
Vuelve a la ventana de la herramienta de parche y ve a la barra de menú.
-
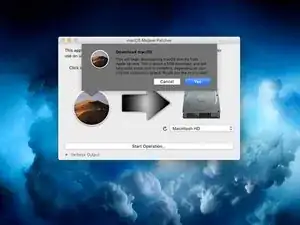
Haz clic en "Tools" (Herramientas), y luego clic en "Download macOS Mojave" (Descargar macOS Mojave) en el menú desplegable que aparece.
-
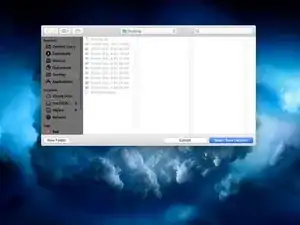
Cliquea en continuar, y luego selecciona donde guardarás el instalador.
-
-
-
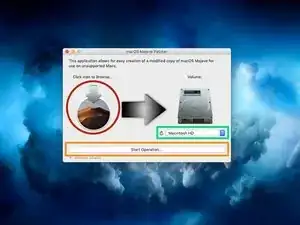
Cuando el instalador de Mojave se haya descargado, selecciona el icono de Mojave en la ventana de macOS Mojave Patcher.
-
Selecciona tu instalador de Mojave y cliquea "abrir".
-
Ahora, selecciona tu volumen haciendo clic en el menú desplegable debajo de la imagen de un disco duro. Querrás seleccionar el nombre de tu unidad USB.
-
Cliquea en "Start Operation" (iniciar operación). Esto podría tardar un rato, basado en la velocidad de tu unidad.
-
-
-
Cuando el proceso esté completo, desconecta tu unidad USB y apaga tu Mac.
-
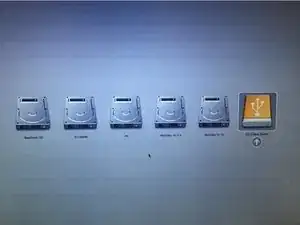
Presiona el botón de encendido en tu Mac y mantén presionada la tecla Opción en el teclado tan pronto cuando veas la pantalla de inicio gris o el logotipo de Apple.
-
Mantén pulsada la tecla Opción hasta que veas una pantalla que se vea similar a la imagen que añadí.
-
-
-
Usa las flechas para moverte a la unidad amarilla con el logo USB en ella. Presiona Enter cuando hayas seleccionado esa unidad.
-
-
-
Cliquea en tu HDD/SSHD/SSD en la barra de menú lateral y cliquea Borrar en la parte superior de la ventana.
-
Selecciona Mac OS Extended (registrado) o APFS y nombra tu HDD/SSHD/SSD con cualquier nombre que quieras que tenga.
-
Cuando hayas borrado tu unidad correctamente, haz clic en "Utilidad de Discos" en la barra de menú. Cliquea "cerrar" y Utilidad de Discos debería cerrarse.
-
-
-
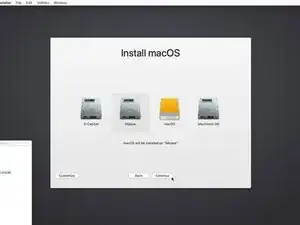
Haz clic en tu HDD/SSHD/SSD que quieras que se instale Mojave. Cliquea Continuar después de haber seleccionado tu unidad.
-
-
-
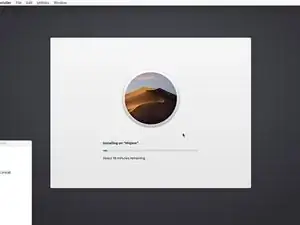
Cuando el instalador haya terminado, apaga tu computadora.
-
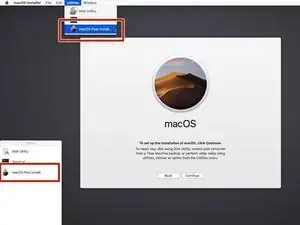
Sigue el paso 6 de nuevo para reiniciar en tu unidad de instalación de Mojave.
-
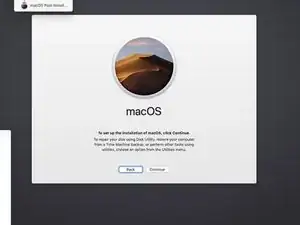
Haz clic en macOS Post Install en el menú lateral o en el menú desplegable en utilidades.
-
-
-
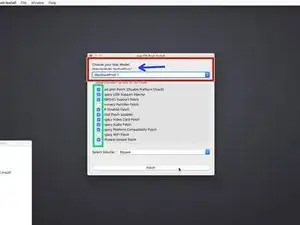
Selecciona tu tipo de Mac en el menú desplegable.
-
La herramienta de parche automáticamente detecta tu modelo de Mac y muestra cuál tienes. Si estás inseguro sobre cuál Mac tienes, selecciona el modelo de la imagen.
-
Mi sugerencia es que selecciones TODAS las casillas de verificación que puedas. No hace daño y puede ser de ayuda después. Muchas de las casillas de verificación son necesarias para que Mojave se ejecute correctamente.
-
Elije la unidad para los parches (el que acaba de instalar Mojave). Haz clic en el parche después de hacer todas las cosas necesarias anteriores.
-


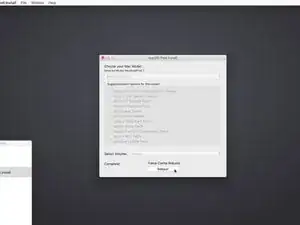
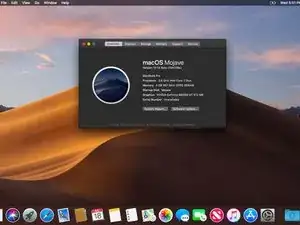
¡Hecho!
147 comentarios
I love how I’m being congratulated with “You’re Finished!”!!!
Peter C -
I have a mid 2009 MacBook Pro. I’ve gone through this process. Everything has worked great, till I reboot. It gets most of the way through then it hangs up. I’ve let it set for hours and nothing. You have any suggestions?
After initial install, the computer cannot complete reboot without the patch “MacOS Post install” (see step 13 above). This will require a hard shut down (hold down the power button if it is stuck) and restart holding down the alt/option key until you can select the installer again. This time, do not reinstall the OS but click on the button on the side (or double click it), or select in the pull down menu.
This will need to be repeated for updates, if new updates also get stuck.
Hope this helps.
I have a Macbook 2008 with 10.7.5 on it and am being told that is the end of the line. Will this work on my Macbook?
If it’s a white MacBook you can hack Mountain Lion and maybe even later with the OS X Hackers tools (which I’ve never used.) If it’s an aluminum 2008 MacBook, it is compatible with the Mojave patcher.
Luke L -
Hi can i know whether Macbook pro late 2008 with el capitian will it work?
Alex -
Replying to my own question. Yes it work . Today I tried. Thing is now after post patch. My keyboard won’t work. Guess I need a original Apple wired keyboard . Tomorrow I go office and try if that is so valuable maybe should buy from my boss
Alex -
my mac got brick after update. i try to reinstall os high sierra. but cant choose the original harddisk. what should i do?
Dennis Hanani Production -
do your disk appear in disk utility ?
Antoine Moreau -
my problem is another one. I bought a new MacBook pro retina in late 2013 that supports Mojave but no way I can install it. app store pushed me only Big Sur since it works on this model but it slows down and don’t need it. Right now I have 10.9.5 macOS and I only get errors where download a Mojave version from the internet. Since its new computer cleans no need for any time machine or backup just a basic Mojave update. How to fix that?
Vlad Movila -
Same thing happened to me. after update. got bricked. having trouble re-installing system.
Iain Cunynghame -
i have another problem and i don’t know if i can solved with this post. i bought a macbook pro 16, 2019, and only this model can’t support Mojave, so i don’t know if i use this Mojave Patched, i can downgrade my IOS form Monterey to Mojave.
Miquel Marquez -